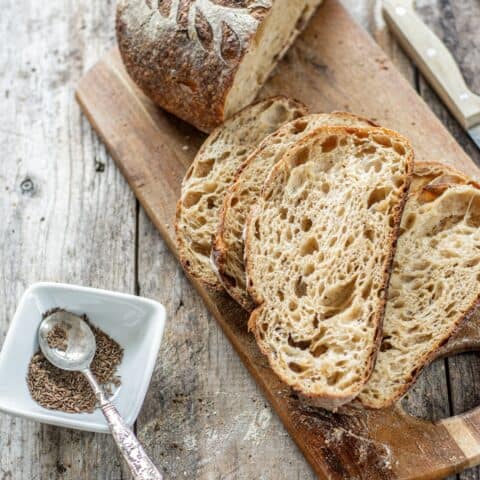
Sourdough Bread with Caraway Seeds and Molasses
A sourdough loaf with caraway seeds and blackstrap molasses. It's soft and flavorful.
Ingredients
Active Starter*
- 25 g starter
- 50 g flour
- 50 g water
Bread
- 280 g water
- 1 1/2 Tbsp molasses
- 400 g bread flour or a strong all-purpose flour with at least 11% protein
- 80 g active starter
- 1 1/2 tsp salt
- 3/4 tsp caraway seeds
Instructions
- Mix together the starter ingredients and tip into a clean jar. Leave it to rise in a warm place for 4-6 hours to at least double (but not collapse).
- When the starter has been rising for around 3-4 hours - in a large bowl, combine the molasses and water and mix it well. Add in the flour and mix it together into a rough dough. Ensure all the dough has been wet through. Cover the bowl with a damp tea towel and let the dough rest.
- Once the starter has doubled, add it to the dough along with the caraway seeds and salt. Use wet hands to squish it all together until well combined. It's a bit messy and sticky but working quickly helps.
- Tip this sticky dough into a baking dish or tray and let it rest for 30 minutes before starting the coil-folding.
- Coil folding - Using wet hands, coax the sides of the dough up with your fingers and lift it up from the middle and back onto itself. See the video below for a demonstration. Turn the dough and repeat on all sides, until it forms a ball. If the dough sticks too much to your hands, wet them again.
- Repeat this every 30 minutes for three hours.
Bulk ferment
- Let the dough rest in a warm spot until bulked out by 50%. It should look a lot puffier. How long this takes greatly depends on the warmth of your room. You can create a warm spot by gently preheating, then turning off the oven and placing the dough in there. Keeping the oven light on can make it a little warmer too.
- Line a banneton basket or bowl with a towel and flour it well.
Shaping the dough (see photos in post)
- Tip your dough out on to floured work surface and gently form it into a rectangle. Take care at this shaping stage to not squash the dough too much and lose all the gases that have been forming.
- Take the bottom third of the dough and fold it up so it meets the middle. Take the right side of the dough and fold it to meet the middle, then do the same with the left side.
- Bring the top third of the dough down to meet the bottom. Now you have a sort of ball shape.
- Stitch this ball together by grabbing a little bit of dough from the top left and a little from the top right and bring them together to meet in the middle.
- Carry on doing this down the length of the dough. When you get to the bottom, grab a flap of dough and carry it up over the top of the stitched dough to meet at the top. This will again create a sort of ball.
- Gently grab this ball and roll it gently towards you on the bench. This will create some surface tension. All the while, take care not to de-gas your dough too much.
- Place in the floured bowl or basket, smooth side down.
- Cover with a floured tea towel and place in the refrigerator for 8-24 hours. This is when the flavor develops in the bread.
Baking
- Preheat the oven to 450°F/230°C as well as the cast-iron dutch oven. Let them preheat for at least 30 minutes until very hot. If you have no dutch oven, you can preheat an oven tray instead and later add ice cubes or water for steam.
- Once hot, remove the dutch oven from the oven and flour the bottom pan well. Remove the sourdough loaf from the fridge and gently tip it into the pan so the smooth side of the loaf is showing.
- Use a razor blade or sharp knife to score gashes into the loaf. This gives the steam a place to escape from when the bread bakes.
- Add on the lid of the dutch oven and place it in the oven. Bake covered for around 20 minutes.
- Remove the lid then bake uncovered for a further 15-20 minutes until browned to your liking.
- Let the loaf cool for 2 hours before slicing.
Notes
*This makes approx 125g of which 80g will be used in the recipe. The remainder can be fed again and refrigerated for next time
Nutrition
Serving: 1gCalories: 218kcalCarbohydrates: 45gProtein: 7gFat: 1gSaturated Fat: 0.1gPolyunsaturated Fat: 0.4gMonounsaturated Fat: 0.1gSodium: 441mgPotassium: 114mgFiber: 1gSugar: 3gVitamin A: 2IUVitamin C: 0.04mgCalcium: 19mgIron: 1mg
Tried this recipe?Let us know how it was!