6-Inch Red Velvet Cake
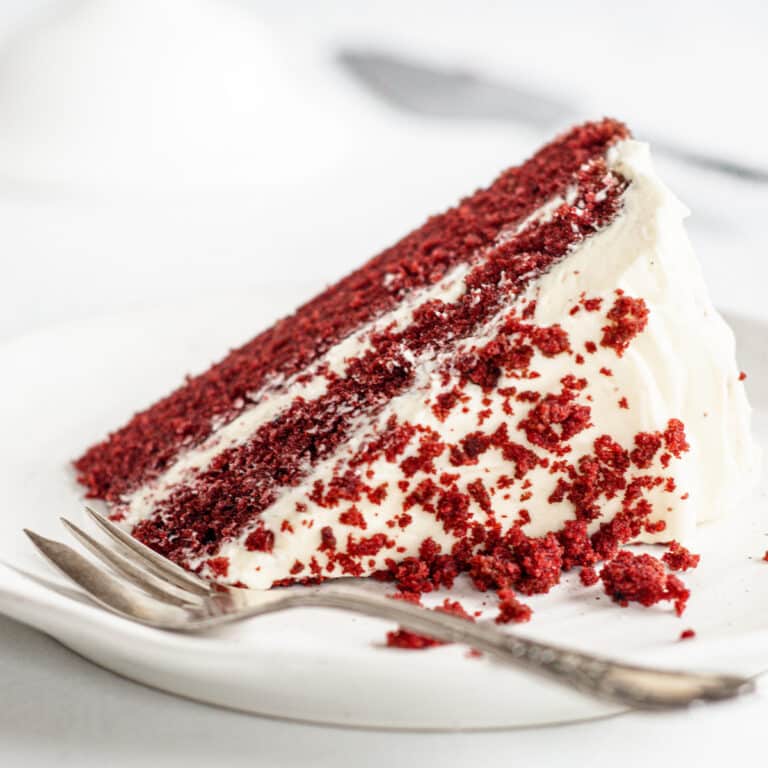
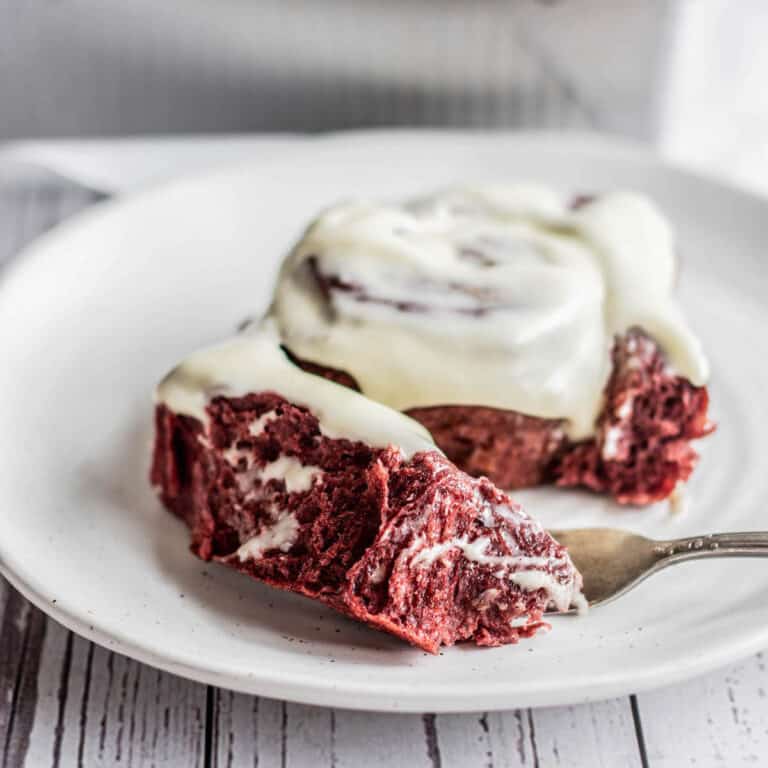
This 6-inch red velvet cake is perfect for intimate celebrations like Valentine’s day, or just because. It’s a light and fluffy 2-layer cake, sandwiched together with creamy frosting.

The classic red velvet cake is known for its bright red color, moist texture, and subtle chocolate flavor. It has a wonderfully tender texture thanks to the addition of buttermilk and a little vinegar. This small batch red velvet cake recipe makes the perfect size for smaller gatherings or those looking to satisfy a craving without making a large cake.
The cake is traditionally paired with ermine frosting, a less sweet, velvety buttercream alternative. This gives a beautiful contrast against the vibrant red color of the cake. However, a tangy, rich cream cheese frosting is more commonly used these days so I will include both recipes!

Ingredients
To make this moist red velvet cake, you will need the following:
- All-purpose or cake flour: Provides a lighter, fluffier cake texture than all-purpose flour, but either can be used.
- A little cocoa powder: brings that subtle chocolate cake flavor. Natural or Dutch-processed cocoa can be used.
- Vegetable oil and unsalted butter: Butter brings flavor, but a little oil keeps the cake moist.
- Baking soda: This creates the cake rise.
- Red food coloring: Gives the cake its vibrant red color. It’s also completely optional.
- Buttermilk and white vinegar: Adds a tangy flavor and a velvety crumb. A buttermilk substitute could be whole milk mixed with a little extra vinegar.
- Good quality vanilla extract: Enhances the cake’s flavors and the frosting.
- Large egg: provide structure
- Granulated sugar: Brings sweetness.
Method
Here’s how to create the perfect red velvet cake recipe. Grease and line two 6-inch cake pans with parchment paper. Preheat the oven to 350°F/180°C.
Whisk the flour, baking soda, and salt in a medium bowl.

Whisk together softened butter, oil, and sugar in a large bowl until light and creamy. Beat in the egg, vanilla, vinegar, and red food color.

Add your dry ingredients to the wet ingredients and fold them together, along with the buttermilk.

Divide the cake batter evenly between prepared pans.

Bake for around 25 minutes until a toothpick inserted into the middle comes out clean.
Let the cakes cool in the pan for 5 minutes before inverting onto a wire rack and cooling the cake layers to room temperature.
Ermine frosting
While the cakes are baking, make the frosting so the flour mixture has time to cool. If you’re making cream cheese frosting, this doesn’t need to be started in advance.
Whisk the flour and granulated sugar in a saucepan to remove any lumps. Whisk in the cold milk.

Place the mixture over medium heat, stirring constantly until it thickens into a custard-like consistency.
Set it aside and let it cool completely.

With an electric beater or a stand mixer with the whisk attachment, beat the room-temperature butter at medium speed until it’s light, fluffy, and lightened in color. It takes around 4-5 minutes.

Once your butter is fluffy, reduce to low speed and add your cooled flour paste to the beaten butter, a spoonful at a time.
Ensure the paste is cool before adding, or the butter will get too soft.

Add the vanilla extract and the pinch of salt. Continue beating on high speed until your frosting is light and airy.
For any troubleshooting tips, see the Ermine frosting post.
Cream cheese frosting
In a large bowl, beat the cream cheese and butter with an electric mixer until smooth. Add the powdered sugar and vanilla extract and continue to beat until the mixture is creamy and smooth.
If the frosting is too thick, add a teaspoon of milk or heavy cream until the desired consistency is reached.
It should be soft but not runny. If it is too thin, add more powdered sugar until it thickens.
Assembling
Use a serrated knife to level the cooled cakes and make their tops flat and even.
Take one cake layer and spoon on 1/2 of the frosting. Use an offset spatula to smooth it out.
Top it with the other cake layer. Spoon the remaining frosting on top of the cake using the offset spatula to spread it on top and the edges. You can also add frosting around the sides of a cake and use an icing smoother to smooth it out.


Crumble up the offcuts of the cake and use them as decorative crumbs on top.
Store any leftovers in an airtight container.

More small cake recipes
Did you enjoy this small red velvet cake recipe? Here are some more mini cakes to try!

Small Red Velvet Cake
This 6-inch red velvet cake is perfect for intimate celebrations like Valentine's day, or just because. It's a light and fluffy 2-layer cake, sandwiched together with creamy frosting.
Ingredients
- 156g (1 1/4 cups) all-purpose flour
- 1/2 teaspoon baking soda
- 1/4 teaspoon salt
- 55g (1/4 cup) unsalted butter, softened
- 12g (1 tbsp) neutral vegetable oil
- 150g ( 3/4 cup) granulated sugar
- 7g (1 tablespoon) unsweetened cocoa powder
- 1 large egg, room temperature
- 1/2 Tablespoon white vinegar
- 2 teaspoons red food color
- 1 teaspoons vanilla extract
- 120g (1/2 cup) buttermilk, room temperature
Ermine frosting
- 32g (1/4 cup) all-purpose flour
- 150g (3/4 cup) granulated sugar
- 180g (3/4 cup) milk
- 1 teaspoon vanilla paste or extract
- 170g (3/4 cup) unsalted butter, room temperature
- 1/4 teaspoon salt
Cream Cheese Frosting - Alternative frosting option
- 140g (5oz) block cream cheese, room temperature
- 30g (2 Tablespoons) unsalted butter, room temperature
- 180g (1 ½ cups) powdered sugar
- 1 teaspoon vanilla paste or extract
- Pinch of salt
Instructions
- Grease and line two 6-inch cake pans. Preheat the oven to 350°F/180°C.
- Whisk the flour, baking soda, cocoa powder and salt in a small bowl.
- Beat softened butter, oil, and sugar together in a large bowl until light and creamy. Whisk in the egg, vanilla, vinegar, and red food color.
- Add your dry ingredients to the wet ingredients and fold them together, along with the buttermilk.
- Divide the cake batter evenly between prepared pans.
- Bake for around 25 minutes until a toothpick inserted into the middle comes out clean.
- Let the cakes cool in the pan for 5 minutes before inverting onto a wire rack and cooling the cake layers to room temperature.
Ermine frosting
- While the cakes are baking, make the frosting so the flour mixture has time to cool. If you're making cream cheese frosting, this doesn't need to be started in advance.
- Whisk the flour and granulated sugar in a saucepan to remove any lumps. Whisk in the cold milk.
- Place the mixture over medium heat, stirring constantly until it thickens into a custard-like consistency.Set it aside and let it cool completely.
- With an electric beater or a stand mixer with the whisk attachment, beat the room-temperature butter at medium speed until it's light, fluffy, and lightened in color. It takes around 4-5 minutes.
- Once your butter is fluffy, reduce to low speed and add your cold flour paste to the beaten butter, a spoonful at a time.
- Add the vanilla extract and the pinch of salt. Continue beating on high speed until your frosting is light and airy.
Cream cheese frosting - The other frosting option
- beat the cream cheese and butter with an electric mixer until smooth in a large bowl. Add the powdered sugar, vanilla extract, and salt and continue to beat until the mixture is creamy and smooth.
- If the frosting is too thick, add a teaspoon of milk or heavy cream until the desired consistency is reached. It should be soft but not runny. If it is too thin, add more powdered sugar until it thickens.
Assembling
- Use a serrated knife to level the cooled cakes and make their tops flat and even.
- Take one cake layer and spoon on ½ of the frosting. Use an offset spatula to smooth it out.
- Top it with the other cake layer. Spoon on the remaining frosting and use the offset spatula to spread it on top and the edges of the cake. You can also add frosting around the sides of a cake and use an icing smoother to smooth it out.
- rumble up the offcuts of the cake and use them as decorative crumbs on top.
- Store any leftovers in an airtight container.
Recommended Products
As an Amazon Associate and member of other affiliate programs, I earn from qualifying purchases.
Nutrition Information:
Yield: 8 Serving Size: 1Amount Per Serving: Calories: 516Total Fat: 28gSaturated Fat: 15gTrans Fat: 0gUnsaturated Fat: 11gCholesterol: 110mgSodium: 402mgCarbohydrates: 61gFiber: 1gSugar: 40gProtein: 6g
This is an informational estimate only. I am not a certified Dietitian or Nutritionist

