

Sourdough Red Velvet Cake
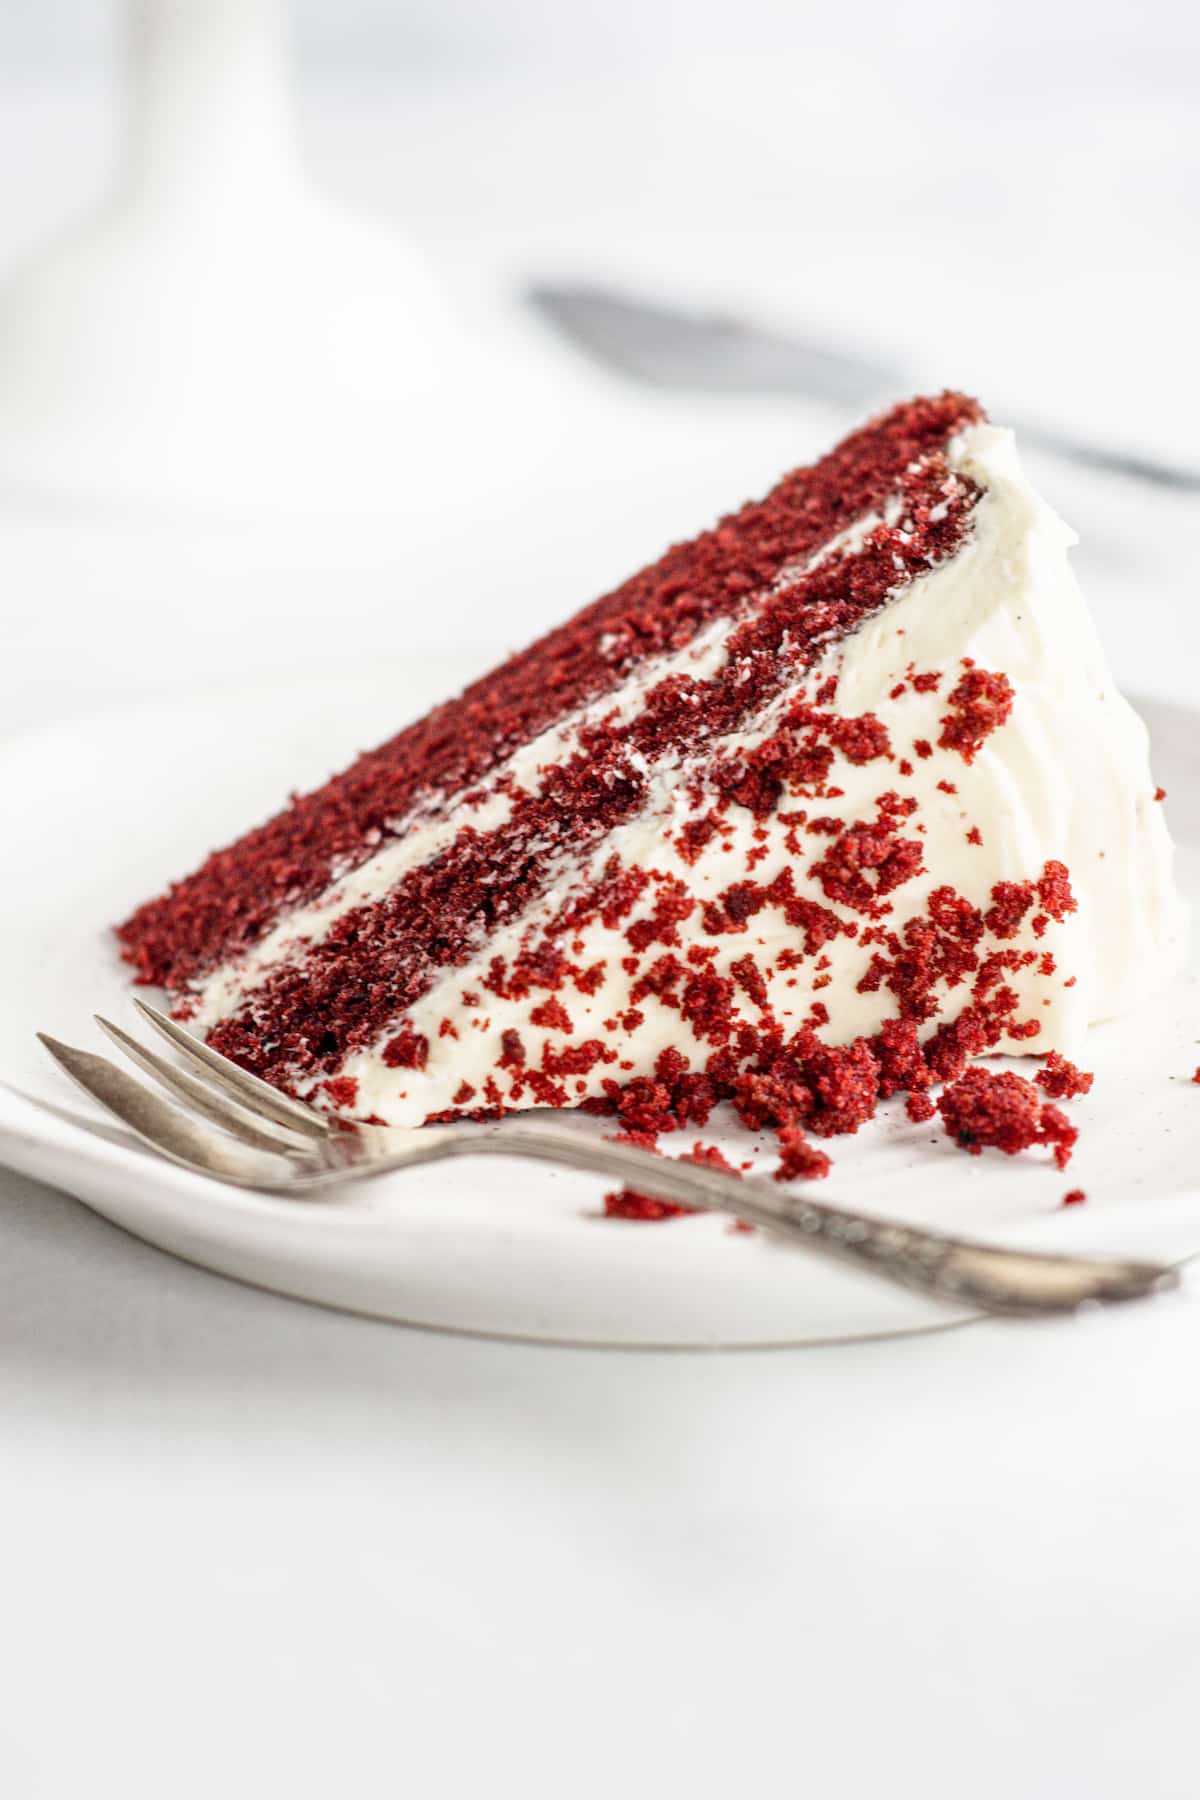
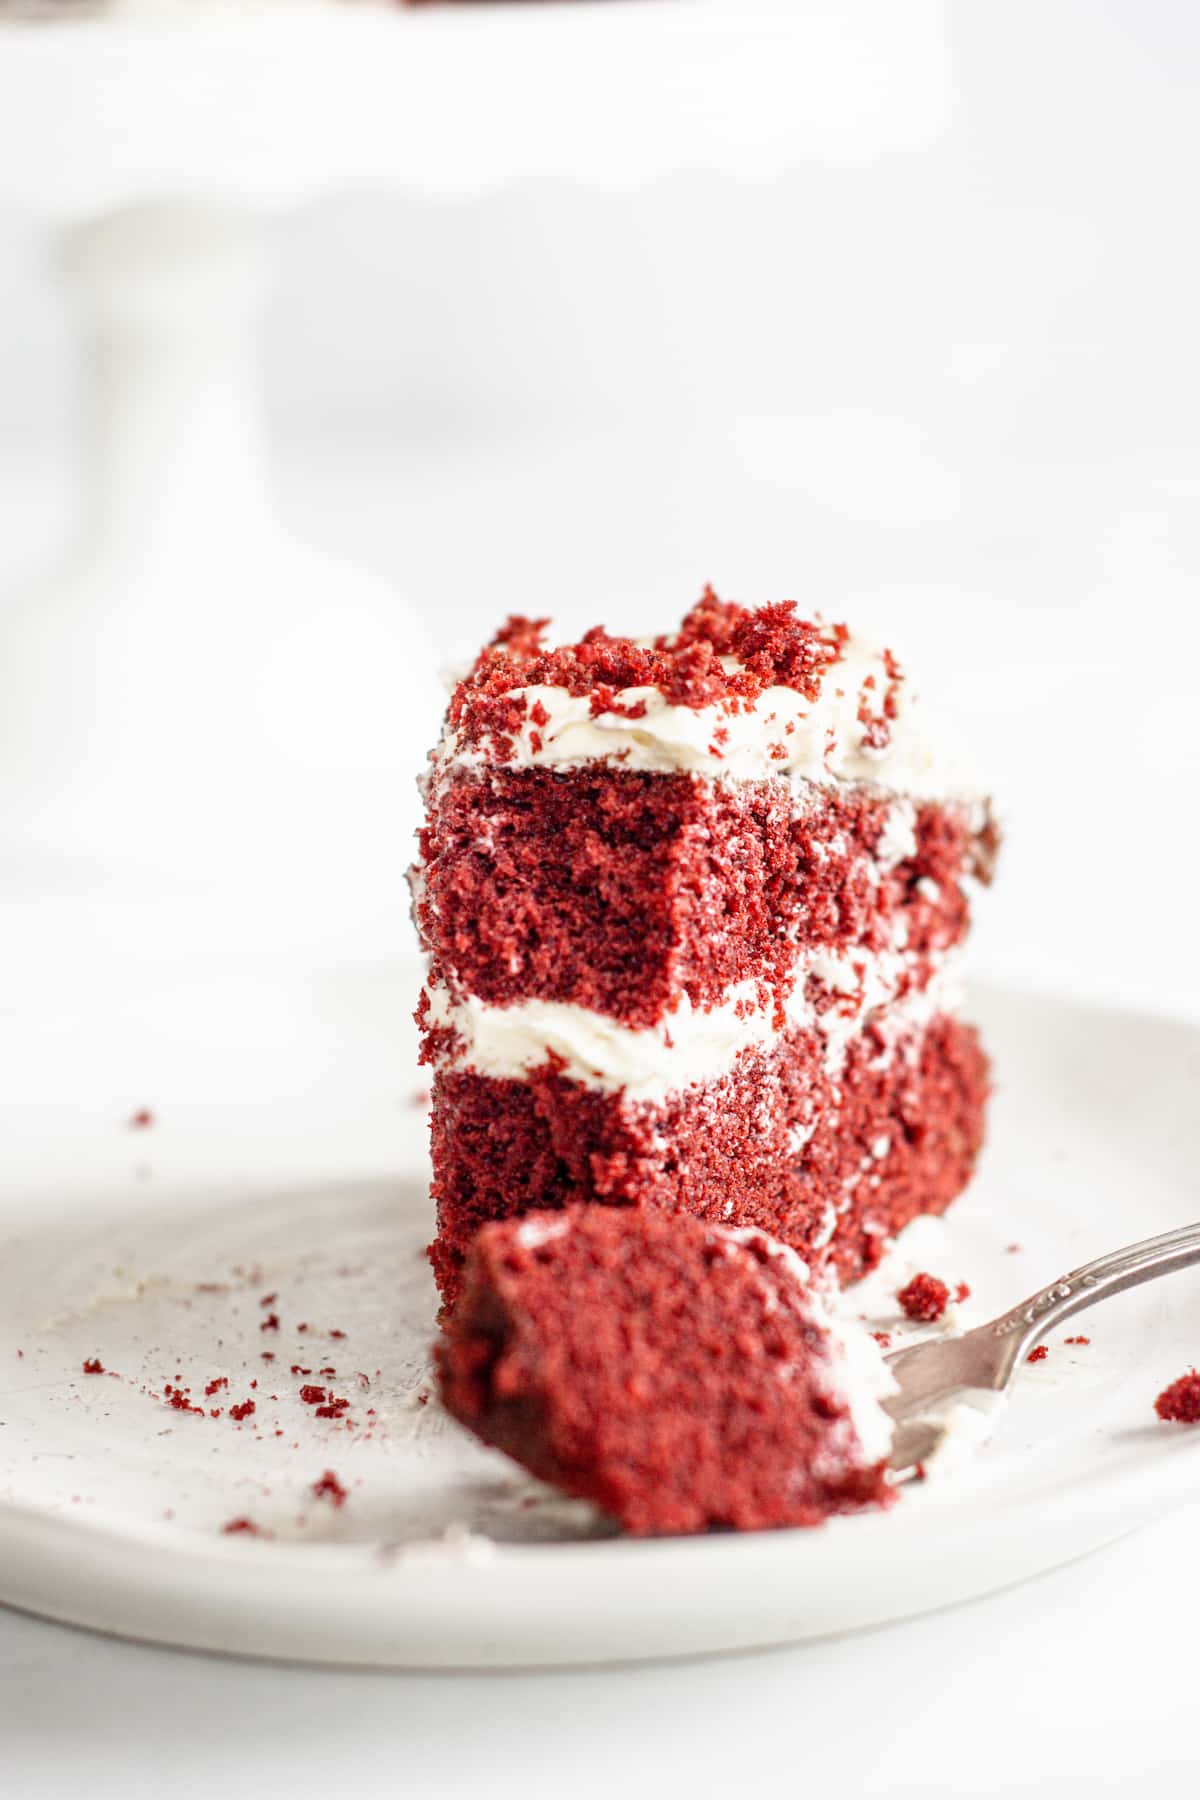
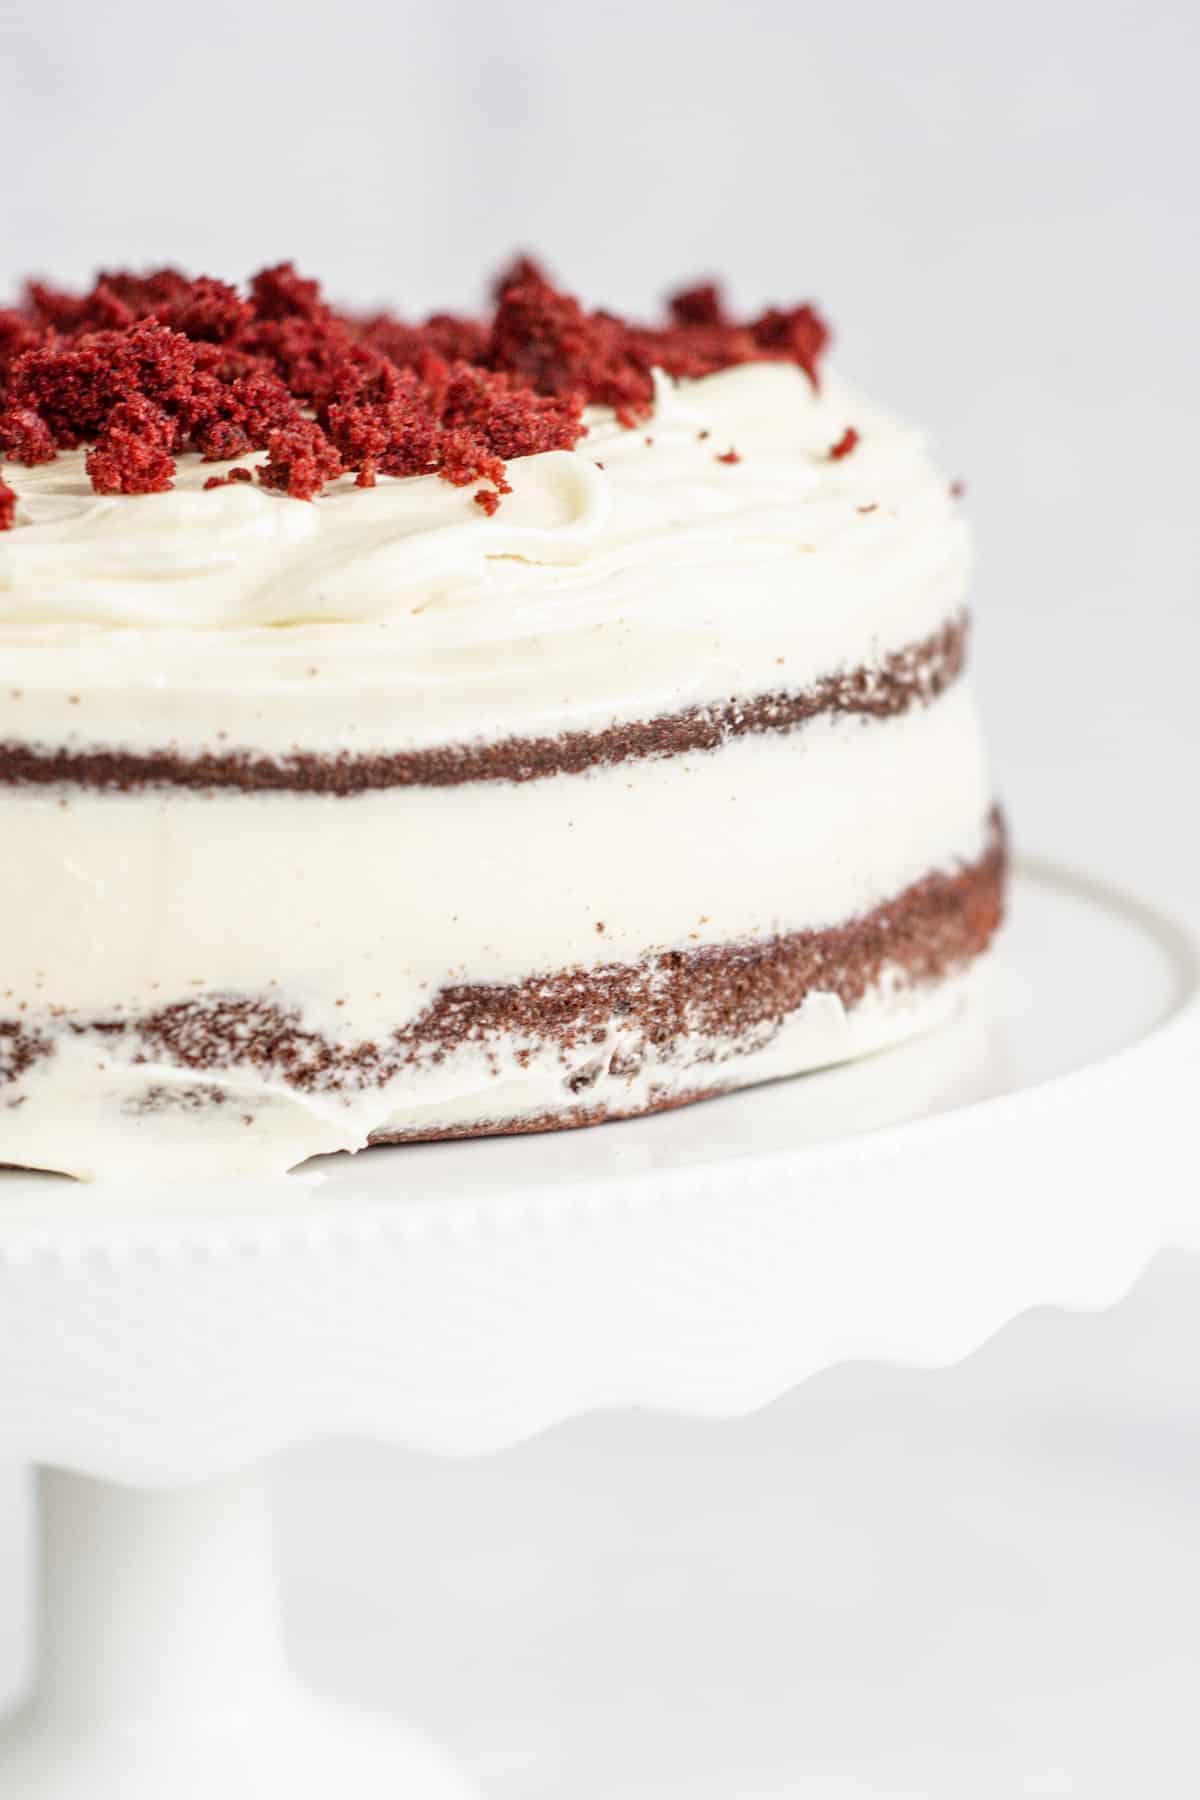
This sourdough red velvet cake is soft, light, and moist, with a tangy cream cheese frosting. It’s a great use for discard sourdough starter.
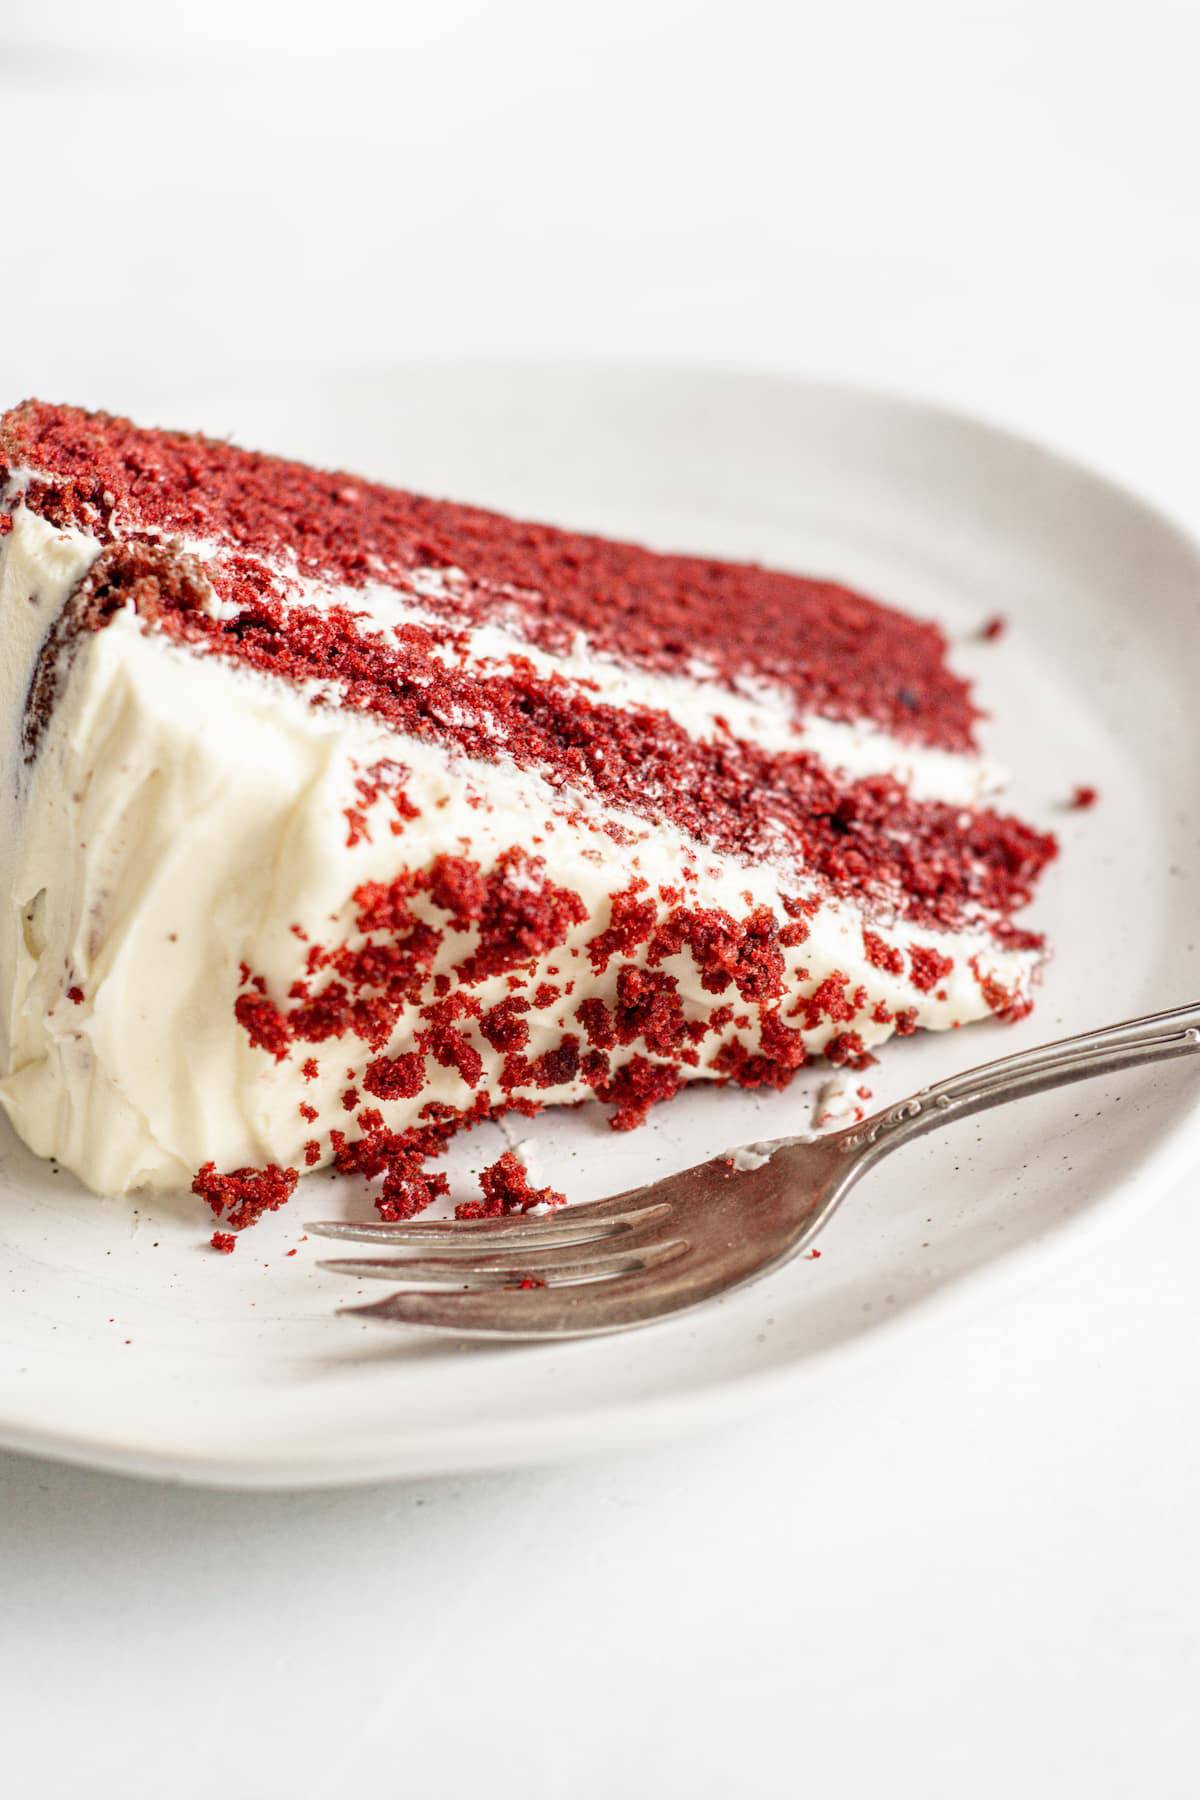
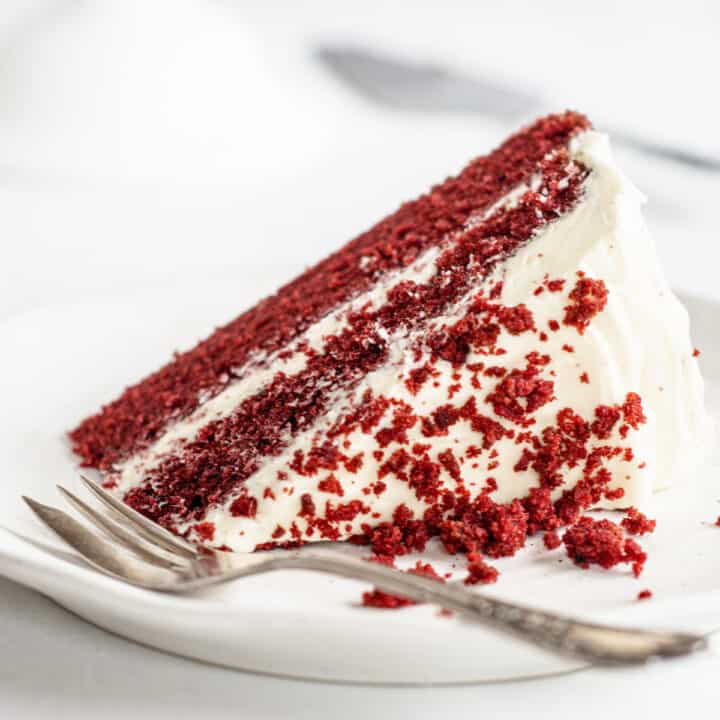
Red velvet cake has an amazing velvety crumb.
A red velvet cake batter uses acidic ingredients which makes it super tender. This sourdough red velvet cake uses sourdough starter as acid – replacing the commonly used buttermilk. If you’ve got leftover sourdough discard, give this cake a try!
What is red velvet cake?
Red velvet cake originates from the United States and was first made in the early 20th century. It was a combination of the 19th-century velvet cake and a devil’s food cake. Back then, the velvet cake was the name of any cake with a fine-textured crumb. A devil’s food cake is a very light and airy chocolate cake that’s leavened with baking soda – more than in other chocolate cakes.
The red velvet cake was a combination of these two. It’s not a devil’s food cake, as it contains only a small amount of cocoa, yet it has the same airiness that a devil’s food cake has. The crumb is soft, moist, and velvety smooth.
The red color in a red velvet cake originally comes from the red anthocyanin in natural cocoa. These days red food coloring is added to enhance the color. Try these red velvet cinnamon rolls next!
What cocoa powder to use in red velvet cake?
The best cocoa powder to use is a natural cocoa powder, such as Nestle or Ghirardelli. This gives a richer taste, and if you’re skipping the food coloring, this will give a natural reddish tint to the cake.
Dutch-processed cocoa powder has been treated with an alkalizing agent which reduces the natural acidity of the cocoa. It’s darker in color and won’t give the same red tint.
The ingredients
For this sourdough red velvet cake, you will need –
- Butter – It can be salted or unsalted butter at room temperature
- Granulated sugar.
- Eggs.
- Vegetable oil – only a little to create a more fluffy crumb.
- Cocoa powder – a natural cocoa powder works best.
- Baking soda.
- Salt.
- Vanilla extract or paste
- Red food color – This is optional. Gel color will give the strongest red without having to add too much.
- Sourdough discard starter.
- All-purpose flour.
- Milk.
Frosting
- Cream cheese
- Softened butter, salted or unsalted.
- Vanilla extract or paste
- Powdered sugar
Traditionally a red velvet cake is frosted with ermine frosting, but this one is frosted with a tangy cream cheese frosting. It enhances the flavors of the cake even more.
Sourdough discard starter
The best starter to use in this cake is a discard starter that hasn’t been fed in a while, or it has passed its peak and has become runny or split. This means the yeast in the starter has run out of food and the starter is now very acidic.
The starter in this recipe replaces the commonly used buttermilk in red velvet cake. Buttermilk is also acidic, and it’s the acid cake batter that reacts with the baking soda to leaven the cake and create a lovely light crumb. The more acidic the starter, the better the cake will rise.
Fermented sourdough cake batter
The cakes can be baked as soon as the batter is made or, left to ferment in the fridge overnight. This helps with breaking down the starches in the flour and helps with digestion.
The cake batter will become very thick once refrigerated, so take care to spread it out evenly in the pans so it bakes evenly.
Method
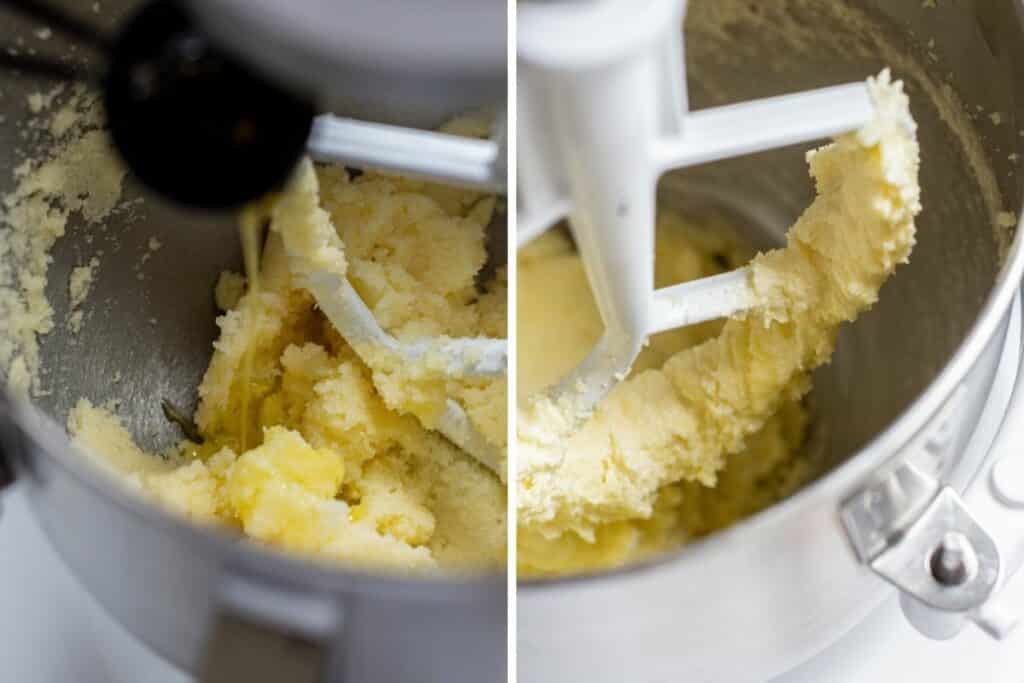
In the bowl of a stand mixer fitted with a paddle attachment, beat the butter and sugar for around two minutes. Add in the oil and beat for another 5 minutes, until creamy and lighter in color.
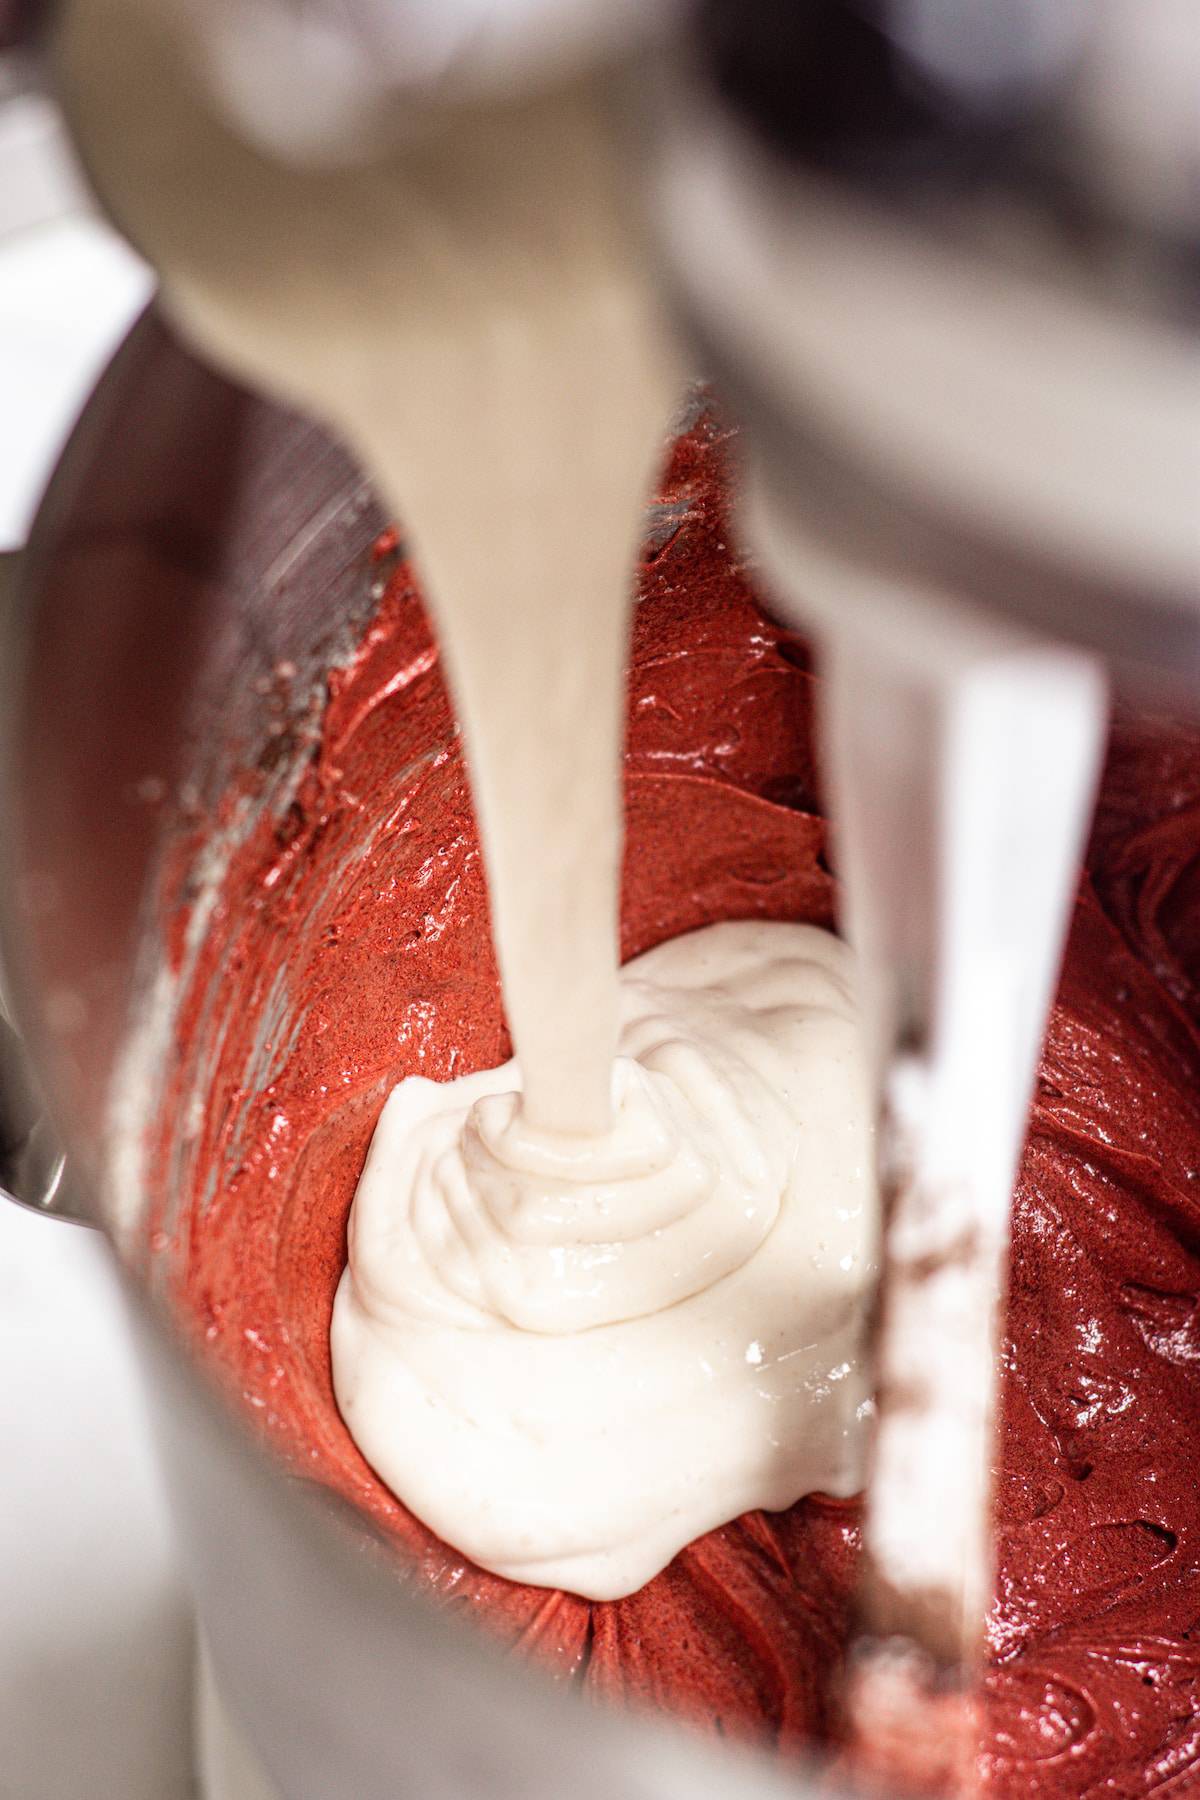
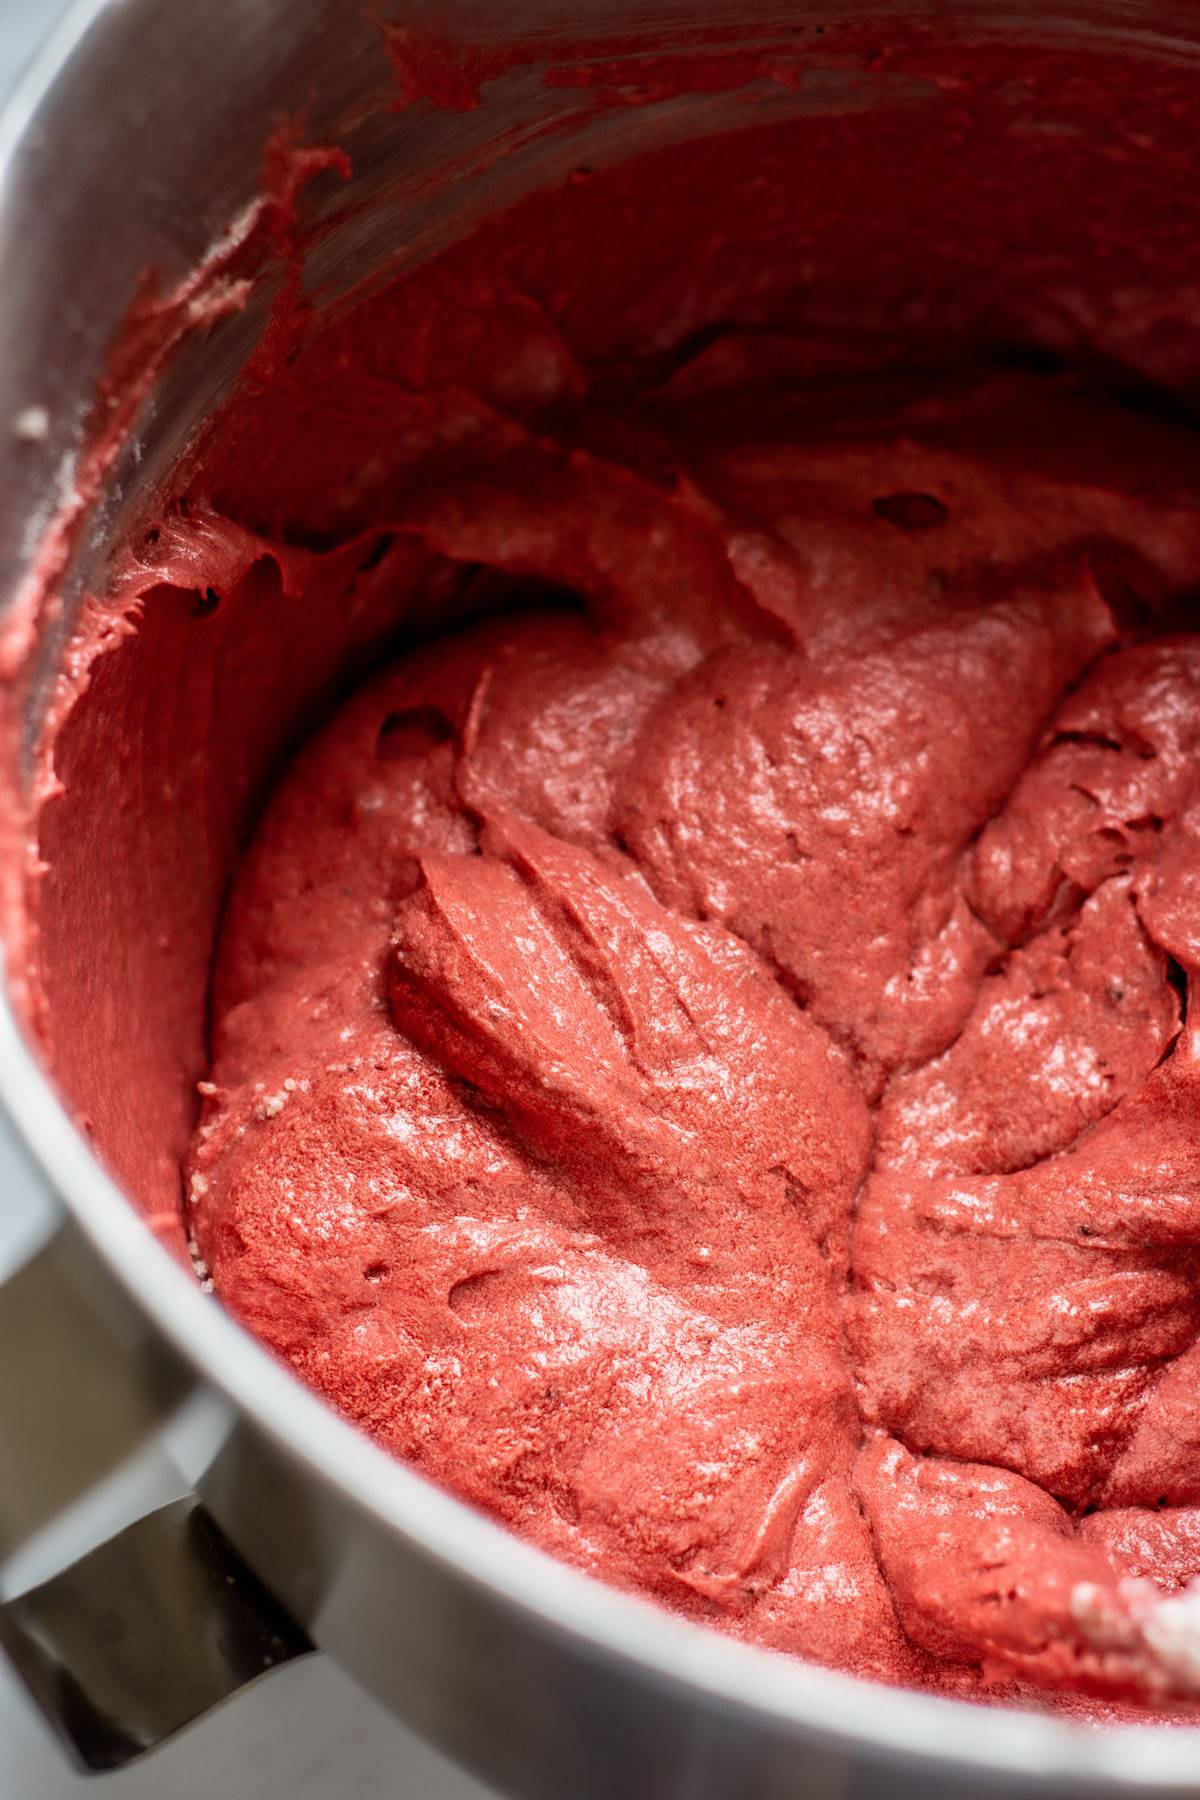
Add in the eggs, one at a time, and beat well after each addition, then tip in the cocoa powder and food coloring. Beat it together. Pour in the sourdough starter and mix it until well combined.
Sift the flour, baking soda, and salt and add to the mixture, alternating with milk, until it is combined but don’t overbeat it.
Divide the mixture between two round 8″ cake pans. Bake at 350f/180c for around 20-22 minutes until the middles of the cakes spring back when touched.
Once baked, let the cakes cool for 15 minutes in their pans, then turn onto a wire rack and allow them to cool completely.
Frosting
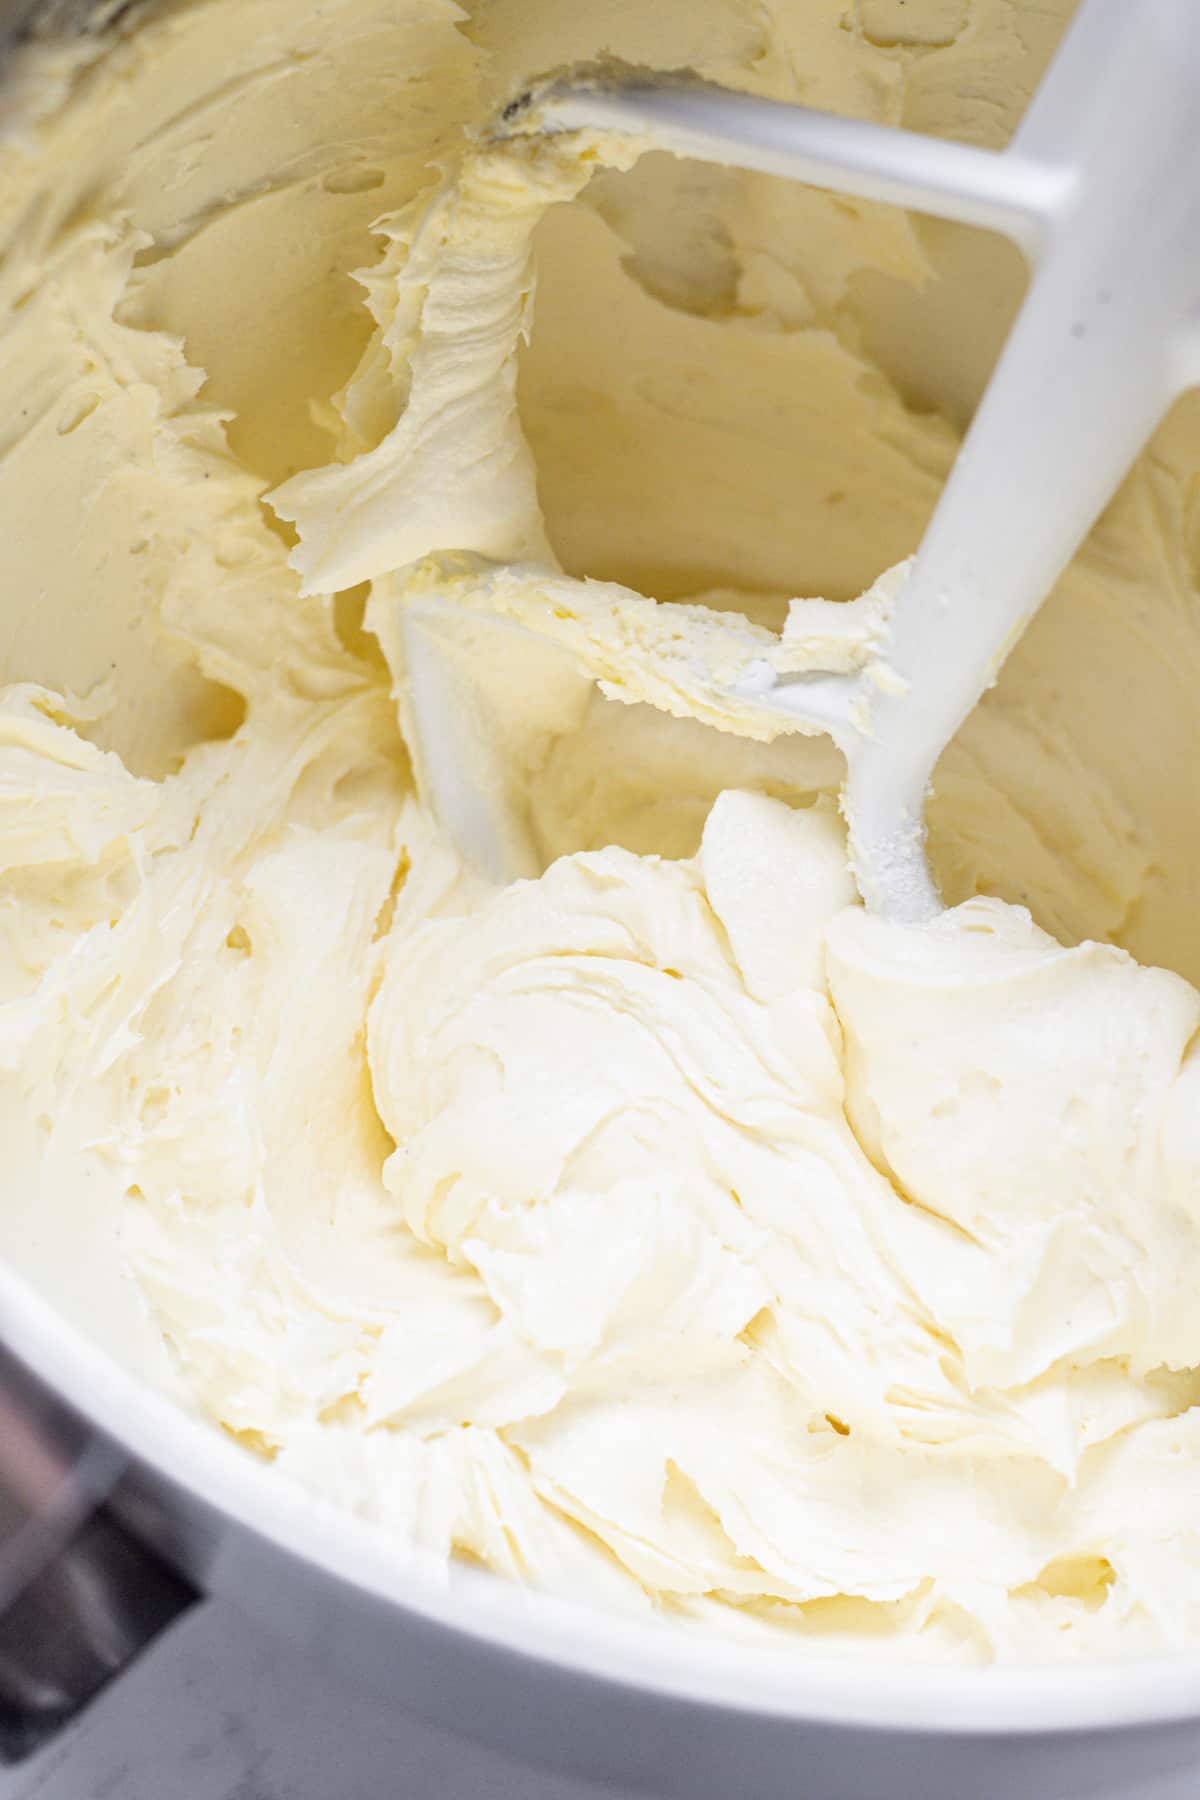
In the bowl of a stand mixer fitted with a paddle attachment, beat the cream cheese and butter on high until it’s light and creamy. Turn the mixer to low and add in the vanilla and powdered sugar.
Once the powdered sugar has been incorporated, turn the mixer back to high and continue beating until it’s light and fluffy.
Assembling the cake
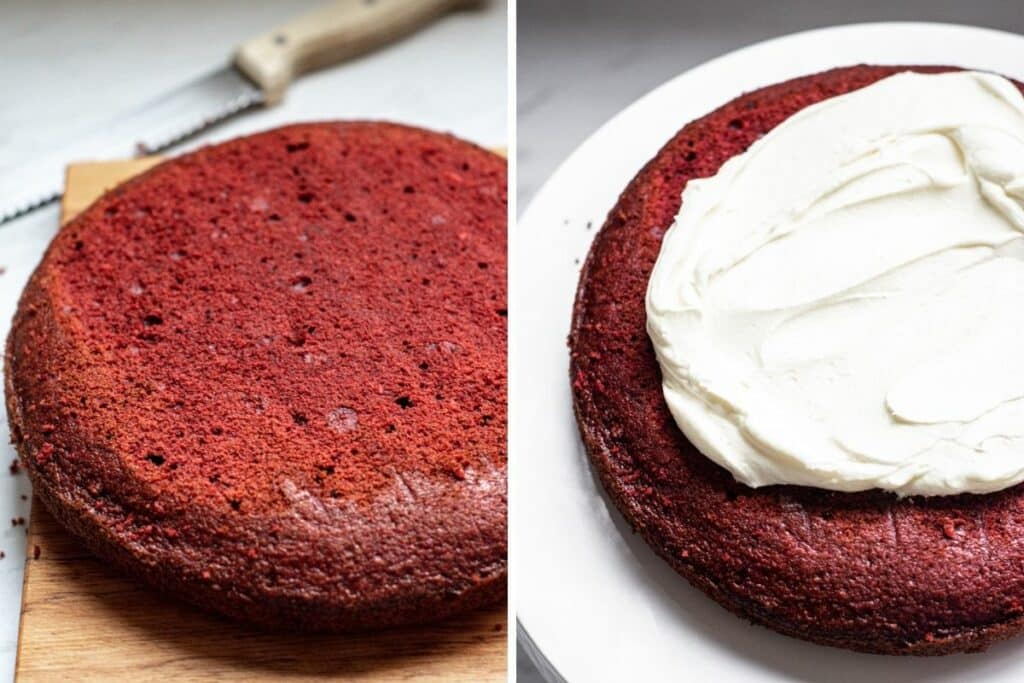
Use a serrated knife to level the cooled cakes and make their tops flat and even.
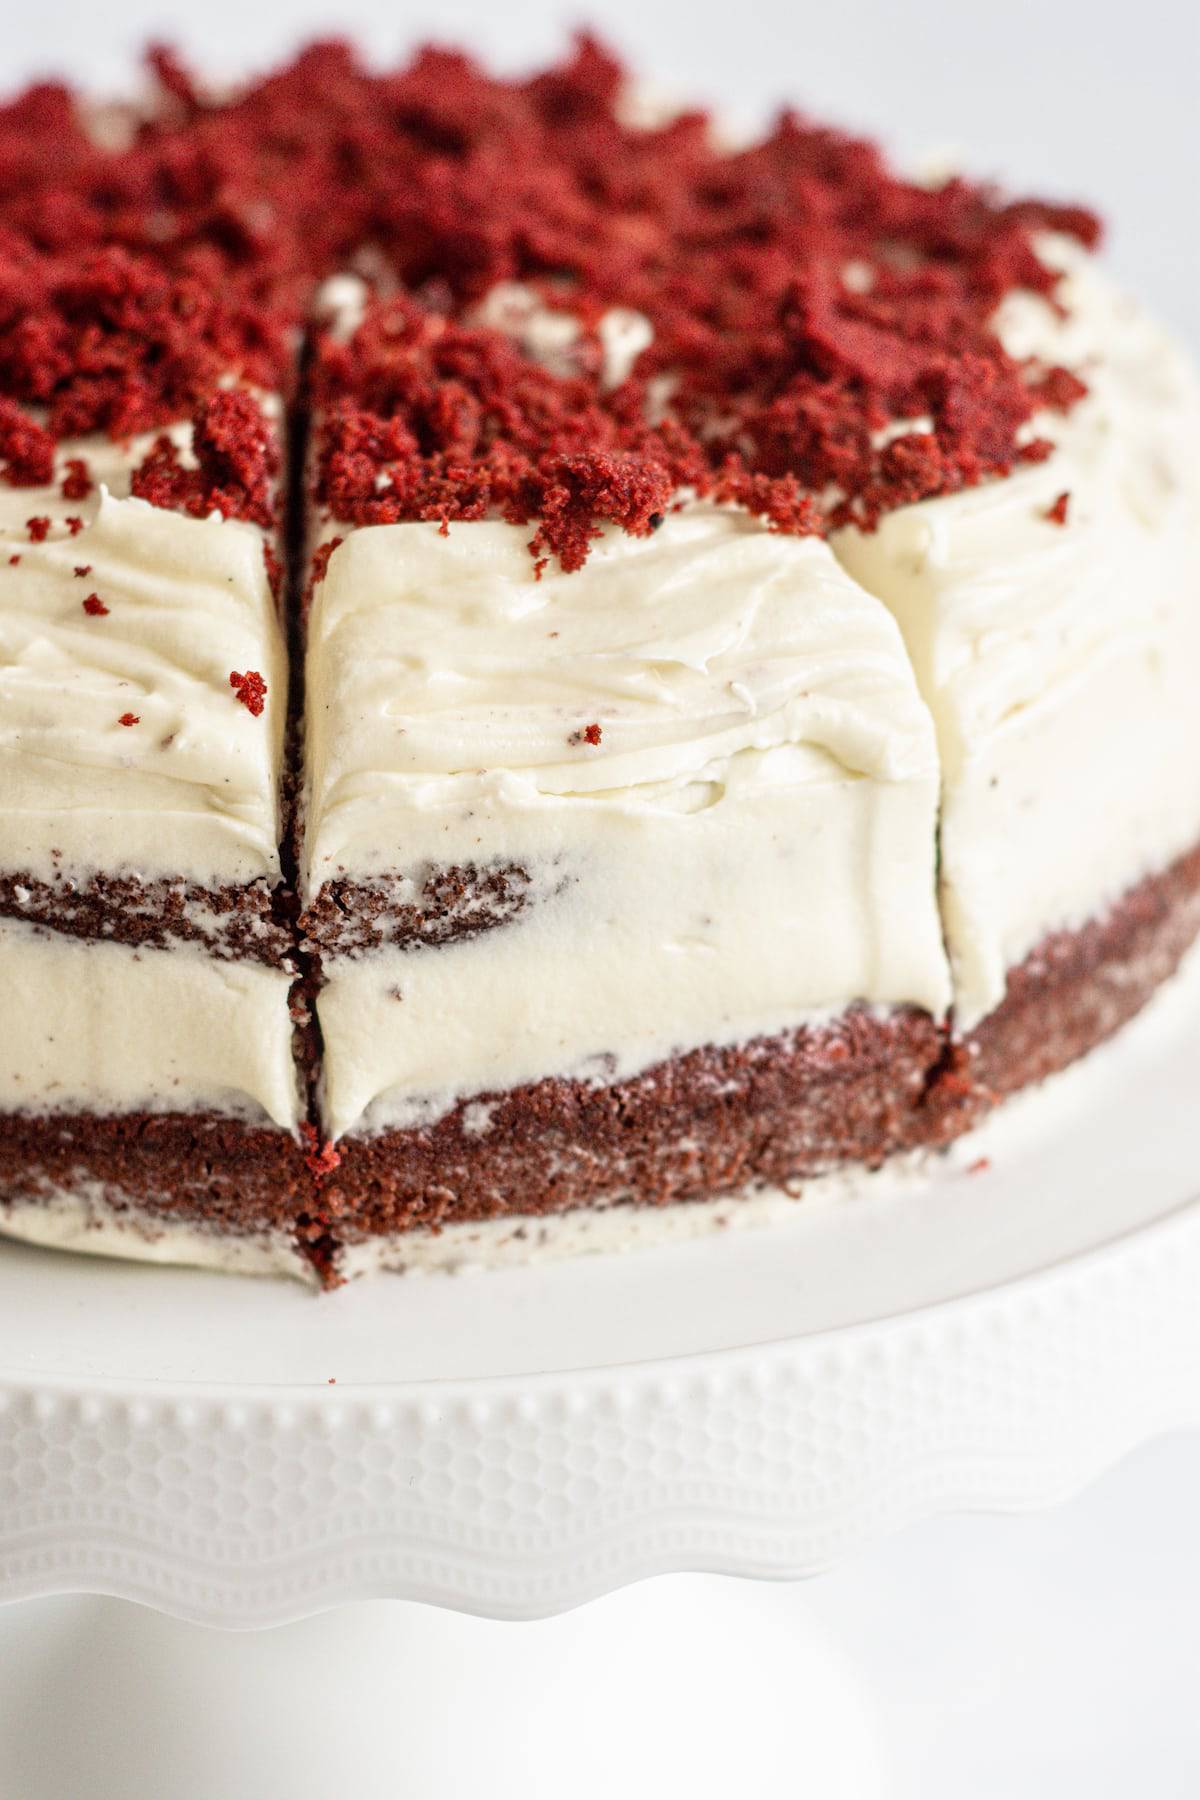
Take one cake layer and spoon on 1/3 of the cream cheese frosting. Use an offset spatula to smooth it out. Top it with the other cake layer. Spoon on the remaining frosting and use the offset spatula to spread it on top and on the edges of the cake.
Use a bench scraper to smooth the frosting around the edge of the cake. Pipe extra frosting in any holes, then smooth it out again. The end cake should be smooth and have parts of the cake layers peeping through.
You can crumble up the offcuts of the cake and use them as decorative crumbs on top.
Serving and storing
Refrigerate the cake until you’re ready to serve. Remove it from the fridge about half an hour before serving.
Leftover cake can be stored in the refrigerator in an airtight container for up to three days.
The cakes can be made in advance and frozen for up to three months. Wrap them tightly so they are airtight. Thaw in the refrigerator overnight before frosting them.
Other sweet treats
- Lemon curd cake
- Brown Butter Banana Bread
- Red Velvet Donuts
- Raspberry mascarpone cake,
- Rhubarb coffee cake!
Sourdough Red Velvet Cake
This sourdough red velvet cake is soft, light, and moist, topped with a tangy cream cheese frosting. It's a great use for discard sourdough starter.
Ingredients
- 113g (1/2 cup) butter, at room temperature
- 250g (1 1/4 cups) granulated sugar
- 30ml (2 Tablespoons) vegetable oil
- 2 large eggs, at room temperature
- 2 teaspoons red gel food color
- 10g (2 tablespoons) natural cocoa powder
- 1 teaspoon vanilla paste
- 100g (1/2 cup) sourdough discard starter
- 250g (2 cups) All-Purpose Flour
- 1 teaspoon baking soda
- 1/2 teaspoon salt
- 180g (3/4 cup) milk, at room temperature
Frosting
- 226g (8 ounce) cream cheese, room temperature
- 113g butter, at room temperature
- 1 teaspoon vanilla paste
- 300g (2 1/2 cups) powdered sugar
Instructions
- Preheat the oven to 350°F/180°C—grease and line two round 8" pans.
- In the bowl of a stand mixer fitted with a paddle attachment, beat the butter and sugar for around two minutes.
- Add the oil and beat for another 5 minutes until creamy and lighter in color.
- Add in the eggs, one at a time, and beat well after each addition, then tip in the cocoa powder, vanilla, and food coloring. Beat it together.
- Pour in the sourdough starter and mix it until well combined.
- Sift the flour, baking soda, and salt and add to the mixture, alternating with milk, until it is combined but don't overbeat it.
- Divide the mixture evenly between the cake pans.
- Bake the cakes for 20-22 minutes or until the tops spring back when touched and a skewer inserted in the middle comes out clean.
- Once baked, let the cakes cool for 10 minutes in their pans, then turn them onto a wire rack and let them cool completely.
FROSTING
- In the bowl of a stand mixer fitted with a paddle attachment, beat the cream cheese and butter on high until it's light and creamy.
- Turn the mixer to low and add in the vanilla and powdered sugar. Once the powdered sugar has been incorporated, turn the mixer back to high and continue beating until it's light and fluffy.
ASSEMBLING THE CAKE
- Use a serrated knife to level the cooled cakes and make their tops flat and even.
- Take one cake layer and spoon on ⅓ of the cream cheese frosting.
- Use an offset spatula to smooth it out.
- Top it with the other cake layer. Spoon on the remaining frosting and use the offset spatula to spread it on top and on the edges of the cake.
- Use a bench scraper to smooth the frosting around the edge of the cake. Pipe extra frosting in any holes, then smooth it out again. The end cake should be smooth and have parts of the cake layers peeping through.
- You can crumble up the offcuts of the cake and use them as decorative crumbs on top.
Serving
- Refrigerate the cake until you're ready to serve. Remove it from the fridge about half an hour before serving.
- Leftover cake can be stored in the refrigerator in an airtight container for up to three days.
Notes
The cup sizes given are for US cups. Note that these are smaller than metric cup sizes. For best results, use grams.
The cakes can be made in advance and frozen for up to three months. Wrap them tightly so they are airtight. Thaw in the refrigerator overnight before frosting them.
Recommended Products
As an Amazon Associate and member of other affiliate programs, I earn from qualifying purchases.


Nutrition Information:
Yield: 12 Serving Size: 1Amount Per Serving: Calories: 521Total Fat: 25gSaturated Fat: 14gTrans Fat: 1gUnsaturated Fat: 9gCholesterol: 91mgSodium: 442mgCarbohydrates: 68gFiber: 1gSugar: 47gProtein: 6g


Hi,
How long before baking the cakes do I need to take them out of the refrigerator if I have left Them in overnight?
You can bake them straight from the fridge 🙂
Hi! Wondering if it’s ok to substitute the AP flour for cake flour? Anything you think I should tweak if I tried it?
You can substitute it yes 🙂 no other tweaks needed
Hi! Since this is 12 servings, would it equate to 12 cupcakes? If so, how long should I put them in the oven for? Thank you! <3
Hey it will make 12 large muffins, so you could do 14-16 smaller cupcakes And bake for around 20 minutes until a cake tester inserted comes out clean 🙂
Hello I will be mixing the ingredients tomorrow to ferment overnight. Can I substitute the milk for half whole milk & half buttermilk?
Thank you <3
Hey yes you can 🙂
Has anyone tried adding chocolate chips to this? Or any thoughts on doing so?
Hi, what changed would I need to make for high altitude?
Hi Ashley, I’m sorry but I haven’t tested this cake at high altitude, so I can’t give exact adjustments.