

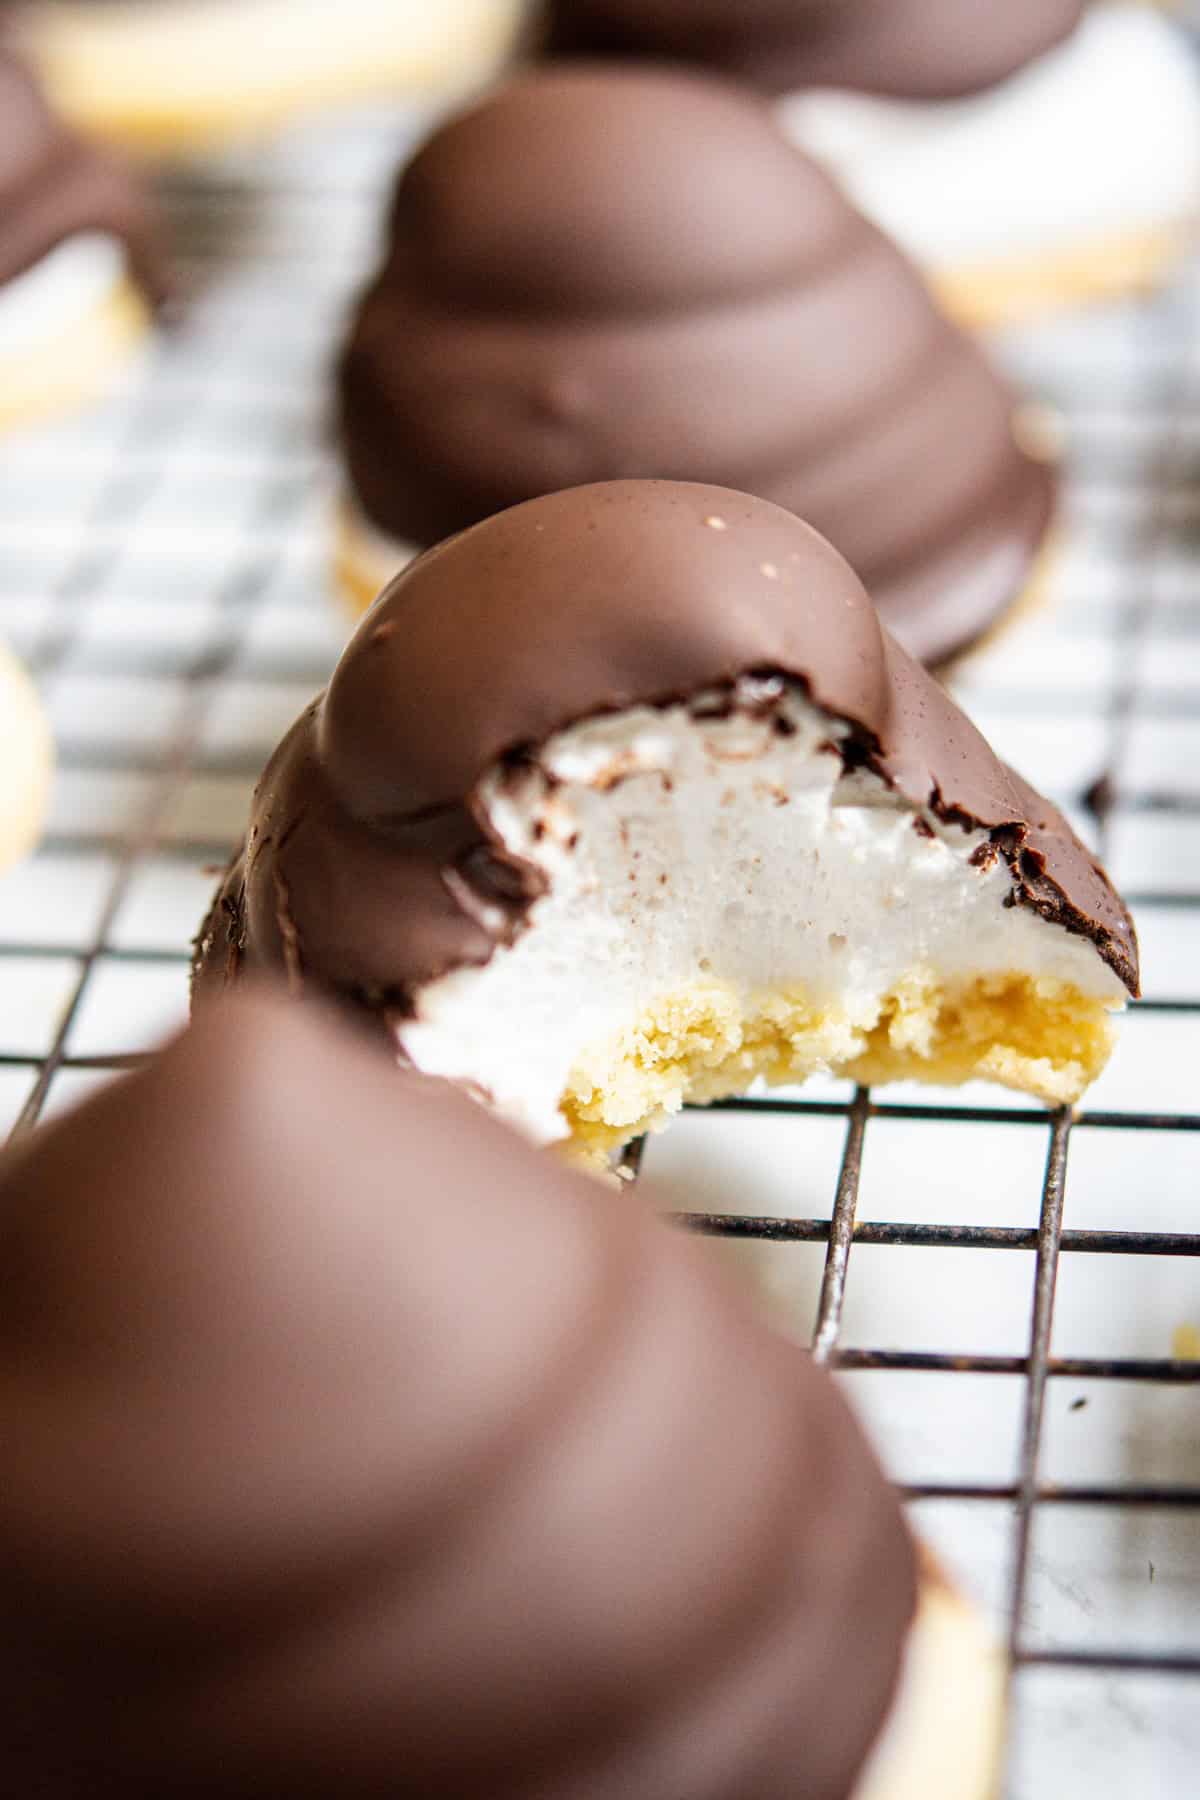
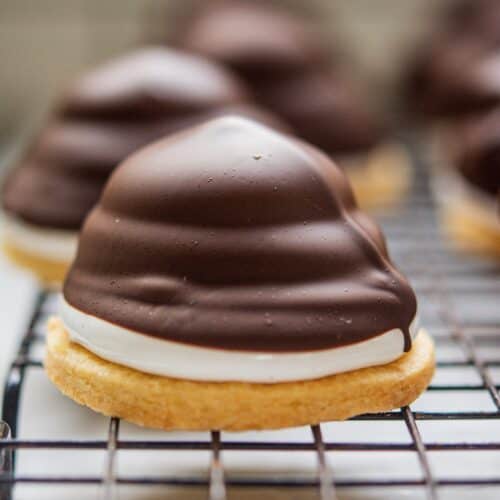
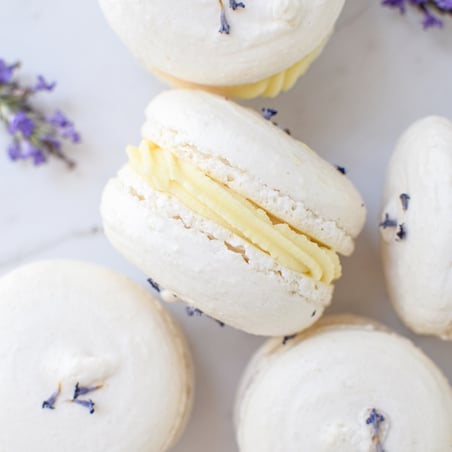
Chocolate Covered Marshmallow Cookies
Can’t decide between cookies and marshmallows? Why choose? These chocolate-covered marshmallow cookies combine a crisp, buttery base with a fluffy, thick layer of homemade marshmallow and a chocolate coating. They’re the perfect blend of textures and flavors for when you want it all!
A quick look
- Texture: Crisp, buttery cookies topped with fluffy marshmallow and coated in smooth chocolate.
- Flavor: A balance of butter, sweet marshmallow, and velvety chocolate.
- Time: There’s a wee bit of assembly required, but it’s worth it!
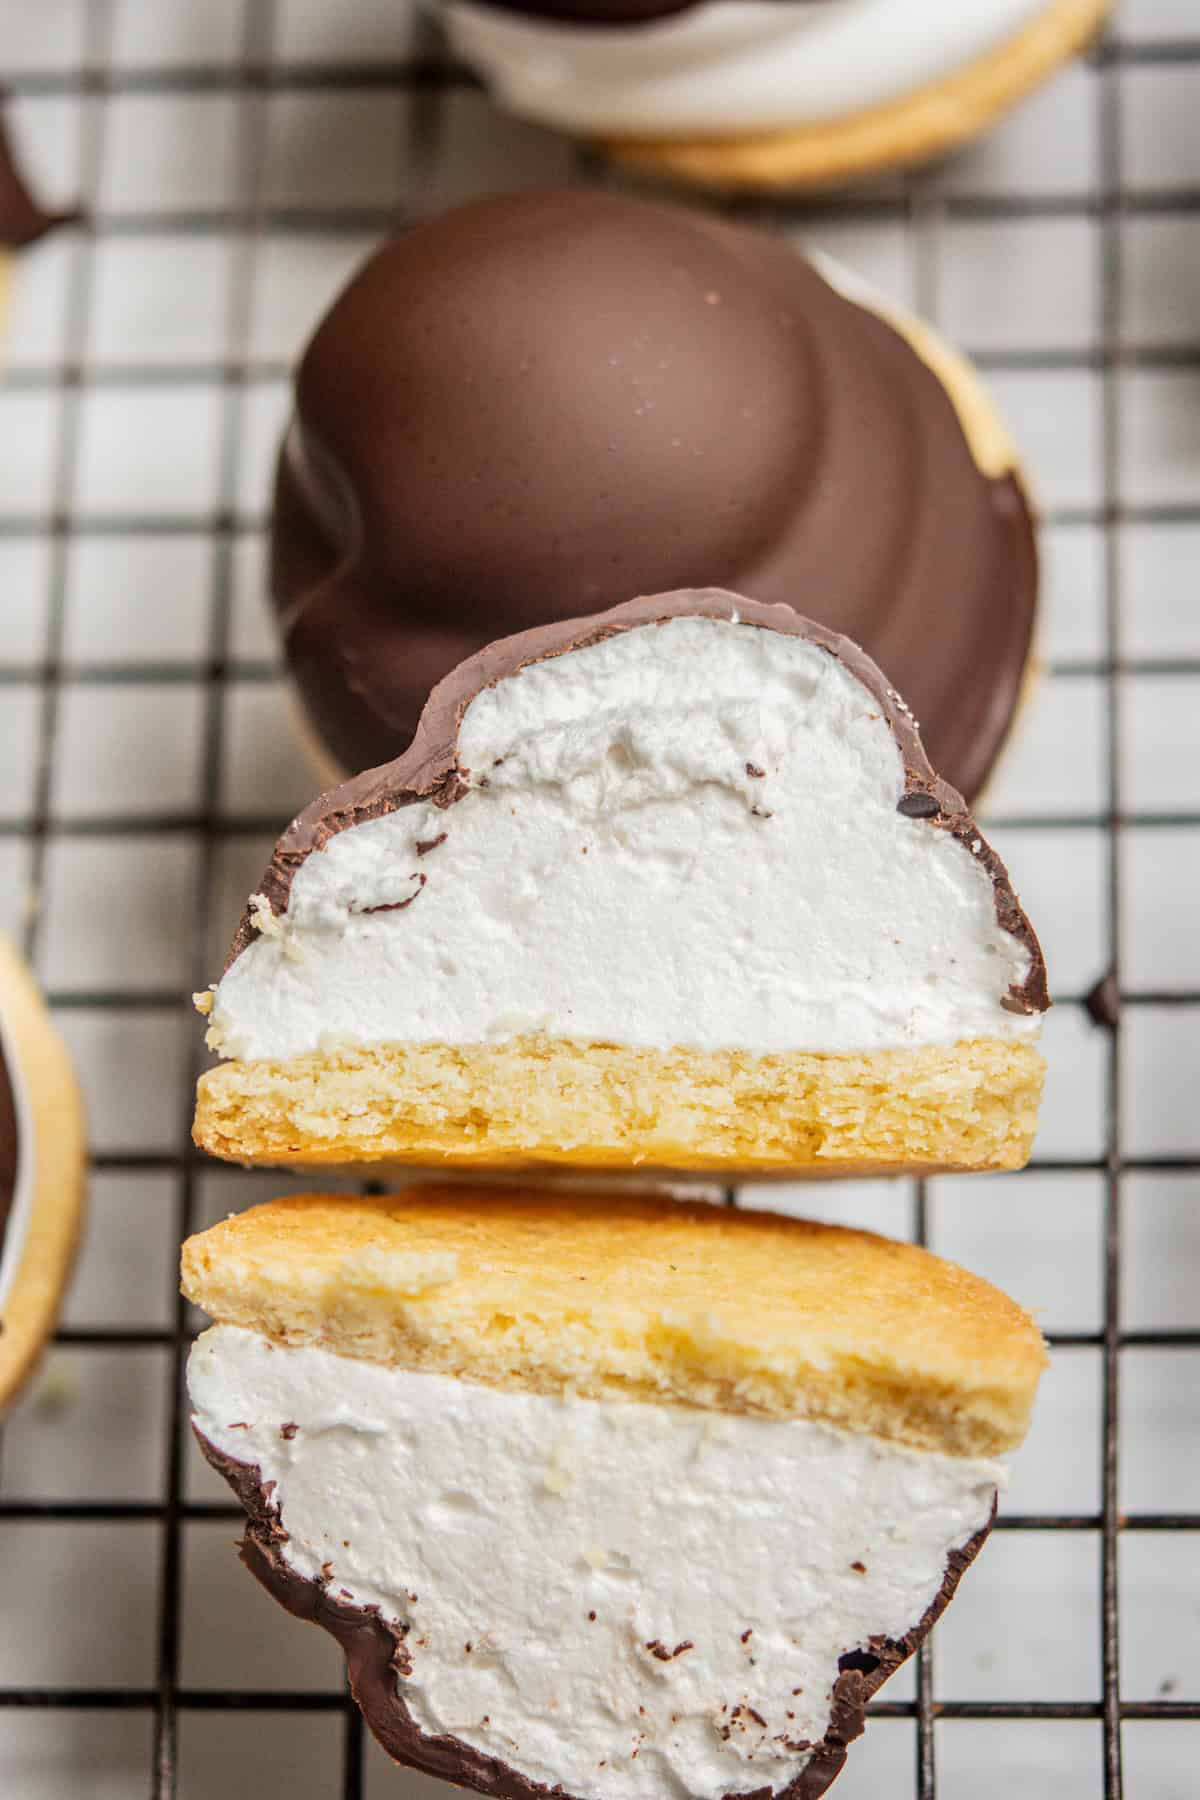
What do you call these? In New Zealand they’re mallow puffs, I think homemade mallomars in the US but in Belgium we called these melocakes. Either way – they’re so good, with a delish mix of textures – the chocolate shell, the fluffy marshmallow and the crisp biscuit. There are three seperate components to these cookies but I’ll break them down so you’ll see it’s all super doable! I think the trickiest part is getting the marshmallow mixture into piping bags before it sets, so I have two piping bags set up and ready to fill before I start. For the cookies I use my small-batch sugar cookie recipe which is a no-chill dough that doesn’t spread.
Marshmallows without corn syrup
I make my marshmallows without corn syrup – that’s pretty standard in NZ but I know for my US readers corn syrup is often featured. It’s used to prevent crystalization of the sugar when making the initital sugar syrup. However, you can avoid crystalization in other ways, like by not stirring the sugar syrup as it’s boiling, so corn syrup is not actually needed.
Ingredients
Here’s a run down of what you need. Find the ingredient amounts in the printable recipe card at the bottom of this post.
Equipment
- Circle cookie cutter
- Rolling pin
- Electric mixer
- Candy thermometer
- Stand mixer with whisk attachment
- Piping bags
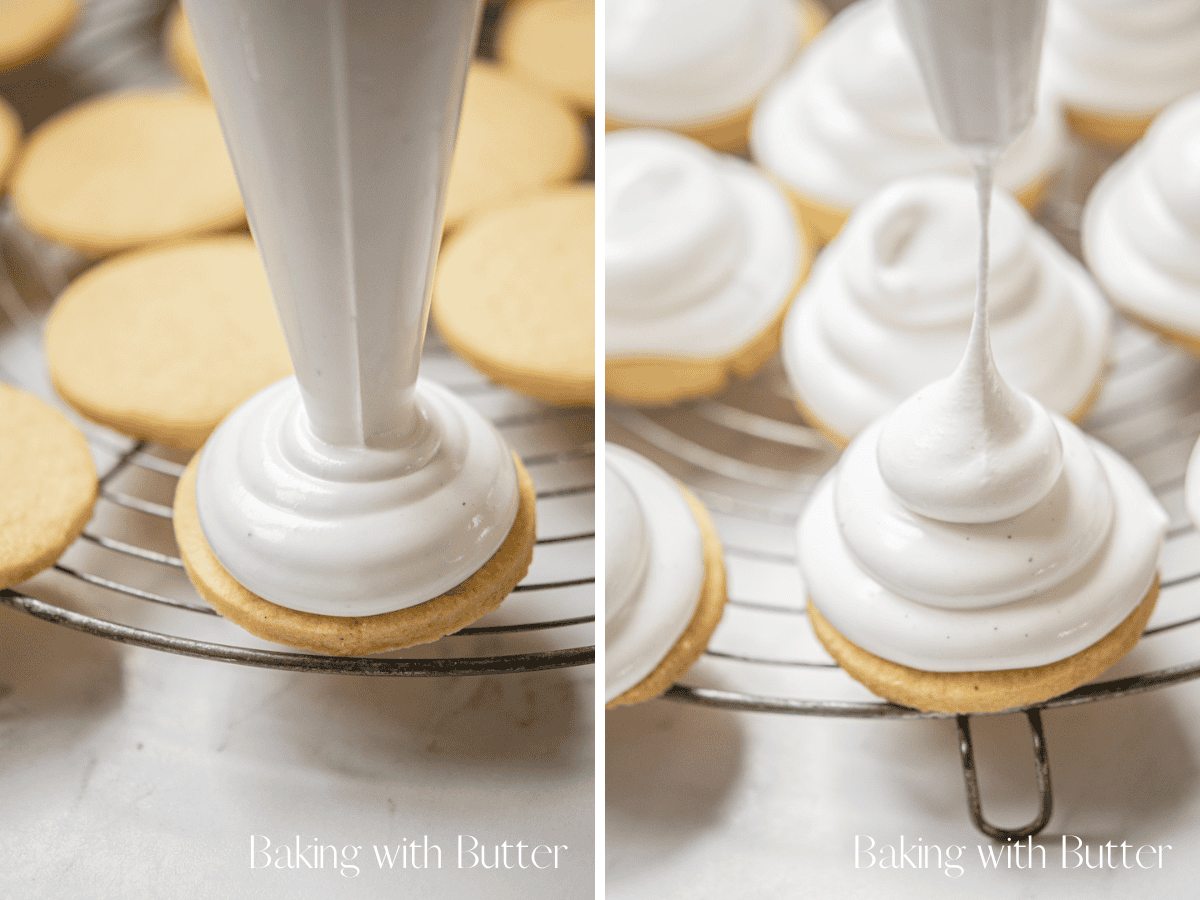
My #1 Tip for Layered Marshmallow Layers
Start with one thin marshmallow layer on all the cookies, then circle back for a second layer. This gives the marshmallow time to slightly set, making it easier to pipe neat, defined shapes.
How to Make Them
Cream butter and sugar until fluffy, then mix in egg yolk, vanilla, baking powder, and salt. Add flour to form a crumbly dough that holds together when pressed. Roll out the dough between two sheets of parchment, then cut into rounds using a cookie cutter. Re-roll scraps as needed. Bake the cookies until lightly golden, then transfer to a cooling rack to cool completely.
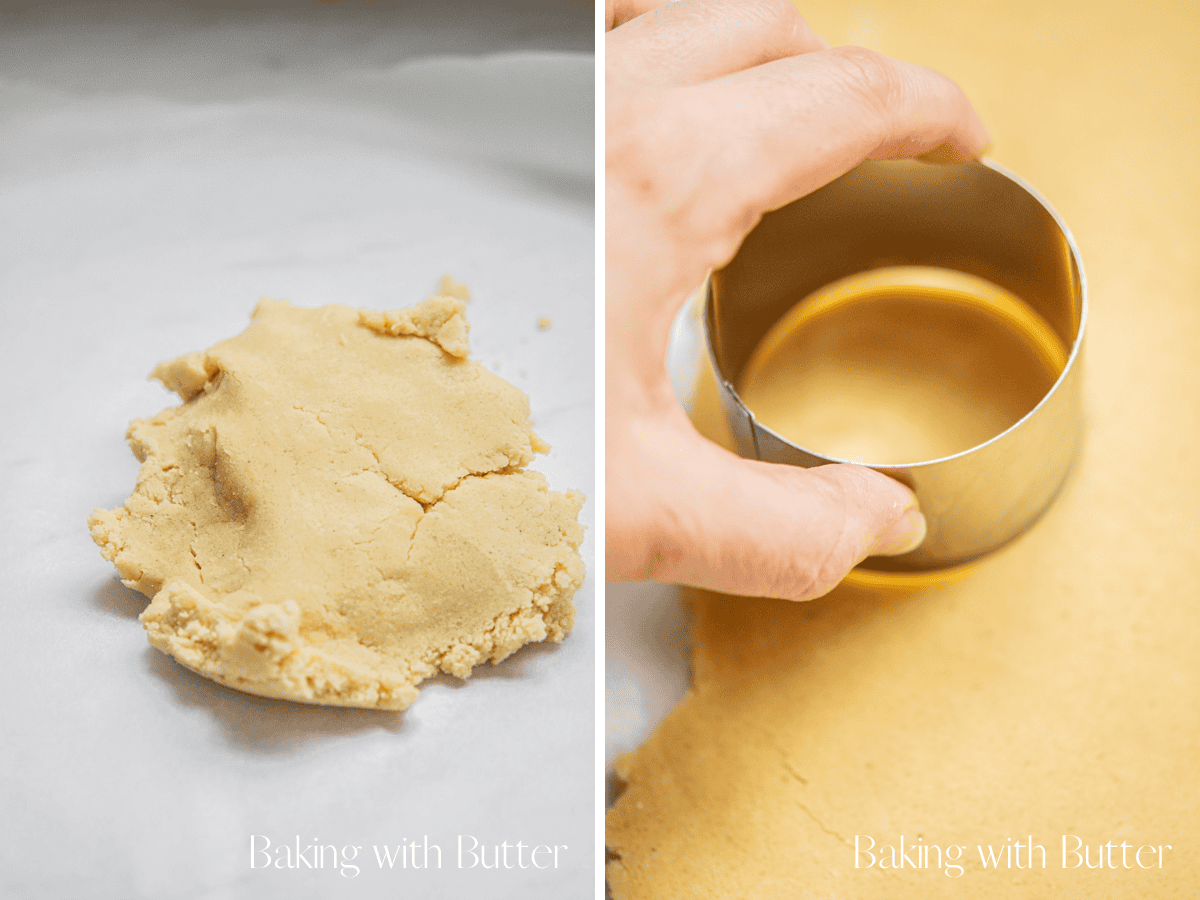

Tips for rolling the cookie dough
The cookie dough will be crumbly at first. To roll, start by pressing it firmly into a mound with your hands to help it hold together. The warmth from your hands helps the butter in the dough soften slightly, making it easier to work with.Roll it between two sheets of parchment paper to prevent sticking and keep it together. Fix any cracks by gently pressing them together, and when re-rolling scraps, press them into a solid mass before rolling again. Avoid adding extra flour, as it can dry out the dough further.
The marshmallow and assembling
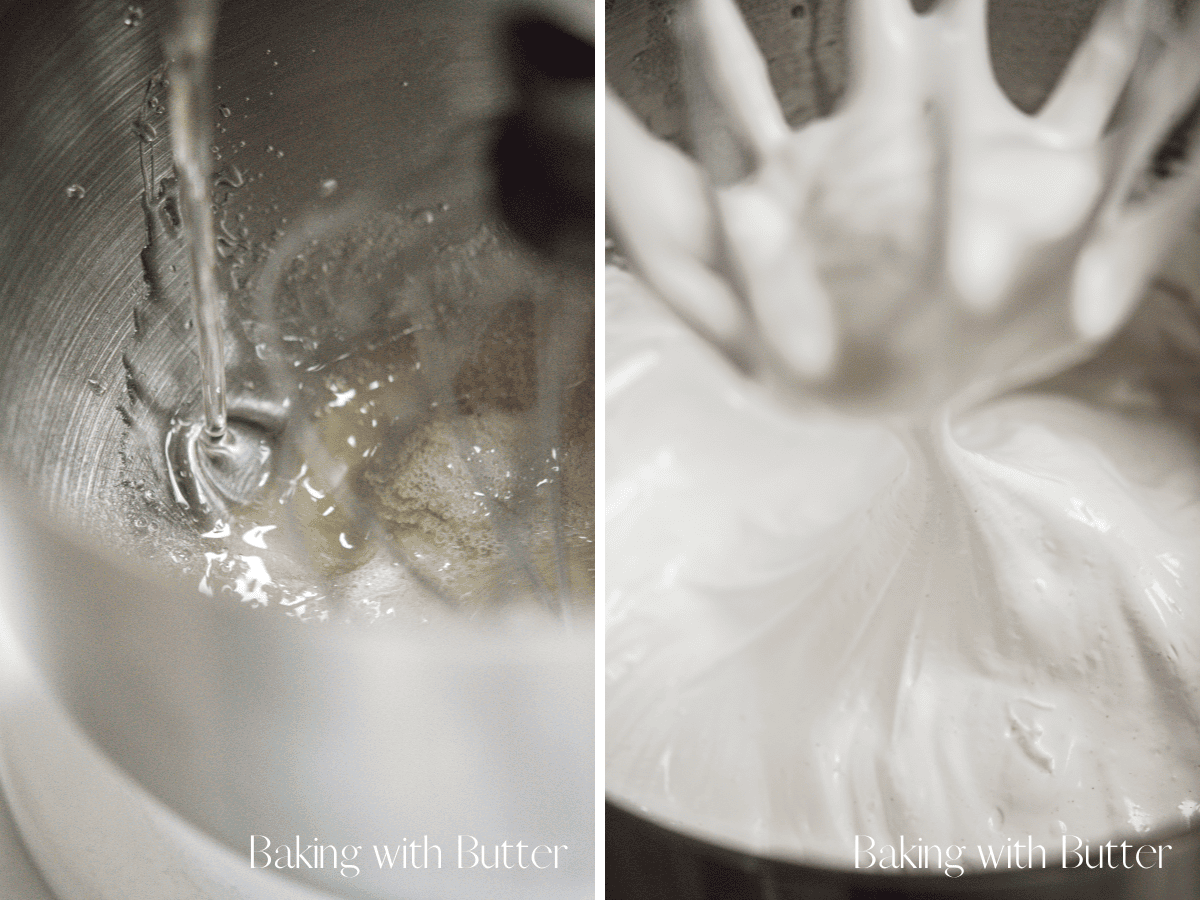
Dissolve gelatin in water in a stand mixer bowl. Meanwhile, heat water, sugar, and salt in a saucepan to make the sugar syrup. Test it with a candy thermometer until it reaches firm ball stage, around 242°F / 116°C – 245°F / 118°C. Drizzle the hot syrup into the gelatin while whisking on low speed, then increase to high and whip until fluffy.
How to test marshmallow syrup without a candy thermometer
- Fill a bowl with very cold water. It should be close to ice cold for accuracy.
- Once your sugar syrup has been cooking, drop a small amount into the cold water.
- Use your fingers to gather the cooled syrup from the bottom of the bowl. If the syrup forms a soft, malleable ball that holds its shape until pressure is applied and then flattens, it’s in the firm ball stage.
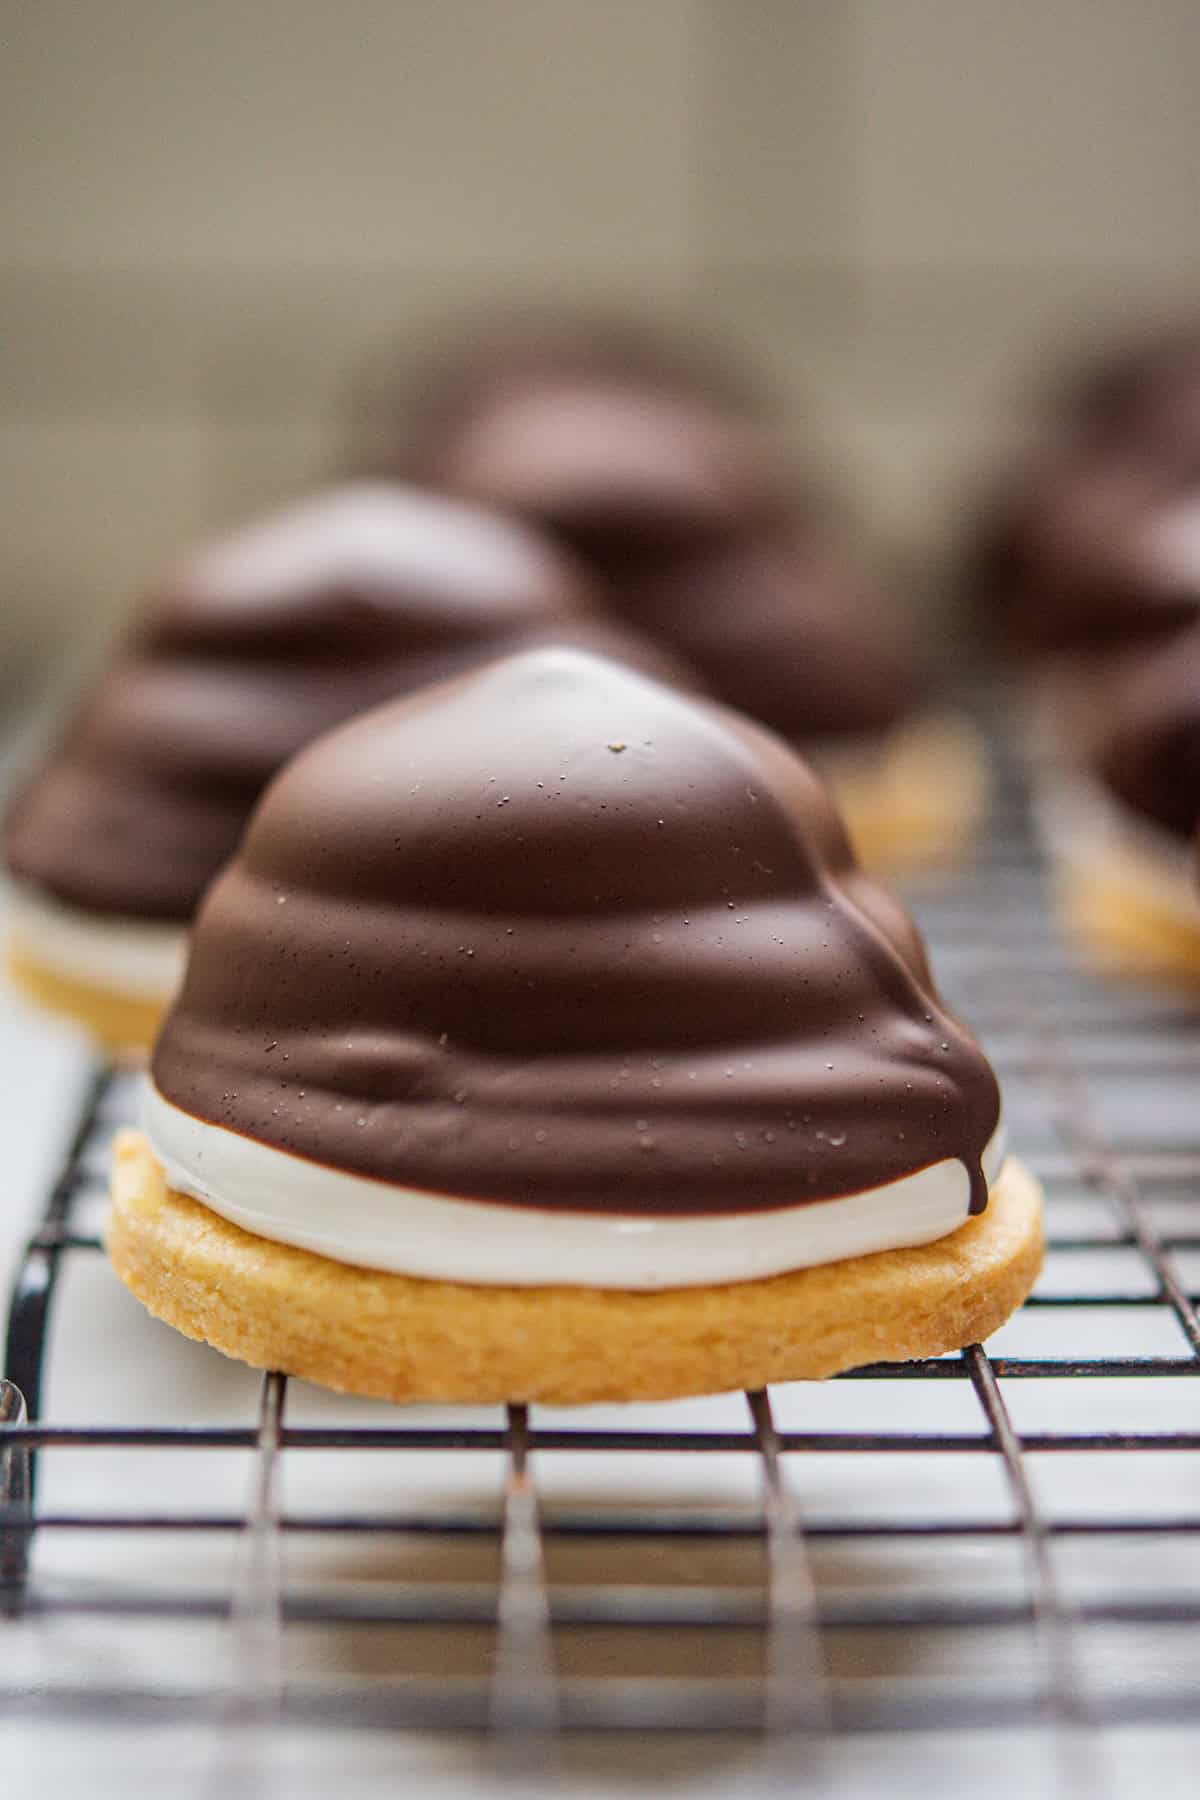
Transfer the marshmallow mixture to a piping bag and pipe a layer onto each cookie. Let it set slightly before adding a second and third layer for height.
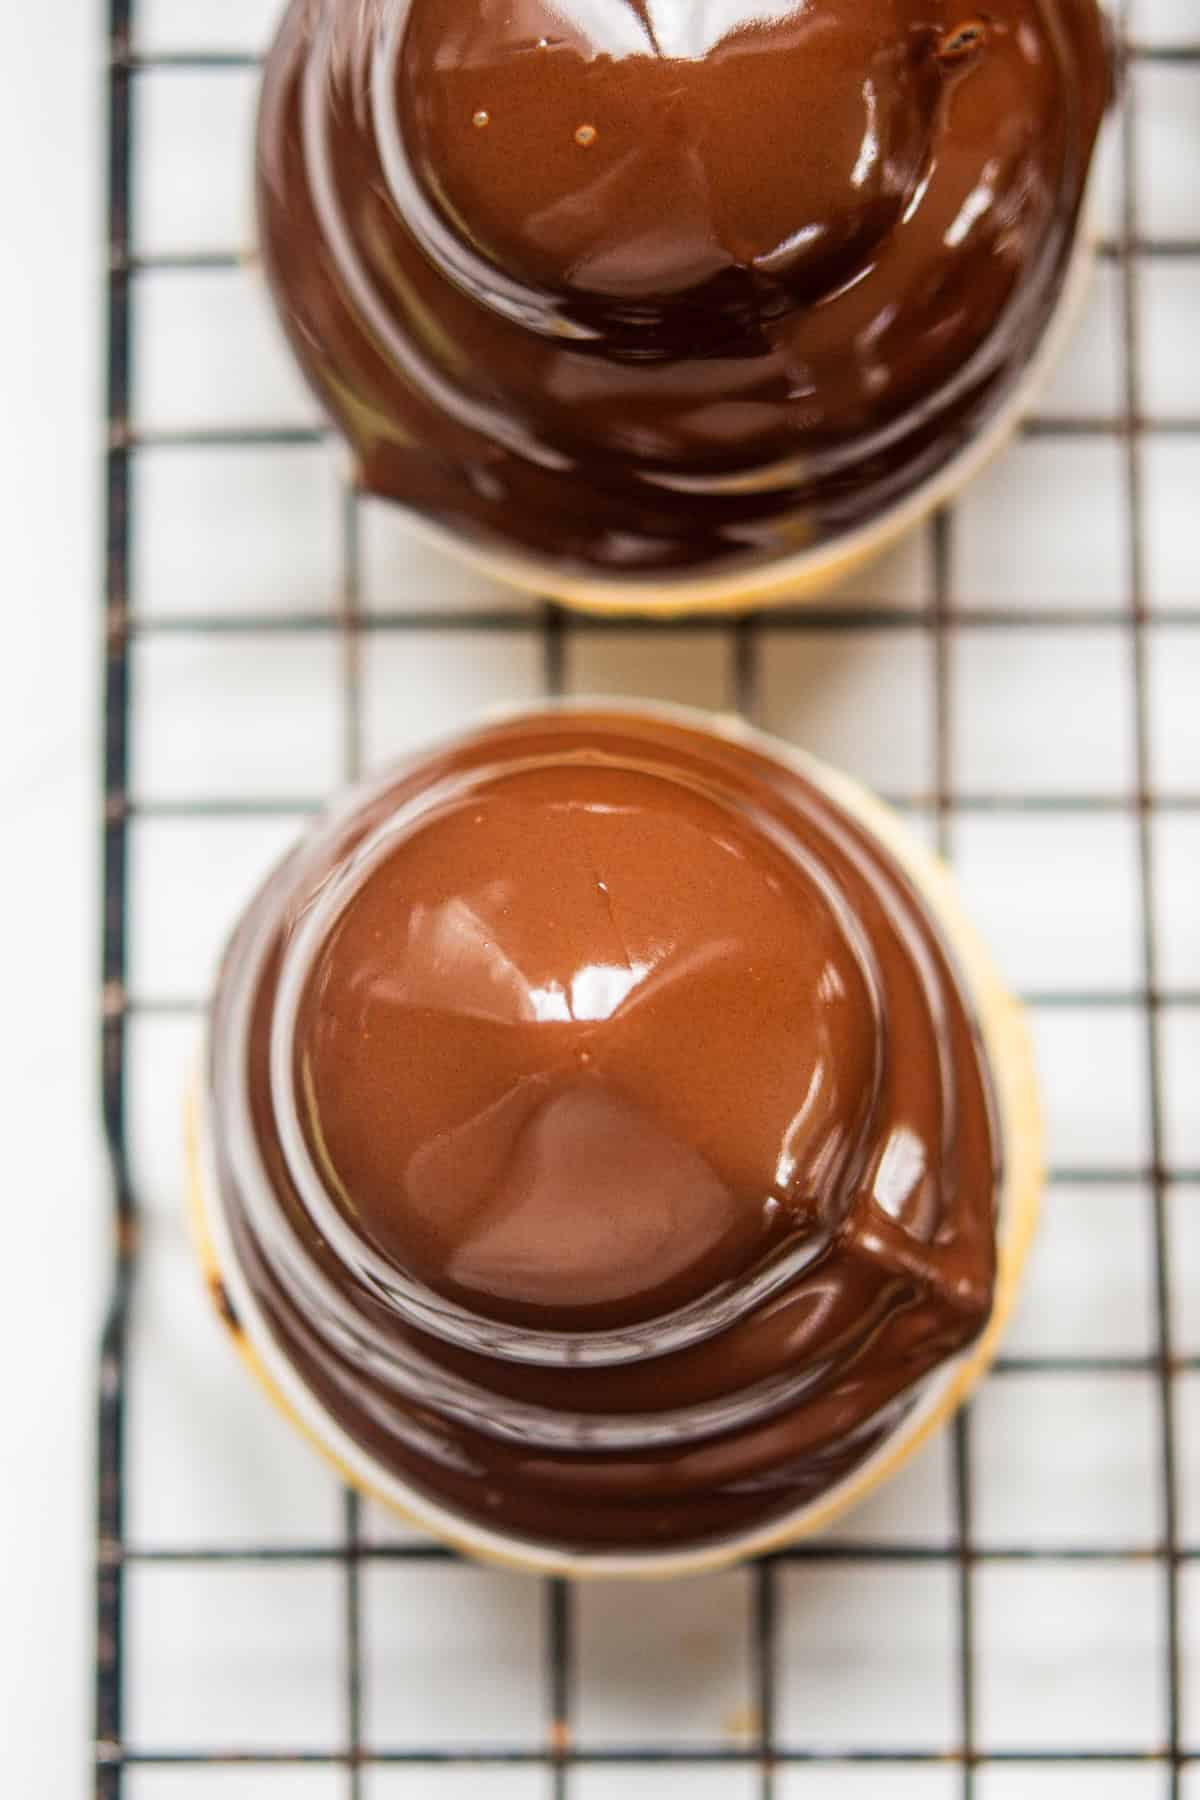
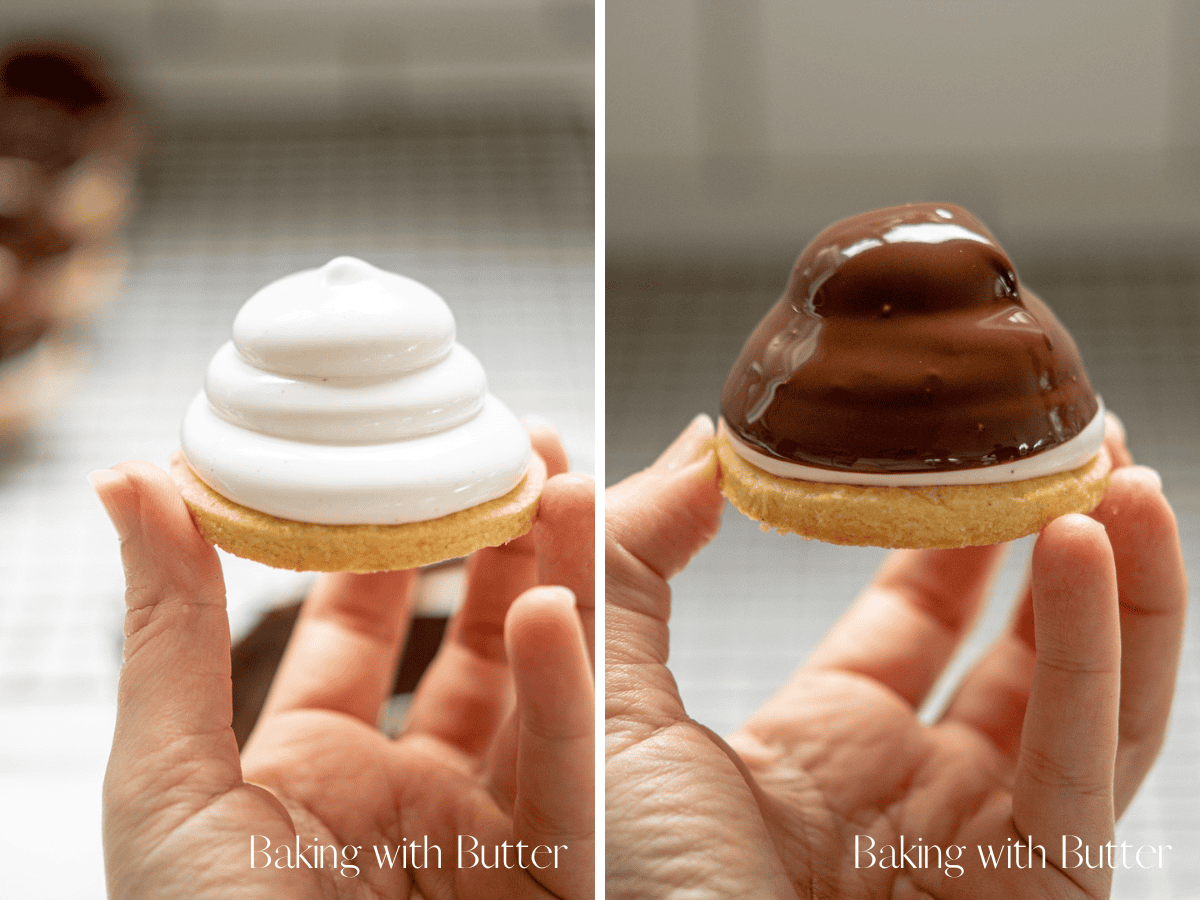
Melt chocolate until smooth. Dip the marshmallow-topped cookies into the chocolate and place them on a cooling rack. Let them set for a few hours before serving.
Browse more cookie recipes
I’ve got a growing collection of cookie recipes on the blog! Here are some of my favorites.
Chocolate Covered Marshmallow Cookies
Ingredients
- 85 g butter softened to room temperature
- 65 g granulated sugar
- 1 large egg yolk
- 1/2 tsp vanilla
- 1/4 tsp baking powder
- 1/8 tsp salt
- 156 g all-purpose flour
Marshmallow
- 10 g powdered gelatin
- 120 g cold water
- 200 g granulated sugar
- 1/8 teaspoon salt
- 3/4 teaspoons vanilla extract or paste
Chocolate
- 170 g semi-sweet chocolate chips or milk chocolate
Instructions
- Preheat the oven to 180C /350F and line a cookie sheet with parchment paper.
- In a medium bowl, with an electric mixer, cream the butter and sugar until light and fluffy. Add in the egg yolk, vanilla, baking powder and salt and beat together. Finally add the flour and mix into a crumbly dough. When pressed with your hands it should hold together easily.
- Form it into a mound and place it on a sheet of parchment paper. The warmth from your hands helps the butter in the dough soften slightly, making it easier to work with. Add a second sheet and roll the dough into a 1/2 cm (1/4 inch) thick rectangle. Use a 6cm (2.5 inch) round cookie cutter to cut the cookies. Any scraps can be re-rolled and cut again.
- Bake the cookies, spaced 2cm apart for around 12 minutes until just lightly golden brown. Let them cool in a single layer on a cooling rack.
Marshmallows and assembling
- Prepare two piping bags by placing one each in tall glass. Fold the top of the bags down to widen the opening. You can use large round piping tips, or if you’re using disposable bags, you can snip off the ends once they’re filled.
- In the bowl of a stand mixer, combine 60g (1/4 cup) cold water and gelatin. Let this sit while you make the sugar syrup.
- Combine the remaining 60g (1/4 cup) water, granulated sugar, and salt in a small saucepan. Stir gently over medium-high heat just until the sugar has dissolved. Then stop stirring, let it boil, and cook until the mixture reaches to around 242°F / 116°C – 245°F / 118°C.
- Add the whisk attachment to your stand mixer and turn it on low speed. Drizzle the hot sugar mixture into the gelatin mixture. Gradually increase to high speed and whisk for 7-9 minutes until the mixture is thick, fluffy, and tripled in volume. Add the vanilla extract near the end.
- Divide the marshmallow mixture over the piping bags. Take one and snip off the end (if you’re not using a piping tip). Pipe the marshmallow evenly over each cookie. You can do layers of marshmallow, but do one layer at a time over all the cookies so it has a minute or two to slightly set before adding on another. Continue with the remaining marshmallow.
- Let them sit for at least 40 minutes before dipping in chocolate.
Chocolate coating
- Add the chocolate to a microwave-proof bowl and melt it in 20-30-second increments in the microwave, stirring after each burst. When it’s nearly all melted, remove it and stir to combine and melt the rest.
- Dip each cookie into the melted chocolate; you can push it quite far into the chocolate to coat it. Let the dipped cookie drip upside down and give it a gentle shake to remove the excess chocolate. Then, place on a cooling rack and let them sit at room temperature for 3-4 hours for the chocolate and marshmallow to firm up.
Notes
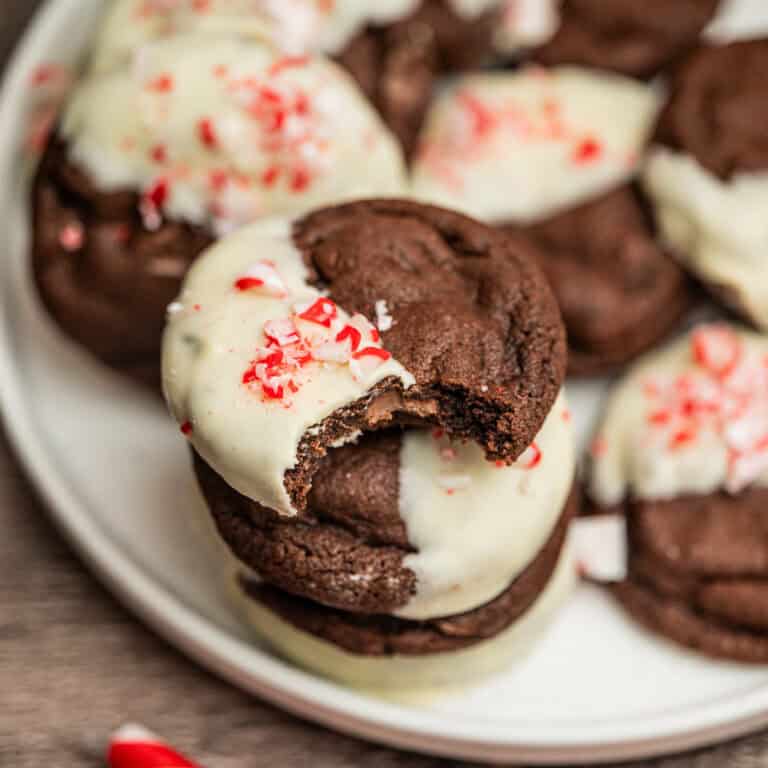
Peppermint marshmallow cookies
For a peppermint marshmallow instead of vanilla, swap the vanilla extract with 1/2 a teaspoon peppermint extract.Cup conversions
Both US cup conversions and metric are provided. Use the toggle to switch between the two. For best results I recommend using grams.How to test marshmallow syrup without a candy thermometer
- Fill a bowl with very cold water. It should be close to ice cold for accuracy.
- Once your sugar syrup has been cooking, drop a small amount into the cold water.
- Use your fingers to gather the cooled syrup from the bottom of the bowl. If the syrup forms a soft, malleable ball that holds its shape until pressure is applied and then flattens, it’s in the firm ball stage.
More notes
- Dough Consistency: The cookie dough is crumbly at first but will hold together when pressed. Avoid adding extra flour to keep the texture just right.
- Piping Marshmallow: Work quickly when transferring the marshmallow mixture to piping bags, as it begins to set fast. Prepare your bags in advance.
- Chocolate Coating: Use a little coconut oil when melting chocolate for a smoother, shinier finish. Ensure the chocolate isn’t too hot before dipping to avoid melting the marshmallow.
- Room Temperature: Store the cookies in an airtight container for up to 3 days, away from direct sunlight or heat, to prevent the chocolate from melting.
- Refrigeration: If you live in a warmer climate, refrigerate the cookies in an airtight container for up to 5 days. Allow them to come to room temperature before serving for the best texture and flavor.
- Freezing: These cookies can be frozen. Place them in a single layer on a baking sheet to freeze, then transfer to a freezer-safe container or bag with parchment paper between layers. Freeze for up to 1 month. The marshmallow doesn’t freeze hard, so you can enjoy these frozen or thaw them before eating.


Hope you love this recipe as much as I do!