

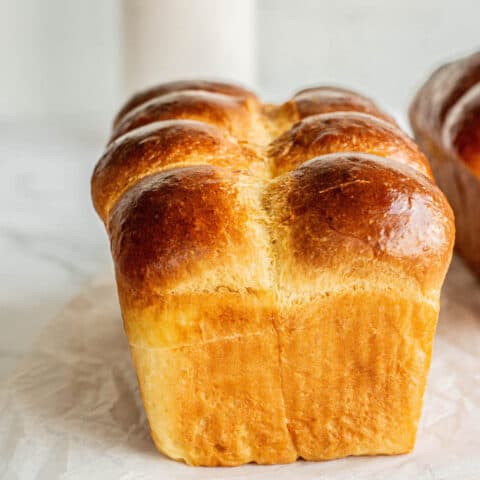
Homemade Brioche Bread Recipe (Step-by-Step)
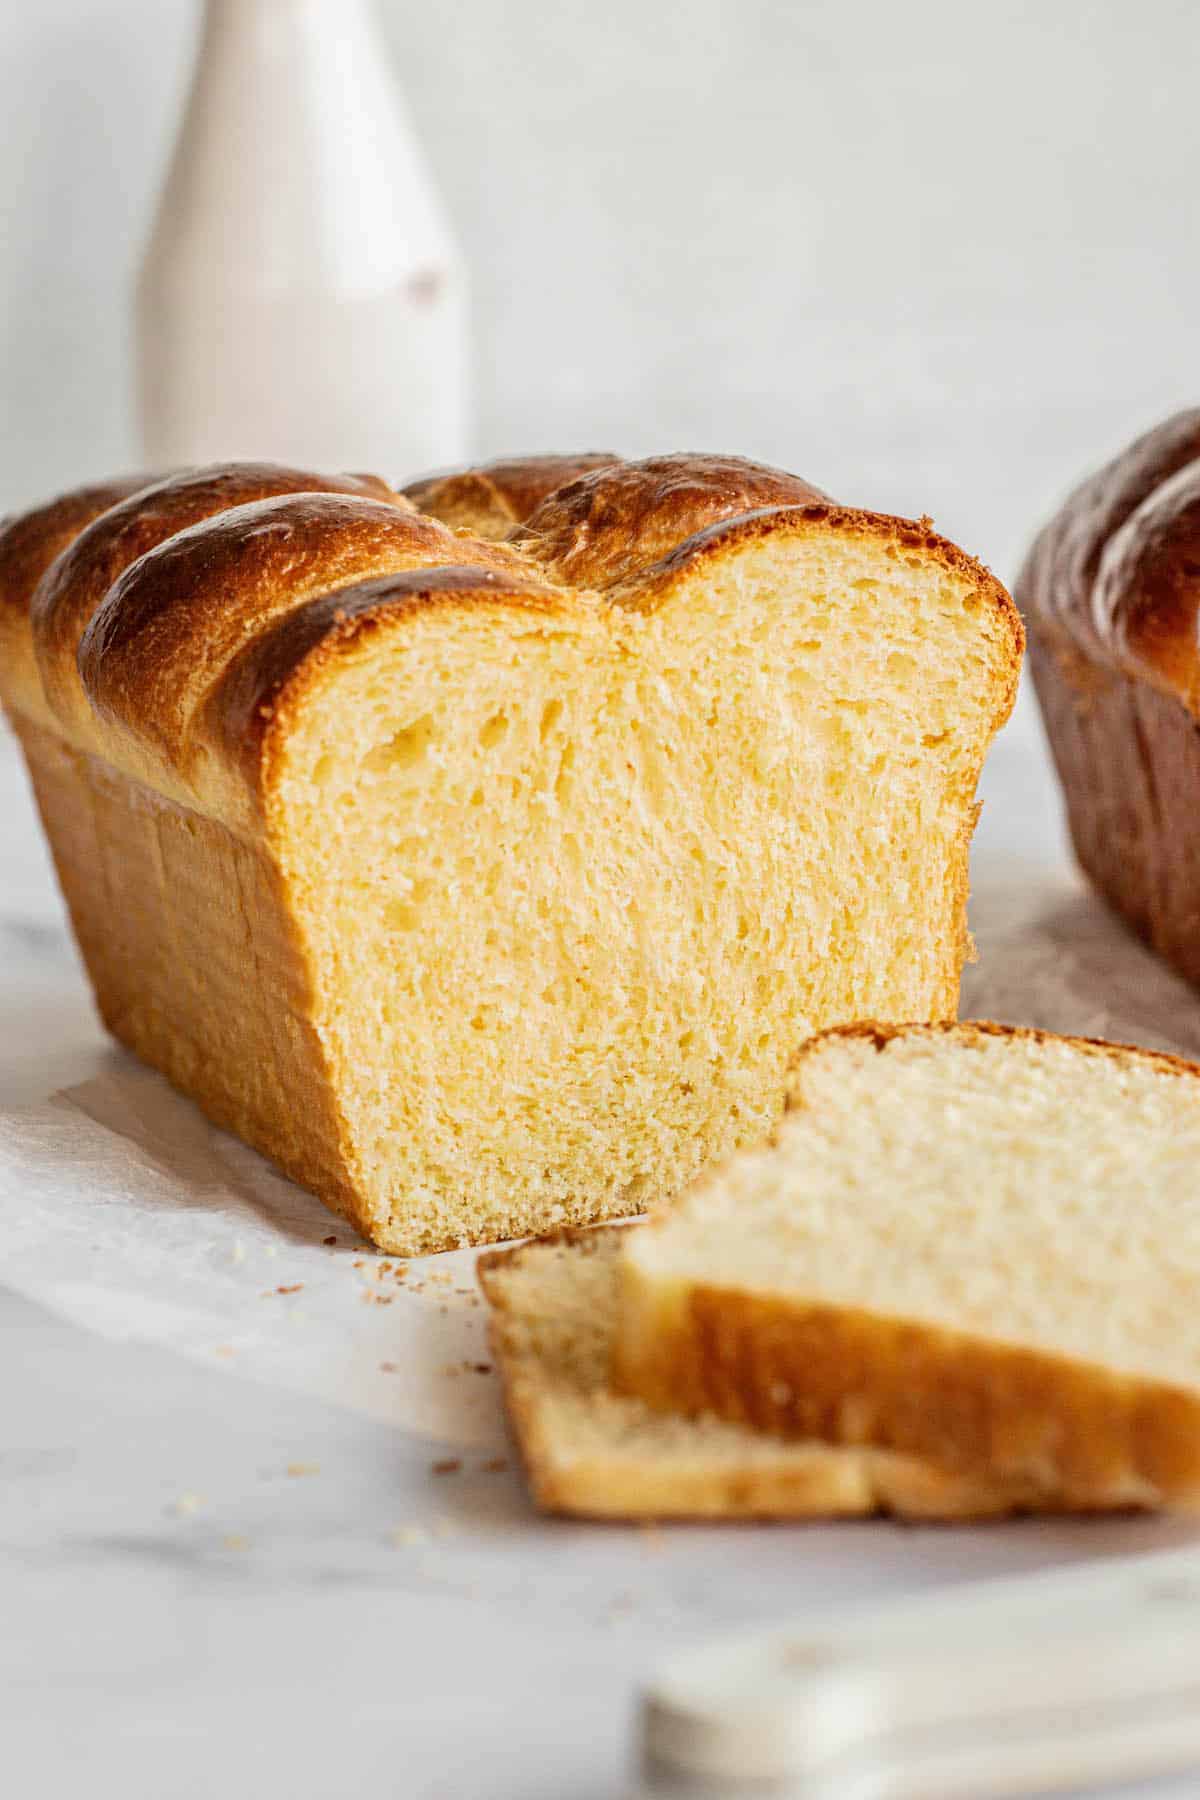
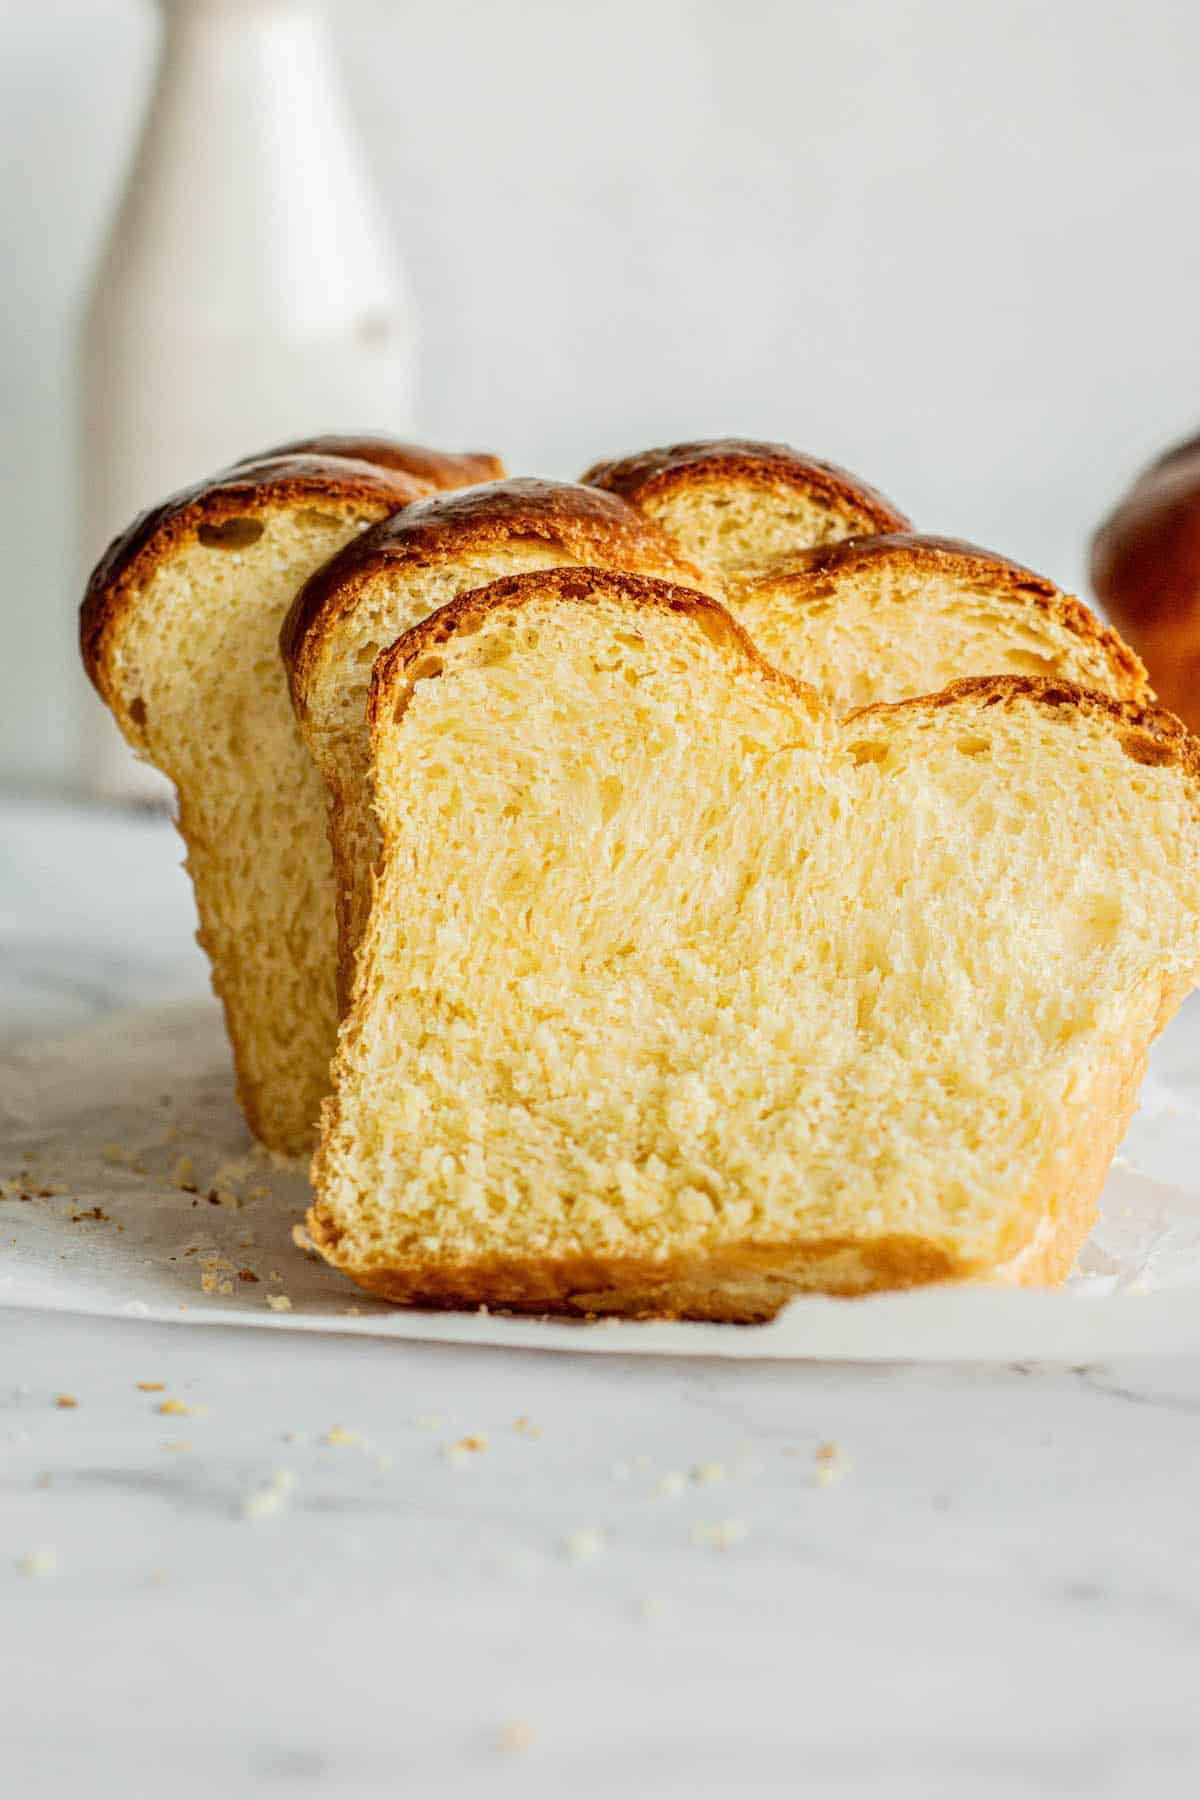
Once you’ve made a proper brioche at home, it’s hard to go back to buying it. The crumb is soft and feathery, the flavor is deeply buttery, and the golden crust has a richness that shop-bought versions just can’t replicate. It’s a bread worth learning.
Brioche has a reputation for being difficult, and I won’t pretend it’s a quick Saturday afternoon bake. It takes time, patience, and a stand mixer that won’t give up on you. But the process itself isn’t complicated, and once you understand what the dough is supposed to look and feel like at each stage, it becomes a lot less daunting.
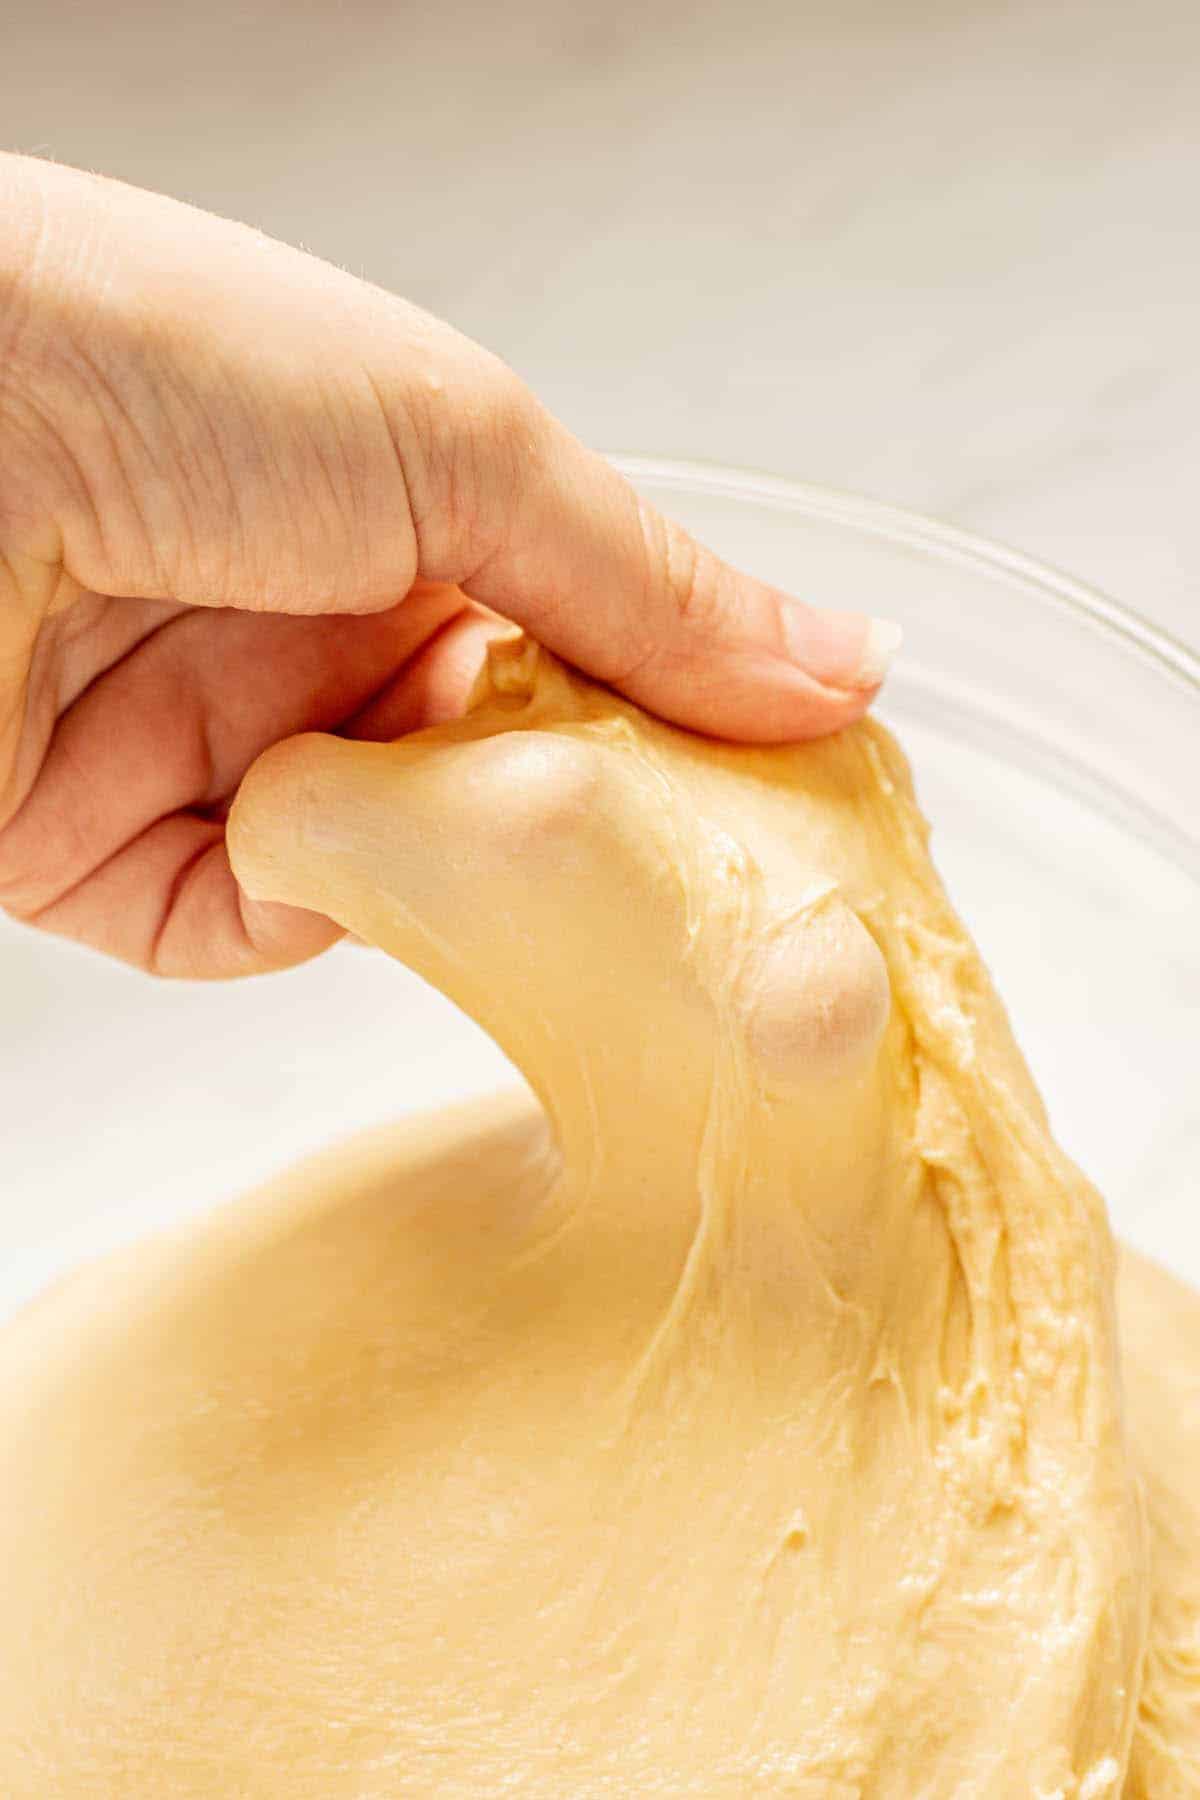
One thing to know upfront: this dough will look like a sticky, greasy mess for longer than feels comfortable. That’s completely normal, it will come together eventually!
What makes this brioche recipe different
A traditional brioche uses eggs as the only liquid. My version includes a small amount of milk too. This makes the dough easier to handle and gives the crumb a slightly softer texture, while keeping all the richness and buttery flavor you’d expect from a proper brioche.
The butter makes up about 38% of the flour weight, which is what gives brioche its characteristic tender crumb and rich flavor. The eggs add protein that strengthens the dough’s structure and helps it rise tall, but they also bring in extra fat for softness. The milk is mostly there for hydration, which makes this dough easier to work with than an eggs-only version.
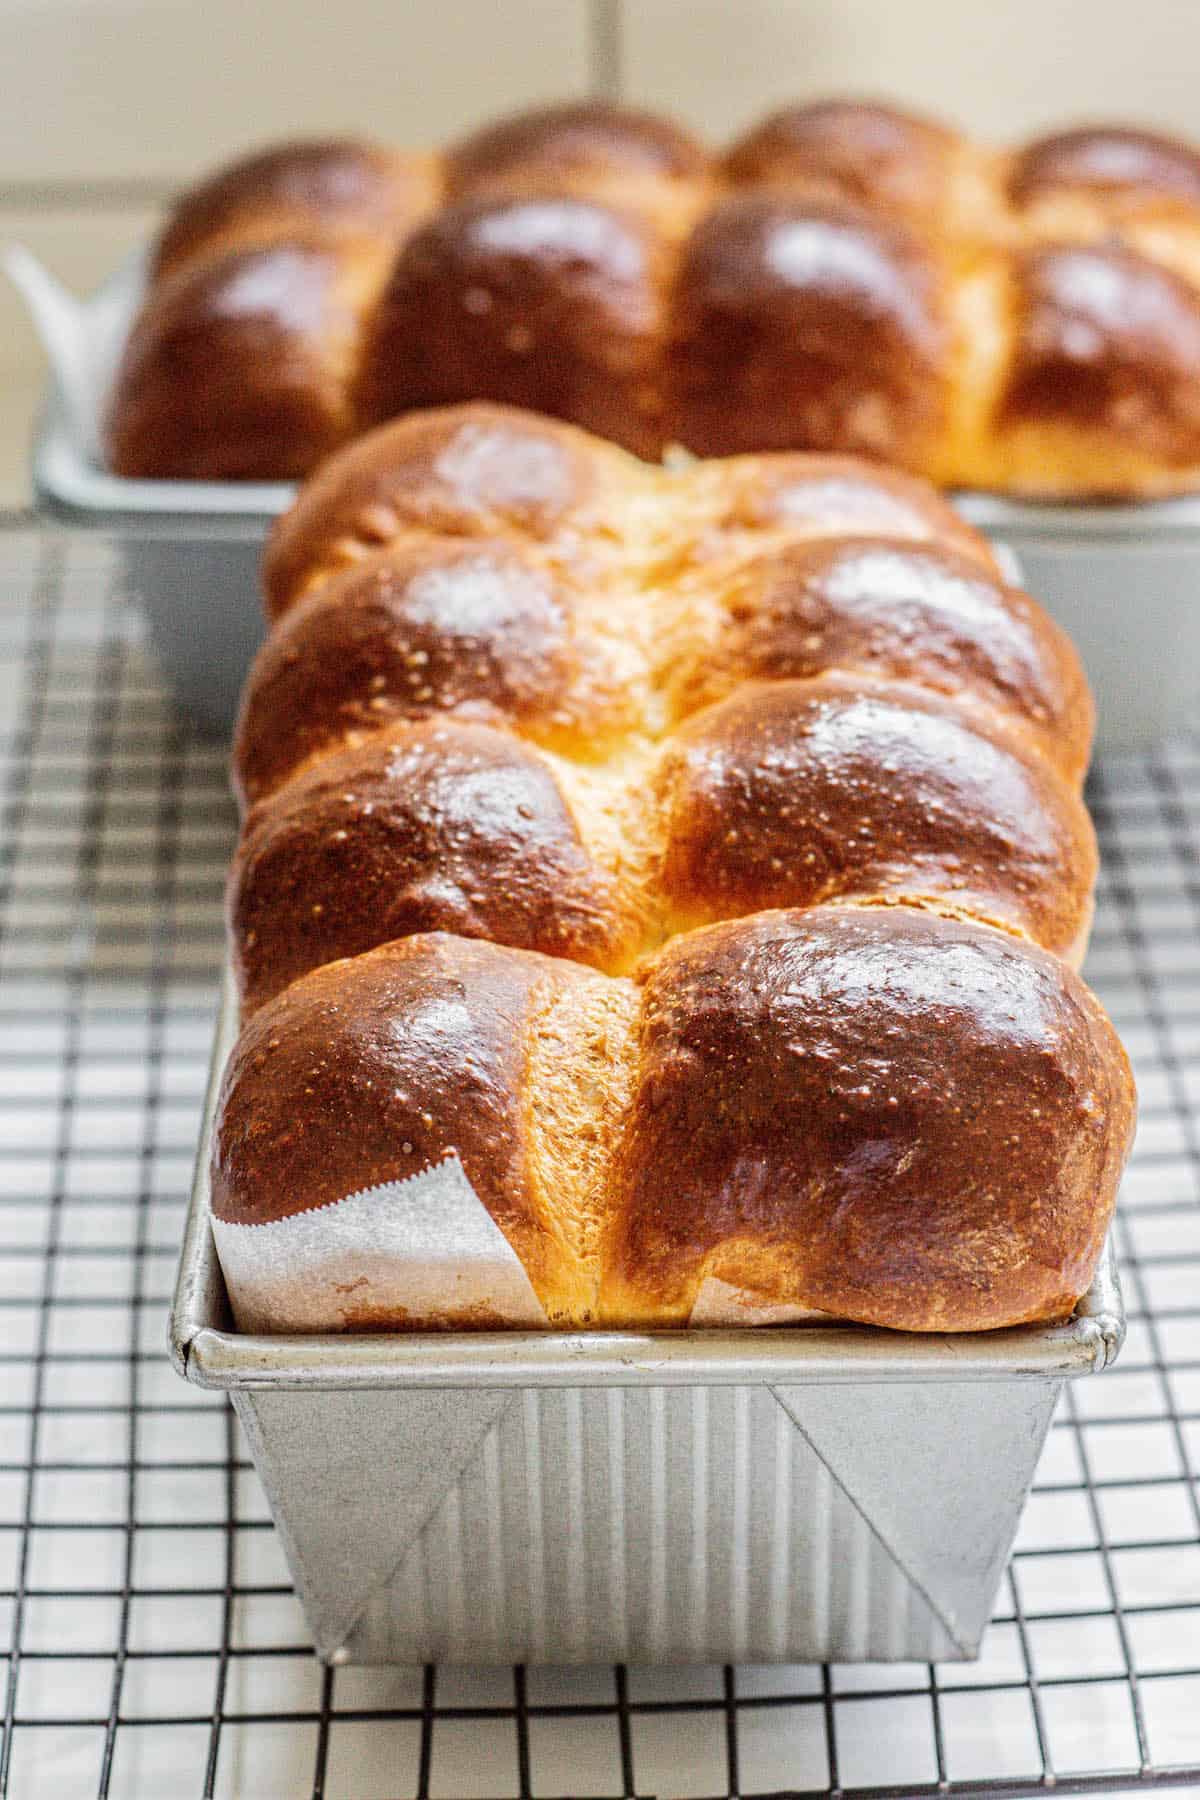
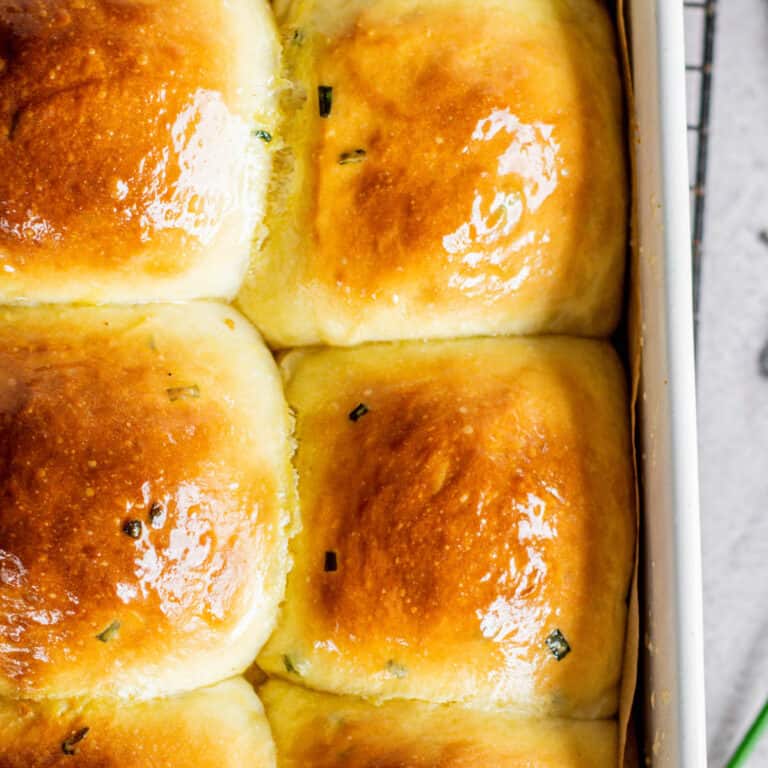
This recipe makes 2 loaves. You can shape them as rolls (8 balls per tin) or as a three-strand braid, both work beautifully with this dough.
Key ingredients
- All-purpose flour. Use a strong one with a protein level of around 11%. The higher protein supports the gluten structure that has to hold up against a lot of butter and eggs. Weaker flours can struggle to develop enough strength, and the loaf won’t rise as tall or hold its shape as well.
- Eggs. Five large eggs, which is a lot for a bread recipe. They add richness, color, and protein. They’re also a big part of why brioche has that deeply yellow, tender crumb.
- Unsalted butter. At cool room temperature. Not cold from the fridge, and not soft and warm. It needs to be pliable enough to press a finger into easily without feeling greasy. Too cold and it tears the dough instead of blending in. Too warm and it separates out, leaving you with a greasy mess. More on this in the tips.
- Milk. Just 125g, lukewarm (95-104°F / 35-40°C). It activates the yeast and adds a little hydration to make the dough more workable. Make sure it’s warm but not hot. Too hot and you’ll kill the yeast before it gets started.
- Instant or active dried yeast. Either works fine. Instant yeast can go straight into the flour without blooming first. Active dried yeast needs 5-10 minutes in warm milk before you add anything else, so you can confirm it’s alive before committing to the rest of the recipe.
- Granulated sugar. Brioche isn’t a sweet bread, but the sugar feeds the yeast and contributes to that golden crust during baking.
The development of brioche dough
Brioche develops over several stages, and the look and feel of the dough change throughout.
- First stage: Mix together everything except the butter. This creates a thick base dough.
- Second stage: Add in the cubed butter, a little at a time. This adds fat and liquid, and the dough will become slack and sticky.
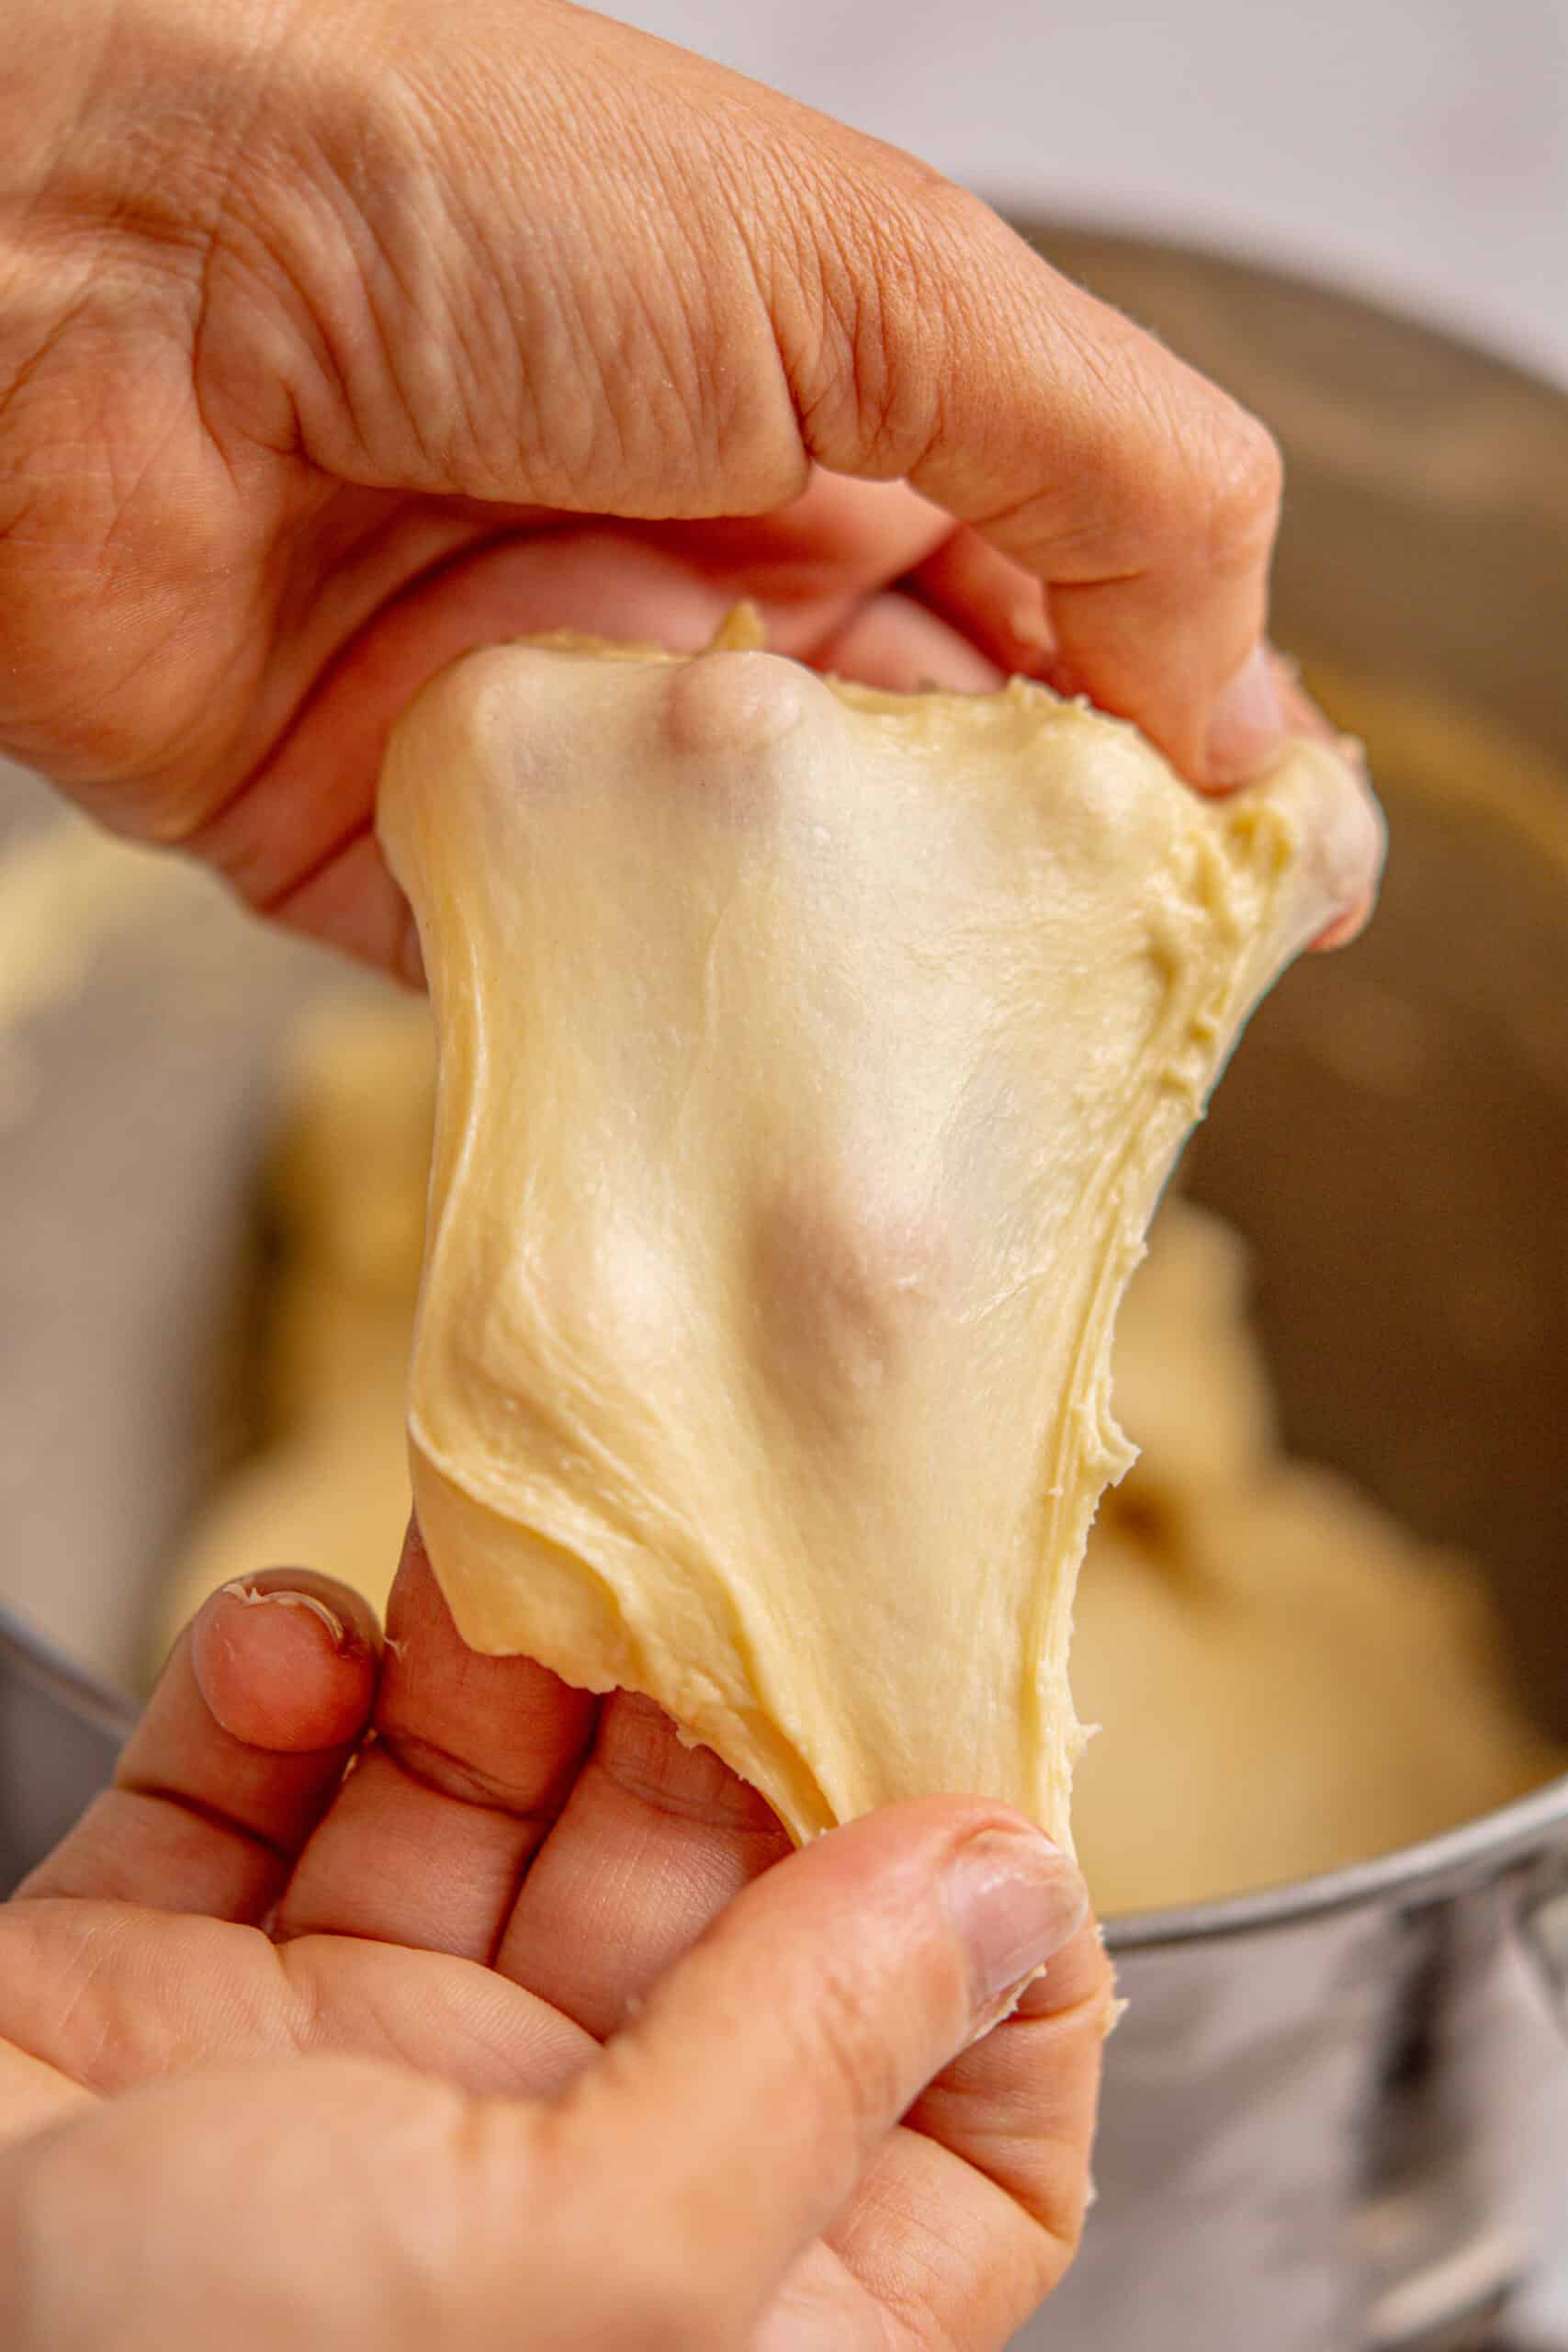
- Kneading: Once the butter is in, knead the dough (ideally in a stand mixer) until it becomes glossy and strong, pulling cleanly from the sides of the bowl.
This is a slow process. The dough will feel sticky for a long time, then suddenly transform into a silky, stretchy dough.
A note on your stand mixer: brioche is one of the hardest doughs a home mixer will ever run through. The long mixing time at medium speed generates heat through friction, and that heat transfers into the dough as well as the motor. If the dough gets too warm, the butter will start to separate out and you’ll lose the emulsion you’ve been building. If the housing feels very hot or the mixer starts slowing down, stop it and let everything rest in the fridge for 10-15 minutes. This protects both the motor and the dough.
Method
- Begin with mixing together your yeast, sugar and warm milk to let it activate.
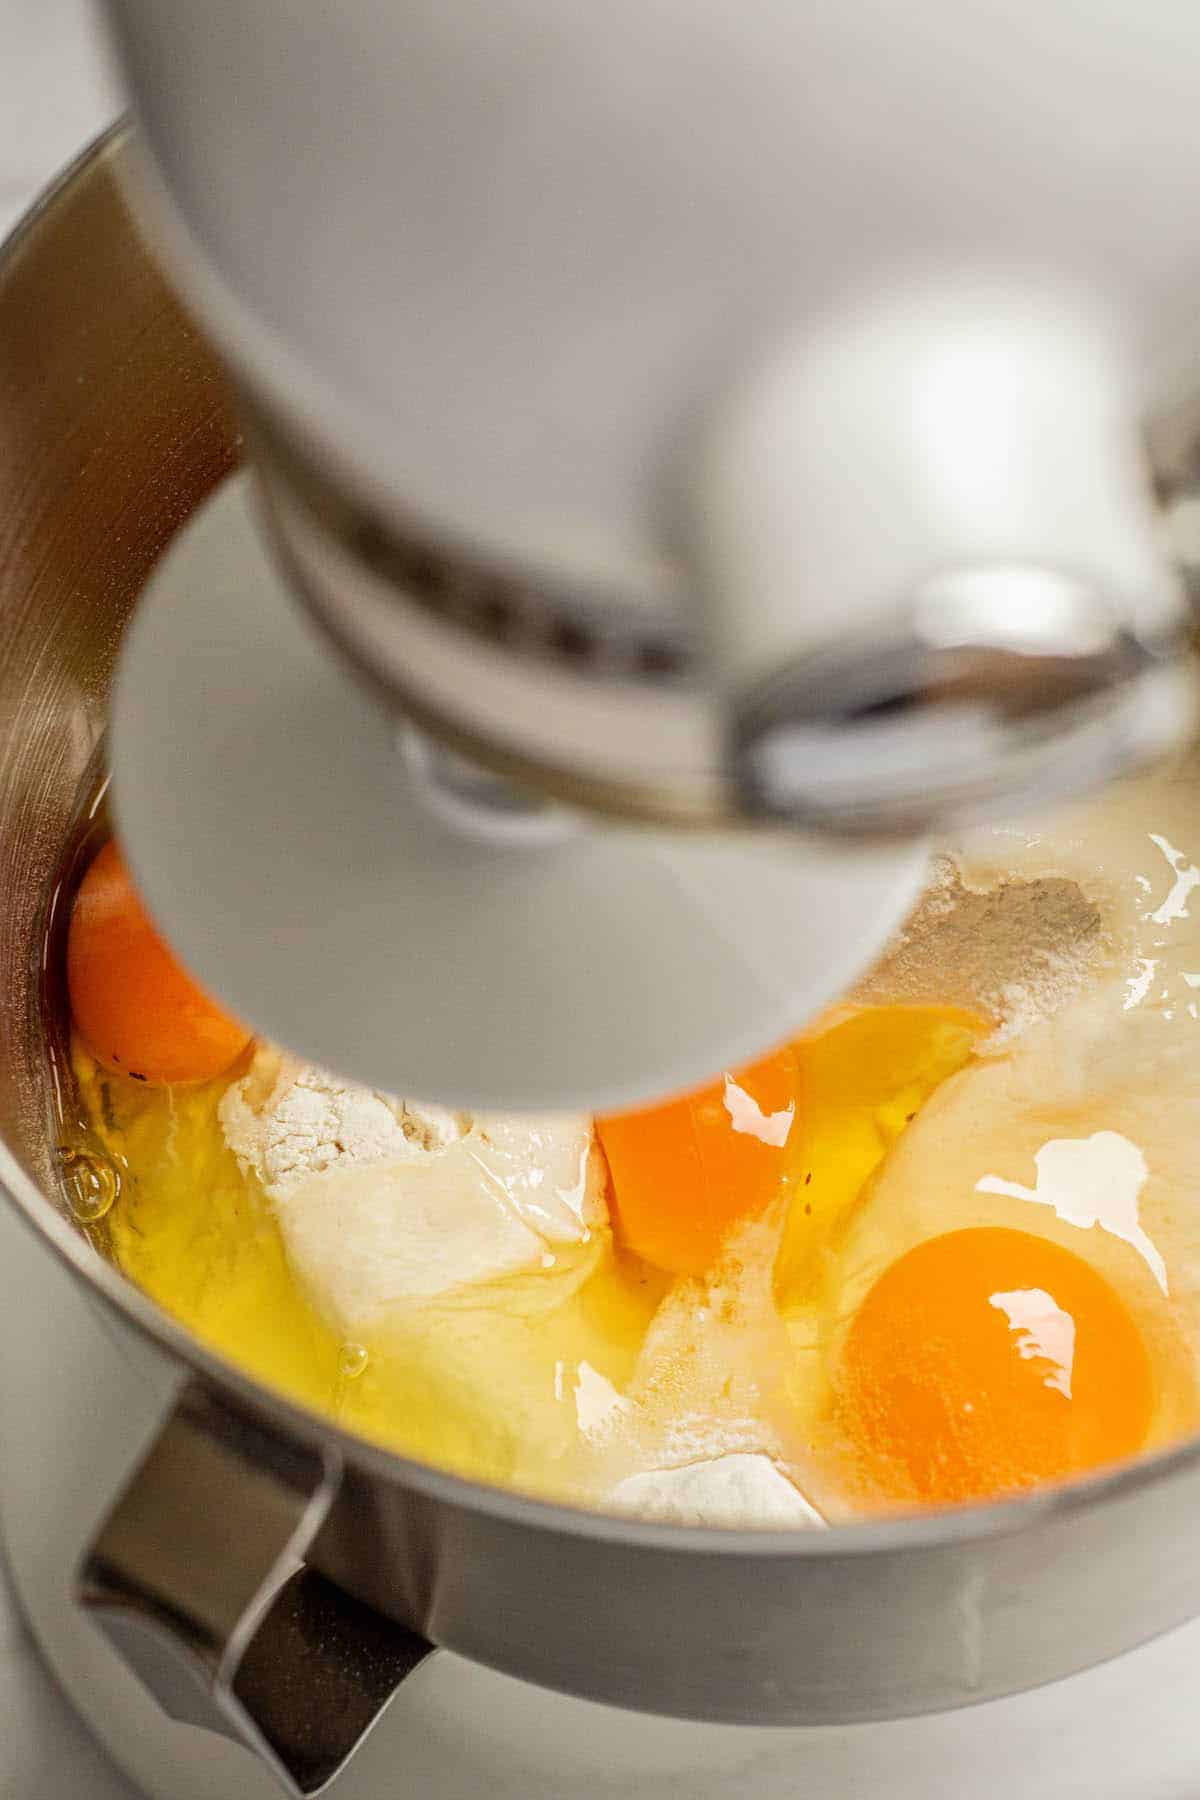
- Add in the eggs, flour and salt and mix it for 5 minutes to form a dough.

- Add in the cubed butter a little at a time until it’s all incorporated. Then keep mixing.
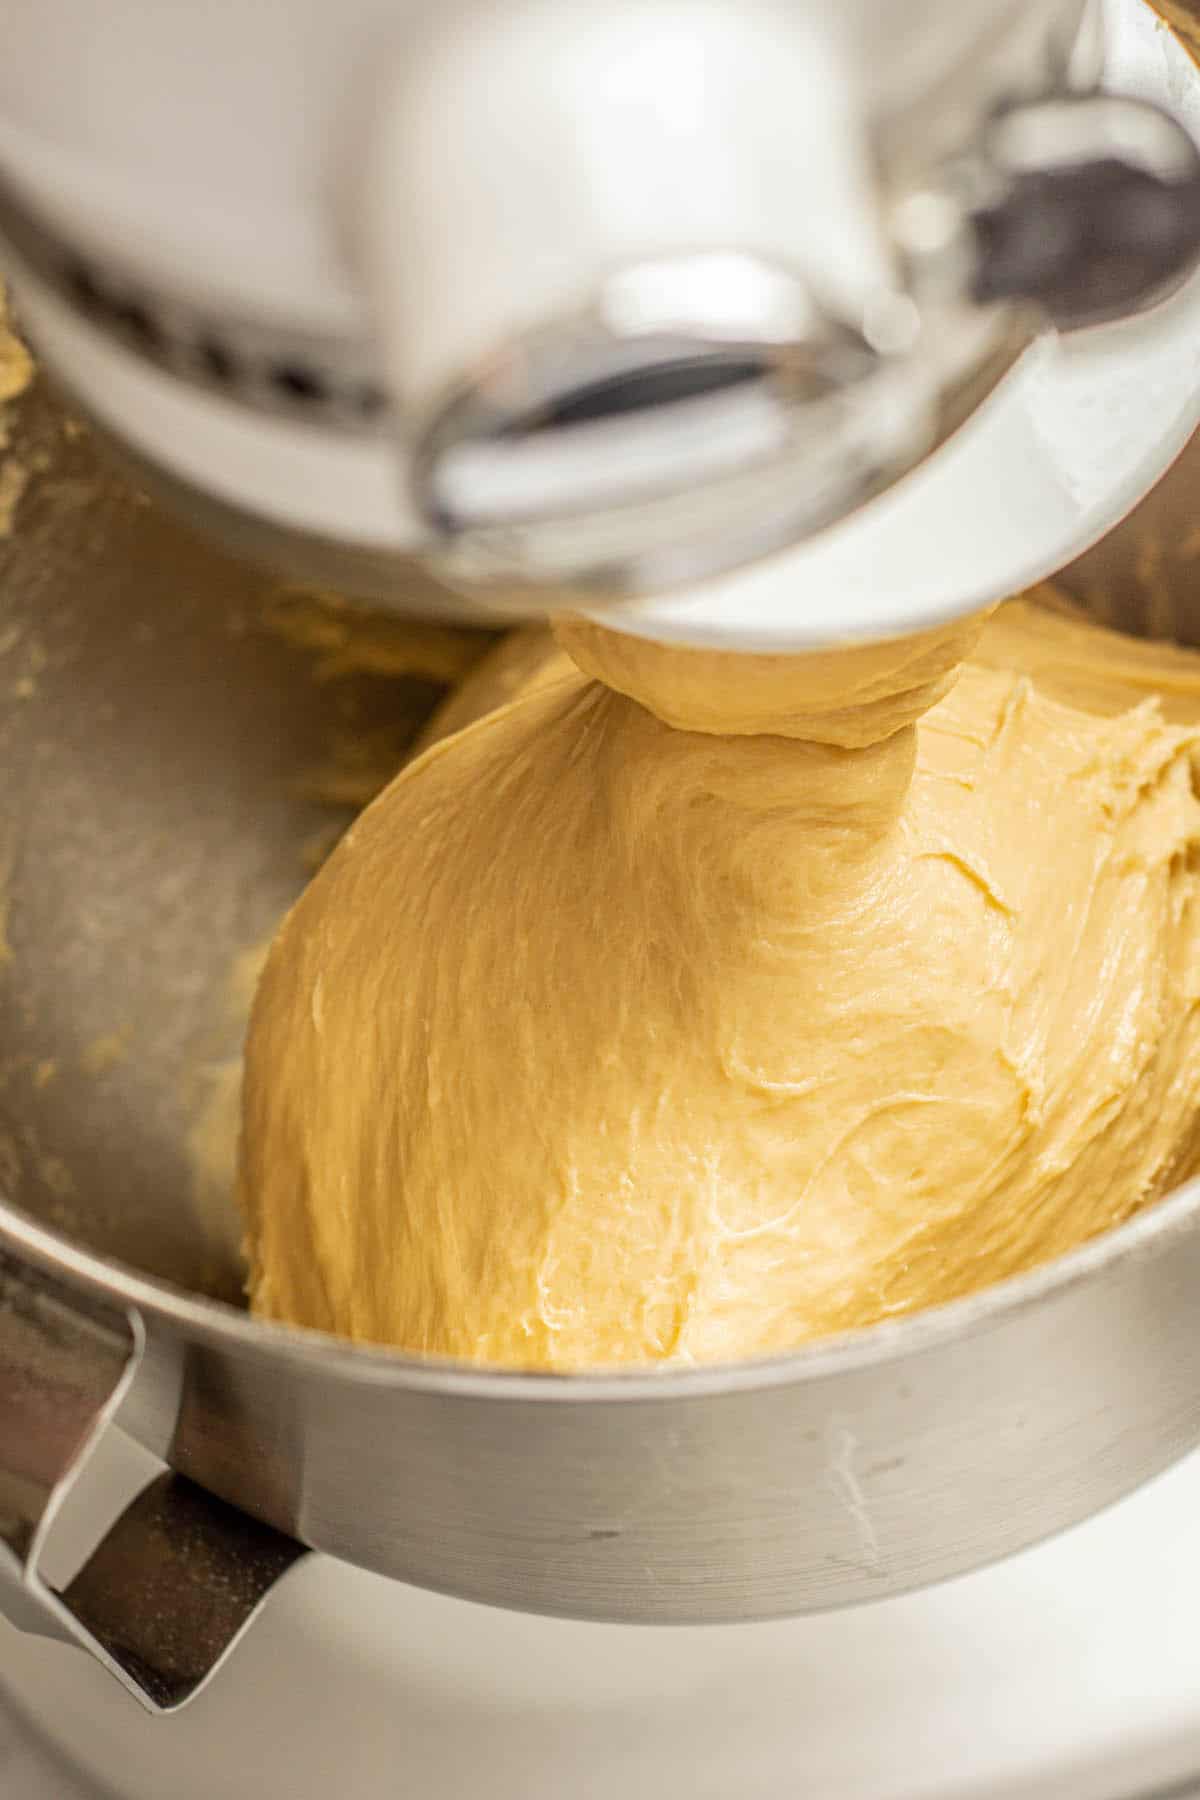
- Keep mixing on medium speed for at least 15 minutes. The dough will look rough and sticky for a long time before it smooths out and starts pulling cleanly from the sides of the bowl.
- Rest the dough for 5 minutes, then do the windowpane test. If it passes, shape into a ball and let it rise.
- Proof the dough at room temperature for a short while, and then again in the fridge where it will rise slowly.
- The next day, shape the cold dough and let it rise.
- Brush the risen dough with egg wash.
- Bake until deeply browned.
Making brioche by hand
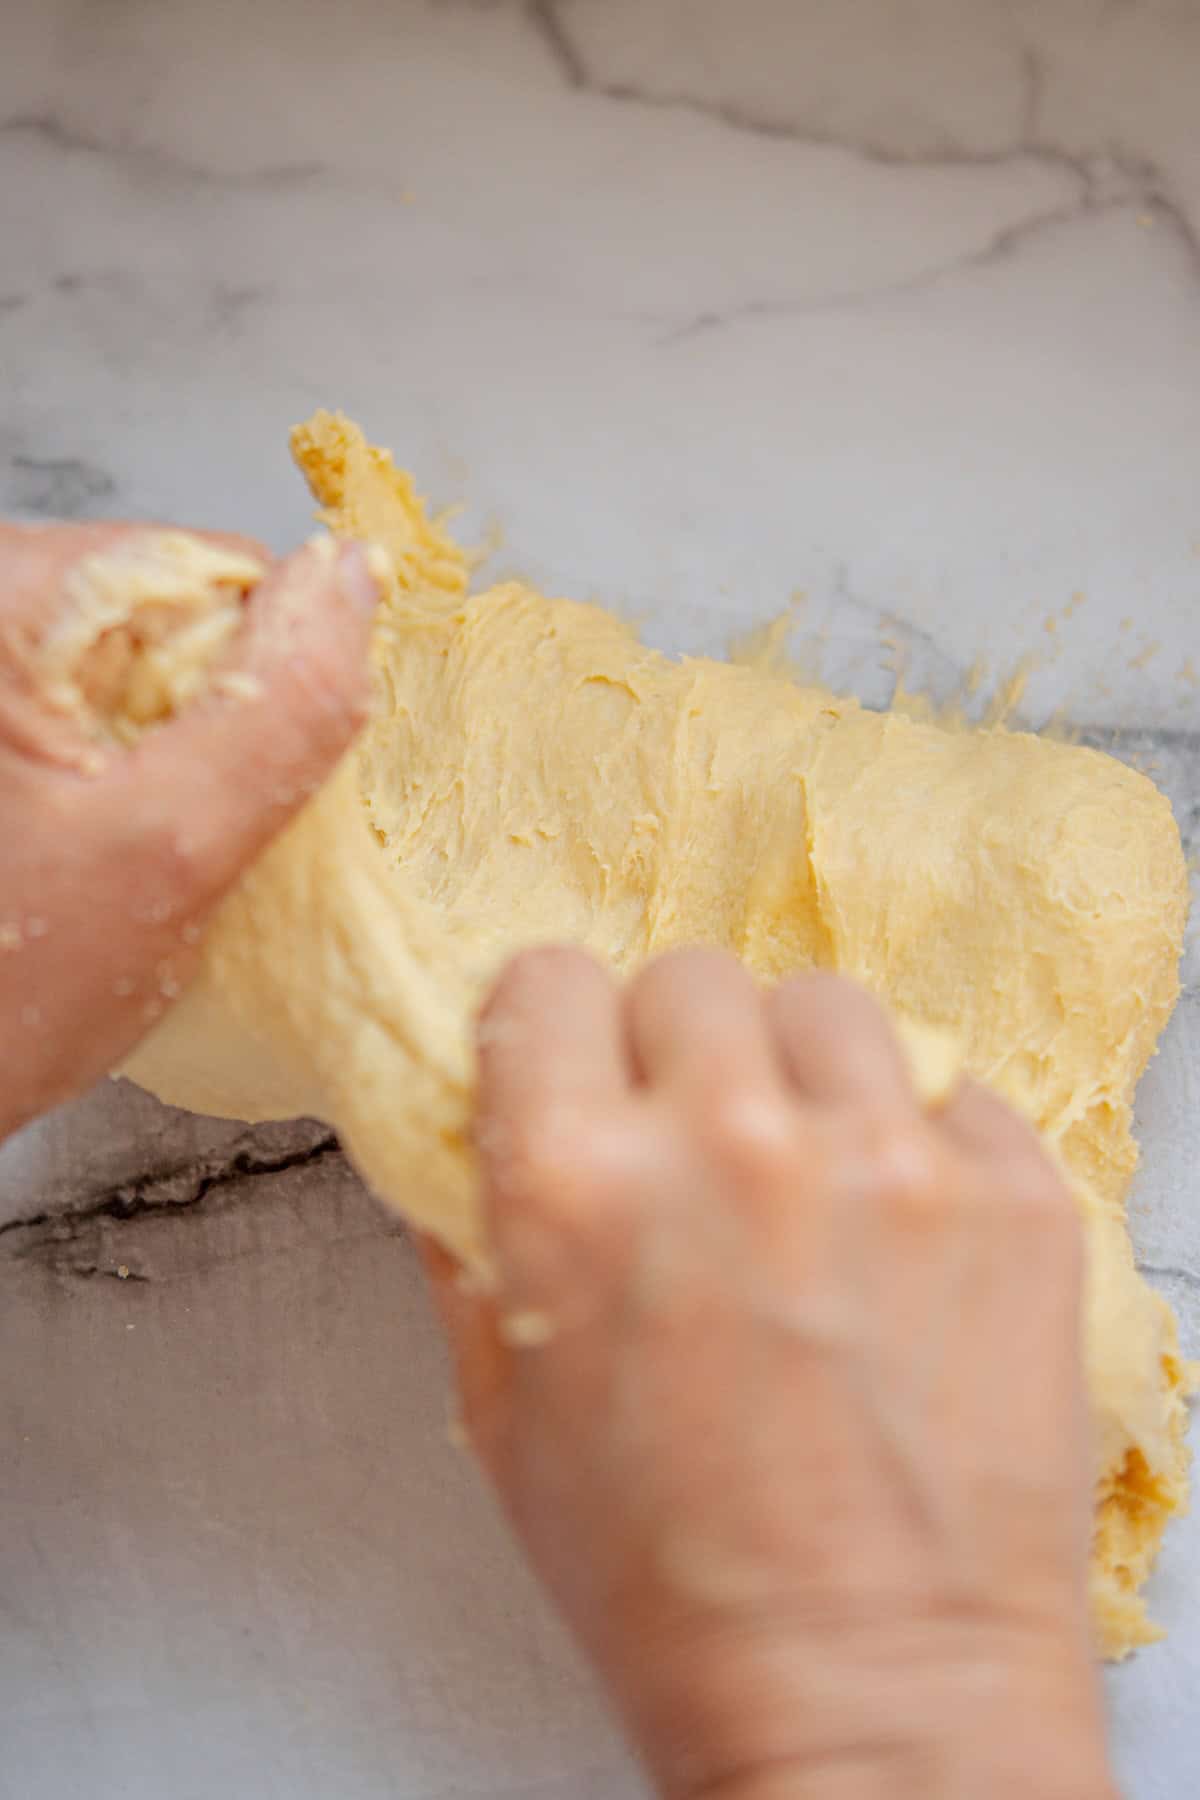
You can make brioche by hand, but be prepared for a workout. The key is to add the butter even more slowly than you would in a mixer. If you pile in too much at once, the dough will struggle to absorb it and turn greasy fast.
I find it easier to slice the butter into thin pieces rather than cubes when working by hand. Press the dough against the heel of your palm with your fingers to smear the butter through. Once all the butter is in, switch to a slap-and-fold method: lift the dough, slap it down onto the bench, fold it over itself, and repeat in fast, steady movements. The quick extension and folding builds gluten without you needing to add flour to manage the stickiness.
It takes about 15-20 minutes of this before the dough becomes smooth, glossy, and elastic. Take breaks if you need to, it actually helps gluten development too, so a few minutes off the bench does the dough good.
One important thing when working by hand: your palms transfer heat directly into the dough, which is actually a bigger temperature risk than the friction from a stand mixer. Work quickly, and don’t be afraid to refrigerate the dough for 10-15 minutes mid-knead if it starts feeling warm, soft, or greasy. Cold dough is much easier to work with and keeps the butter where it belongs.
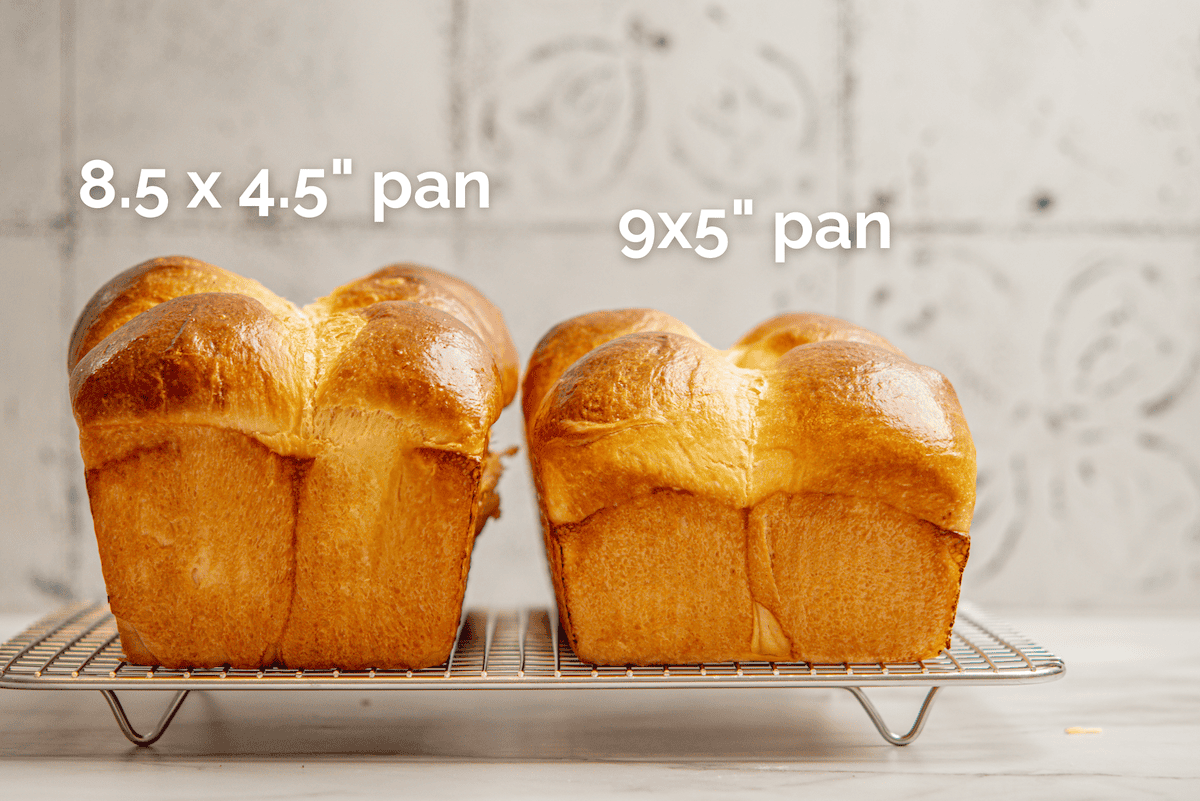
Choosing the right pan
This recipe works in either a 9×5 inch or an 8.5×4.5 inch loaf pan. Both give great results, but the finished loaves look a little different.
- The 8.5×4.5 inch pan is my preference. It gives a taller, more domed loaf with a dramatic rise above the tin.
- The 9×5 inch pan produces a slightly wider, lower loaf. Still beautiful, just a different shape.
Tips for the best brioche
What to do with leftover brioche
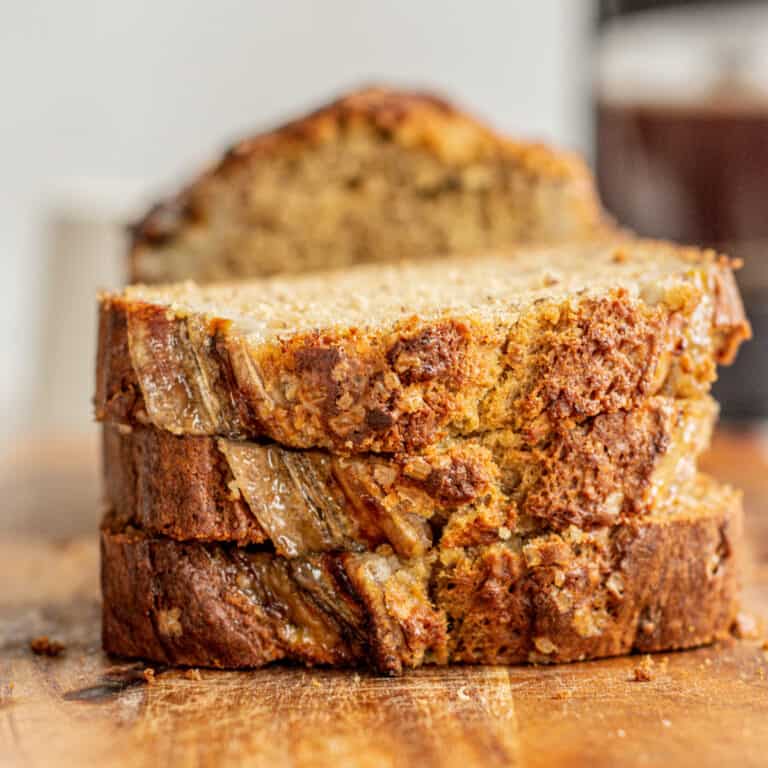
By day two and three the bread firms up a little, which is the butter setting as it cools. It makes excellent French toast, bread pudding, or grilled cheese for exactly this reason. Here are 21 great ways to use brioche, from savory to sweet.
Storing
Fresh brioche can be stored in an airtight container at room temperature for up to three days. You can also freeze it, wrapped tightly for up to 3 months. I like to pre-slice it before freezing so I can grab one or two slices as needed.
FAQs
Related recipes
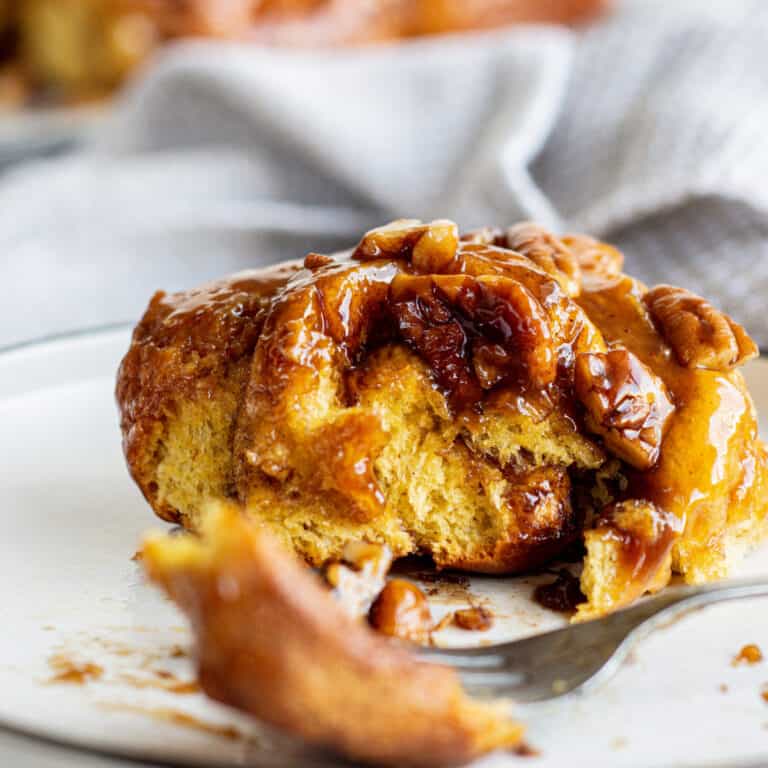
- Brioche cinnamon rolls
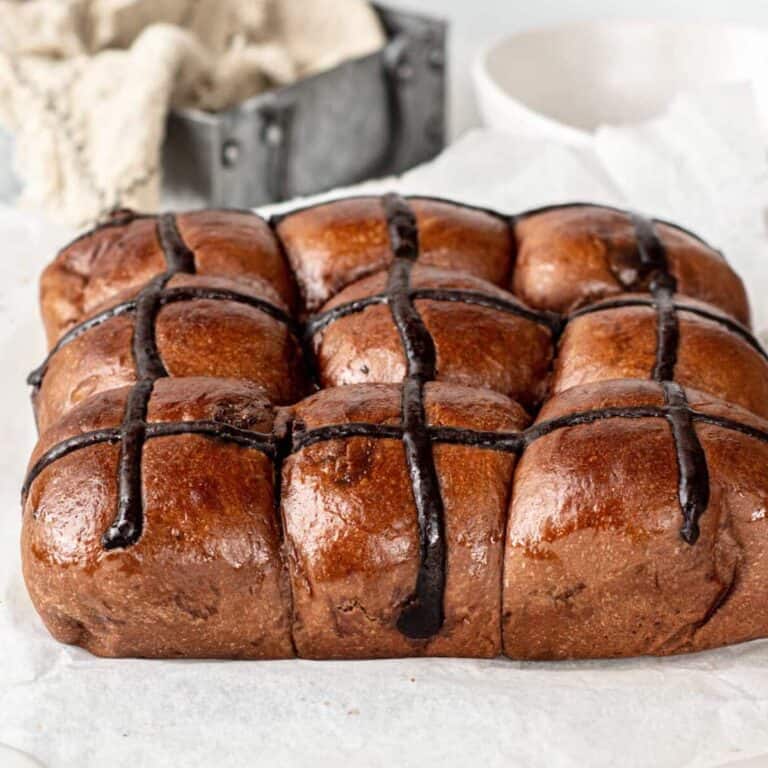
- Brioche hot cross buns
- Brioche donuts
- Lemon curd donuts
- Chocolate chip brioche
- Cinnamon babka
- Biscoff babka
- Challah rolls
Authentic Brioche Bread Recipe
Ingredients
- 125 g milk lukewarm(95-104°F / 35-40°C)
- 2 1/2 teaspoons instant yeast or active dried yeast
- 65 g granulated sugar
- 600 g all-purpose flour
- 5 large eggs approx. 260g-270g excluding shell.
- 1 3/4 teaspoon salt
- 230 g unsalted butter cool room temperature, cubed
Egg wash
- 1 large egg
- 1 Tablespoon water
Instructions
Dough
- Pour the lukewarm milk into the bowl of a stand mixer fitted with a dough hook. Stir in the yeast and one tablespoon of the sugar. If using active dried yeast, leave it to sit for 5-10 minutes until foamy. If using instant yeast, you can skip the wait and proceed straight to the next step. 125 g milk, 2 1/2 teaspoons instant yeast, 65 g granulated sugar
- Add the remaining sugar, flour, eggs, and salt to the milk mixture. Turn the mixer on low and combine until a thick, slightly sticky dough forms. Mix on low for 5 minutes to begin developing the gluten. 600 g all-purpose flour, 5 large eggs, 1 3/4 teaspoon salt
- Add the cubed butter a few pieces at a time with the mixer running on medium speed. Don't add the next piece until the previous one has disappeared into the dough. Once all the butter is in, continue mixing on medium for a total of at least 15 minutes from when you started adding the butter. The dough will go through a sticky, rough-looking phase before it smooths out and starts pulling cleanly away from the sides of the bowl. This is normal. Once it looks smooth and cohesive, stop the mixer and let the dough rest for 5 minutes. Then pull off a small piece and stretch it gently between your fingers. If you can stretch it thin enough to almost see light through without it tearing, the gluten is properly developed. This is called the windowpane test. If it tears, put it back on the mixer for a few more minutes and test again. 230 g unsalted butter
- Pull the dough from the bowl onto a lightly floured surface and form it into a ball. Place it into a clean greased bowl, cover with a lid or plastic wrap, and let it rise at room temperature for around 1 hour until just puffy. Then deflate it lightly and refrigerate overnight. This room-temperature rise adds flavor, but if you’re short on time you can refrigerate the dough straight after kneading.
Shaping
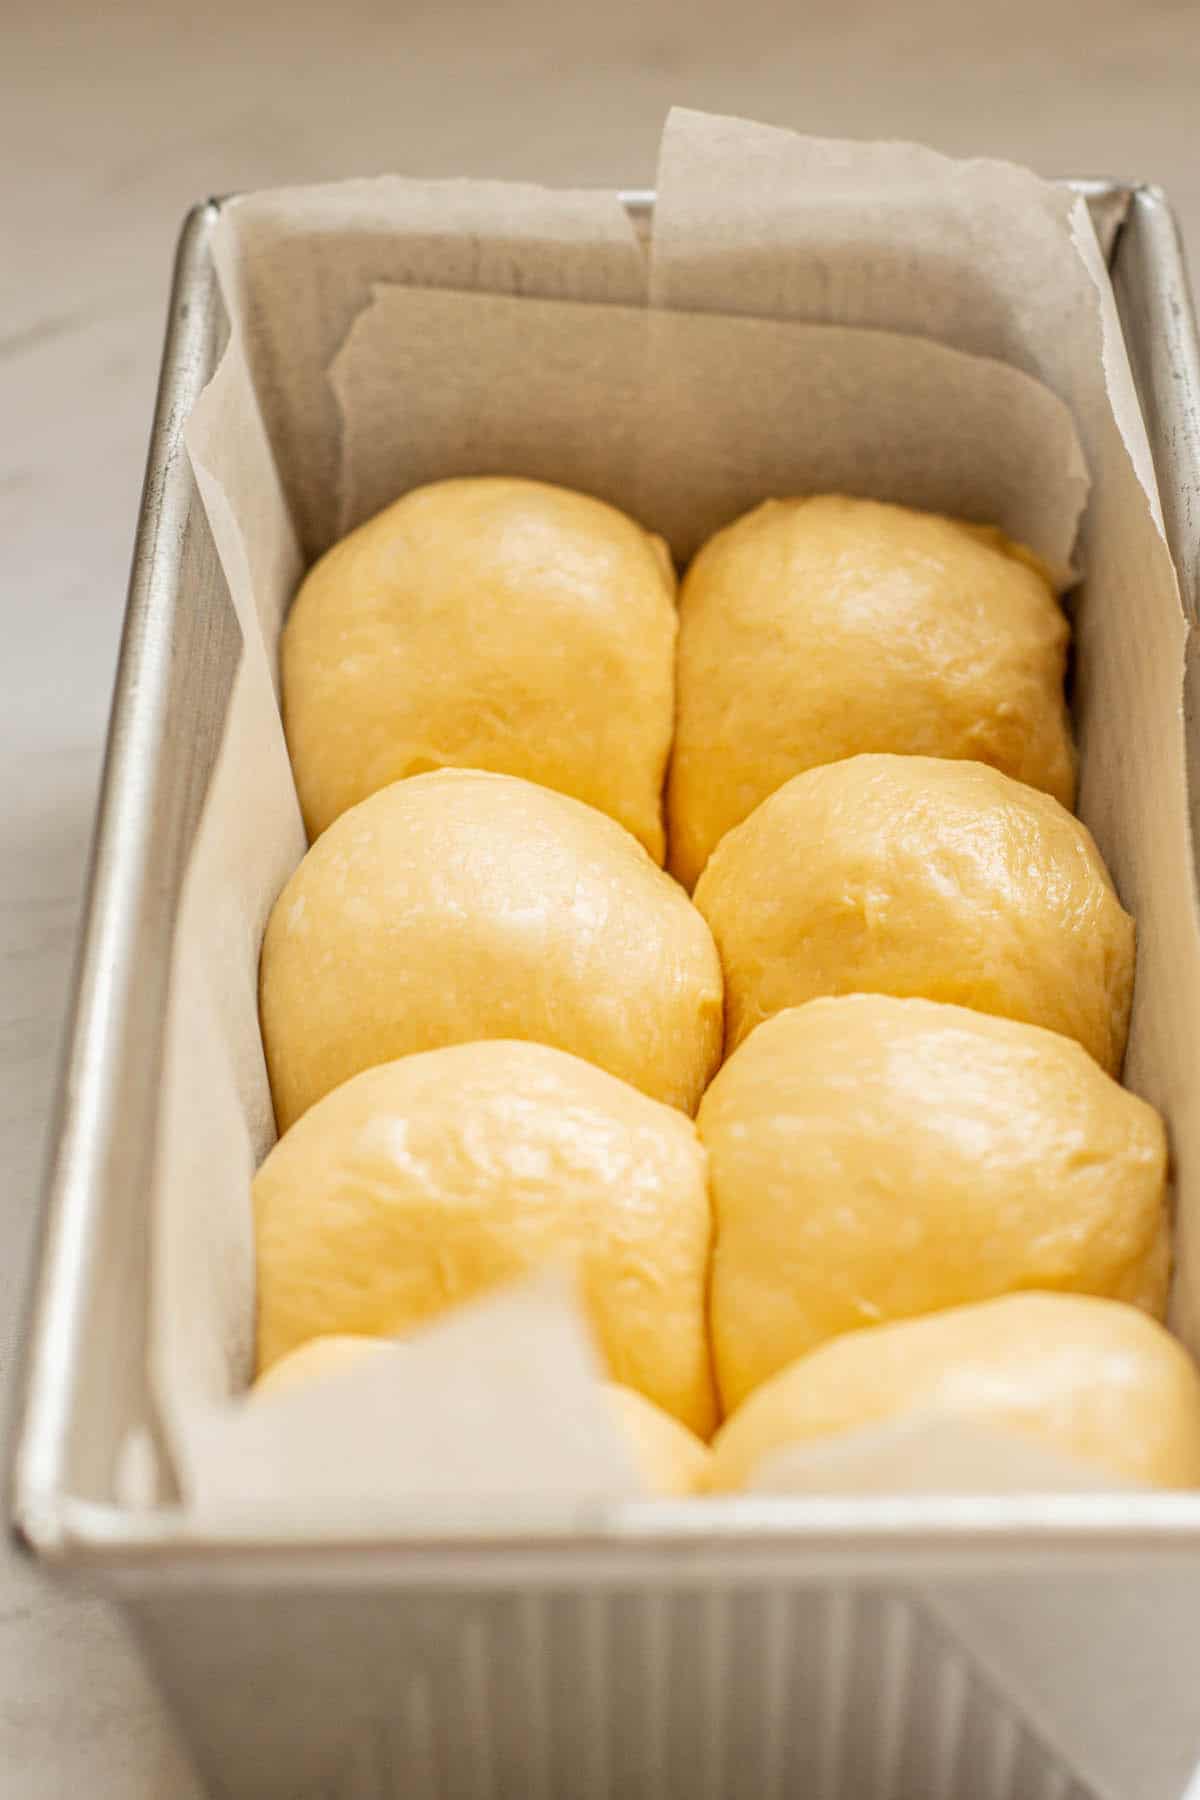
- Pull the cold dough from the bowl and tip it onto a lightly floured surface. It will feel stiff and cold, which is normal. Deflate it and divide into two equal portions. Line two loaf pans (9×5 inch or 8.5×4.5 inch) with parchment paper.
- Shape each portion using one of the following methods:
- Option 1 (rolls). Divide each portion into 8 equal pieces. Roll each into a tight ball and place them side by side in two rows in the lined tin.
- Option 2 (braid). Divide each portion into 3 equal pieces. Roll each into a log about 30cm (12 inches) long. Braid the three lengths together, tuck in the ends, and place in the lined tin.
- Let the shaped loaves rise in a warm spot (around 75-80°F / 24-27°C) until doubled in size and feeling airy. This typically takes 2-3 hours depending on room temperature. The dough should not feel so warm that the butter is melting.
Baking
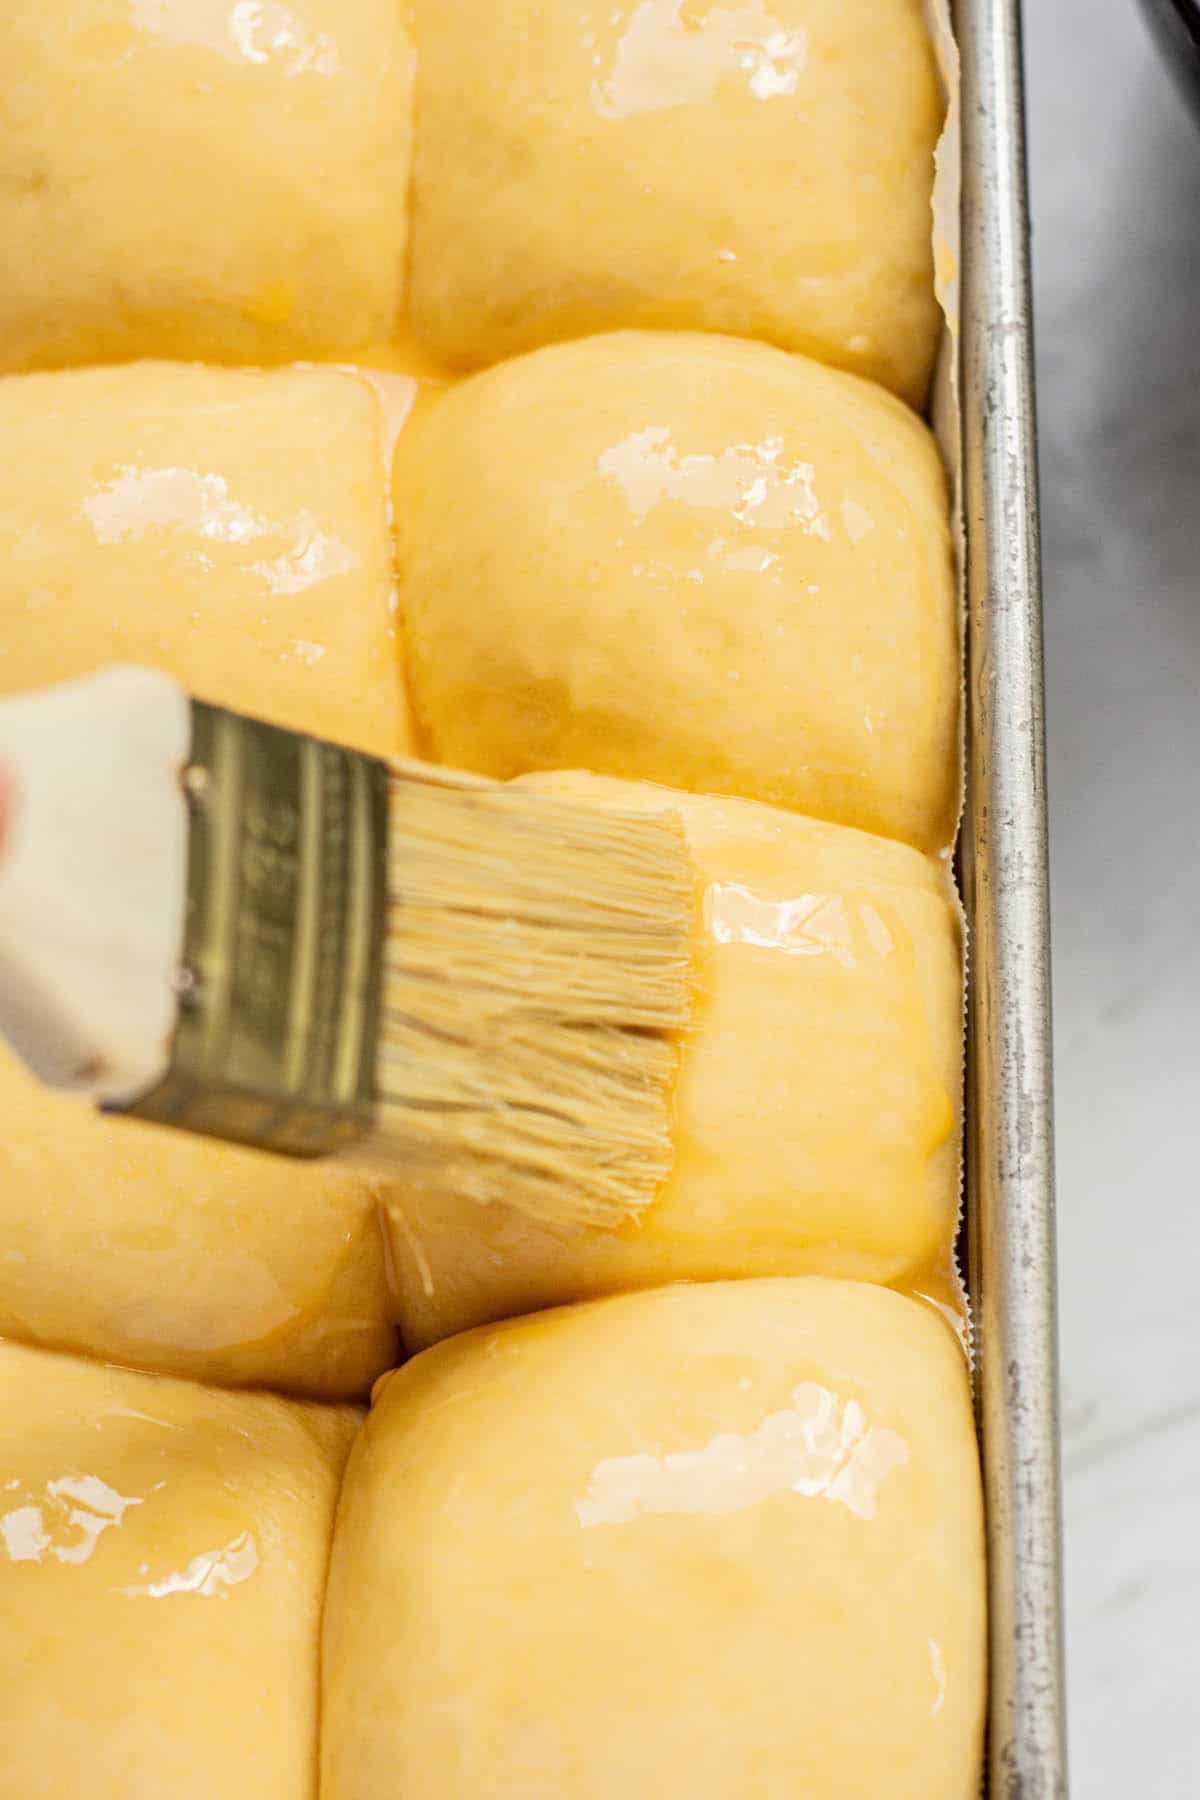
- Preheat the oven to 350°F / 180°C. Whisk the egg and water together for the egg wash. Brush gently over the tops of the risen loaves. 1 large egg, 1 Tablespoon water
- Bake for 30-35 minutes until a deep golden brown. If the tops are browning too quickly, loosely tent with aluminum foil. The loaves are done when they sound hollow when tapped on the bottom, or when an instant-read thermometer reads 195°F / 90°C in the center.
- Leave the loaves to cool in their pans for 15 minutes, then transfer to a wire rack. Let them cool fully before slicing. The crumb needs time to set.
Notes
- Both US customary and metric measurements are provided. Use the toggle to switch between the two.
- Flour. This recipe works best with all-purpose flour with around 11% protein. Protein levels vary between brands and the names of flour vary between countries, so it’s worth checking the protein level on the packet rather than going by name alone.
- Butter temperature. The butter must be at cool room temperature, not cold from the fridge and not soft or greasy. Take it out 30-45 minutes before you start. Too cold and it tears the dough. Too warm and the dough turns greasy.
- If the dough looks greasy or separated while mixing, refrigerate the bowl for 15-20 minutes and resume on medium speed. Chill it first before doing the windowpane test.
- Kneading by hand. Slice the butter into thin pieces rather than cubes. Press it into the dough using the heel of your palm. Once all the butter is in, switch to a slap-and-fold method: lift the dough, slap it onto the bench, fold it over itself, and repeat in fast, steady movements. This takes 15-20 minutes.
- Leftover brioche keeps at room temperature in an airtight container for up to 3 days. Freeze sliced for up to 3 months.


I live in the U.S. and my oven goes up by 10s so if I can’t do 392F could I do 350F or 375F?
350 🙂
Love your recipes ( I have two questions at the end of this)
When I made this bread. It was on a very cold day so my kitchen was not warm, however, during the first proof of sitting covered on the counter it to let it rise and it rose within an hour. For the second proof in the refrigerator it also rose quickly and was almost going over the side of the bowl within two hours. I then shaped into small balls for buns (using a muffin pan) and then did a braid for the loaf pan, covered to let is rise for a third proof. It more than doubled in 30 minutes. The bread is good and cuts like butter. Makes wonderfully tasty French toast. The buns worked out good and the kids loved them with a little butter and a slice of ham or even just plain. I do plan on making this bread again, however I do have a couple of questions.
First, How come during the proofs it rose so quickly. I followed the measuring and mixing instructions word for word (I even bought a scale to weigh out the ingredients).
Second: For this brioche bread are you able to add dried fruit and nuts to it at all after you do all the proofs when you are forming it into a loaf?
Hey, did you use instant yeast? That proves quite quickly! It’s not a problem though, as long as it doesn’t overproof on the last rise just before you bake it :).
You can add fruit and nuts after it has been kneaded, before the first rise.
I made 2 batches of your cinnamon rolls the first time, they turned out so tasty and beautiful. I froze a few to enjoy later and shared the rest equally with four other siblings and their family. I was requested to bring the dinner rolls for our Thanksgiving dinner tomorrow. So today I’m making two more batches of the recipe for our thanksgiving dinner. I know they’ll be a hit at our dinner.
I am trying this recipe for the first time this morning and I got about 80% of the way through the mixing process when my stand mixer broke! The pin that hold the mixer head on worked its way out and I didn’t notice until it was too late! So I turned it out and started the first proof. The problem us, the dough never became less sticky and glassy! Will it still work??? I’m so sad. 😔
Hey Beth, sorry to hear about your mixer! Your bread should still work out though.
I made it exactly and weighed everything. I didn’t have instant yeast so used regular active yeast. It is in the refrigerator now, been there for about 4 hours. It is almost over the sides of the large bowl. I make regular sourdough bread weekly and have never had one rise this much.
I’m afraid by morning it will have escaped the bowl, lol. What should I do?
Punch it down and place it back in the fridge, it will rise again so maybe a bigger bowl too but will be fine to shape in the morning 🙂
Thank you for responding. I light punched it part way down and went to bed. This morning it had not rose back up and I was afraid I had messed it up. But I followed the rest of the recipe and wow. It is fantastic. My fresh eggs are such a wonderful color that made a beautiful bread. I wish I could attach a picture.
I am a novice at making bread, but this recipe was easy to follow. During the first and second rise, the bread doubled in size, but it never rose during the third proof. I took it right out of the refrigerator and plopped it in a loaf pan (I did half the recipe). There is no kneeding or shaping before I put it in the pan. I baked it anyway but it turned out like a brick. What could I have done wrong? Thank you for the recipe!
Hey Jane, it’s essential to deflate the dough after it rises, then shape it before putting it in the loaf pan. If you just put it in the loaf pan right out of the fridge after it rose in there, the structure of the dough will be fragile and full of large air pockets that can’t expand anymore. Therefore, the dough won’t rise anymore and will most likely collapse (and you end up with dense bread). Deflating and then shaping the dough helps create a new structure for the dough and provides ‘a new place’ for the yeast to work and the gases to expand during the final rise.
Can this recipe be used for dinner rolls?
Can you make and then freeze and bake later?
Trying to bake for Thanksgiving today, my only day off.
Thank you
Hey Nancy you could use this for dinner rolls, but I’ve not tried freezing the dough so I can’t give you any tips on that i’m sorry! I usually freeze the baked bread only.
Just a quick question I plan on making this in a few days but using it for French toast Can I bake it in Loaf pans? and would I need one or two?
Hey I do bake this in 2 loaf pans
Consistently fluffy and yummy! I add Nutella to mine and braid it and it’s a croud pleaser
I am making your brioche. In the top instructions it says to let it rise in the counter before putting it in the frig, but in the recipe portion it says to put straight into the frig. Is a counter rise missing?
Hey Mary thanks for the question! You can do either or, and I had forgotten to write that in the recipe card. The initial room temperature rise , then fridge gives a bit more flavor to the dough. But it’s also fine to put it straight in the fridge for its first rise. I have updated it now, sorry about that!
Thanks for answering so promptly. I did a counter rise and then punched it down for a frog rise and will do another ride after shaping. We’ll see what happens!