
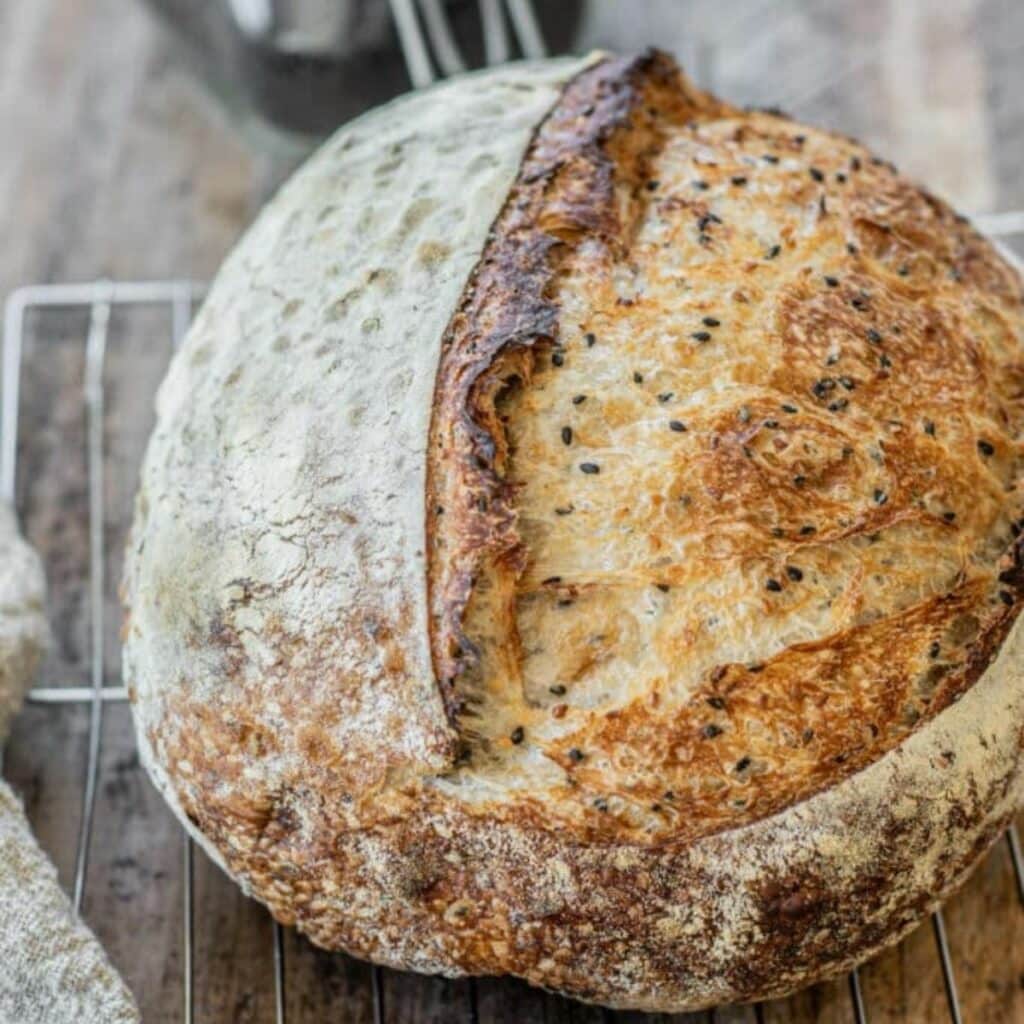
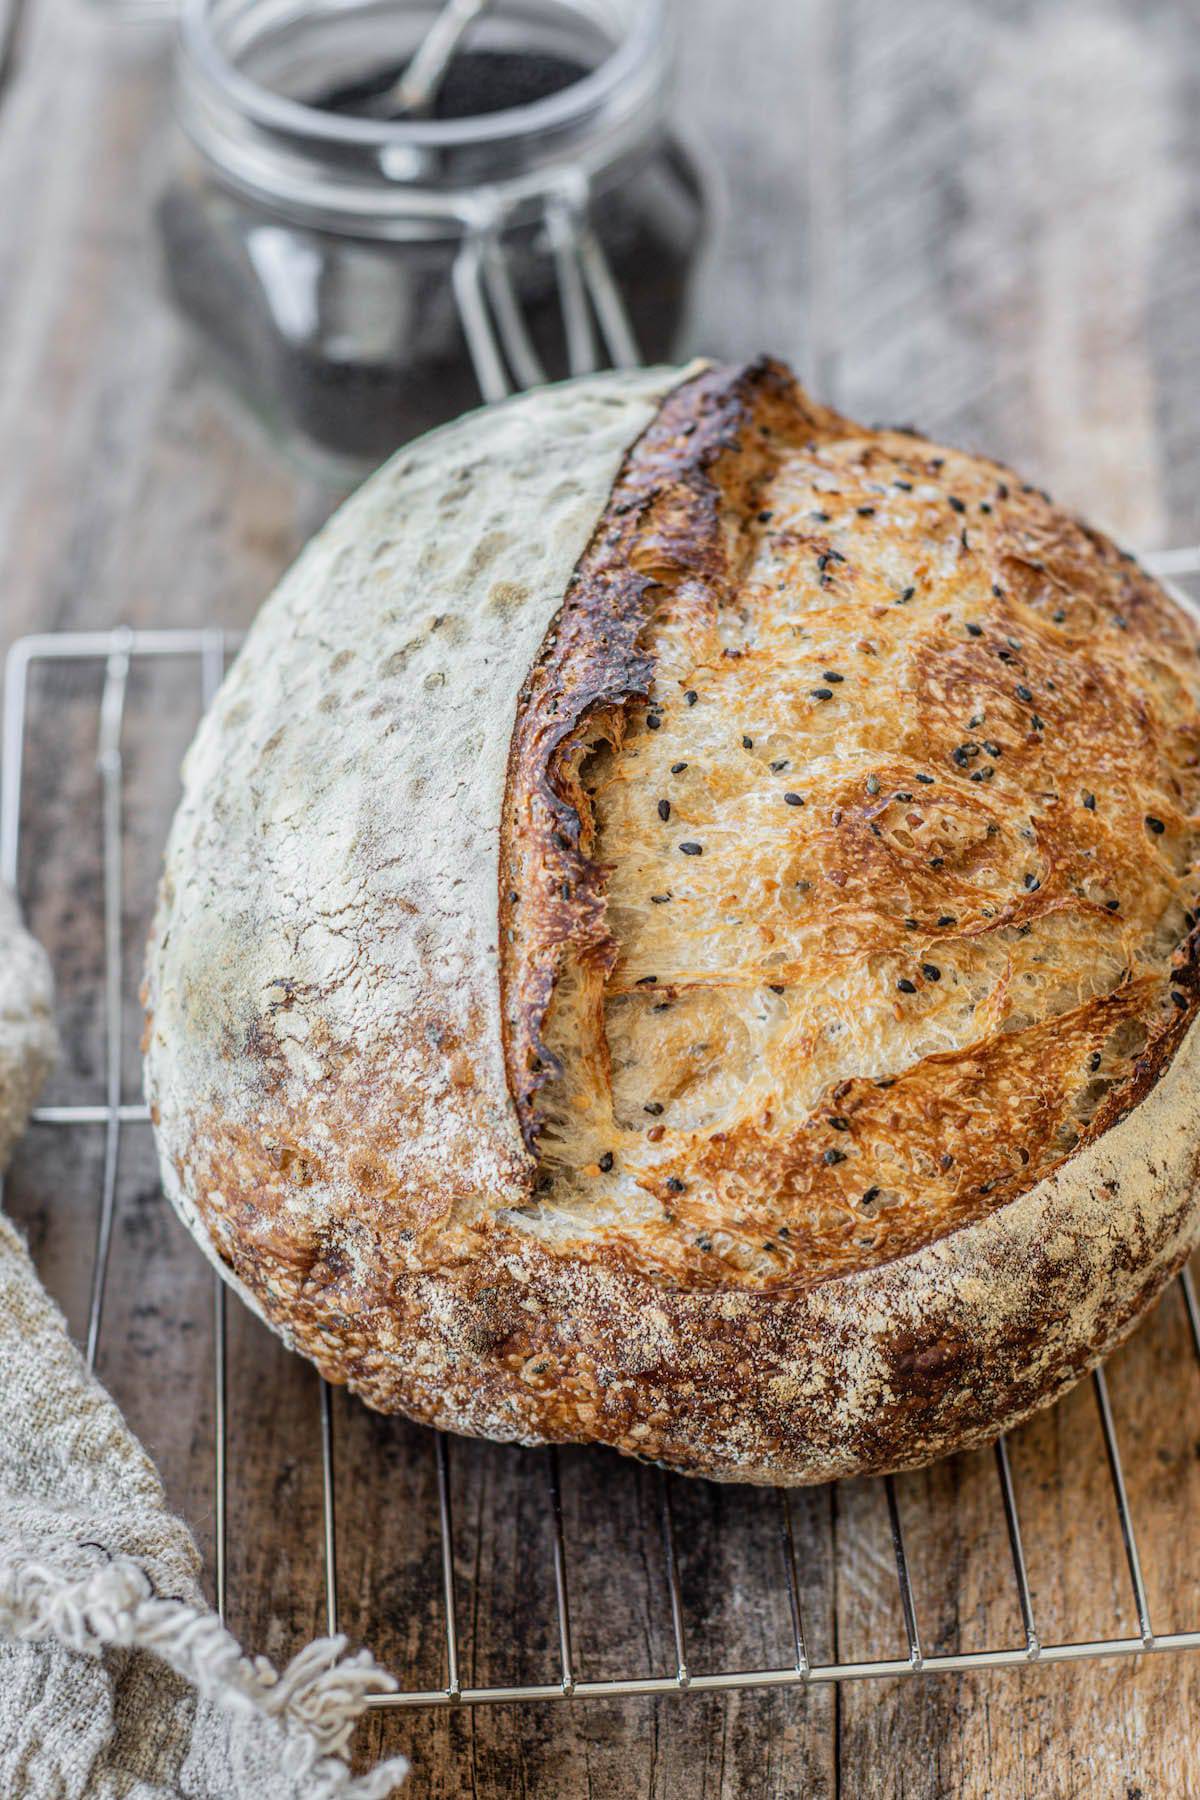
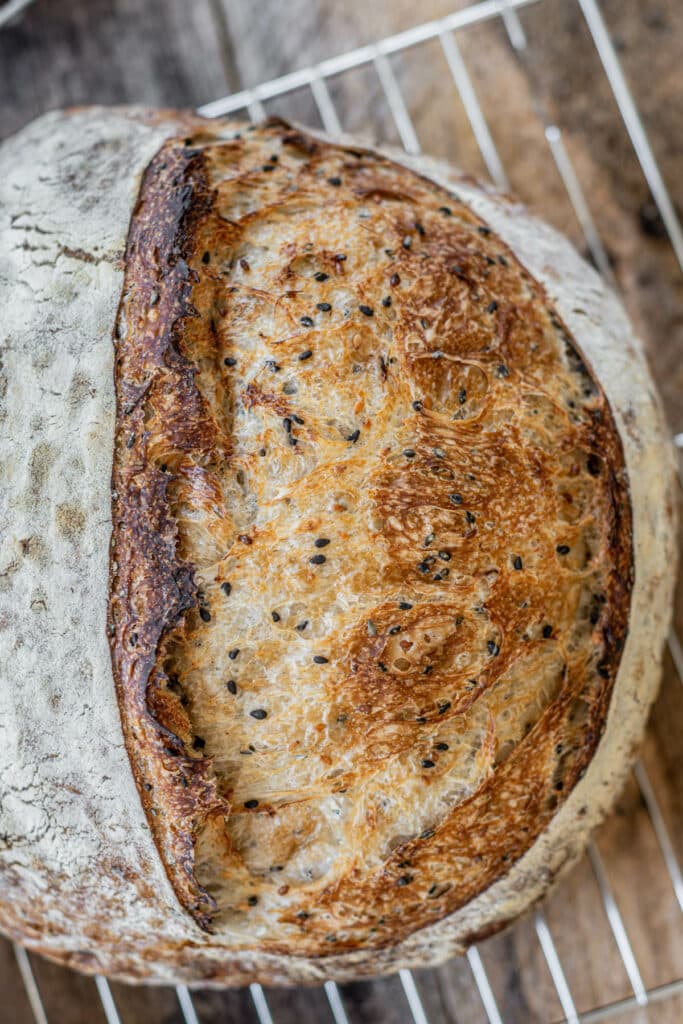
Sesame Seed Sourdough
This sesame seed sourdough is filled with black sesame seeds and white sesame seeds and a hint of honey. It’s an easy recipe to make with step-by-step instructions.
A sesame seed sourdough is a great way to turn an everyday loaf of sourdough into something a bit more special. The use of black and white sesame seeds adds color and contrast, vitamins, and a slightly nutty taste.
The sourdough starter
To make this sourdough loaf, you need an active sourdough starter. If you don’t have one, here is how to make your own sourdough starter.
If you do have one, keep feeding and discarding regularly to keep the acid content in the starter low. Too much acid can affect the structure of the bread.
Any ‘discard’ starter can be saved up and used in delicious sourdough discard recipes like sourdough donuts, sourdough banana bread, or sourdough pancakes.
The bread flour
Use bread flour for this sesame sourdough bread, or a strong all-purpose flour with at least 11% protein. These flours contain two proteins called glutenin and gliadin. The gluten network is developed in the dough when these proteins are mixed with water. This can be developed further through stretching and folding the dough.
This helps to create a good dough structure.
The dough for this sesame sourdough has a sourdough hydration of around 73%. This makes it quite a wet dough, however, strong bread flour and a good sourdough starter can handle this amount of water easily.
This recipe is using white flour, though you can bring in some whole grain flour too if you like. Using lots of wholemeal flour can make denser bread, so try it with a smaller amount first (20% of the total flour.)
The sesame seeds
A combination of white sesame seeds and black sesame seeds adds great color contrast, but also different flavors and health benefits. Black sesame seeds are unhulled and have a stronger taste than the hulled white seeds. You can increase the sesame flavor even more in the loaf by first toasting the seeds before adding them to the dough.
Toasted sesame seeds
Place a pan over low-medium heat. Once the pan has heated, add in the sesame seeds and swirl them in the pan for around 3-5 minutes over the heat until they smell toasted. Remove them from the heat and let them cool down before adding them to the dough.
You can also add in other seeds if you like, sunflower seeds, poppy seeds, linseeds, and chia seeds are all great options! For a very flavored loaf, you can introduce seeds in smaller amounts like cumin, fenugreek, or caraway seeds.
The equipment
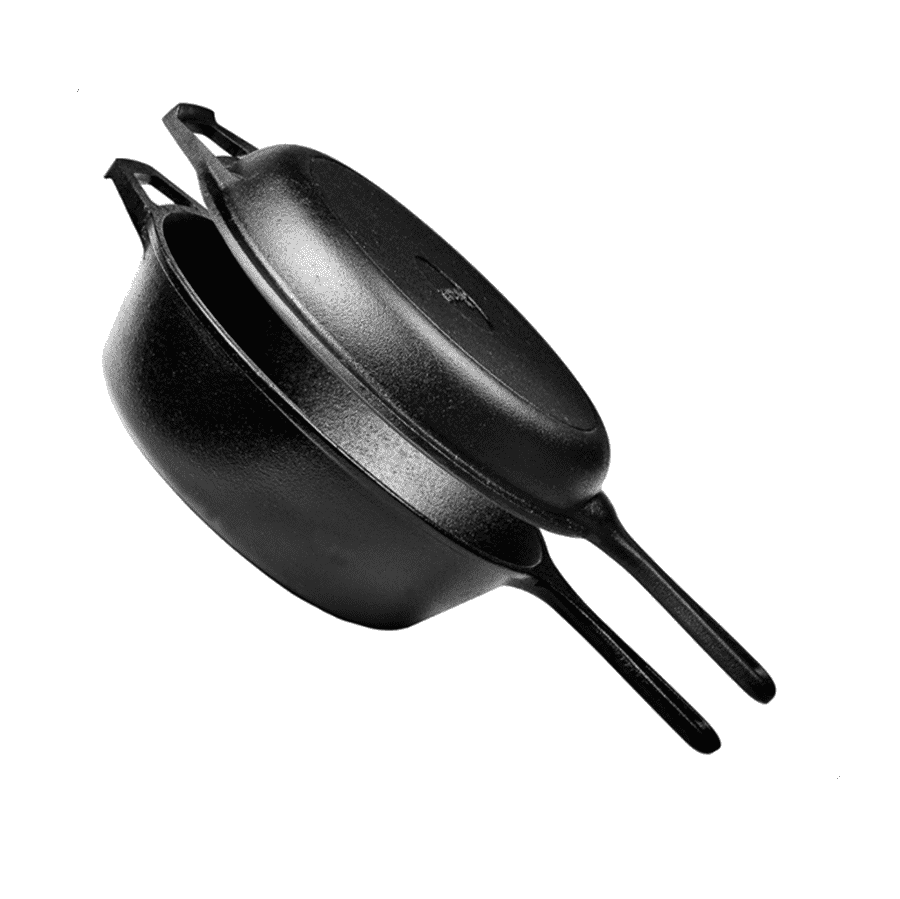
Use a dutch oven to bake this bread for the best results. A cast-iron one works super well as they hold heat for a long time.
Baking sourdough in a dutch oven traps steam during the baking stage which allows the sourdough to rise to its full potential before the crust forms.
If you have no dutch oven, you can bake the bread on an oven tray or baking stone instead and use ice cubes or cold water to create steam.
Baker’s schedule
This is a high-level overview and example of the timing of what goes into the process of the sourdough bread schedule.
These exact times of day can be adjusted to suit your own schedule.
- 8 am – Feed your starter
- 12 pm – Autolyse -Mix the water, honey, flour, and sesame seeds.
- 1 pm- Add the starter to the dough
- 1.30- 4:30 pm – Fold every 30mins for 3 hours (6 total)
- 4:30- Bulk ferment
- 8:30 pm – Shaping and fridge proof overnight
- The next morning – bake
Step-by-step instructions
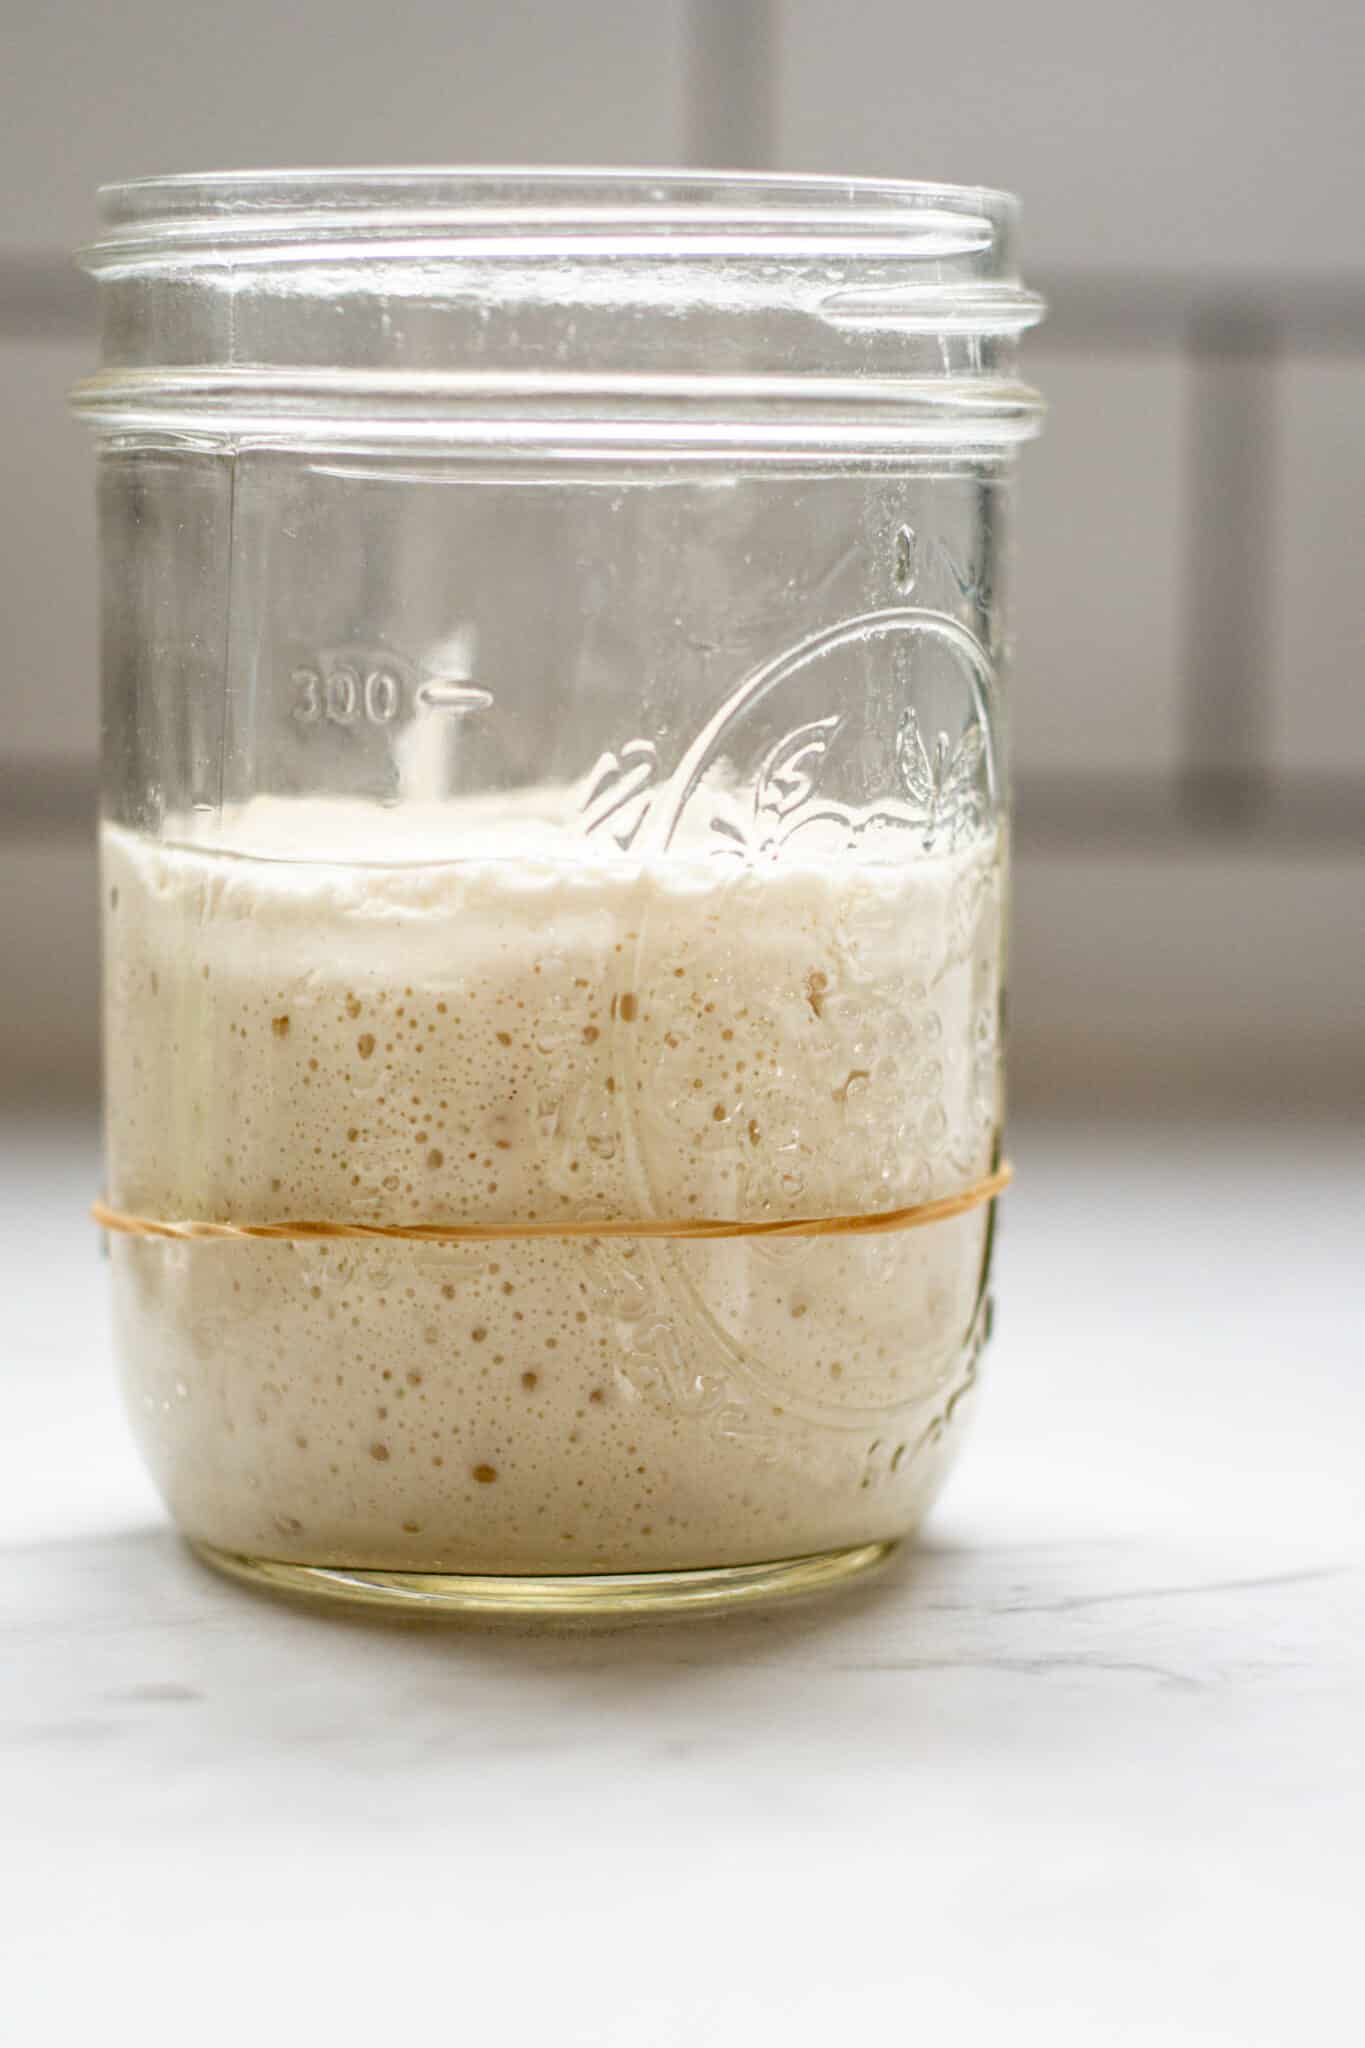
Step 1 – Feed sourdough starter.
Leave it to rise in a warm place for 4-6 hours to double or triple (but not pass its peak).
- Note: The starter amounts in the recipe card below will make a bit more than is needed for the dough. This is so that any leftover starter not needed can be fed again and stored in the refrigerator for the next time.
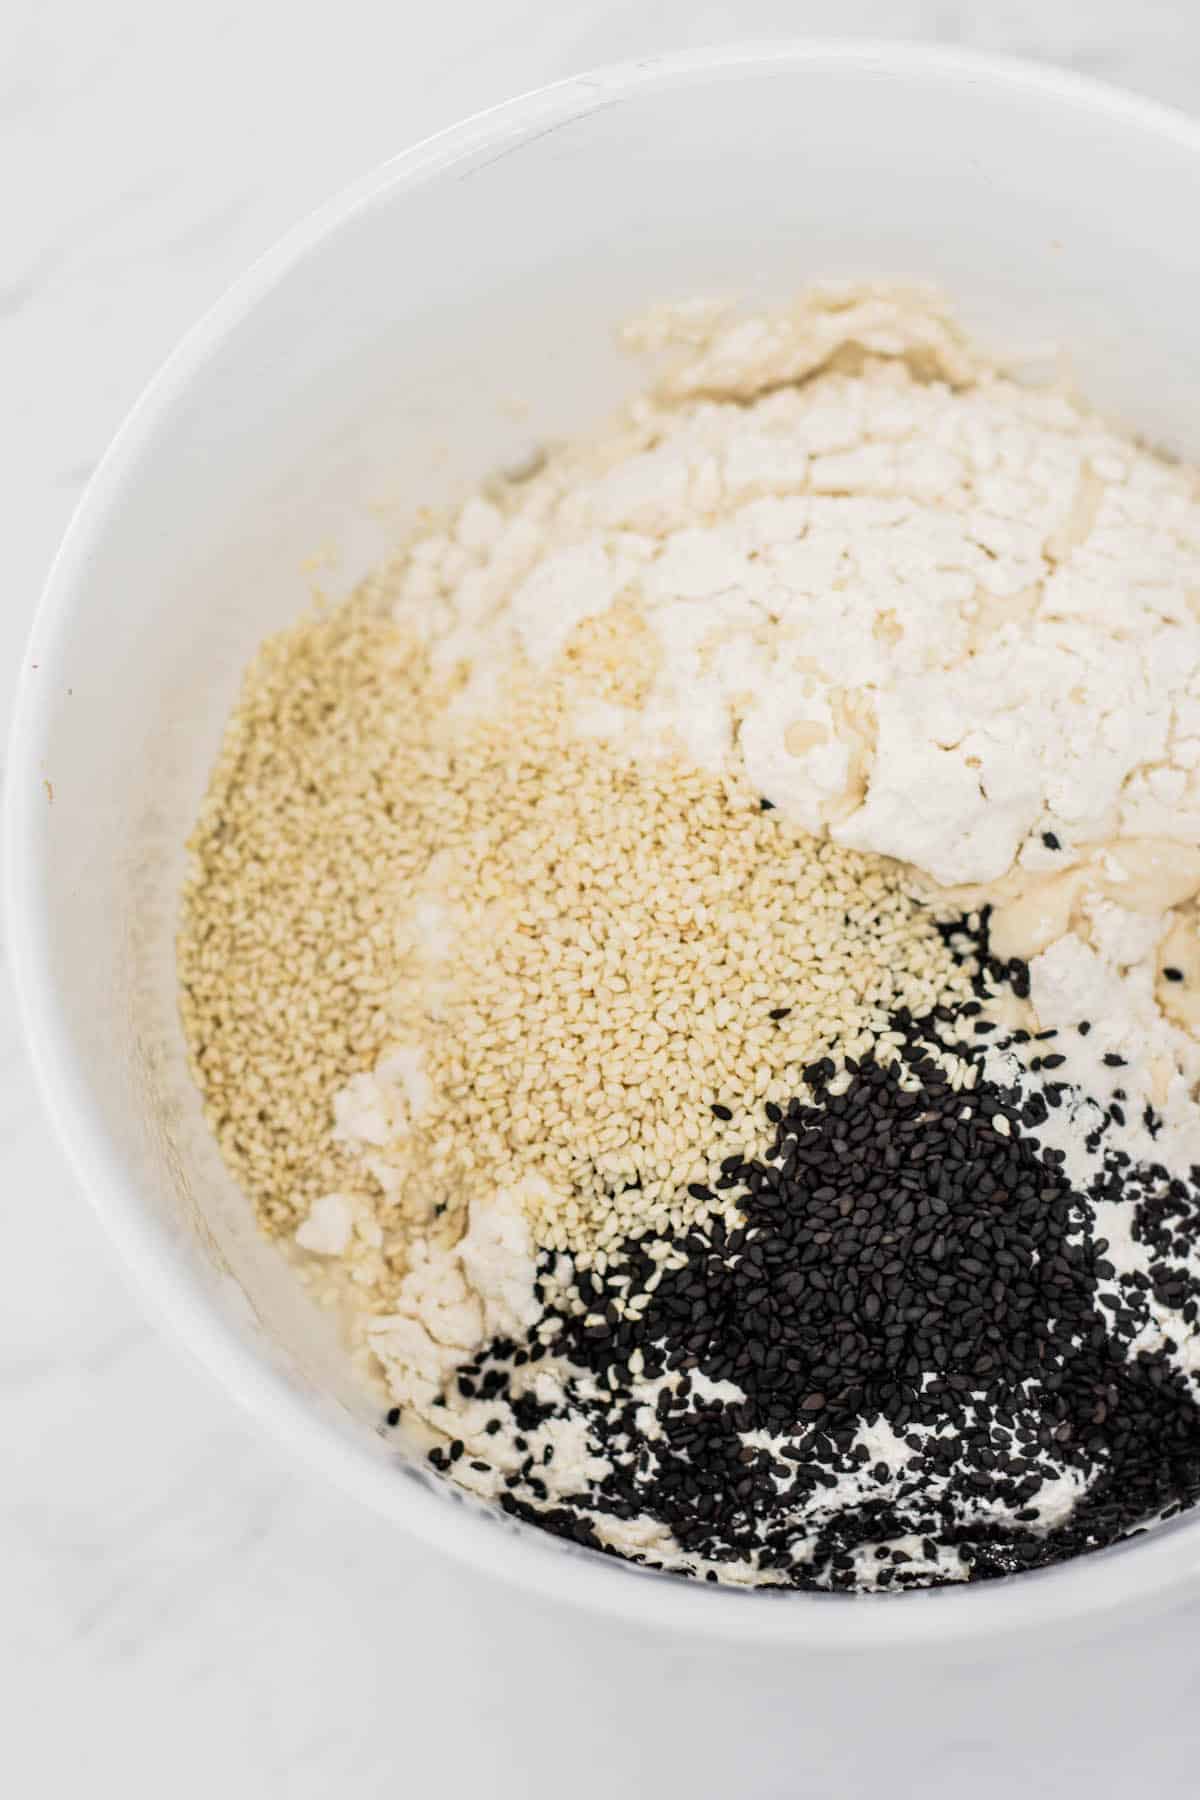
Step 2 – Autolyse.
Start this at least 30 minutes before your starter is ready to use, but up to a few hours in advance. In a large bowl, combine the water and honey and mix them well. Add in the flour and sesame seeds and mix them together into a rough dough.
Ensure all the dough has been wet through. Cover the bowl with a damp tea towel to stop the dough from drying out and let it rest at room temperature for at least 30 minutes.
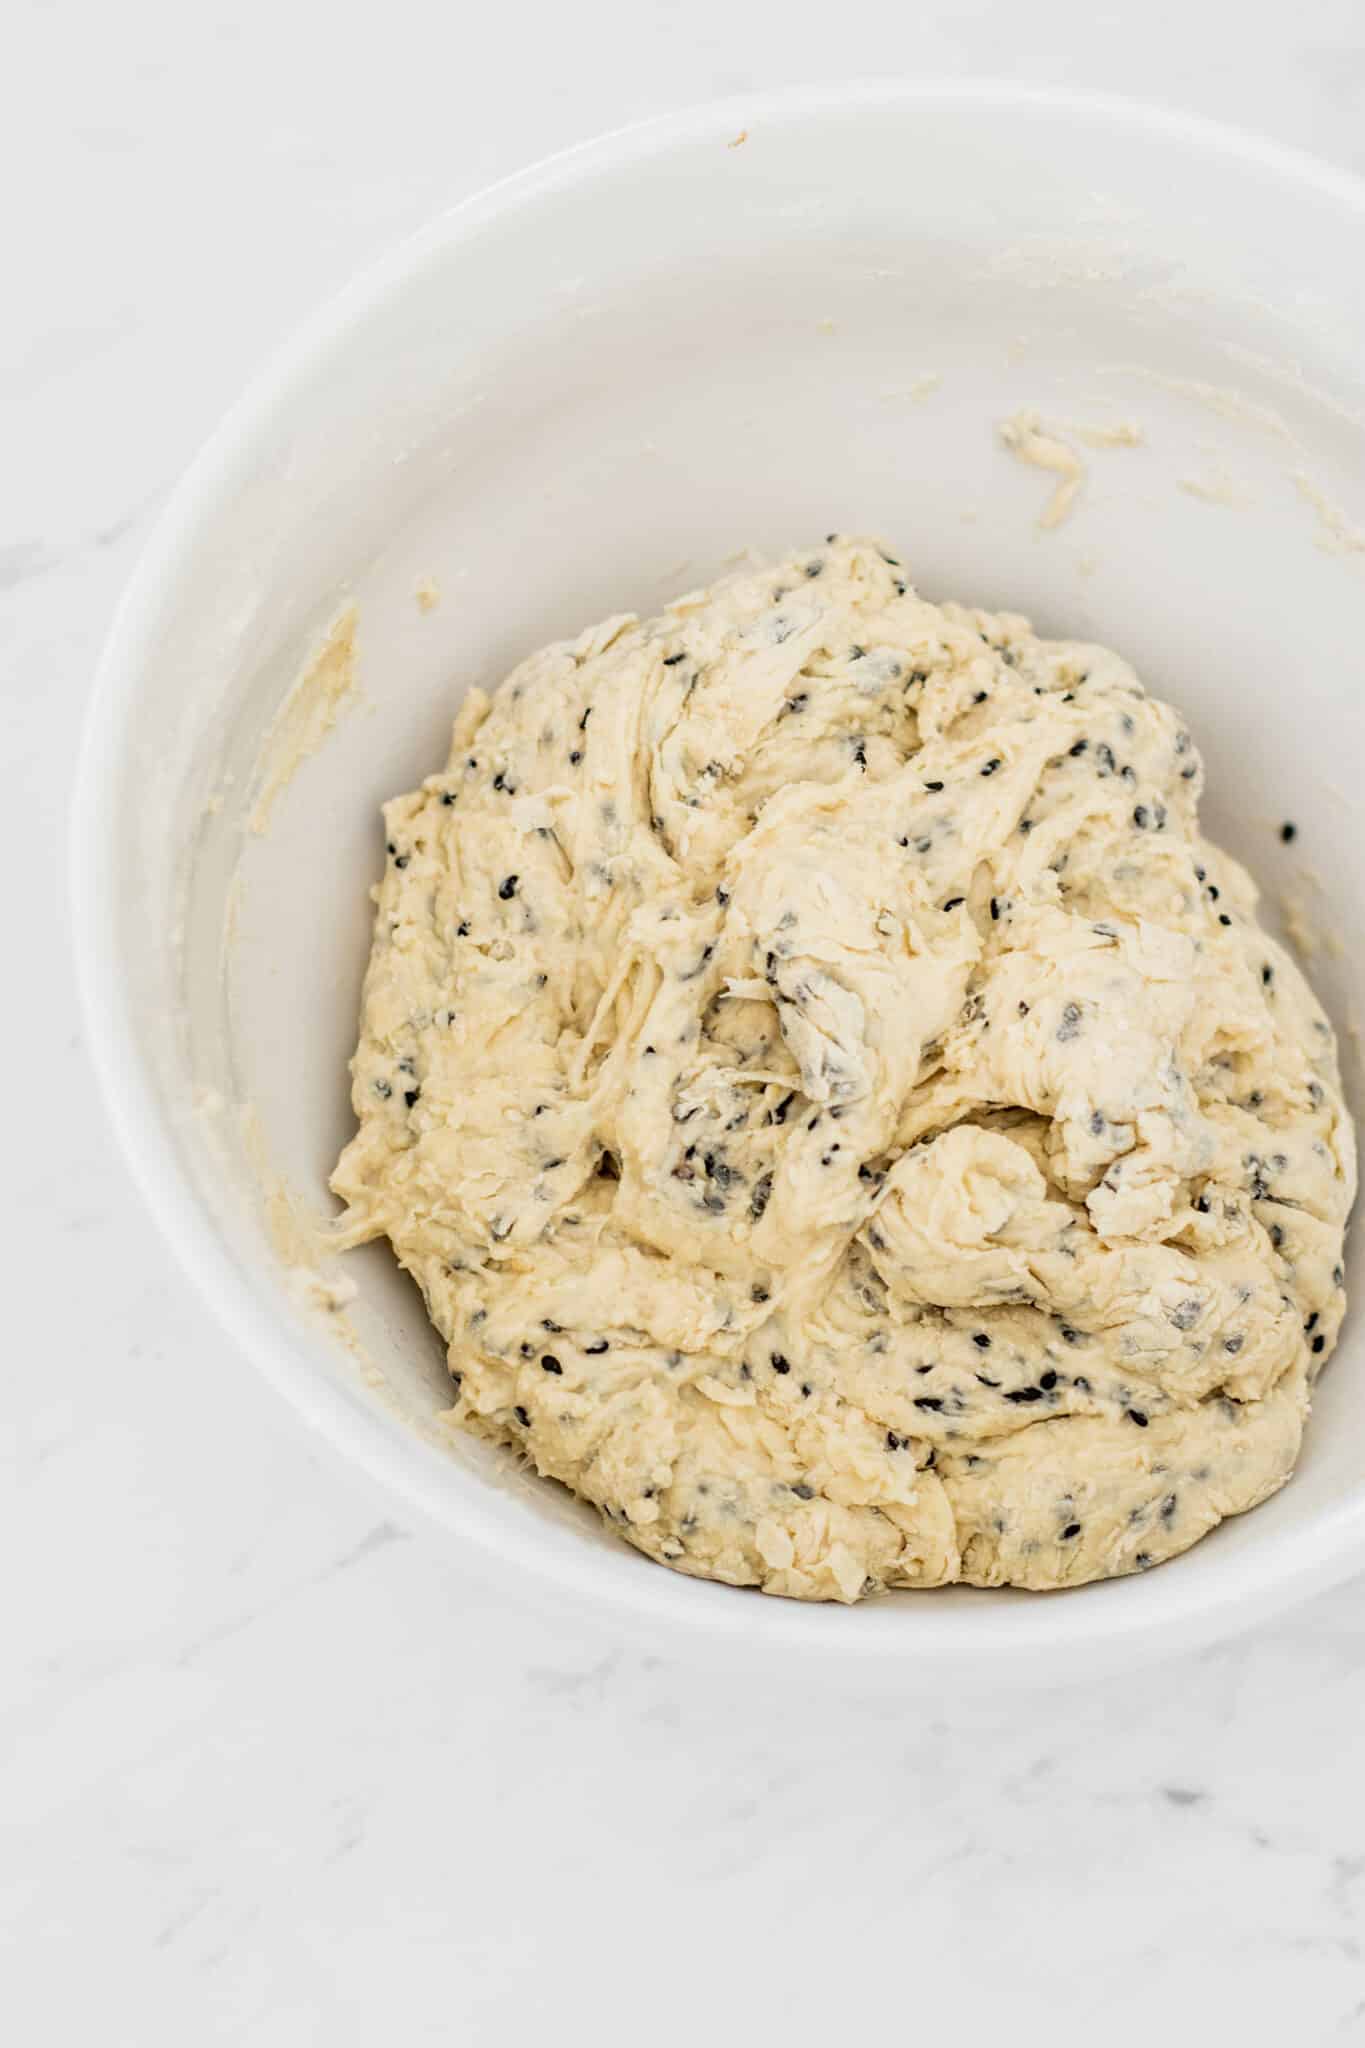
Step 3: add starter and salt
Add in the doubled starter and salt. Use wet hands to squish it all together until well combined. It’s a bit messy and sticky but working quickly helps.
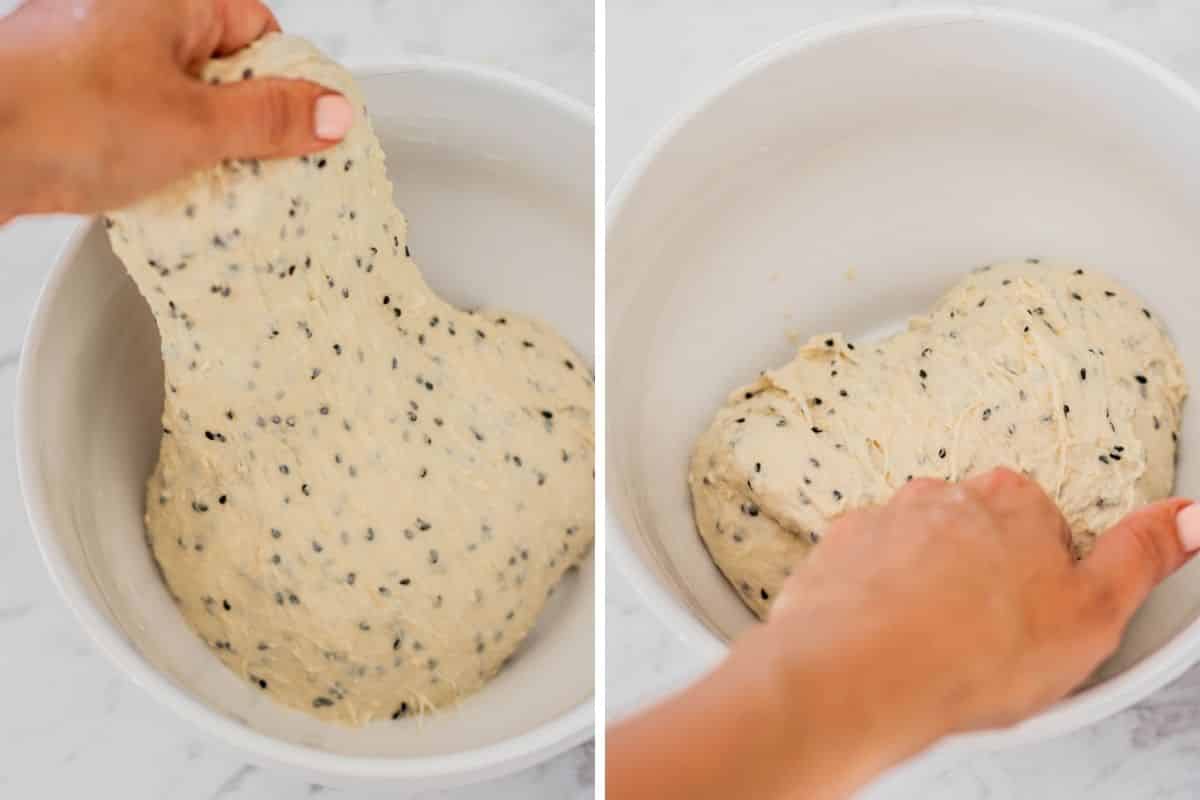
Step 4 -Folding
Over the next 3 hours, perform 6 sets of stretches and folds, one every 30 minutes. You can choose to do a regular stretch and fold method, or a coil fold.
A stretch and fold method is when one side of the dough is stretched up and pulled over itself. The bowl is then turned a quarter turn and this move is repeated on the following side. Continue stretching and folding and turning the bowl until all sides have been folded. You can do a few extra turns if needed. That is ‘one set’ of stretch and folds.
The dough begins as a very sticky shaggy dough that rips easily. Over time as the structure is built, it will become much stronger and more elastic. By the last stretch and fold or last coil fold, it will be super stretchy and not rip easily.
Step 5 – Bulk fermentation
After the folding comes one of the most important steps of sourdough – the bulk ferment.
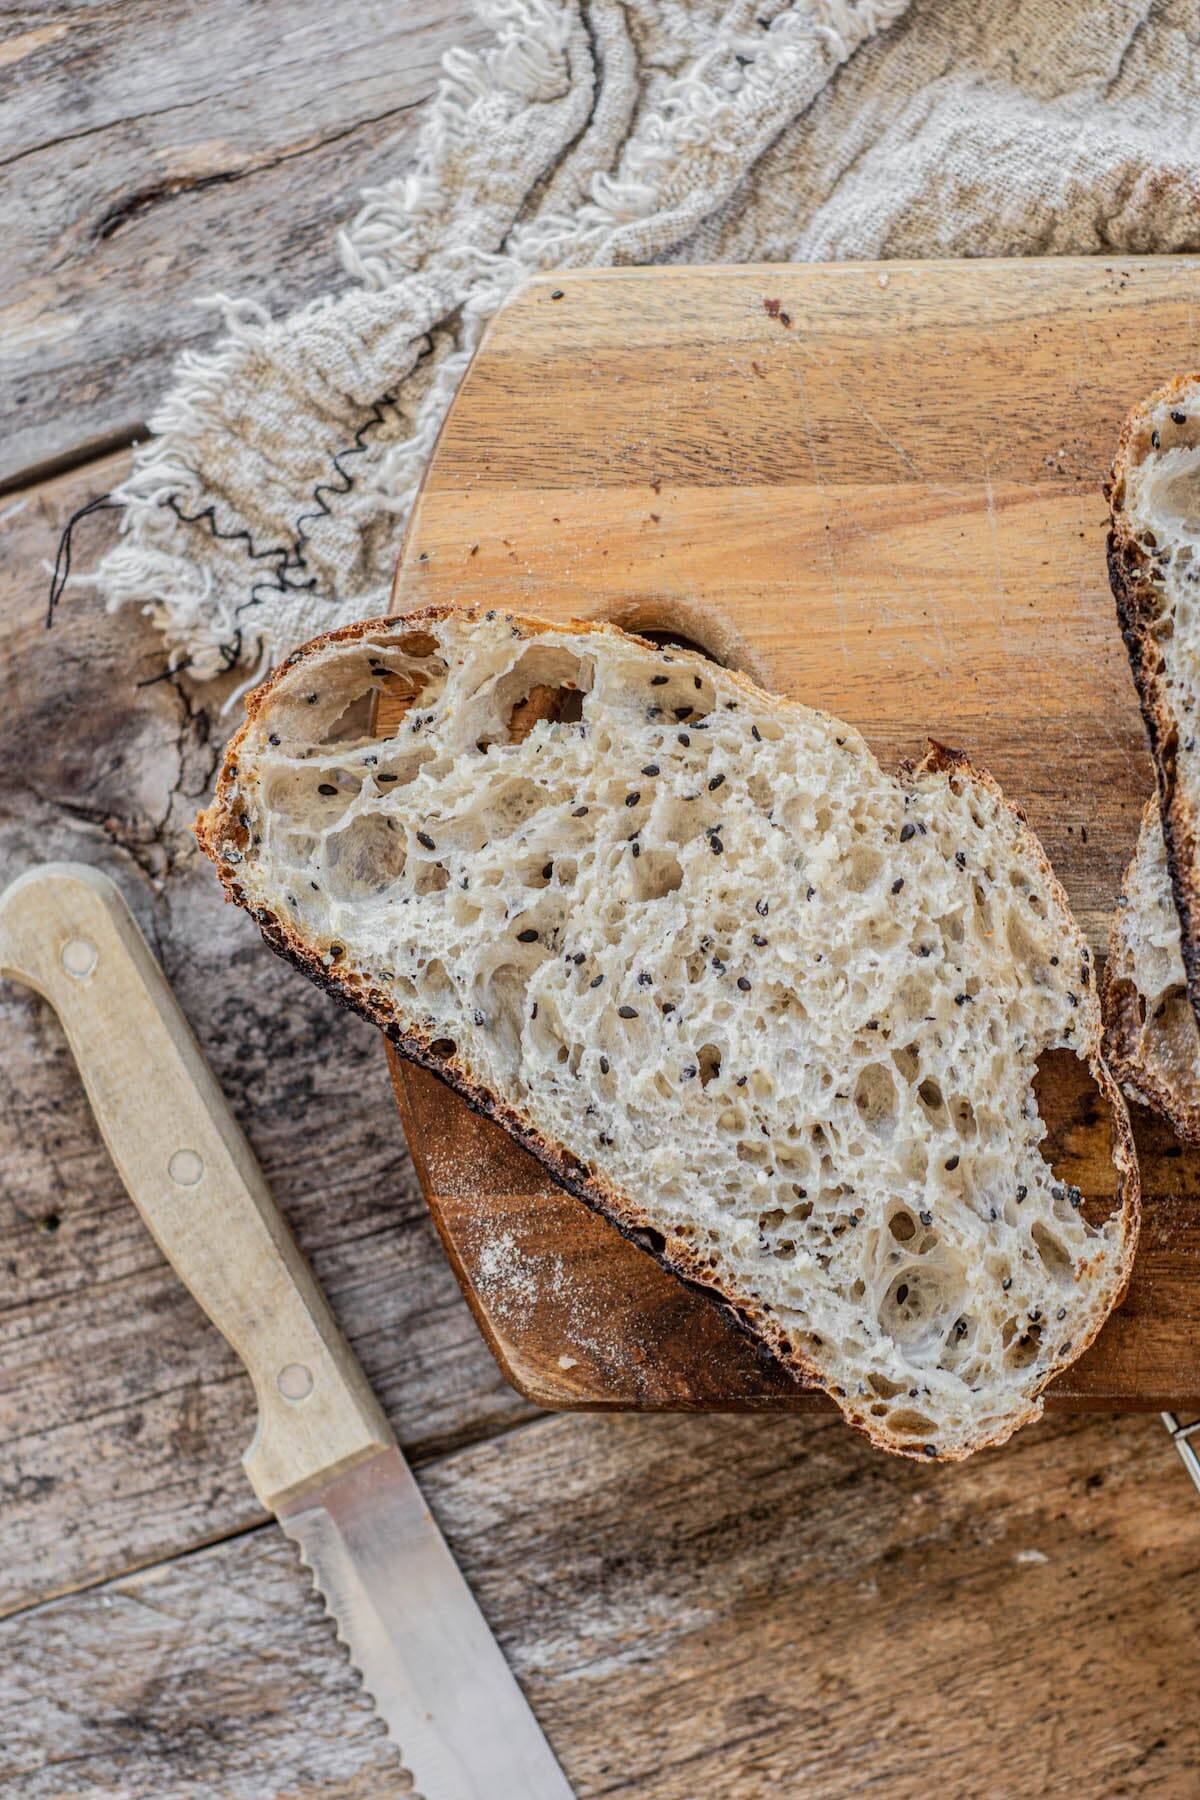
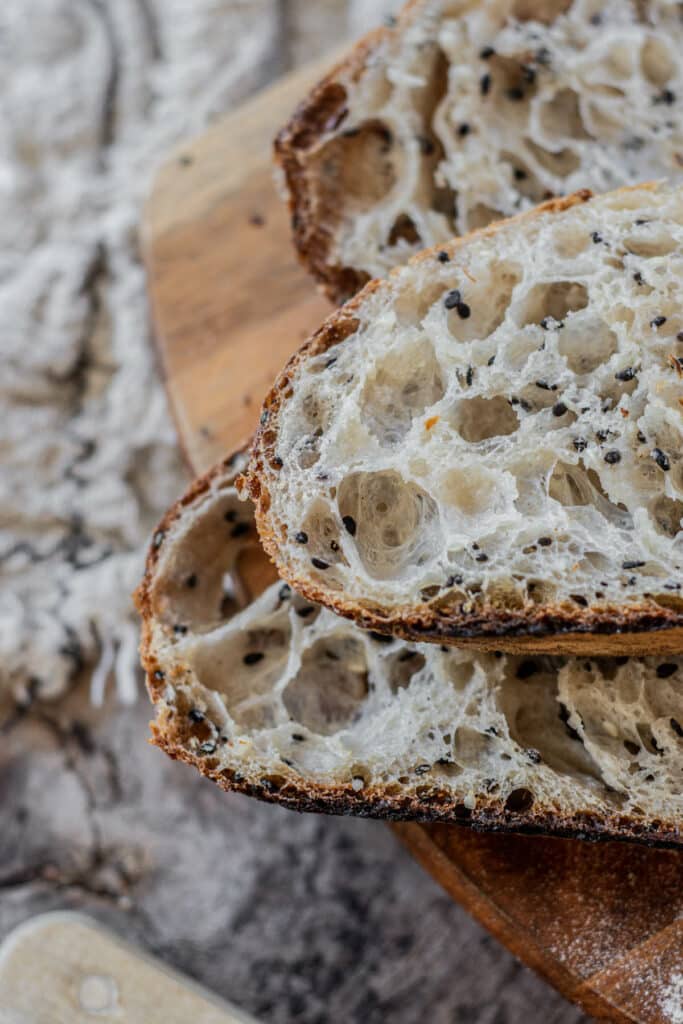
This step decides whether you achieve a light and open crumb or a dense and gummy sourdough.
The bulk ferment needs to be long enough for your dough to rise by around 50%. It doesn’t mean it doubles, but it needs to fill out by about half the amount and look much puffier.
The total time depends greatly depends on your room temperature. You can dough a bench rest if your kitchen is warm, or create a warm spot by placing the dough next to a mug of boiled water in a turned-off oven.
Watch the dough and not the clock. It is normal for your dough to stretch back out and fill the bowl again, but it should feel bouncier and fuller.
Step 6 – shaping
There are many ways to shape a sourdough loaf. The aim is to create some tightness and surface tension, but not de-gas the loaf too much. You can find your own way to shape it if you like, but here is one example.
Tip your dough out onto the floured surface and gently form it into a rectangle.
Take the bottom third of the dough and fold it up so it meets the middle. Take the right side of the dough and fold it to meet the middle, then do the same with the left side.
Bring the top third of the dough down to meet the bottom. Now you have a sort of ball shape.
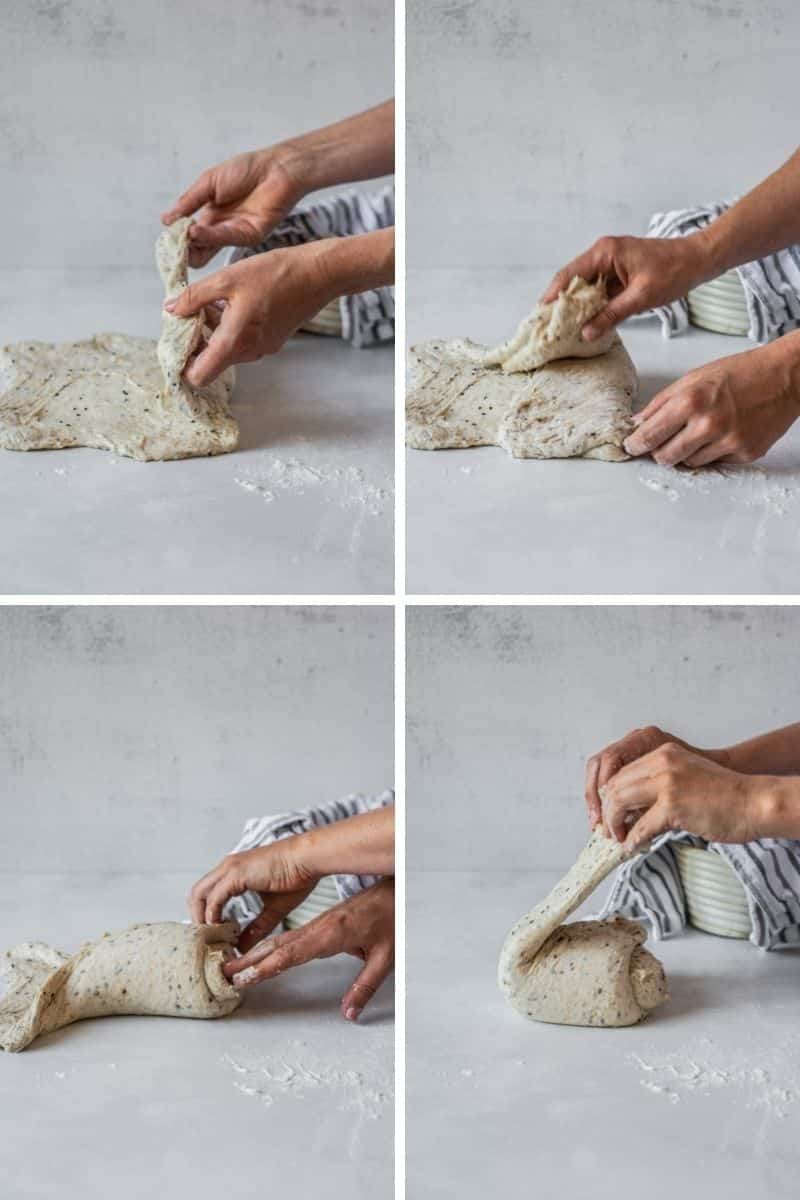
Stitch this ball together by grabbing a little bit of dough from the top left and a little from the top right and bringing them together to meet in the middle.
Carry on doing this down the length of the dough. When you get to the bottom, grab a flap of dough and carry it up over the top of the stitched dough to meet at the top. This will again create a sort of ball.
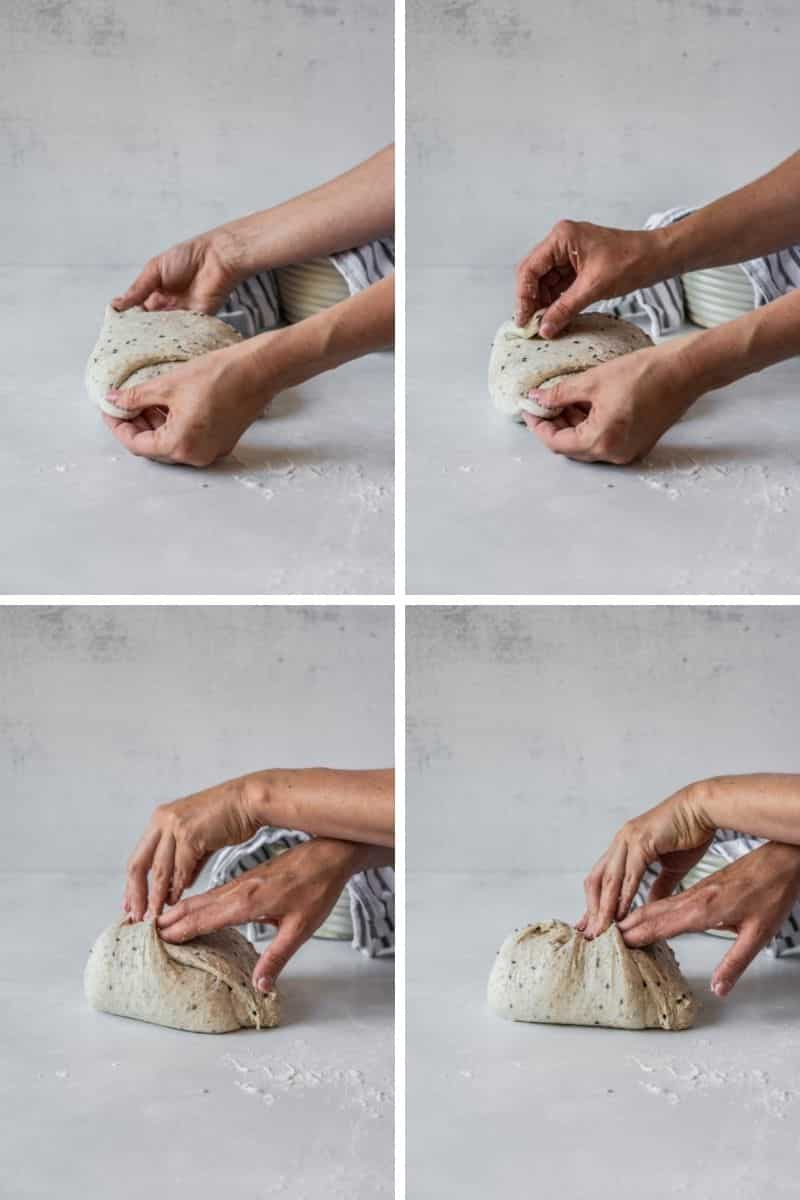
Gently grab this ball and roll it gently towards you on the bench. This will create some surface tension. All the while, take care with your dough handling so as not to de-gas your dough too much.
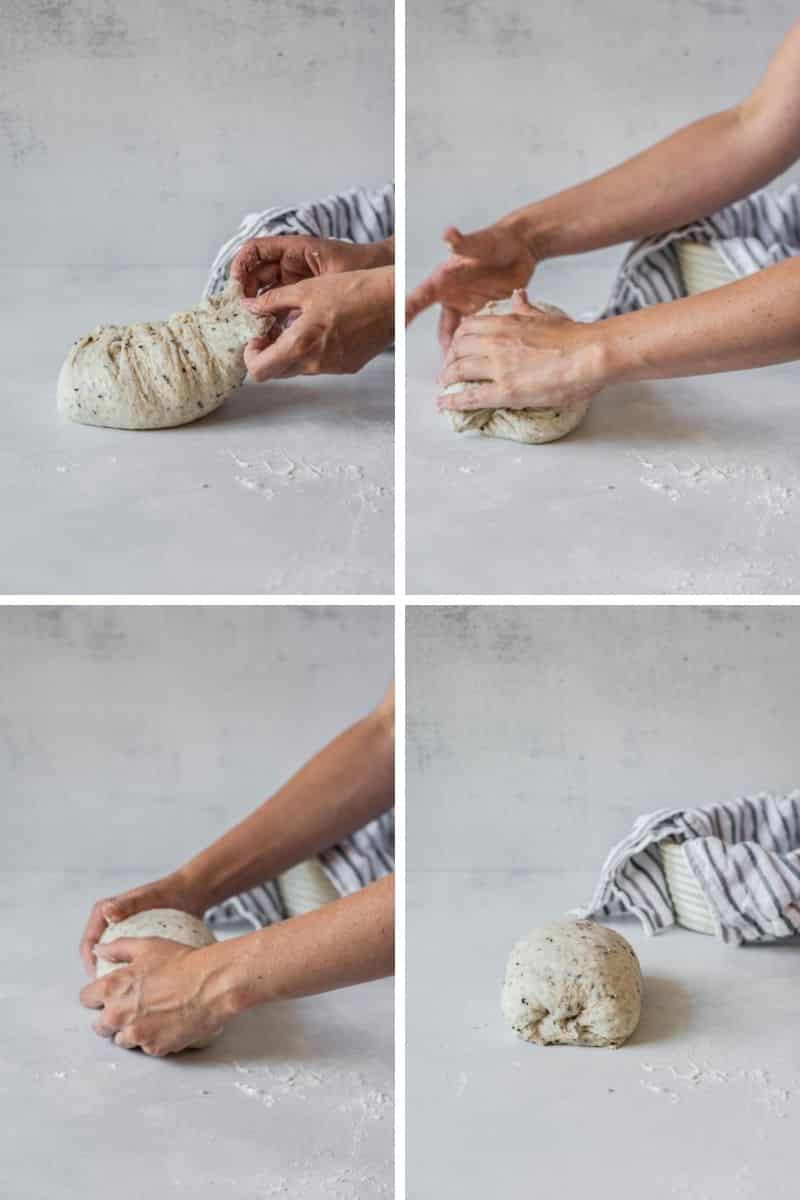
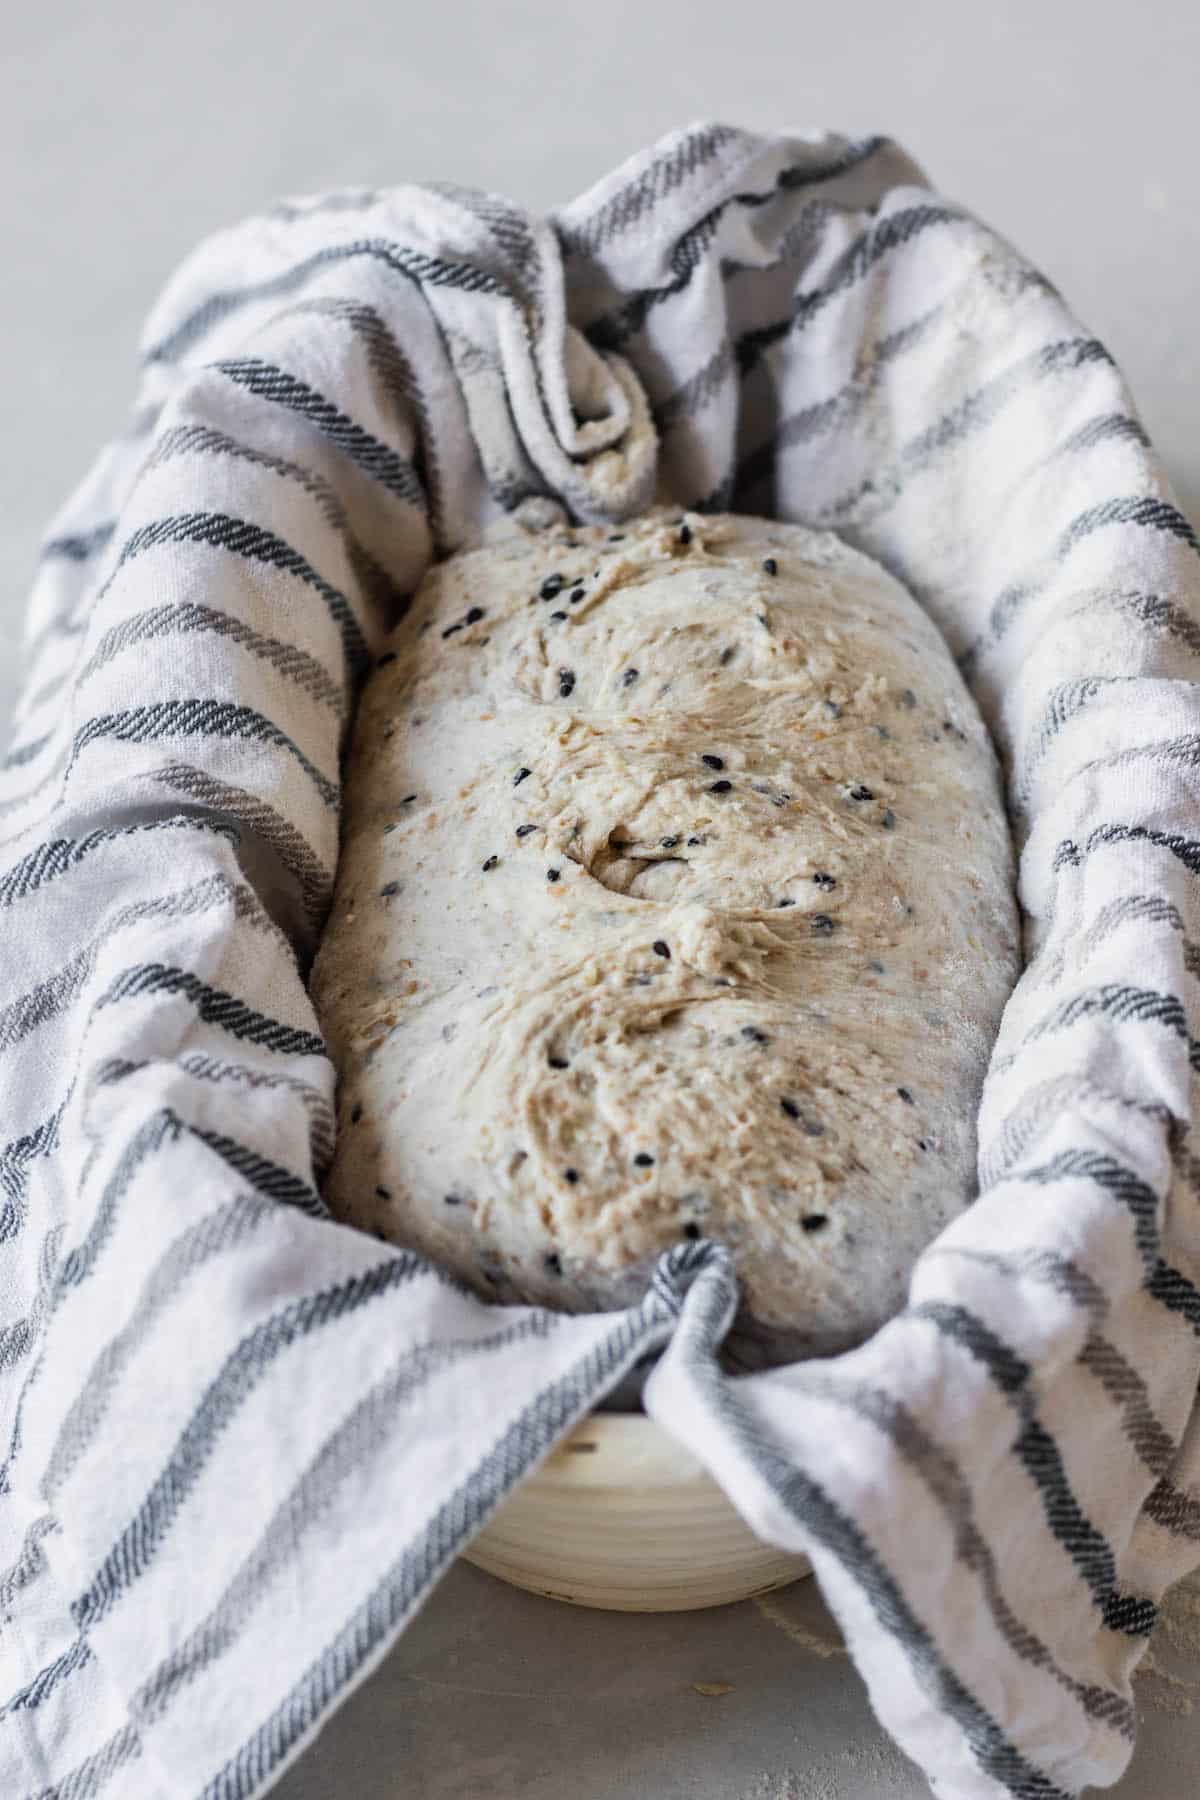
Place in the floured bowl or basket, seam side up.
Step 7 – cold proof
Cover with a floured tea towel and place in the refrigerator for 8-20 hours. This is when the flavor develops in the bread.
Step 8 – baking
Preheat the oven to 482°F/250°C as well as your dutch oven. Let them preheat for at least 30 minutes until very hot.
If you have no dutch oven, you can preheat an oven tray or baking stone instead and later add ice cubes or water for steam.
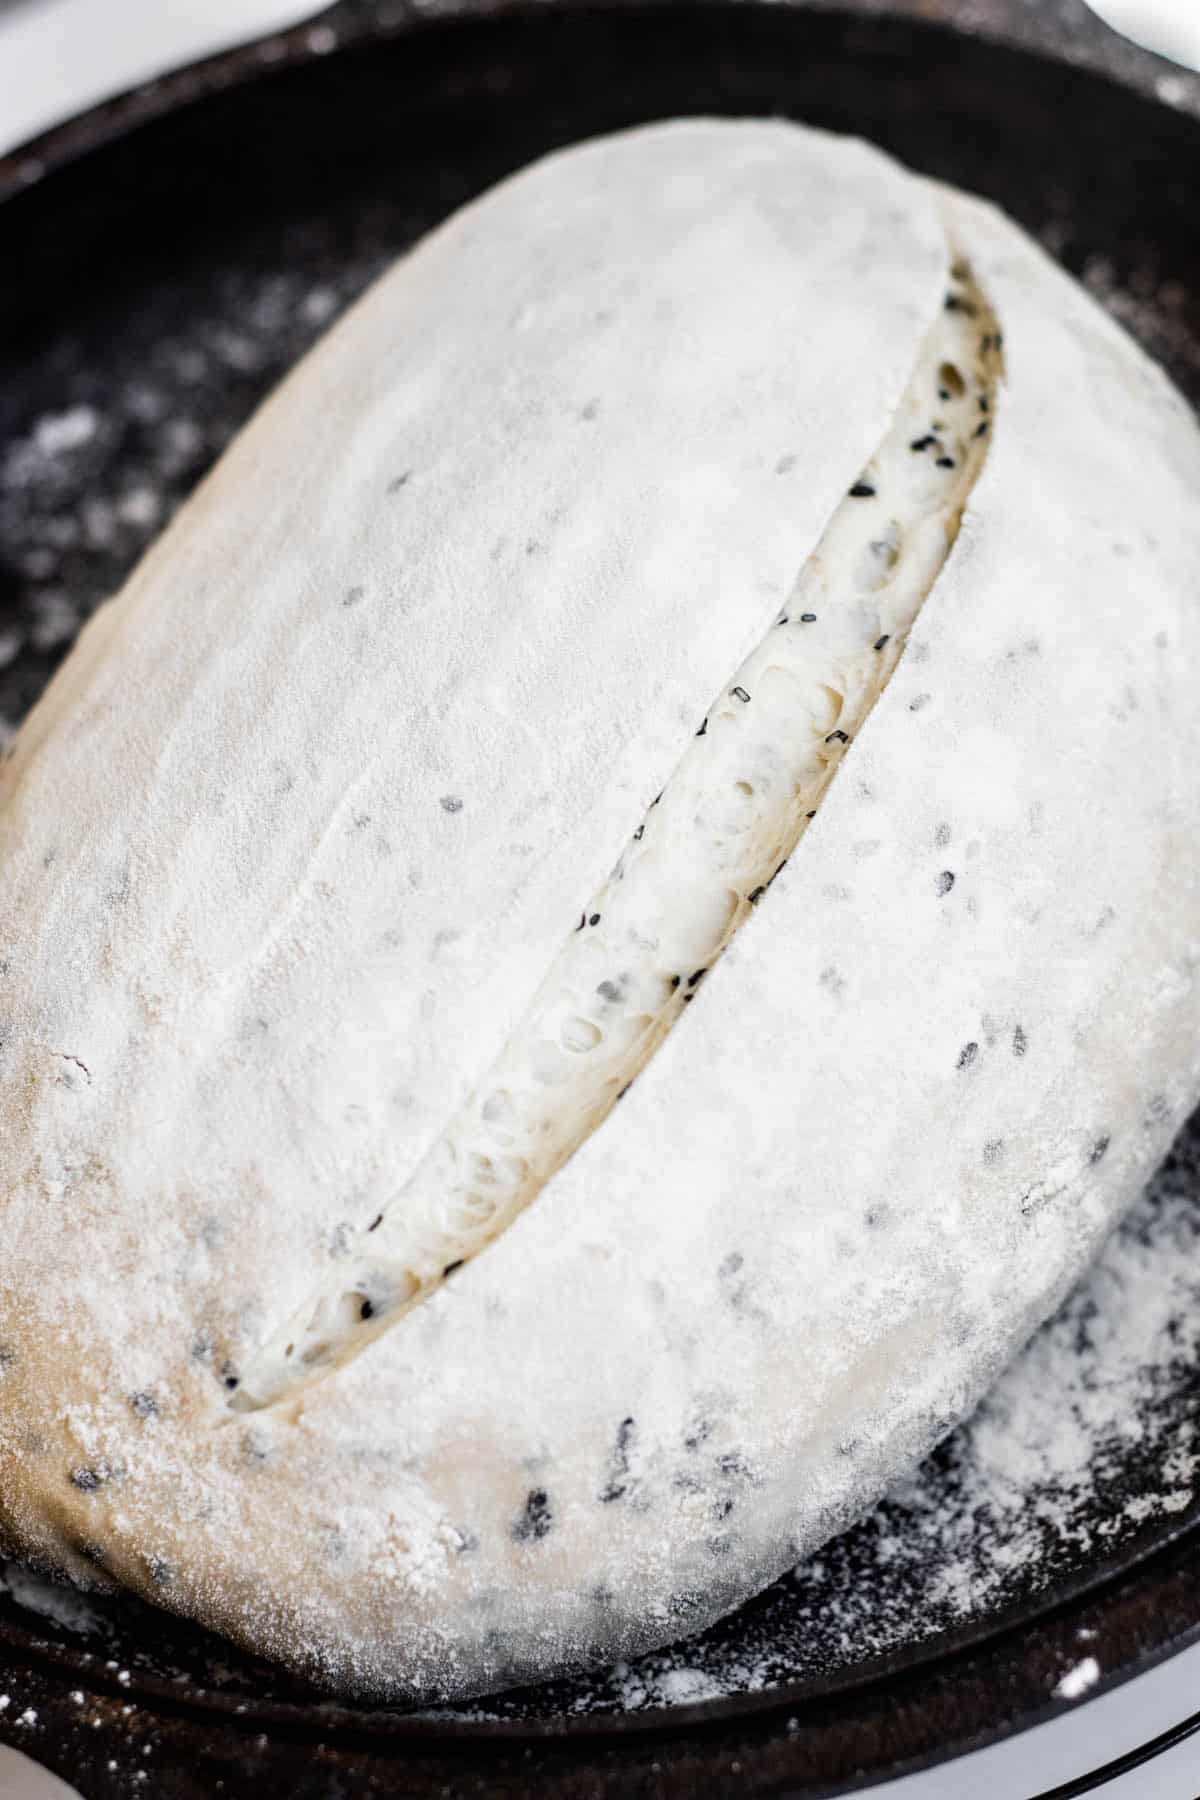
Once hot, remove the dutch oven from the oven and flour the bottom pan well. Remove the sourdough loaf from the fridge and gently tip it into the pan so the smooth side of the loaf is showing.
Use a razor blade or sharp knife to score a gash down the long side of the loaf. This gives the steam a place to escape from when the bread bakes.
Add on the lid of the dutch oven and place it in the oven. Bake covered for around 20 minutes.
Remove the lid then bake uncovered for a further 15-20 minutes until browned to your liking.
Serving and storing
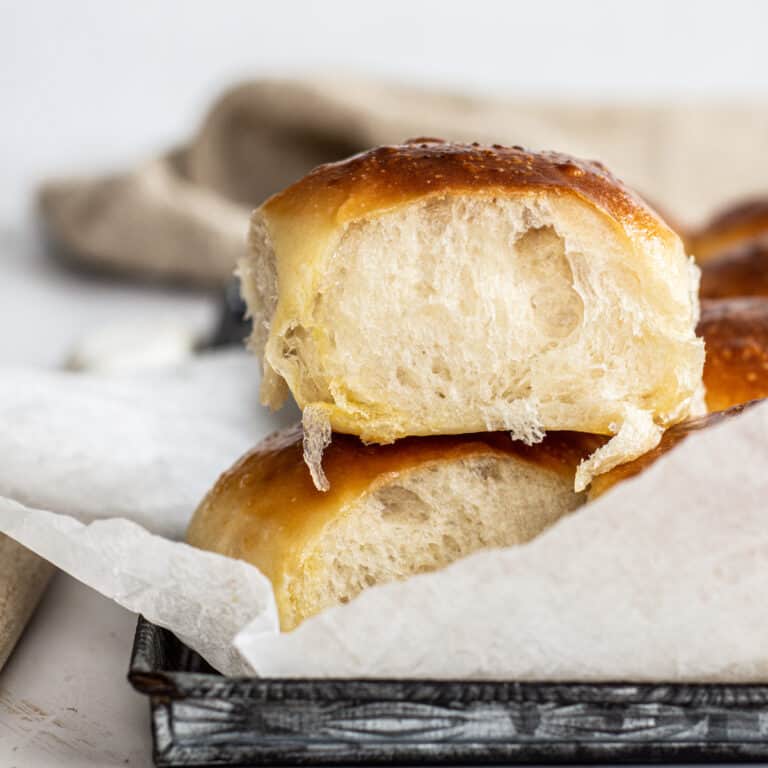
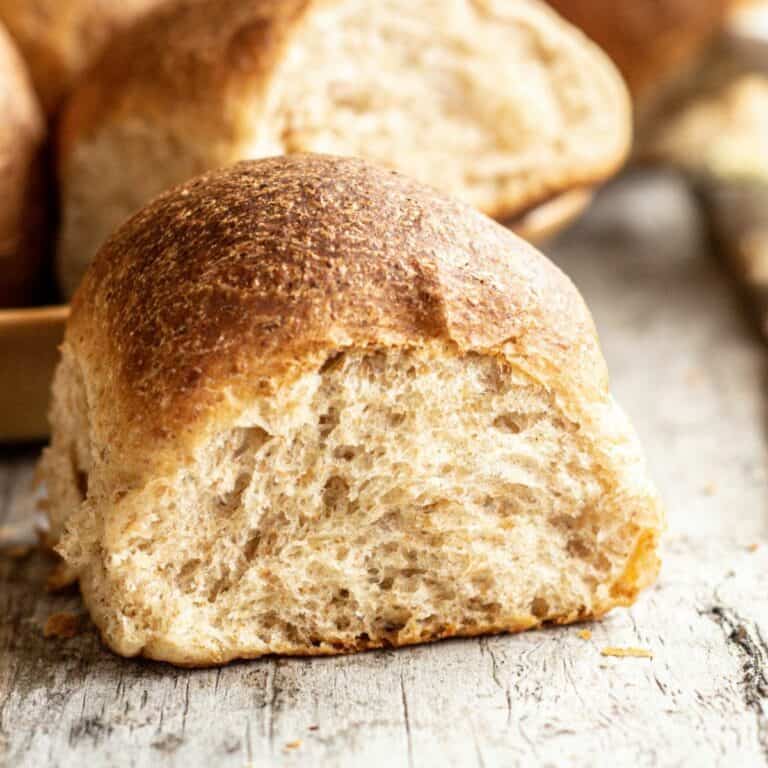
Let the loaf cool on a cooling rack for 2 hours before slicing. It’s normal for sourdough to have a crackling crispy crust when it comes from the oven, that softens up once the sourdough is cool.
Leftover sesame sourdough can be stored covered at room temperature for up to 3 days. Sourdough can also be frozen, and wrapped tightly for up to 3 months.
Related recipes

Sesame Seed Sourdough
This sesame sourdough loaf is filled with black and white sesame seeds, and has a hint of honey.
Ingredients
Starter* (this makes approximately 125g starter of which 80g will be used in the recipe.)
- 25g starter
- 50g flour
- 50g water
Bread
- 280g warm water
- 1 Tablespoon honey
- 400g bread flour or a strong all-purpose flour with at least 11% protein
- 50g sesame seeds*
- 80g doubled starter
- 1 ½ teaspoon salt
Instructions
- Mix together the starter ingredients and tip into a clean jar. Leave it to rise in a warm place for 4-6 hours to at least double (but not collapse).
- When the starter has been rising for around 4 hours, in a large bowl, combine the water and honey and mix it well. Add in the flour and sesame seeds and mix it together into a rough dough. Ensure all the dough has been wet through. Cover the bowl with a damp tea towel and let the dough rest.
- Once the starter has doubled, add 80g of it to the dough along with the salt. Use wet hands to squish it all together until well combined. It's a bit messy and sticky but working quickly helps.
- Over the next 3 hours, perform 6 sets of stretch and folds, one every 30 minutes. You can choose to do a regular stretch and fold method, or a coil fold (see above post for details.)
Bulk ferment
- After the folds are completed let the dough rest in a warm spot until bulked out by 50%. It should look a lot puffier. How long this takes depends on the warmth of your room. You can create a warm spot by placing the dough next to a mug of boiled water in a turned off oven.
Line a banneton basket or bowl with a towel and flour it well.
Shaping (see post for photos)
- Tip your dough out on to floured work surface and gently form it into a rectangle. Take care at this shaping stage to not squash the dough too much and lose all the gases that have been forming.
- Take the bottom third of the dough and fold it up so it meets the middle. Take the right side of the dough and fold it to meet the middle, then do the same with the left side.
- Bring the top third of the dough down to meet the bottom. Now you have a sort of ball shape.
- Stitch this ball together by grabbing a little bit of dough from the top left and a little from the top right and bring them together to meet in the middle.
- Carry on doing this down the length of the dough. When you get to the bottom, grab a flap of dough and carry it up over the top of the stitched dough to meet at the top. This will again create a sort of ball.
- Gently grab this ball and roll it gently towards you on the bench. This will create some surface tension. All the while, take care not to de-gas your dough too much. Place in the floured bowl or basket, smooth side down.
- Cover with a floured tea towel and place in the refrigerator for 8-20 hours.
Baking
- Preheat the oven to 482°F/250°C as well as the cast-iron dutch oven. Let them preheat for at least 30 minutes until very hot. If you have no dutch oven, you can preheat an oven tray instead and later add ice cubes or water for steam.
- Once hot, remove the dutch oven from the oven and flour the bottom pan well. Remove the sourdough loaf from the fridge and gently tip it into the pan so the smooth side of the loaf is showing.
Use a razor blade or sharp knife to score gashes into the loaf. This gives the steam a place to escape from when the bread bakes. - Add on the lid of the dutch oven and place it in the oven. Bake covered for around 20 minutes.
- Remove the lid then bake uncovered for a further 15-20 minutes until browned to your liking.
- Let the loaf cool for 2 hours before slicing.
Notes
*You can increase the sesame flavor even more in the loaf by firstly toasting the seeds before adding them to the dough.
Place a pan over low-medium heat. Once the pan has heated, add in the sesame seeds and swirl them in the pan for around 3-5 minutes over the heat until they smell toasted. Remove them from the heat and let them cool down before adding to the dough.
Recommended Products
As an Amazon Associate and member of other affiliate programs, I earn from qualifying purchases.

Nutrition Information:
Yield: 8 Serving Size: 1Amount Per Serving: Calories: 326Total Fat: 4gSaturated Fat: 1gTrans Fat: 0gUnsaturated Fat: 3gCholesterol: 1mgSodium: 406mgCarbohydrates: 59gFiber: 3gSugar: 2gProtein: 13g


Sourdough is definitely a labor of love, with all of the 30 minute stretches and folds… but so worth it! The sesame seeds added a great flavor and the bread had a wonderful crust and chew. Two thumbs up from me & my husband!
yay Tina so happy to read this! Thank you!
I love this sesame sourdough.
I’ve made it twice. It turned out well both times.
*****
I couldn’t see where I could leave my 5 star rating!
Thank you so much Yadee! You can leave star ratings by clicking the stars on the recipe card. So happy you enjoy the recipe!