Guide to How to Make Cultured Butter
Learning how to make cultured butter is easy and worth it. The end result is a creamy, golden spread, perfect to eat over bread or used in baking.
Making homemade cultured butter yourself has an extra bonus of the buttermilk that is expelled while the butter is churned. This tangy liquid is an amazing addition to baked goods, adding tenderness and taste.
This guide will tell you everything you need to know about how to make cultured butter at home.
What is cultured butter?
Cultured butter is made from cream lightly fermented with live cultures. This fermenting process adds a slight tangy taste to the butter.
The addition of the cultures to the cream is to ferment the cream. This fermenting process increases the fat content in butter once it is churned, which creates a more ‘buttery’, rich result. It adds a slightly tangy flavor too, one that can be increased depending on how long you let the cream ferment.
The ingredients
To make cultured butter, you’ll need heavy cream and fresh yogurt (unflavored, with live cultures.) If you’ve got no yogurt, kefir yogurt or sour cream can be used too, just ensure what you use contains live cultures.
How to make cultured butter
Fermenting the cream
Pour cream into a bowl and add in yogurt. Stir it together, cover, and leave it at room temperature to sit and do its thing. At least 36 hours, but it can be as long as 48 hours too.

I use the mixing bowl from my stand mixer that I will be whipping the butter in later on, to save on dishes and because it comes with a lid to cover it.

Churning the Butter
Once the cream has fermented, it should smell slightly tangy. It may have formed a thick cream layer on the top, but don’t worry. This will all get mixed in.
Pop the bowl in your mixer. Alternatively, use a hand-held beater or pour the mixture into a food processor. Start on low-medium speed, whisking until the cream thickens. This part can get a bit messy, especially as the butter starts to split from the buttermilk. If your mixer has a splash guard, use that.
The mixture will thicken, then become grainy. Keep on mixing and soon the yellow clumps of butter will form.

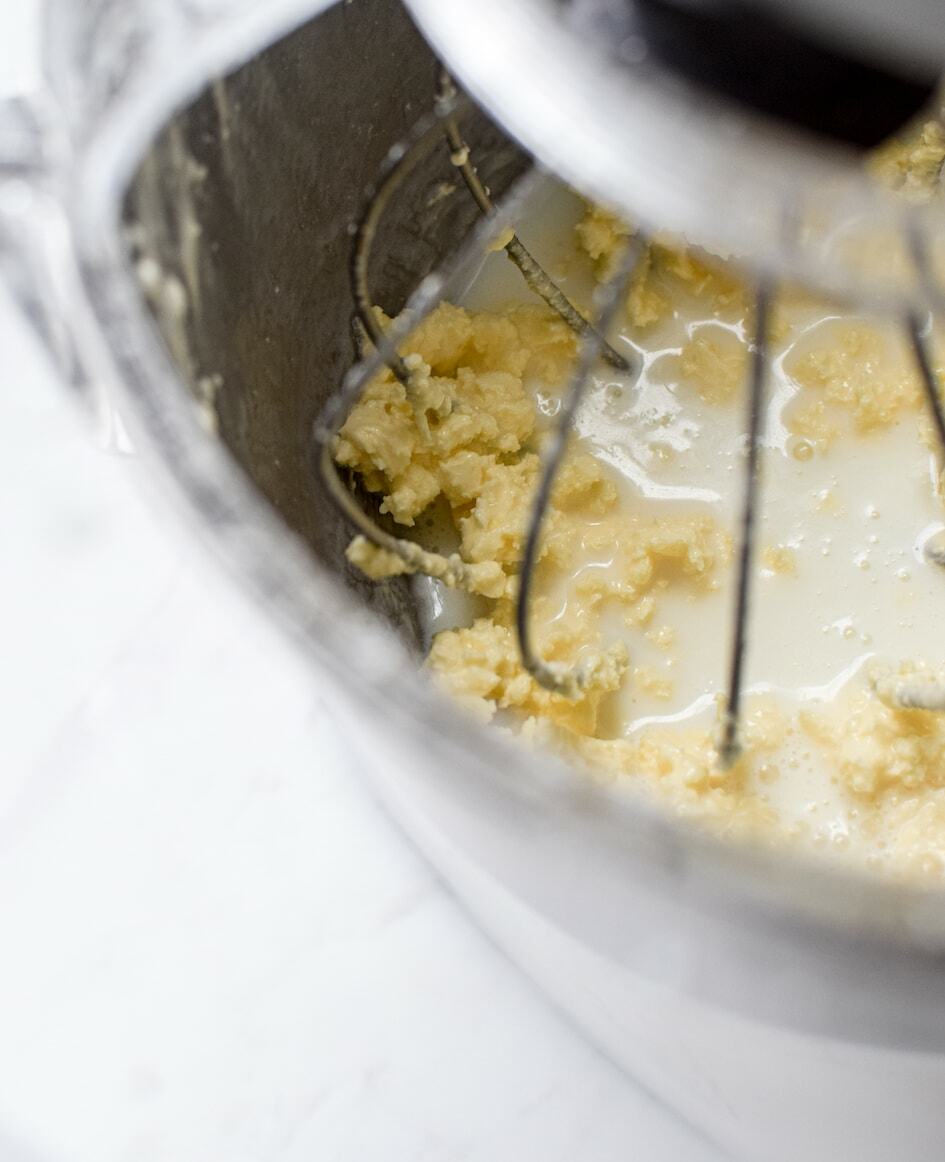
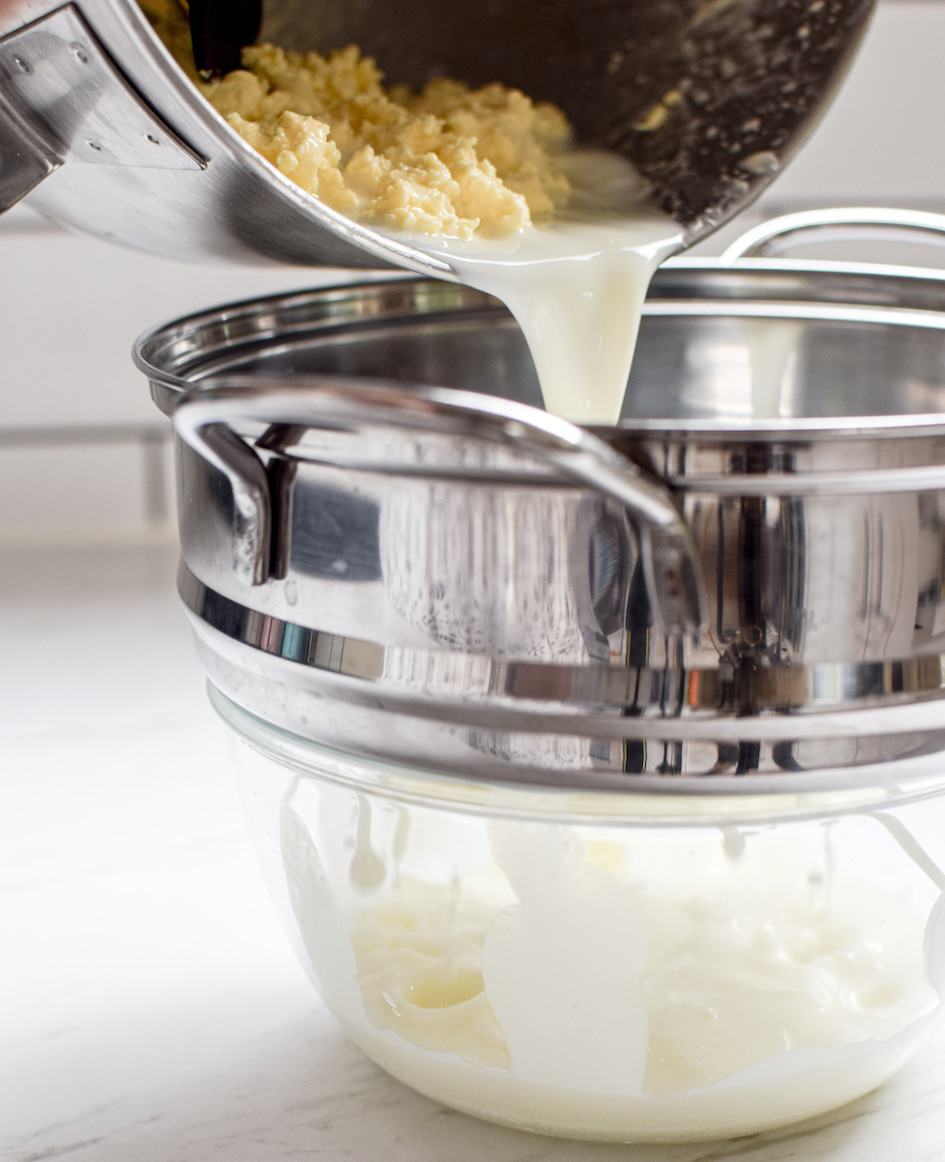
Removing the buttermilk
Now the buttermilk must be poured off. Tip the mixture into a colander over a bowl to catch the milk.
Save the buttermilk in a jar in the fridge or the freezer to use later on.
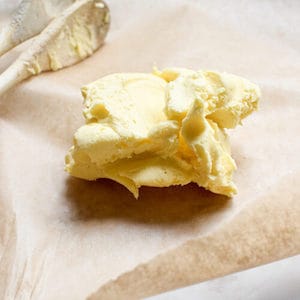
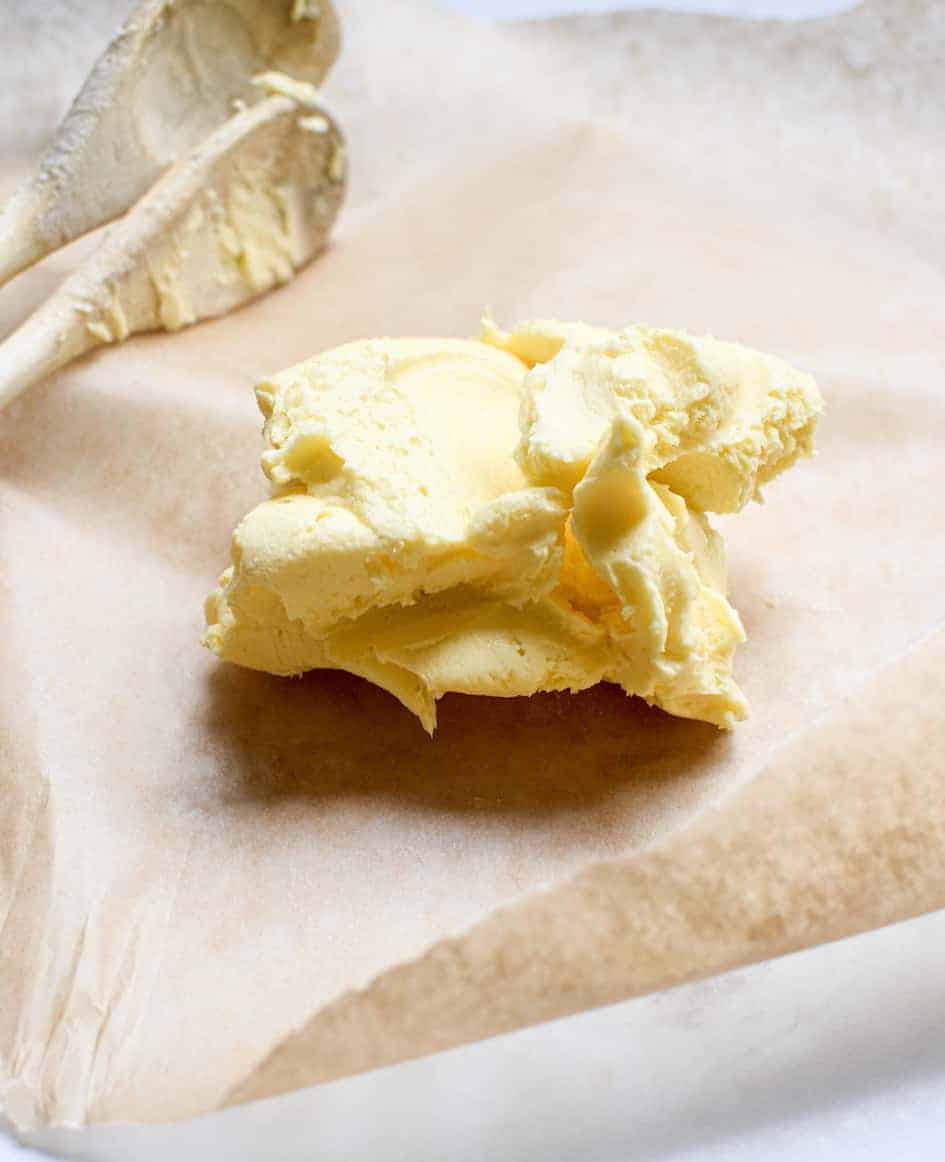
Place the butter clumps back into the mixing bowl whisk it again, or use your hands to squeeze and knead the butter to remove more buttermilk.

Now rinse the remaining butter in the colander under cold water, then pop it into a bowl of ice-cold water. Use your hands to squeeze and knead the butter to remove the remaining buttermilk.
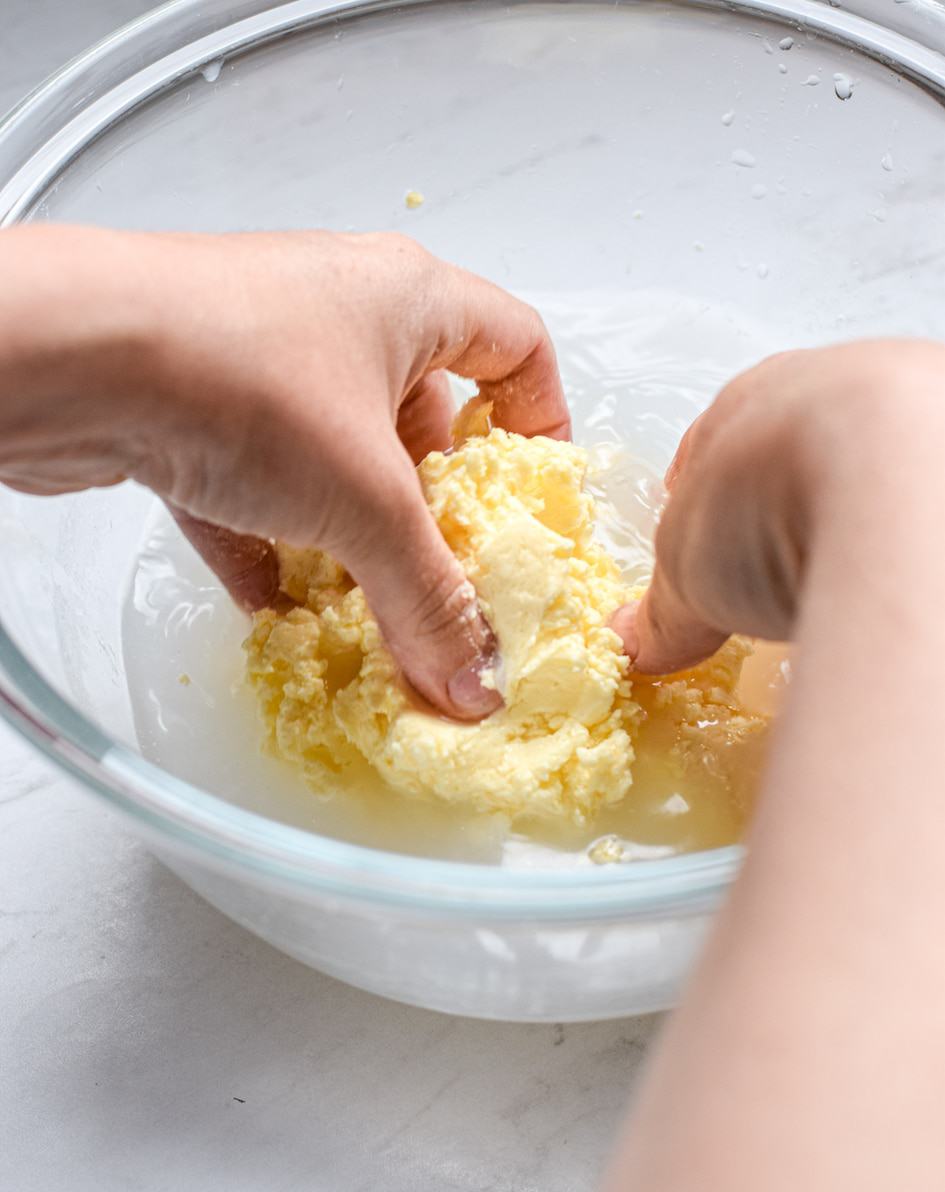
Refresh the cold water and keep repeating this process until the water in the bowl is clean. Ensure the water stays cold throughout this process by adding ice cubes as needed.

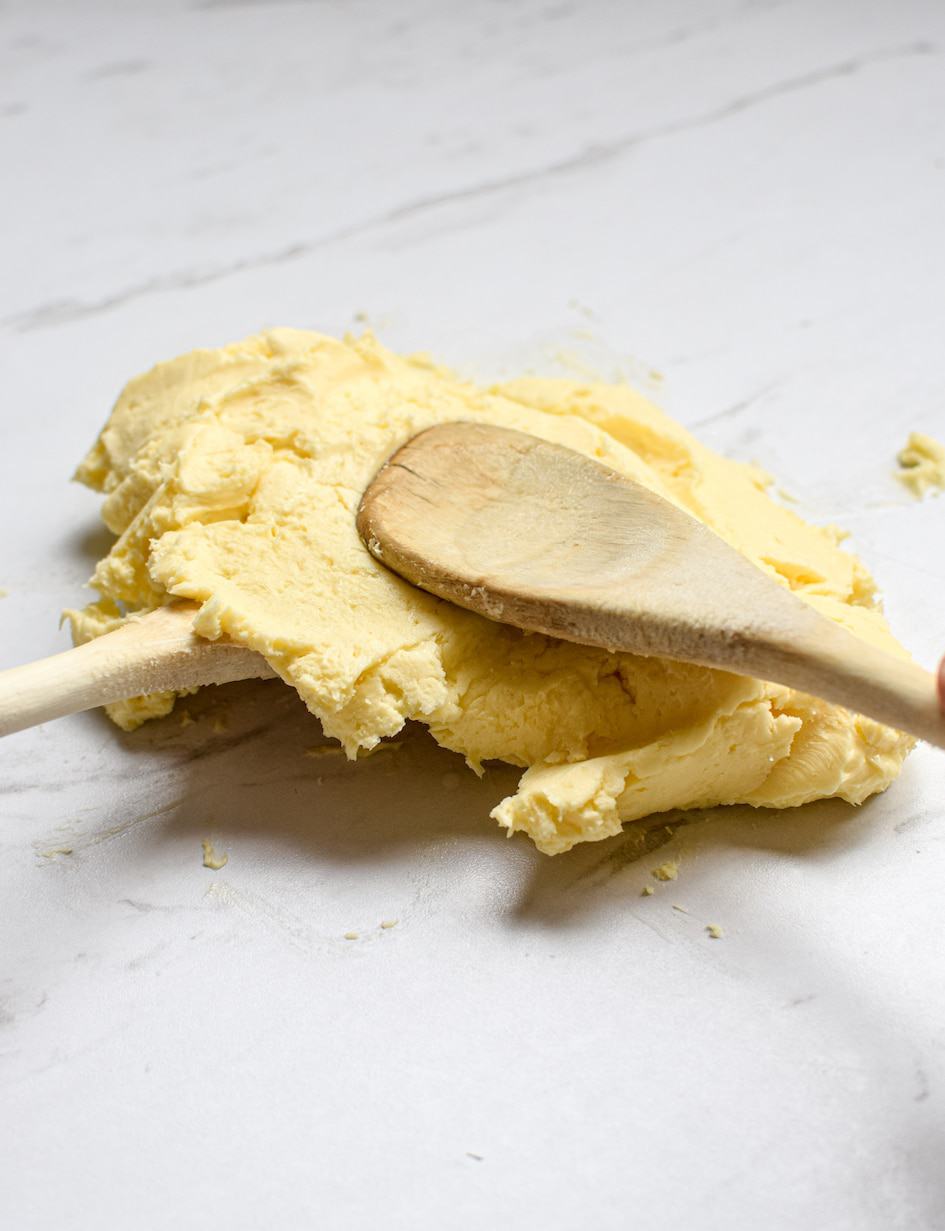
Shaping the butter
If you’ve got wooden butter paddles, pop them in the freezer to cool. I use wooden spoons instead.
Place the butter on a clean bench. If you are working in a very warm environment, it’s helpful to work on a marble or stone board that can be chilled in the fridge or rubbed with ice blocks before using.
Salting the butter
If you want to add a bit of salt to the butter for flavor, weigh the ball of butter first. Then, flatten it out on the bench and sprinkle over a little unrefined salt. Around 1.5% percent of the total butter weight.
Fold the butter over itself a few times to incorporate the salt. If the butter has warmed too much, place it in the fridge and let it chill.

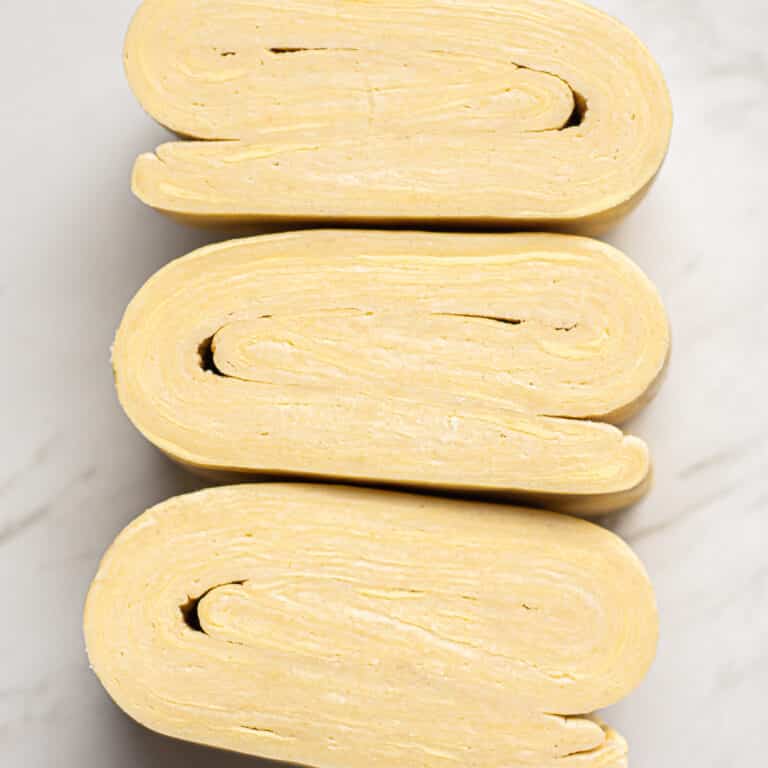
Flattening the butter
Now use, the cold butter paddles or wooden spoons to flatten and squash the butter, over and over again. This removes those last remaining drops of buttermilk.
At this point, you can use the paddles or spoons to shape the butter into blocks. I don’t bother shaping. Instead, I just put the butter onto some parchment paper and wrap it up tightly.
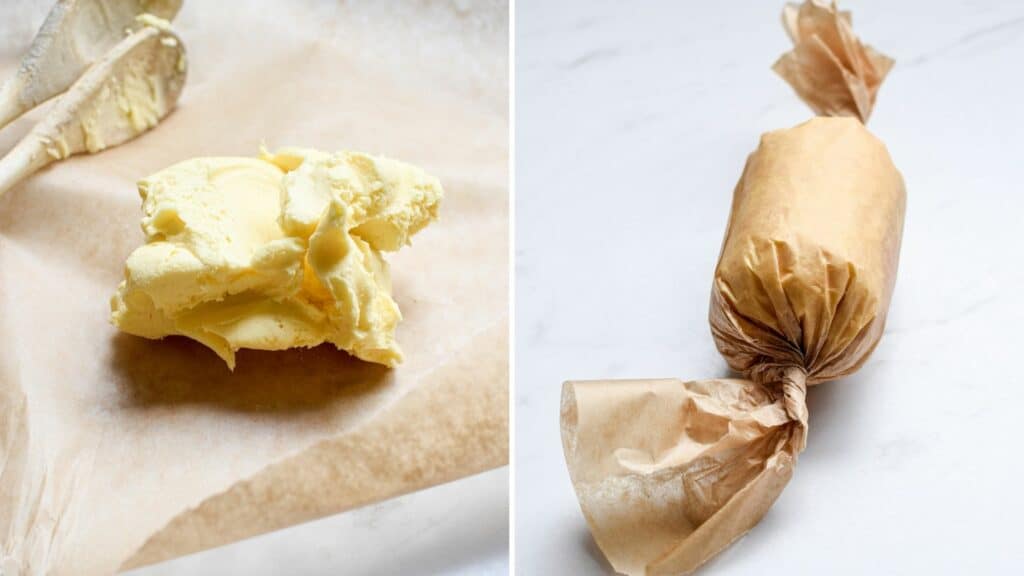
The butter can also be portioned and frozen for later use.
And that’s it! Now you get to enjoy your homemade cultured butter.
Related recipes
For ways to use the cultured butter or the leftover buttermilk, check out these recipes!
How to Make Cultured Butter at Home (European Butter)

Ingredients
- 500 ml heavy cream
- 50 grams unflavored yogurt with live cultures
- unrefined salt
Instructions
- Pour the cream into a bowl and add in yogurt. Stir it together, cover the bowl and let it sit to ferment at room temperature for 36 hours, or up to 48 hours.
Once the cream has fermented, it should smell lightly tangy. It may have formed a thick cream layer on the top, but don’t worry. This will all get mixed in. - Now use a mixer or a food processor to whisk the cream until it thickens. It will thicken, then become grainy. Keep on mixing and soon the yellow clumps of butter will form.
This part can get a bit messy, especially as the butter starts to split from the buttermilk. If your mixer has a splash guard, use that. - Once the butter has formed, pour the mixture into a colander that's balanced over a bowl to strain out the buttermilk. Save the buttermilk for future baking.
Place the butter clumps back into the mixing bowl and whisk it again, or use your hands to squeeze and knead the butter to remove more buttermilk. - Rinse the remaining butter in the colander under cold water, then pop it into a bowl of ice cold water. Use your hands to squeeze and knead the butter to remove the remaining buttermilk.
- Refresh the cold water and keep repeating this process until the water in the bowl is clean. Ensure the water stays cold through out this process by adding ice cubes as needed.
If you’ve got wooden butter paddles, place them in the freezer to cool, or use wooden spoons instead.
Then, put the butter on a clean bench. If you are working in a very warm environment, it’s helpful to work on a marble or stone board that can be chilled in the fridge or rubbed with ice blocks before using. - Salting the butter
If you want to add a bit of salt to the butter for flavor, weight the ball of butter first. Then, flatten it out on the bench and sprinkle over a little unrefined salt. Around 1.5% percent of the total butter weight.
Fold the butter over itself a few times to incorporate the salt. If the butter has warmed too much, place it in the fridge and let it chill. - Now use, the cold butter paddles or wooden spoons to flatten and squash the butter, over and over again. This removes those last remaining drops of buttermilk. Use paddles or spoons to shape the butter into blocks, or just put the butter onto some parchment paper and wrap it up tight.
The butter can also be portioned and frozen for later use.

This was a great step-by-step! Just made my first batch and I am in love!
Yay so pleased to hear that!