
The Best Sourdough Focaccia Recipe
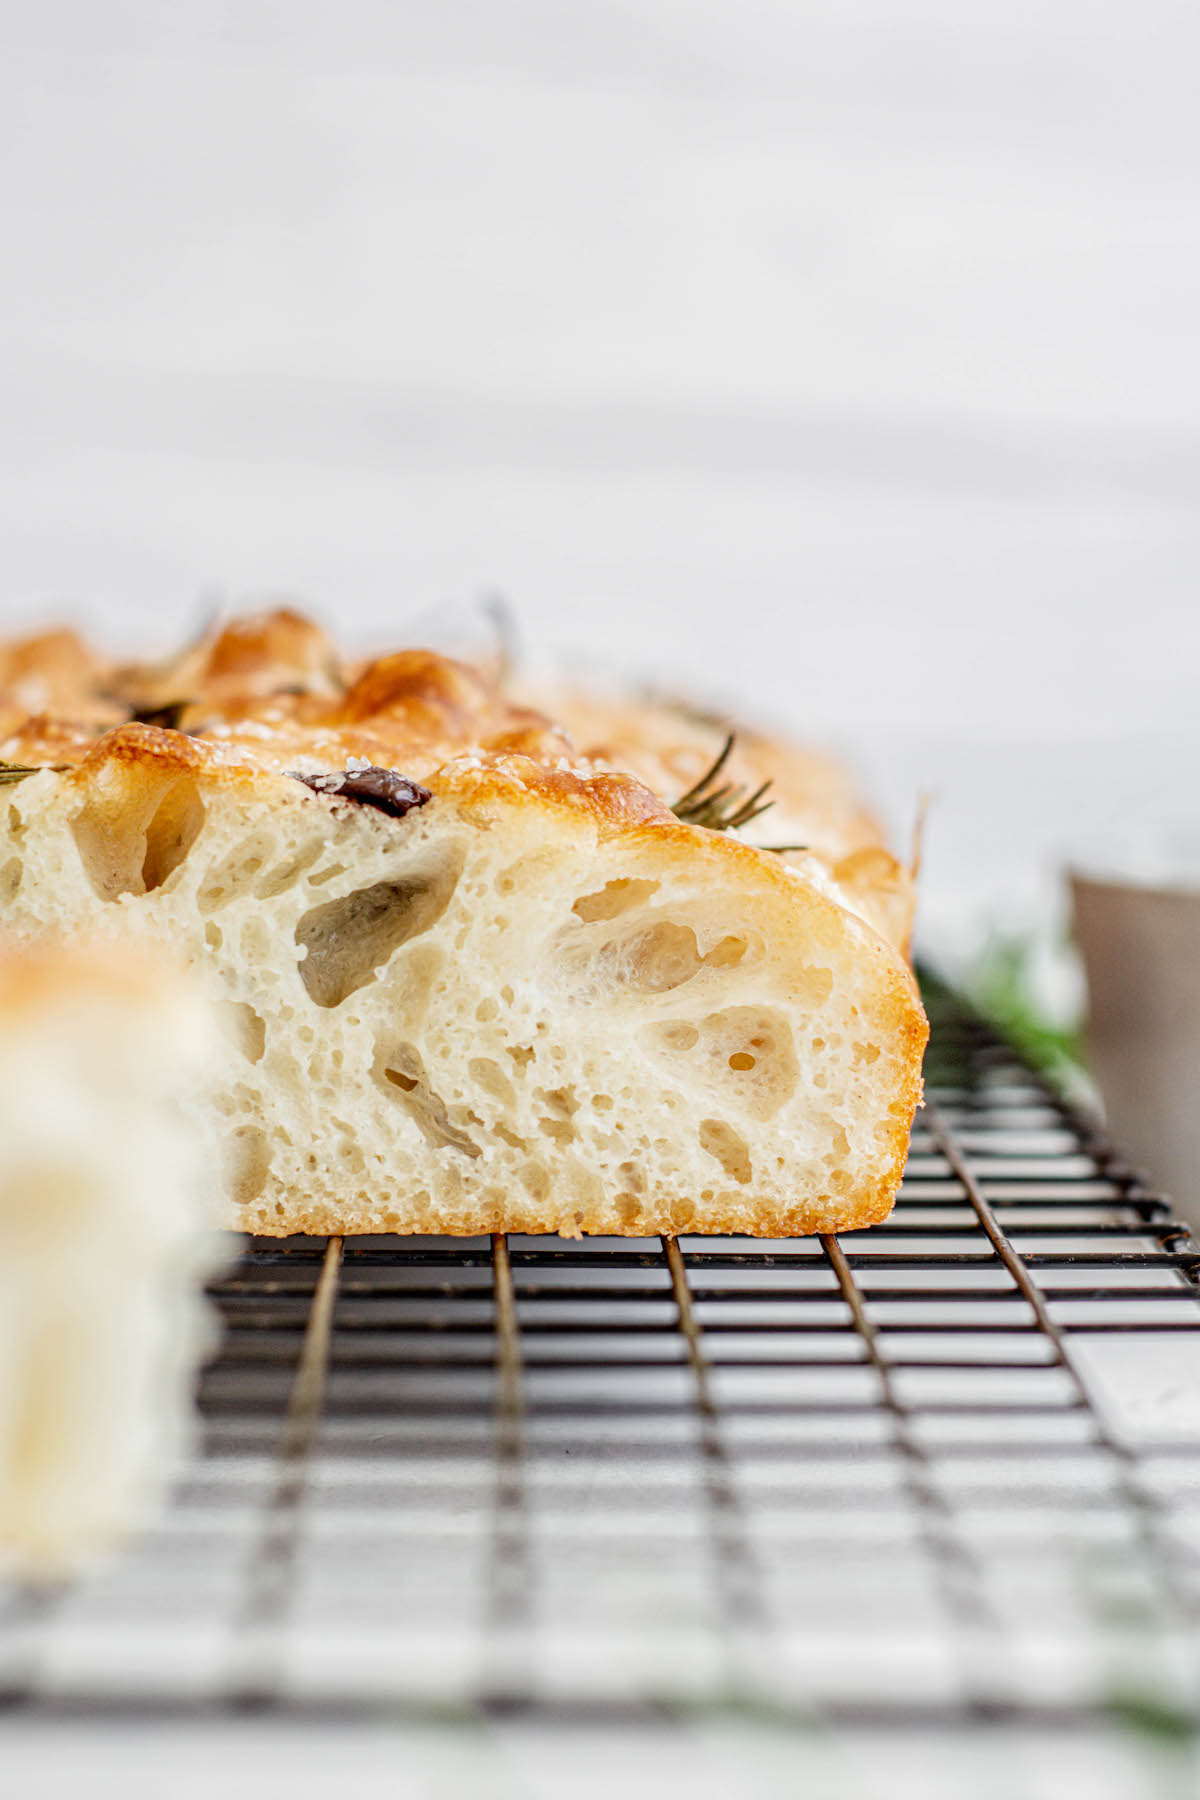
Sourdough focaccia one of the best things to make with your starter. It’s really easy despite it being a very high-hydration dough. The dough is mixed by hand with stretches and folds, and given a long slow ferment. It’s generously coated in olive oil before baking which gives it a crispy, fried crust that’s a beautiful contrast with the soft interior. The contrast in texture of a sourdough focaccia is what makes it so great!
Like most of my sourdough recipes, I spread the process over two days so the dough gets a long cold rest in the fridge overnight, which is where most of the flavor comes from.
Key ingredients and why
Find the full amounts in the printable recipe card at the bottom of this post. Here is a quick rundown of what each ingredient is doing.
- All-purpose flour. A strong all-purpose flour works well here. Check the protein level, because a flour of at least 11% protein gives you the gluten strength to hold all that water. You can also use bread flour, or a mix of bread and all-purpose flour.
- Water. This is a very high hydration dough at around 91%, so a lot of water goes in. That much water makes traditional kneading pretty hard, which is exactly why we use a stretch and fold method instead. You can work out the hydration yourself for other sourdough recipes with this hydration calculator.
- Salt. Salt adds flavor and tightens up the gluten, giving the slack dough a little more strength. Flaky sea salt goes on top later as well.
- Active sourdough starter. This is what leavens the bread, so it needs to be active and lively. If yours is sluggish, start with my guide to sourdough starter.
- Extra-virgin olive oil. The dough is coated generously in olive oil before baking. This is what crisps and fries the crust, and it adds a lot of flavor, so use a good one.
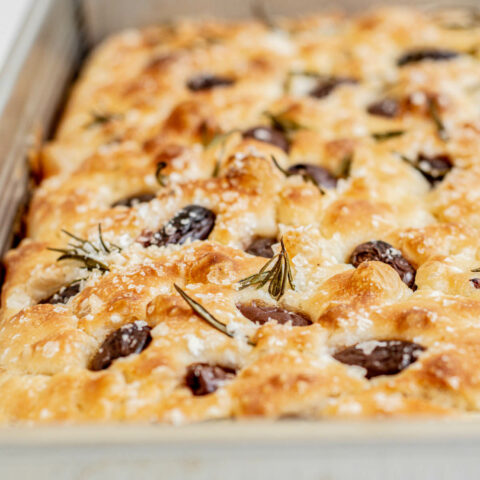
- Fresh rosemary and olives. These are the toppings for a classic rosemary and olive focaccia, but they swap out easily. Sun-dried tomatoes, capers, cherry tomatoes, other fresh herbs, onions, garlic, or thinly sliced potatoes all work beautifully.

Equipment
There isn’t a mixer needed for this recipe as it’s easily stretched and folded by hand. You will need a baking pan or a cast-iron skillet to bake the focaccia bread in. This recipe is using 9x13inch USA metal baking pan.
Baker’s schedule
The full timings are in the recipe card, but here is the overall shape of the two days. These are flexible, so tweak them to fit around your day.
Day 1. Feed the starter, then mix and stretch the dough in a large bowl. The dough then goes into the fridge for a long cold proof overnight. This cold proof is the part that brings the flavor, so don’t skip it.
Day 2. Press the cold dough into an oiled pan, then leave it to rise until puffy. Dimple it, add your toppings, and bake.

How to make sourdough focaccia
- Feed your starter so it’s nice and active when you need it.
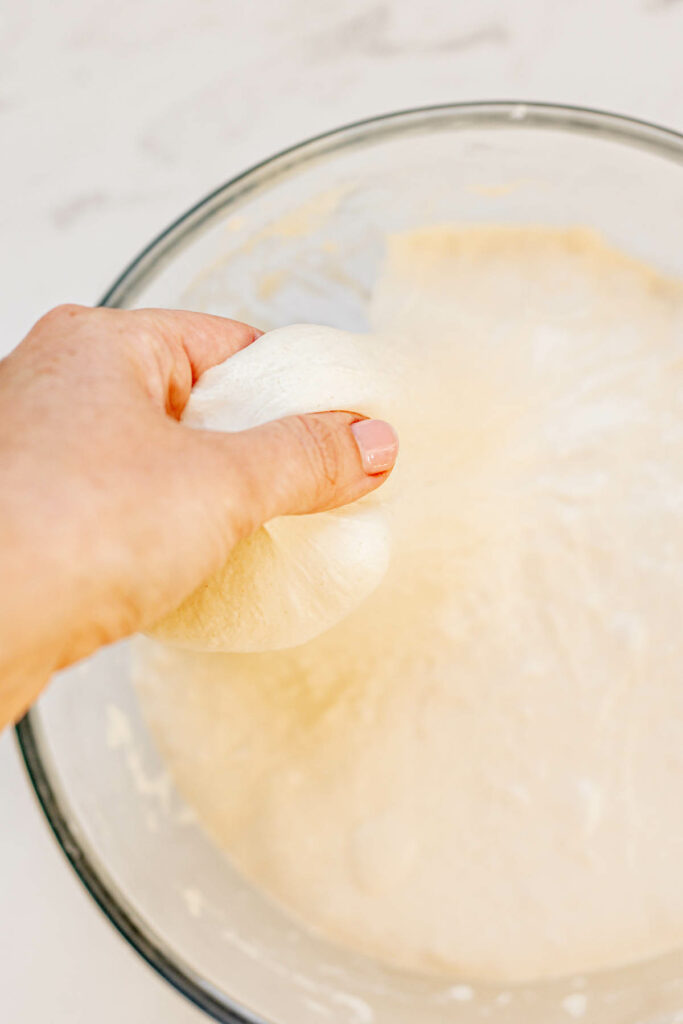
- In a large bowl, add water, sourdough starter, flour and salt. Use a rubber spatula or wooden spoon to combine it all together into a wet and shaggy dough.
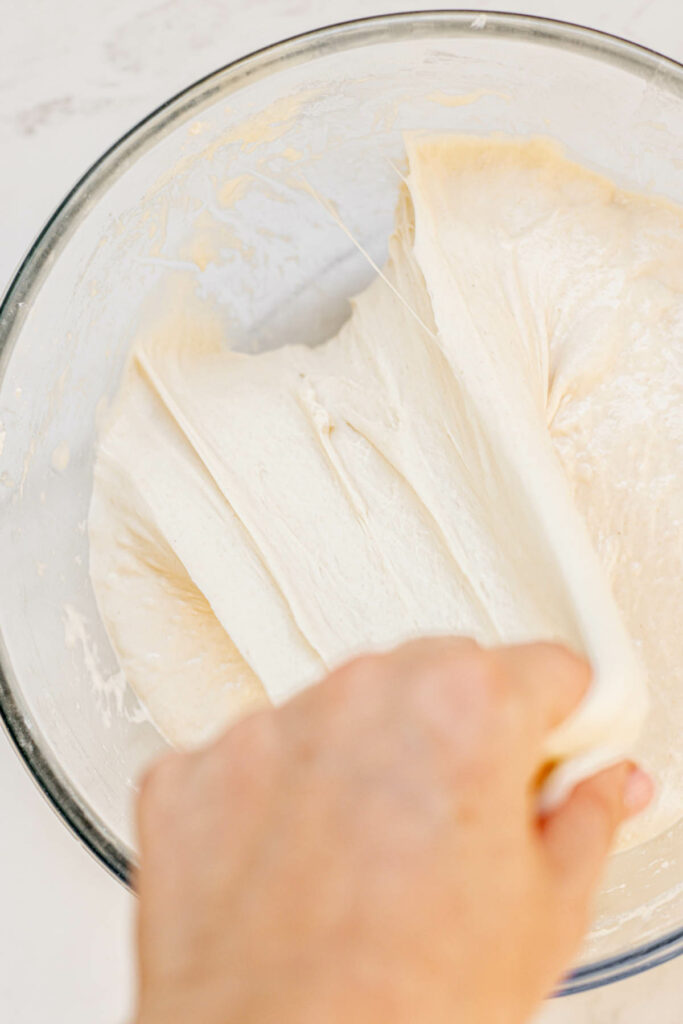
- Over a period of 2 hours, perform 4 sets of stretch and folds, one every 30 minutes.
- In each set, stretch and fold the dough over 4-5 times, turning the bowl each turn.
- The first set of folds will be very messy and the dough will tear. As time passes, the dough will become more and more elastic.
- Each time the dough sits, cover the bowl to stop the top of the dough from drying out.
Bulk fermenting
- Let the dough bulk ferment at room temperature until bubbly, then cover and refrigerate overnight.
Shaping
- Tip the cold dough into a well-oiled pan, rest for 10 minutes, then press it out to the edges with oiled fingers.

- Let it rise until jiggly and puffy, then dimple all over with oiled fingers, pushing right to the bottom.
Dimpling and topping
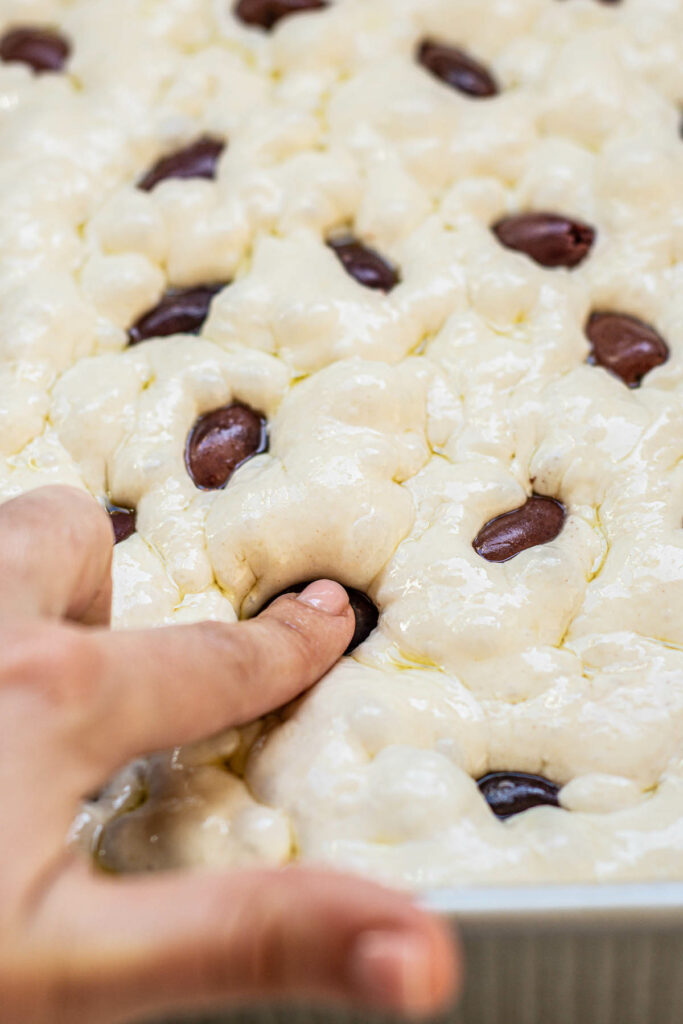
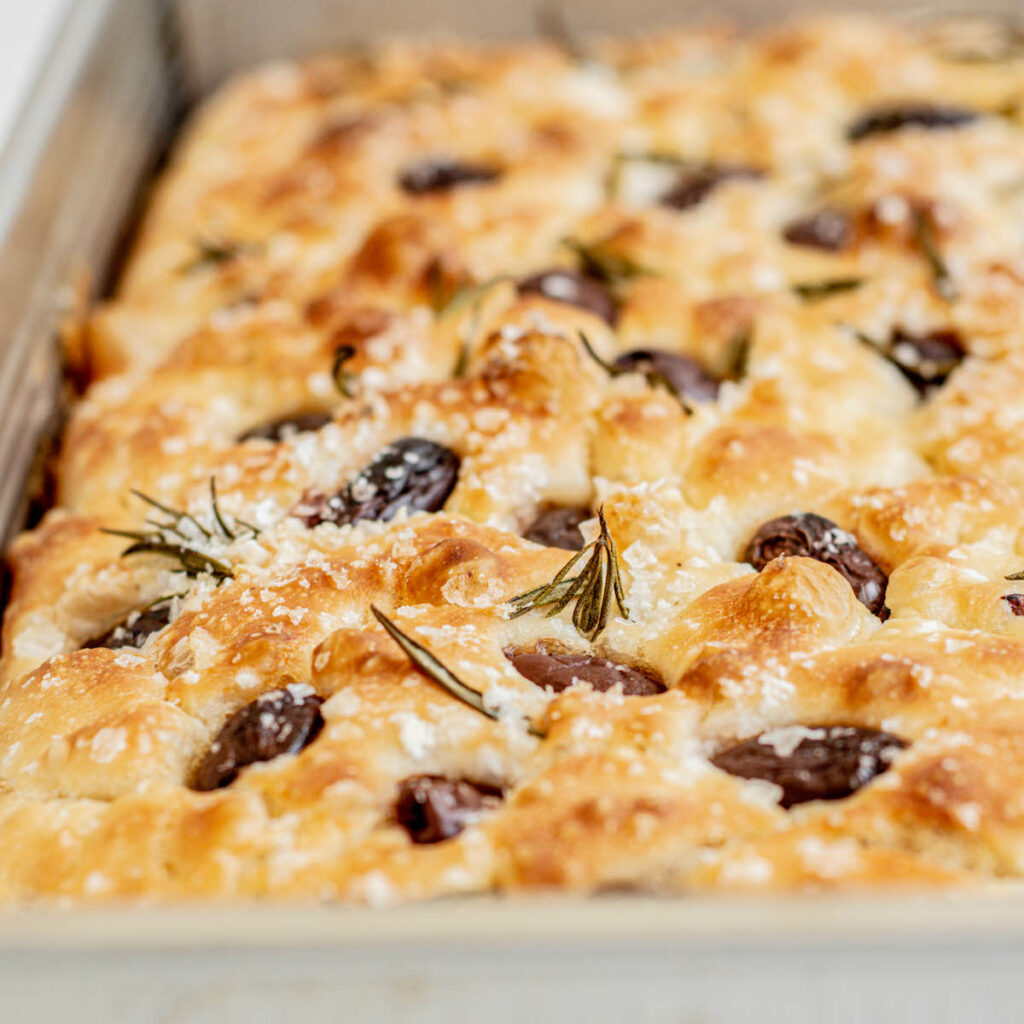
- Drizzle with olive oil and press in the olives and rosemary, and sprinkle with flaky salt.

- Press the olives quite deep into the dough so they don’t dry out.
Baking
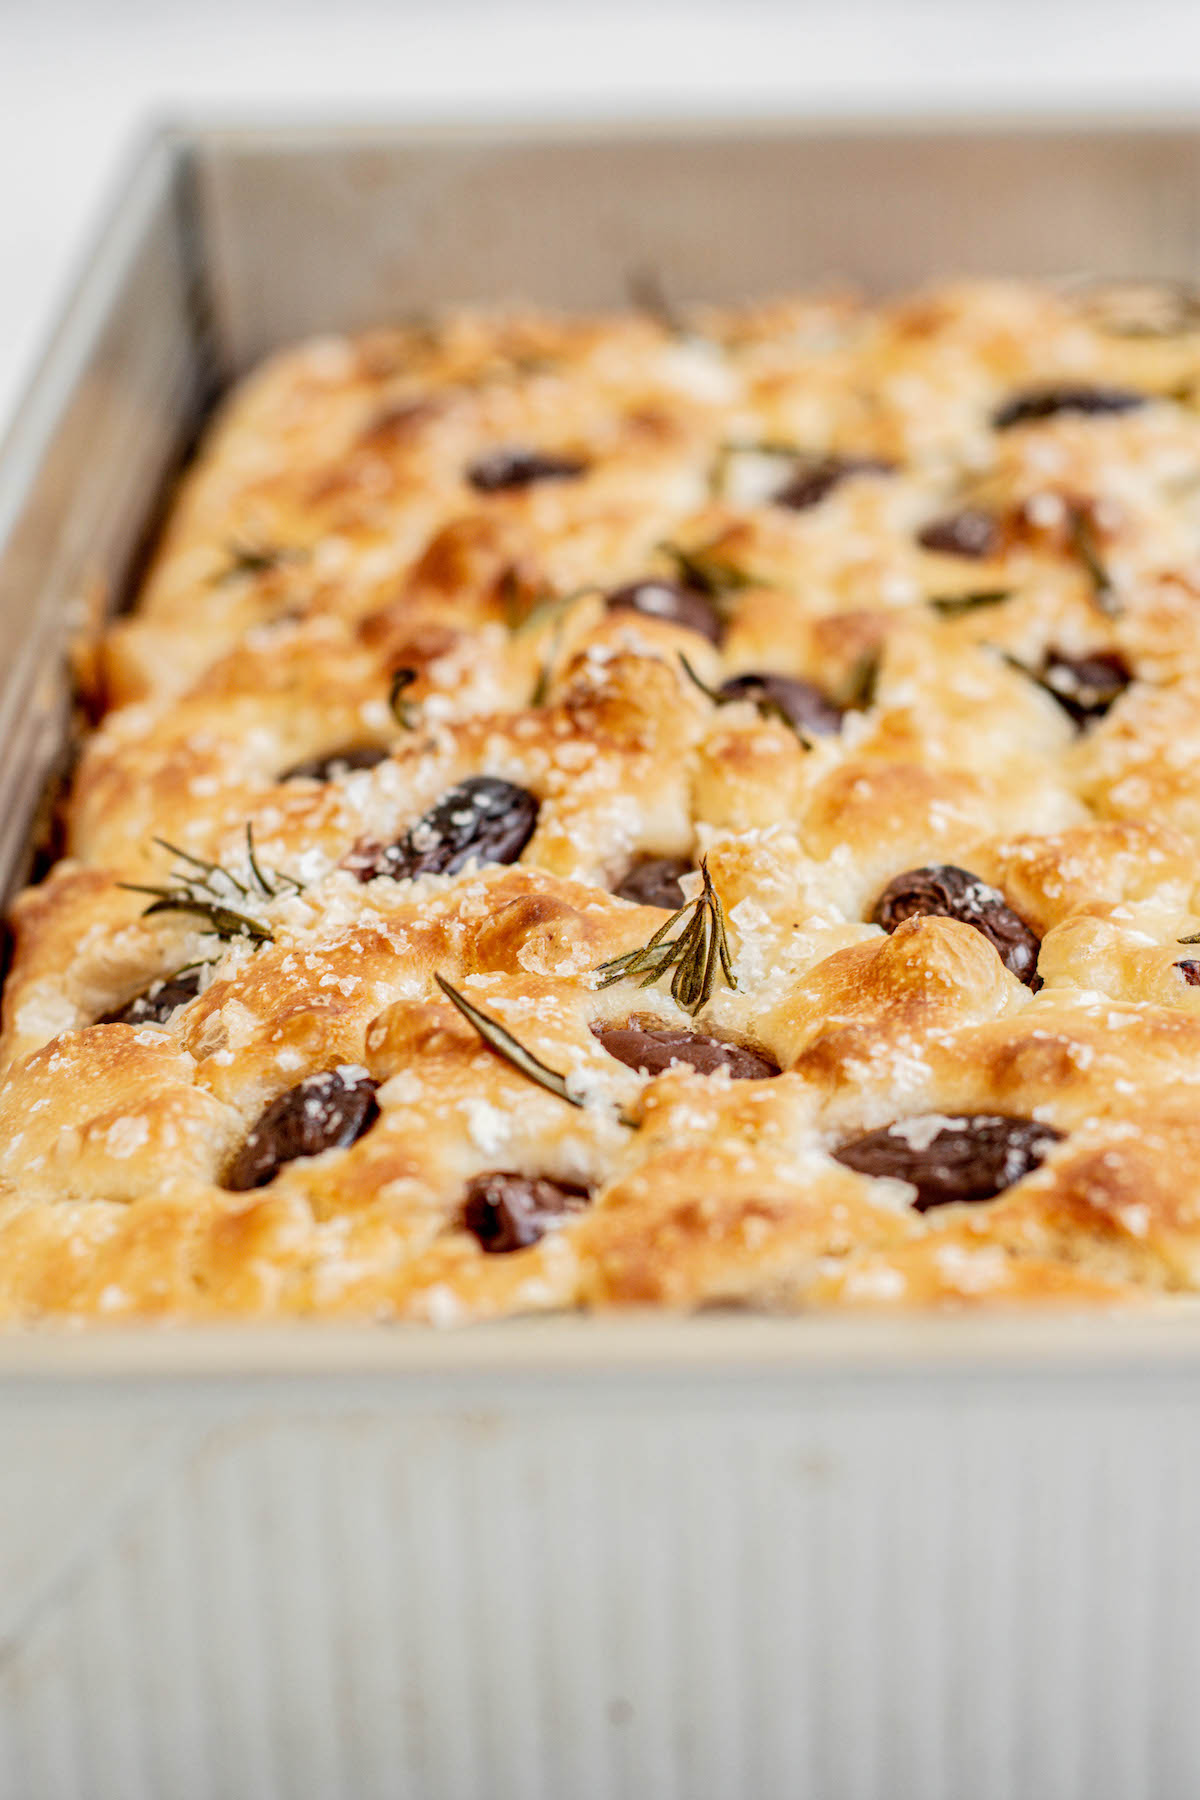
- Bake the focaccia until puffed and deep golden brown and the bread pulls away from the edges of the baking dish.

Topping ideas
Rosemary and olive is the classic, but the dough is super good with other toppings too!
- Sun-dried tomatoes
- Caramelized onion and goat cheese
- Basil pesto or sun-dried tomato pesto
- Thinly sliced potatoes
- Fresh cherry tomatoes and thinly sliced red onion
Tips
- Use enough oil. The crisp, fried base is the best part of focaccia, and that only happens with a genuinely generous amount of olive oil in the pan. This is not the place to be shy with it.
- Watch the dough, not the clock. Both rises depend heavily on your kitchen temperature. Too cold and the dough can be underproofed and leave you with a denser crumb. Too warm and it can overproof and lose its structure, so go by the visual cues: bubbly after the bulk ferment, jiggly and puffy before baking.
Serving and storing
Fresh focaccia is wonderful just as it is, with the salt, good olive oil, and herbs. It also splits beautifully for sandwiches, and the dough can be pressed out thinner to use as a pizza base.
Day-old focaccia rewarms well in the oven and makes a great bread for dipping into soups or mopping up pasta sauces. Store it wrapped or in an airtight container at room temperature for up to 3 days.
Related recipes
- Sun-Dried Tomato Focaccia
- Sourdough Ciabatta Sandwich Rolls
- Homemade Sourdough Bread
- Fluffy Sourdough Rolls
- The Best Garlic Bread Bites
- Homemade Sourdough Bagels
- The Guide to Sourdough Starter
- Sourdough Starter Not Rising (Plus Other Common Issues)
Easy Sourdough Focaccia Recipe
Ingredients
Sourdough starter
- 25 g sourdough starter
- 50 g all-purpose flour
- 50 g water
Dough
- 530 g all-purpose flour
- 480 g water
- All the sourdough starter around 100g
- 8 g salt
Toppings
- Kalamata olives
- Fresh rosemary
- Flaky salt
Instructions
- In the morning or the evening before, feed your sourdough starter and let it rise until doubled in size.
- In a large bowl, combine the water, sourdough starter, flour, and salt. Use a rubber spatula or wooden spoon to bring it together into a wet, shaggy dough.
- Over a period of 2 hours, perform 4 sets of stretch and folds, one every 30 minutes. To stretch and fold, lift one side of the dough up and pull it over itself, then turn the bowl and repeat on the next side, continuing until you have worked all the way around. That is one set. The first set will be shaggy and the dough will rip easily, but as you work through the sets the gluten develops and the dough gains strength.
- Each time the dough sits, cover the bowl with a damp kitchen towel to stop the surface from drying out.
Bulk fermenting
- After the final stretch and fold, let the dough rise at room temperature for around 2 to 4 hours. You should see signs of bulk fermentation, with plenty of bubbles appearing throughout the dough.
- This depends on the temperature of your kitchen. A cooler kitchen means the dough needs to sit a little longer. You can create a warm spot by placing a mug of boiled water in a turned-off oven.
- Transfer the dough to an airtight container, or cover the bowl with plastic wrap.
- Place it in the fridge overnight, or for up to 36 hours for an extra-long ferment.
Shaping
- Drizzle the bottom of a 9×13 inch baking pan with a generous amount of olive oil. You can line the pan with parchment paper as well if you think it might stick.
- Transfer the cold dough to the oiled pan.
- Let it rest for 10 minutes, then oil your fingers and press your fingertips into the dough to spread it out into the pan. If the dough resists stretching, let it rest and try again in a few minutes.
- Let the dough rise in a warm place until it is jiggly and puffy. This can take anywhere from 3 to 5 hours depending on the room temperature.
- Keep the dough covered at this stage, or brush it with extra-virgin olive oil to stop the top from drying out.
Dimpling and topping
- Preheat the oven to 450°F / 230°C.
- Drizzle a little olive oil over the surface of the dough, then use oiled fingers to create deep dimples all over the top, pushing all the way down. Do this across the entire surface.
- Press sliced olives deep into the dough. Press in the rosemary leaves. Sprinkle the dough with flaky salt.
- Bake the focaccia for around 25 to 30 minutes, until puffed, deep golden brown, and pulling away from the edges of the pan. If the top starts browning too much, loosely cover it with aluminum foil.
- Remove it from the oven and let it sit for 3 to 4 minutes. Carefully lift it out of the pan, then let it cool further on a wire rack before serving.


I’m reading your recipe (I’m interested in bettering my recipe)and am surprised there’s no garlic listed. Do you not use it. I’m asking as I love the added flavor. I poke cloves into the dimples but the tend to burn. Any ideas for me?
I’m reading your recipe (I’m interested in bettering my recipe)and am surprised there’s no garlic listed. Do you not use it? I’m asking as I love the added flavor. I poke cloves into the dimples but they tend to burn. Any ideas for me?
Hey Rachel, if I was to add garlic to it, I would cook some off in olive oil, then let that oil cool and use that to dimple the focaccia (but hold back the cooked garlic.) And then after baking, I would scoop over the cooked garlic. I do this for my garlic bread bites and it works to bring in the garlic without it burning 🙂
Tried today and it SLAYYYED! Thank you!!
This recipe is beautiful. The focaccia was fluffy and perfect in texture. I added a 1/4 cup of hemp hearts to the dough for texture and protein. I’ve been using a recipe I got from a recipe book written by a professional chef, and it just wasn’t great, so this will definitely be my go-to from now on. Thanks!
So happy you loved it!!
Hello- I have a fed starter sitting on my counter right now and want to make this it looks real good , how much would I add to your recipe in grams ?
around 100g active starter 🙂
Came here to ask this too! Thanks!
I am currently doing stretch and folds and my dough is really wet and sticky. Not shaggy at all. Normal?
Yup the dough is very very wet through out. It should gain a bit of a strength as they do on though, but stay very wet
thank you for the recipe! I don’t have a 9×13 pan but could i use a 9×9 cake pan? or would it be better to use a pan that’s larger than 9×13?
Hey it would make quite a thick bread in a 9×9 pan so if you have one that’s just slightly larger than a 9×13 pan i’d probably use that!
You might need to check the coding on your recipe. Your are showing up and not hidden.
Thank you so much for letting me know!!
So delicious, great texture! Easy to follow!
This is my fave focaccia recipe. I make it almost weekly and my family devours it. Just so you know — Pinterest is marking all of your links as spam so you might want to file an appeal against that! 🙁 had to find your recipe the old fashioned way even though you’d think I had it memorized by now!
Thank you so much for letting me know!! I will definitely be appealing that! So happy though that you love the recipe and found it this way instead 😀