
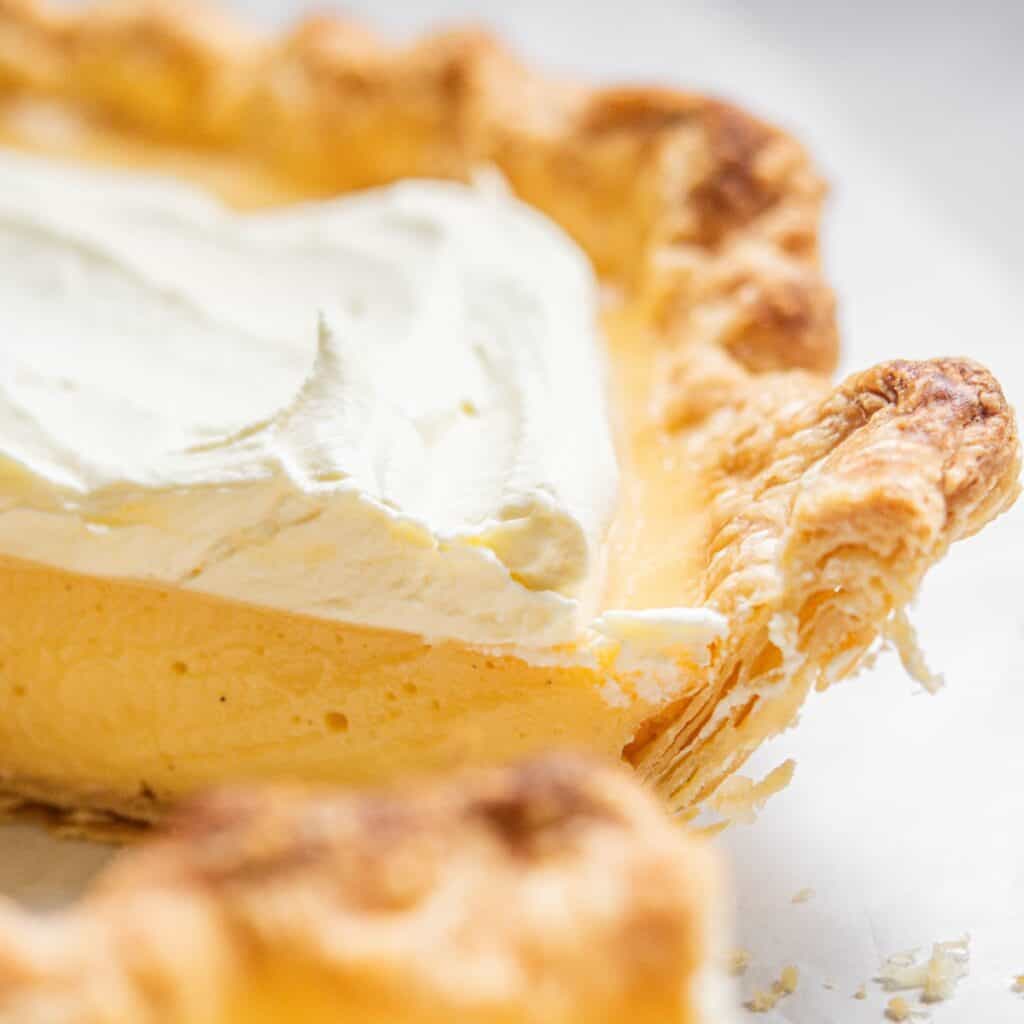
Flaky Butter Pie Crust
This is a flaky butter pie crust recipe that’s easy to make by hand. It’s super light and flaky and full of layers and the perfect base for sweet and savory pies.
Don’t be intimidated by making your own crust. It’s not hard, and I’ve got a few key steps to ensure you get a perfect crust each time! I always add some acidity to my crust, whether it be yogurt or lemon juice, and I laminate it.
Laminated pie crust
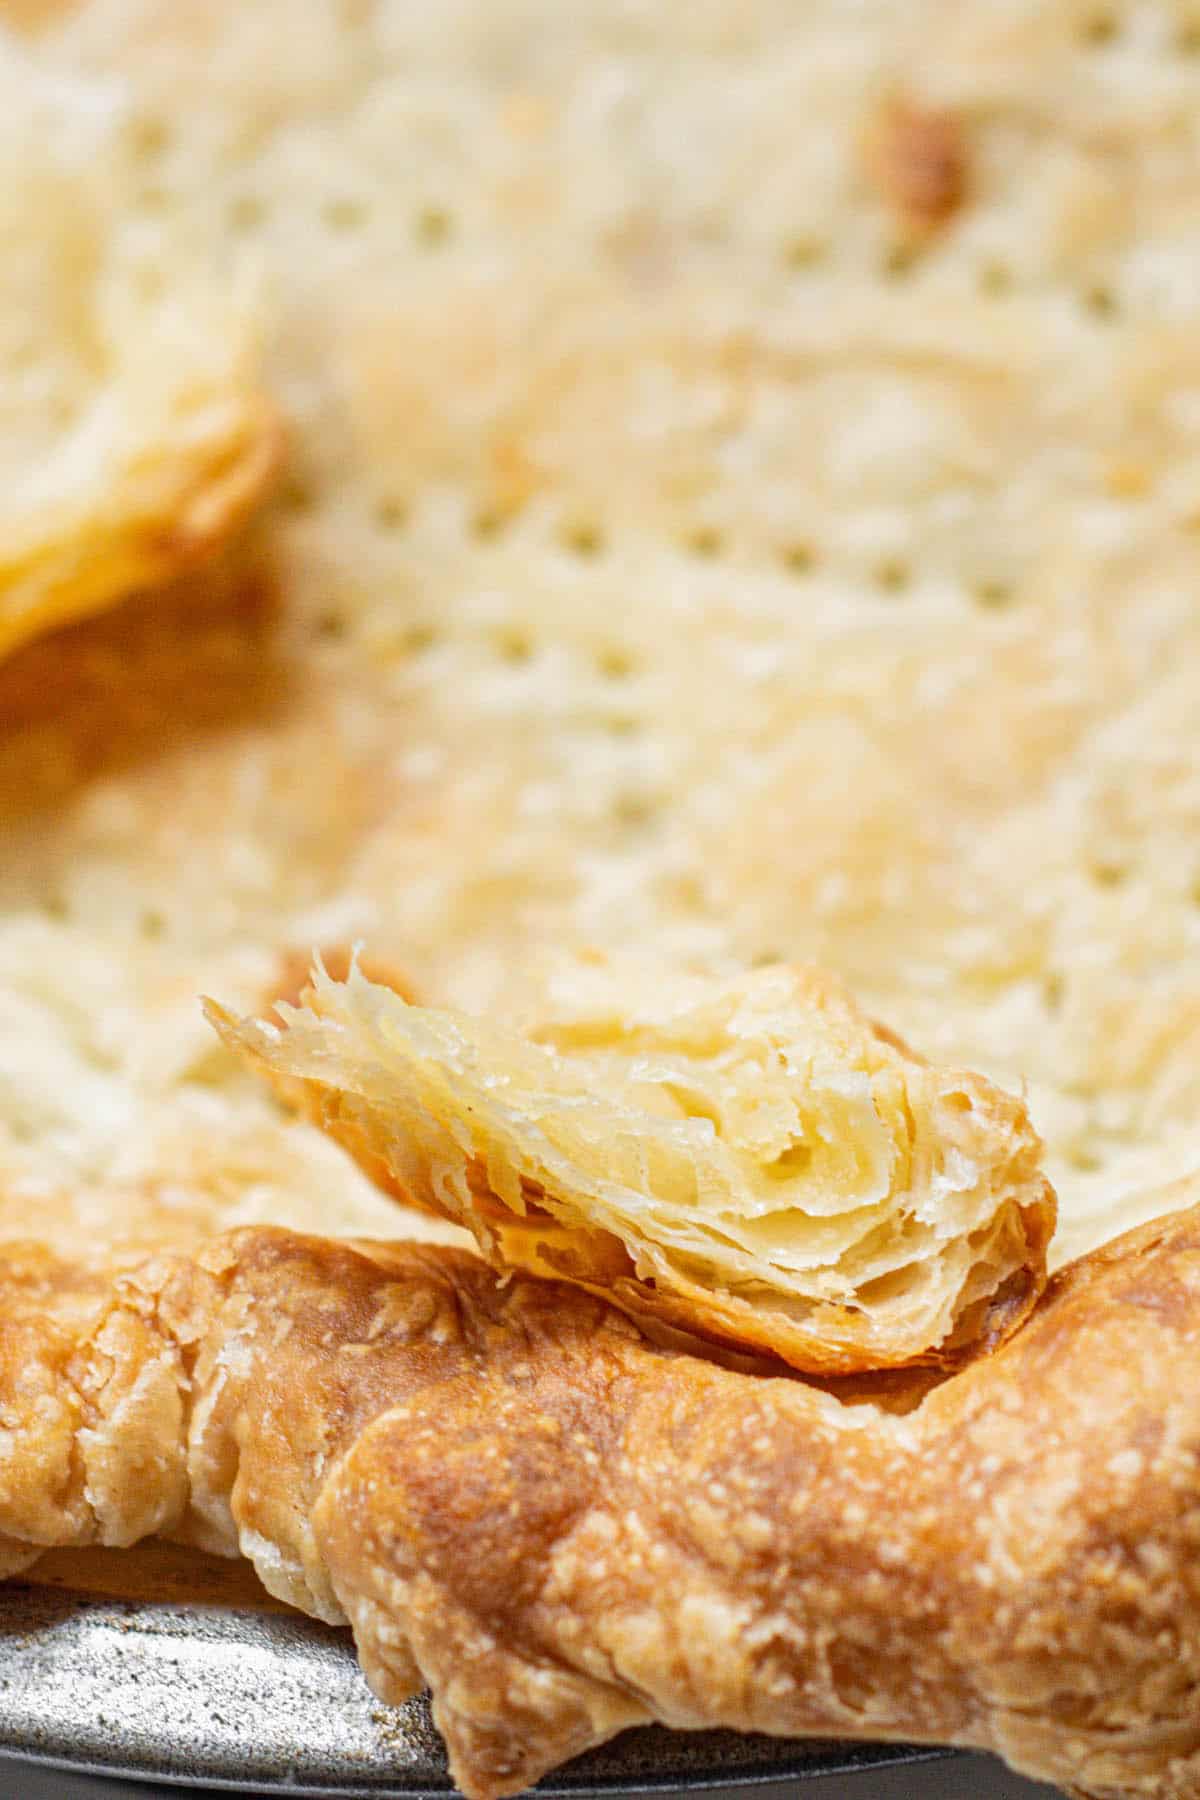
Laminating involves folding butter into the dough in a way that creates alternating layers of butter and dough. As it bakes, the water in the butter turns to steam, pushing the layers apart to form a light, flaky crust. It’s the same method used to make croissants or puff pastry but made simple for pie dough.
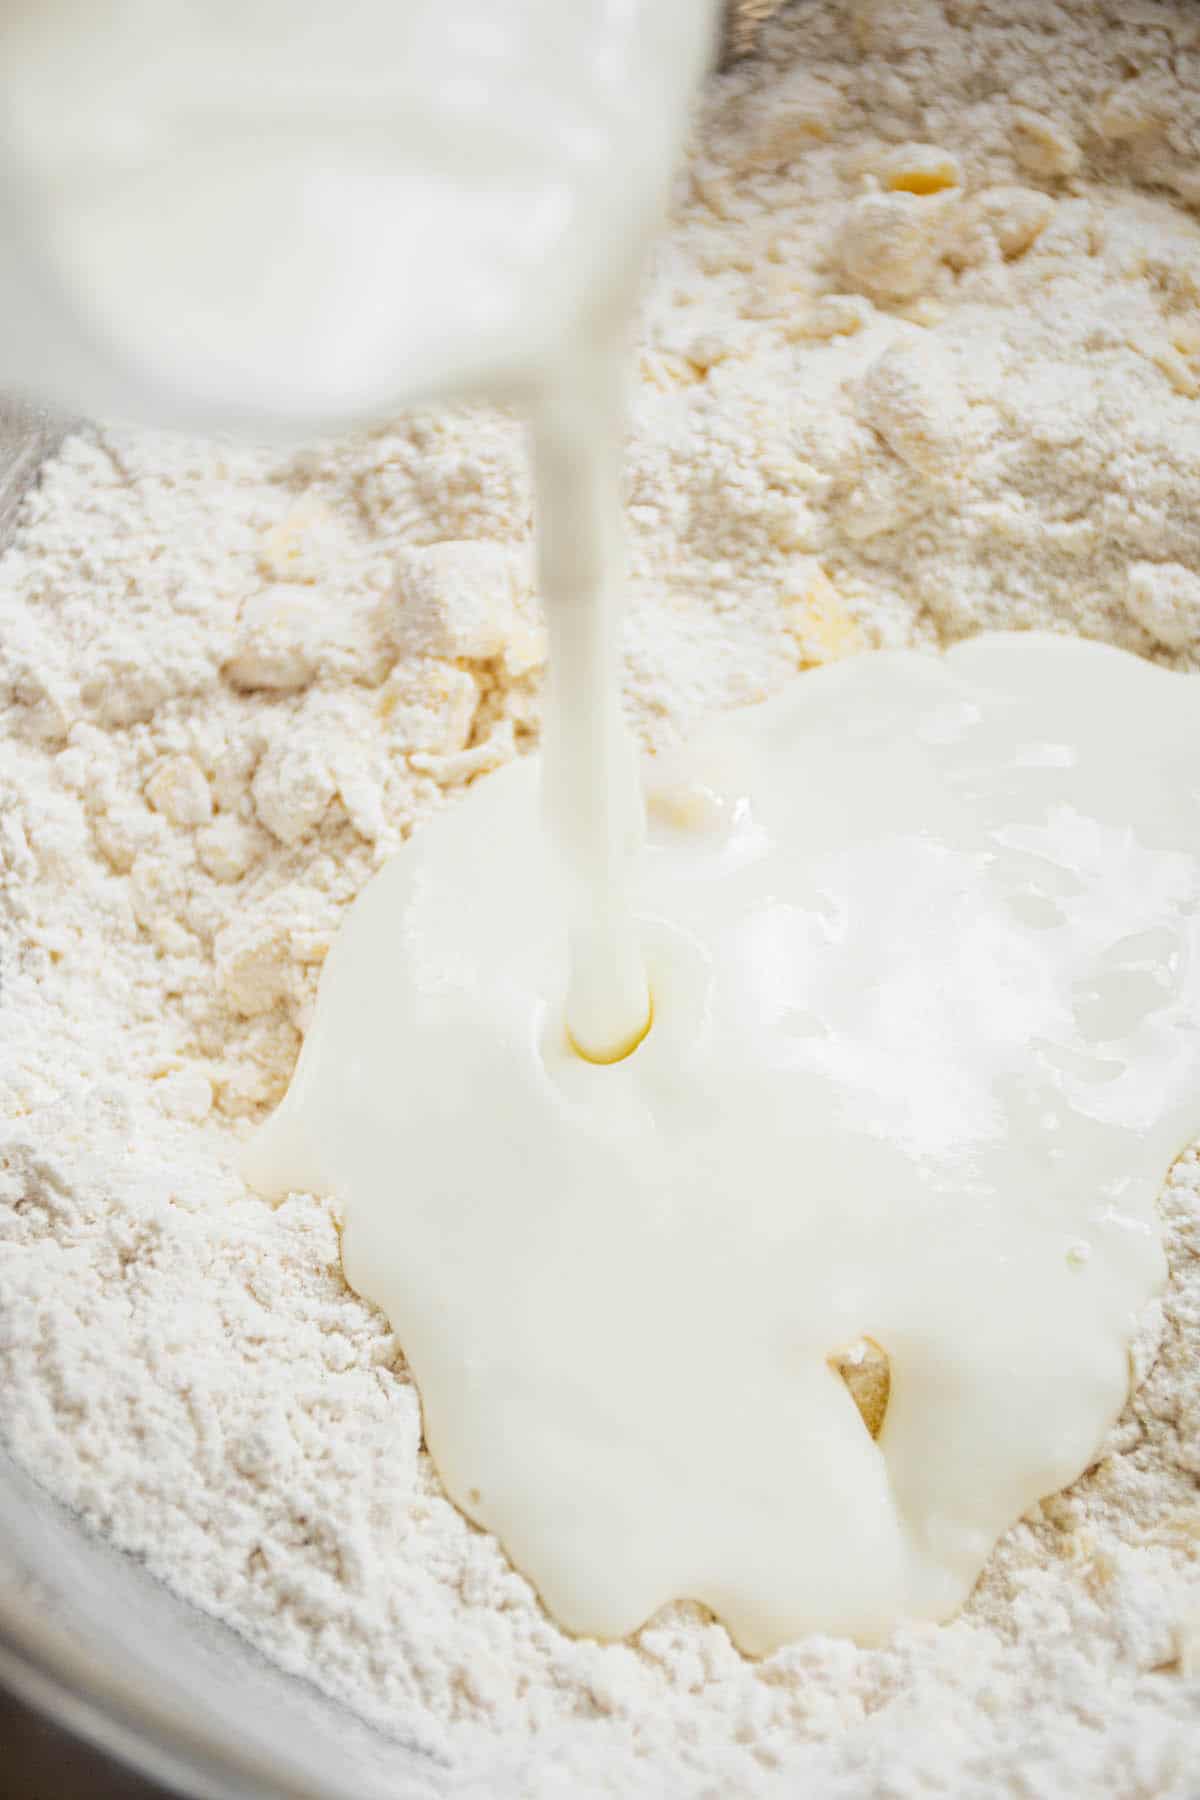
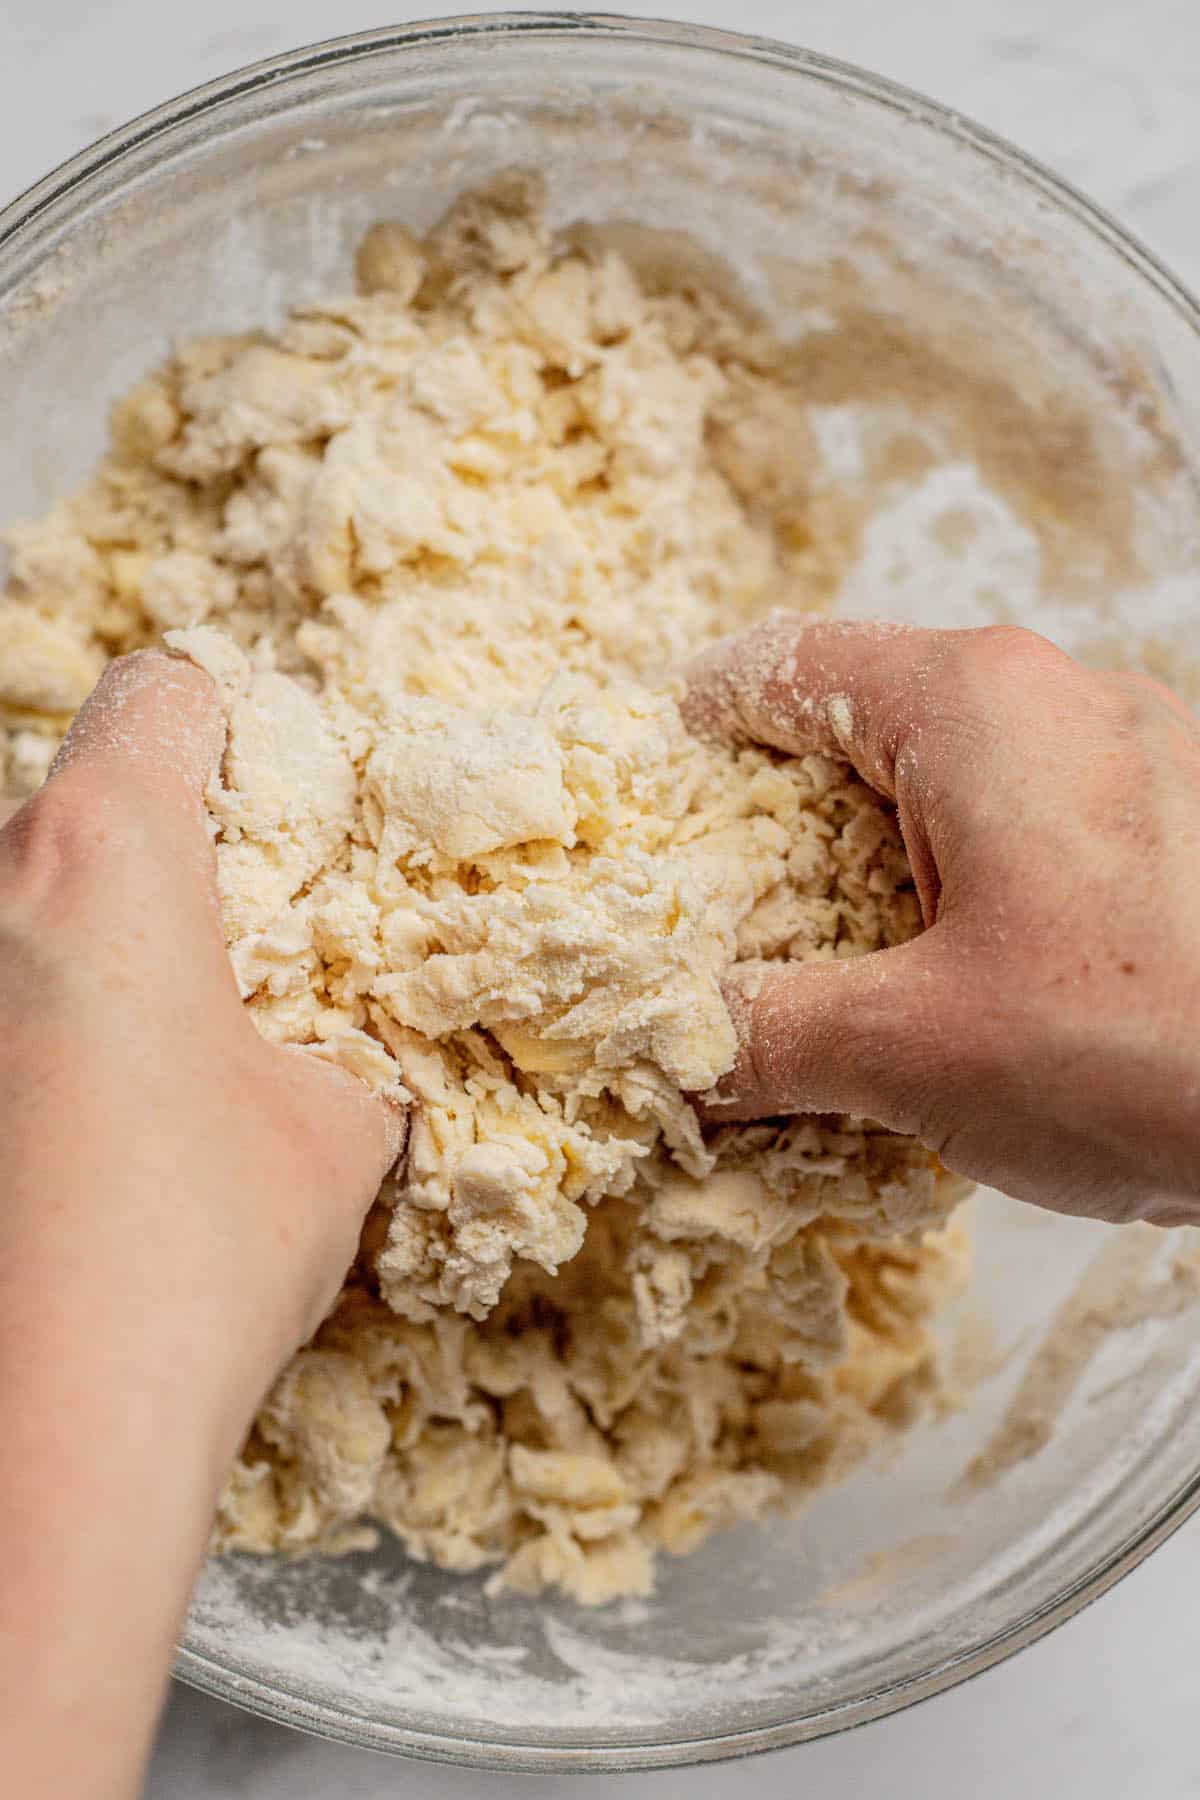
In this recipe, cold chunks of butter are cut into the dough until it’s broken into coarse breadcrumb pieces with a few pea-sized butter pieces in there too. I always cut my butter by hand with a pastry cutter because it lets me control the size of the butter pieces in there. A food processor can really quickly cut them too small. When the pastry hits the oven, the water in the butter evaporates and creates air pockets in the pastry.
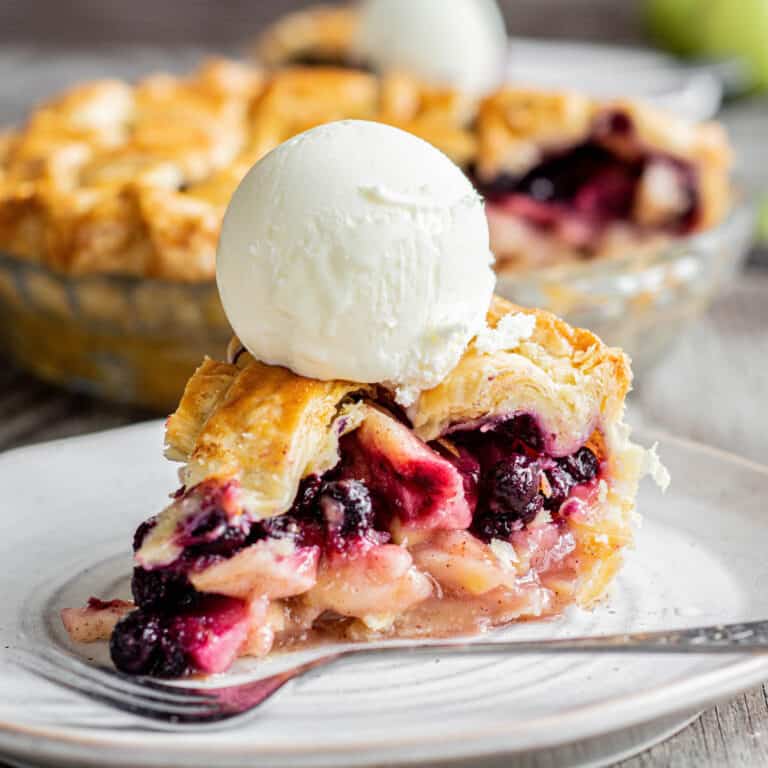
This pie crust is great to keep in the freezer for any time you’re baking a pie. Use it for pecan pie, old-fashioned lemon pie, or blackberry hand pies!
The Ingredients and why
- Butter. You can use salted butter or unsalted butter but a good quality butter is best. The added salt component in the recipe can be slightly adjusted if salted butter.
- Flour. All-purpose flour is my go to!
- Sugar and salt. The sugar is optional, but together with the salt, it enhances the crust flavor
- A bit of acidity. There are lots of options for this. You can use yogurt, lemon juice, or vinegar.
- Ice-cold water – just a little bit to help bring the dough together.
Top tips for achieving the perfect flaky crust
- Keep the butter cold. Keeping the butter cold at all times is essential. Using cold yogurt will help with that too. If the butter melts into the dough, you won’t get the reaction of the water evaporating in the oven, and won’t be flaky.
- Consider shortening. If you are in a hot environment, you may want to swap half the butter for shortening. While butter makes a flakier crust with more flavor, shortening is easier to work with as it has a higher melting point than butter.
- Make the pie crust dough by hand. A food processor might save time, but cutting the butter by hand makes a superior crust. There is the risk of cutting the butter too small when using a food processor, which won’t make it as flaky.
- Handle the dough gently. Bring the dough together with just enough liquid without working it too much. Once a dough forms, roll it into a rectangle, then fold it into layers like a pamphlet. This process is similar to lamination in inverted puff pastry and makes a flakier crust.
- Don’t add too little or too much water. Dough hydration is essential. Too much water and you’ll get gluten formation that’ll make your crust tough. Not enough water or too much flour will make your dough crumbly and impossible to roll out. Find that perfect balance where the dough stays together when pressed but isn’t sticky or dry.
- Rest the dough. And speaking of balance, don’t forget to give your dough some rest time. Two hours is ideal for relaxing the gluten and making your crust tender and delicious. And if you’re not ready to bake just yet, freeze that dough for future use!
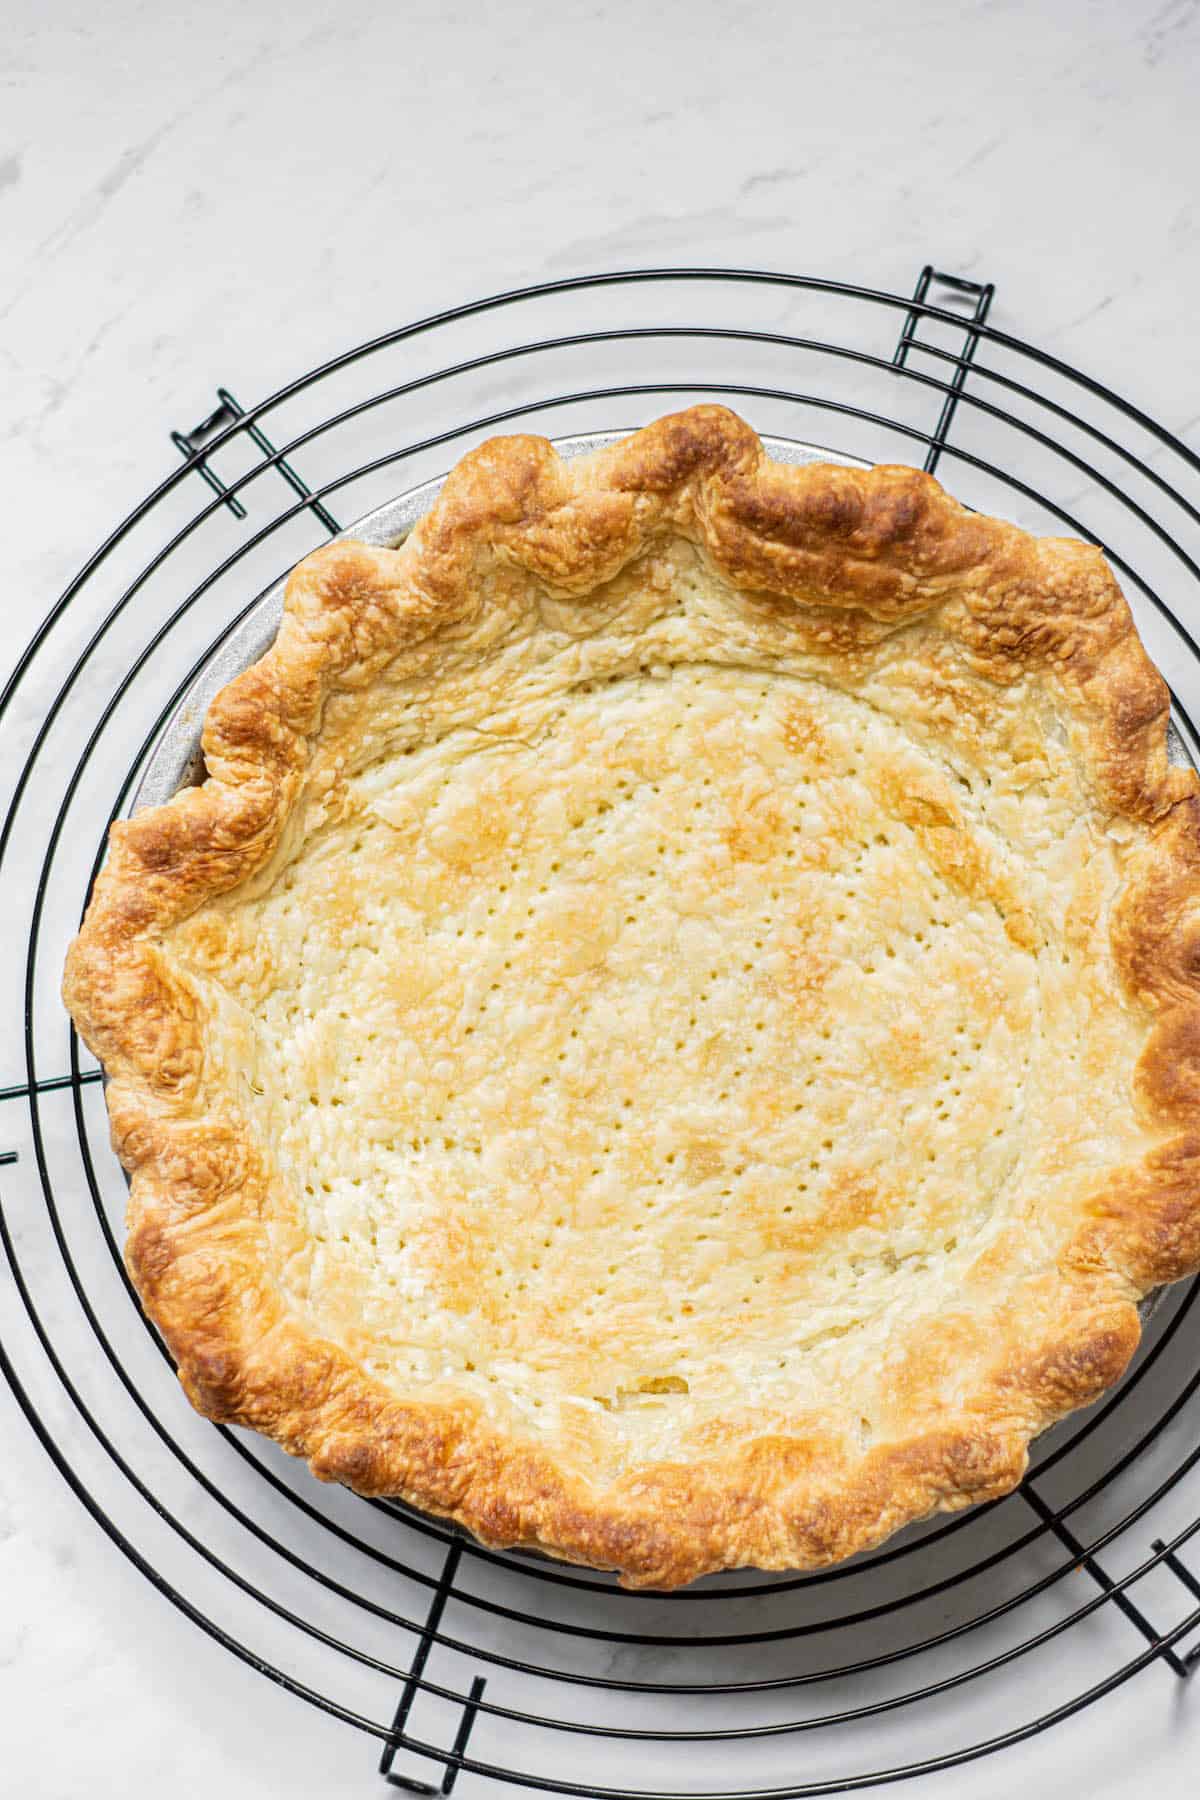
- Bake the pie crust properly. Properly baking the pie crust is essential to achieving a flaky texture. You want it to be nice, crisp, and flaky, so follow the recipe and bake it perfectly. And voila! You’ll have a pie crust that’s flaky, delicious, and ready to be filled with all your favorite goodies.
- Don’t skimp on pie weights when blind baking. This one is often overlooked but very important, especially for a flaky crust like this. You need enough weight to hold down the pie dough and stop it slipping down the edges. The weights should fill up the whole dish. I use around 1kg of rice as my pie weights.
Instructions and Photos
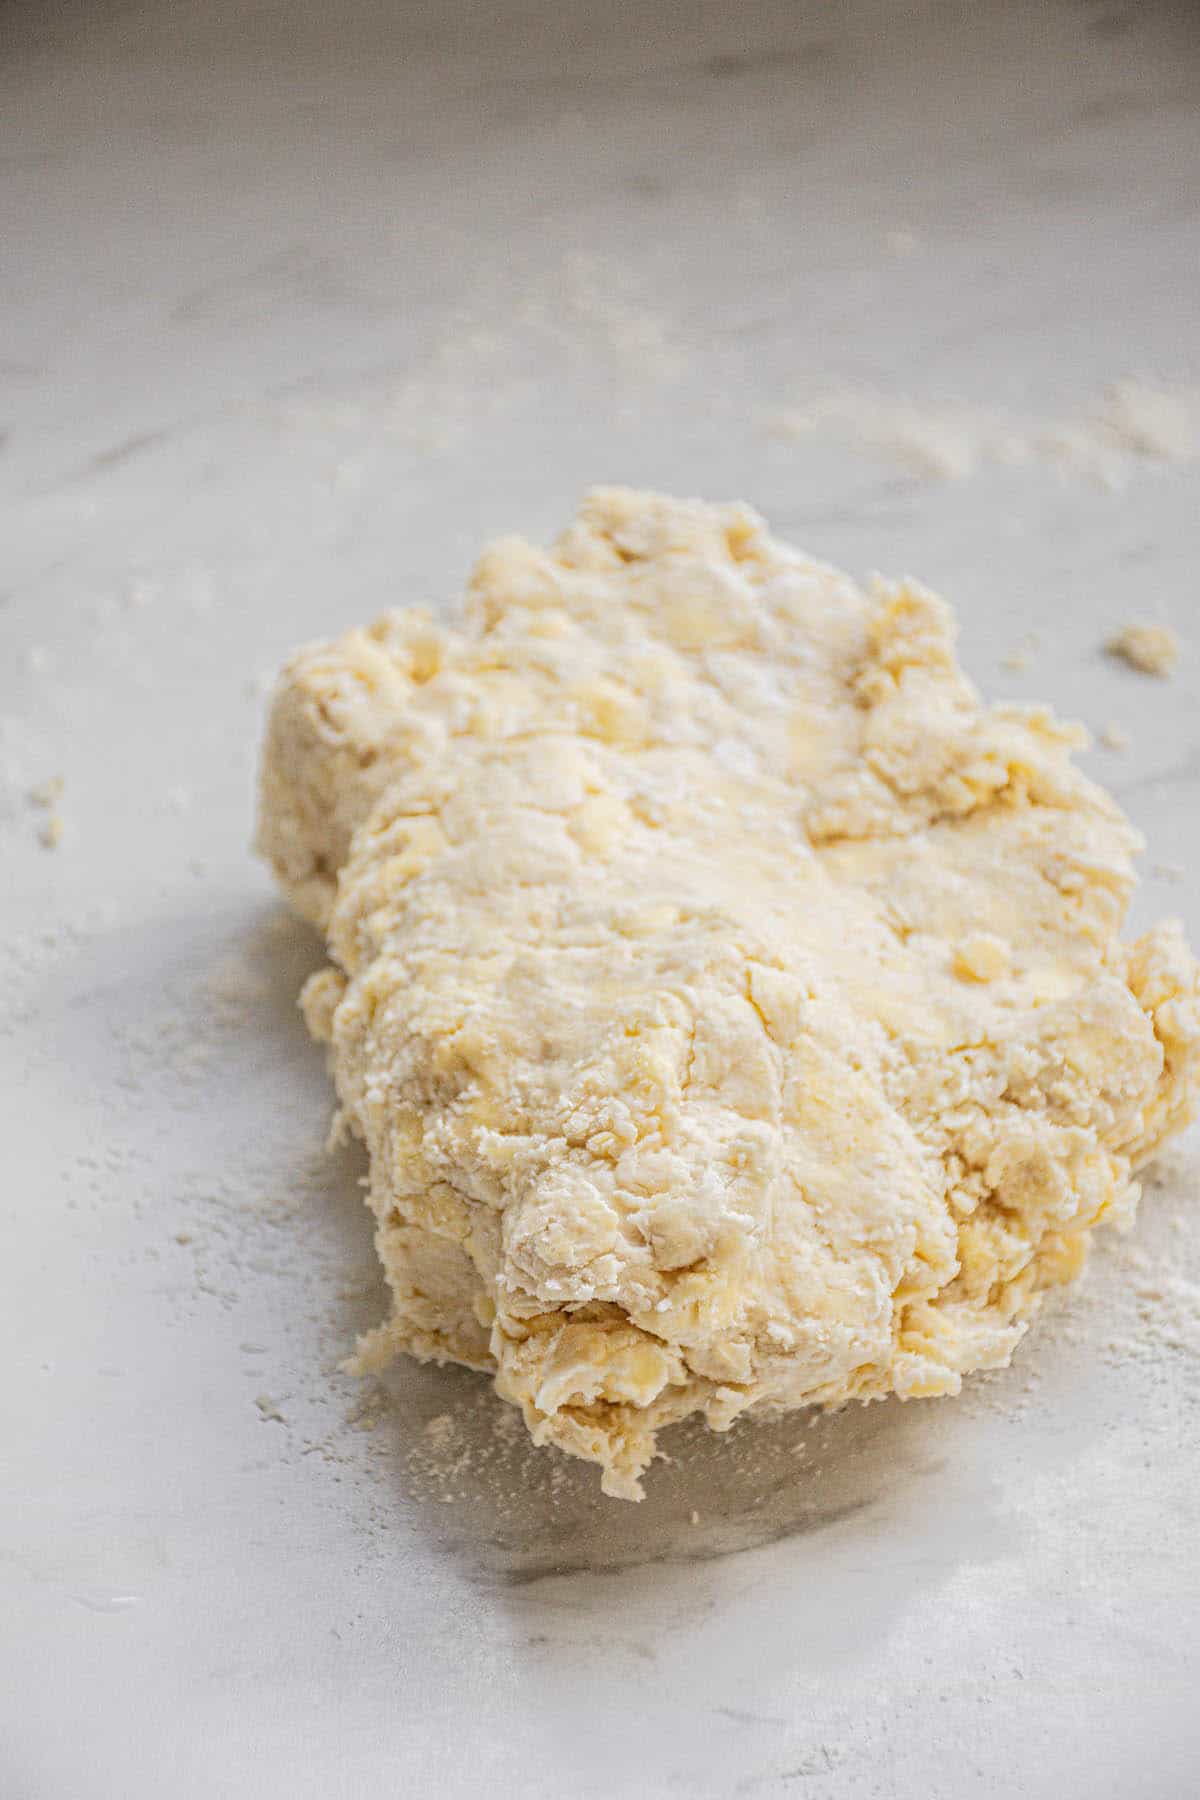
- Make the dough: Combine flour and salt in a large bowl. Add cold, cubed butter and cut it into the flour using a pastry cutter or your fingers until the mixture resembles coarse crumbs. Gradually add ice water and vinegar, 1 tablespoon at a time, until the dough just comes together. Shape it into a rectangle, wrap in plastic, and chill for 30 minutes.


- Roll and fold: Roll the chilled dough into a rectangle on a floured surface. Fold a third over the middle, then fold the remaining third on top, like folding a letter.
- Chill and repeat: Rotate the dough 90 degrees, roll it out into another rectangle, and repeat the folding process. Chill the dough for 30 minutes between folds to keep the butter firm.
- Roll and use: After the final fold, roll the dough to your desired thickness and shape it to fit your pie dish. Chill for 30 minutes before baking to ensure the butter remains cold.


Rolling a single pie crust
Here are the steps to rolling out one portion of this pie dough which fits a 9 inch pie pan. Remember, always work with a cold dough so the butter doesn’t melt!
- Lightly dust your work surface with flour. Place the chilled pie dough on the floured surface and evenly sprinkle some flour on top. Press down gently with a rolling pin, starting from the center of the dough and working your way out.
- Rotate the dough 90 degrees after each pass to ensure a nice and even circular shape. Continue doing this until you get a crust thickness of about 1/6-inch, around 1 inch (3 cm) larger than your pie plate.
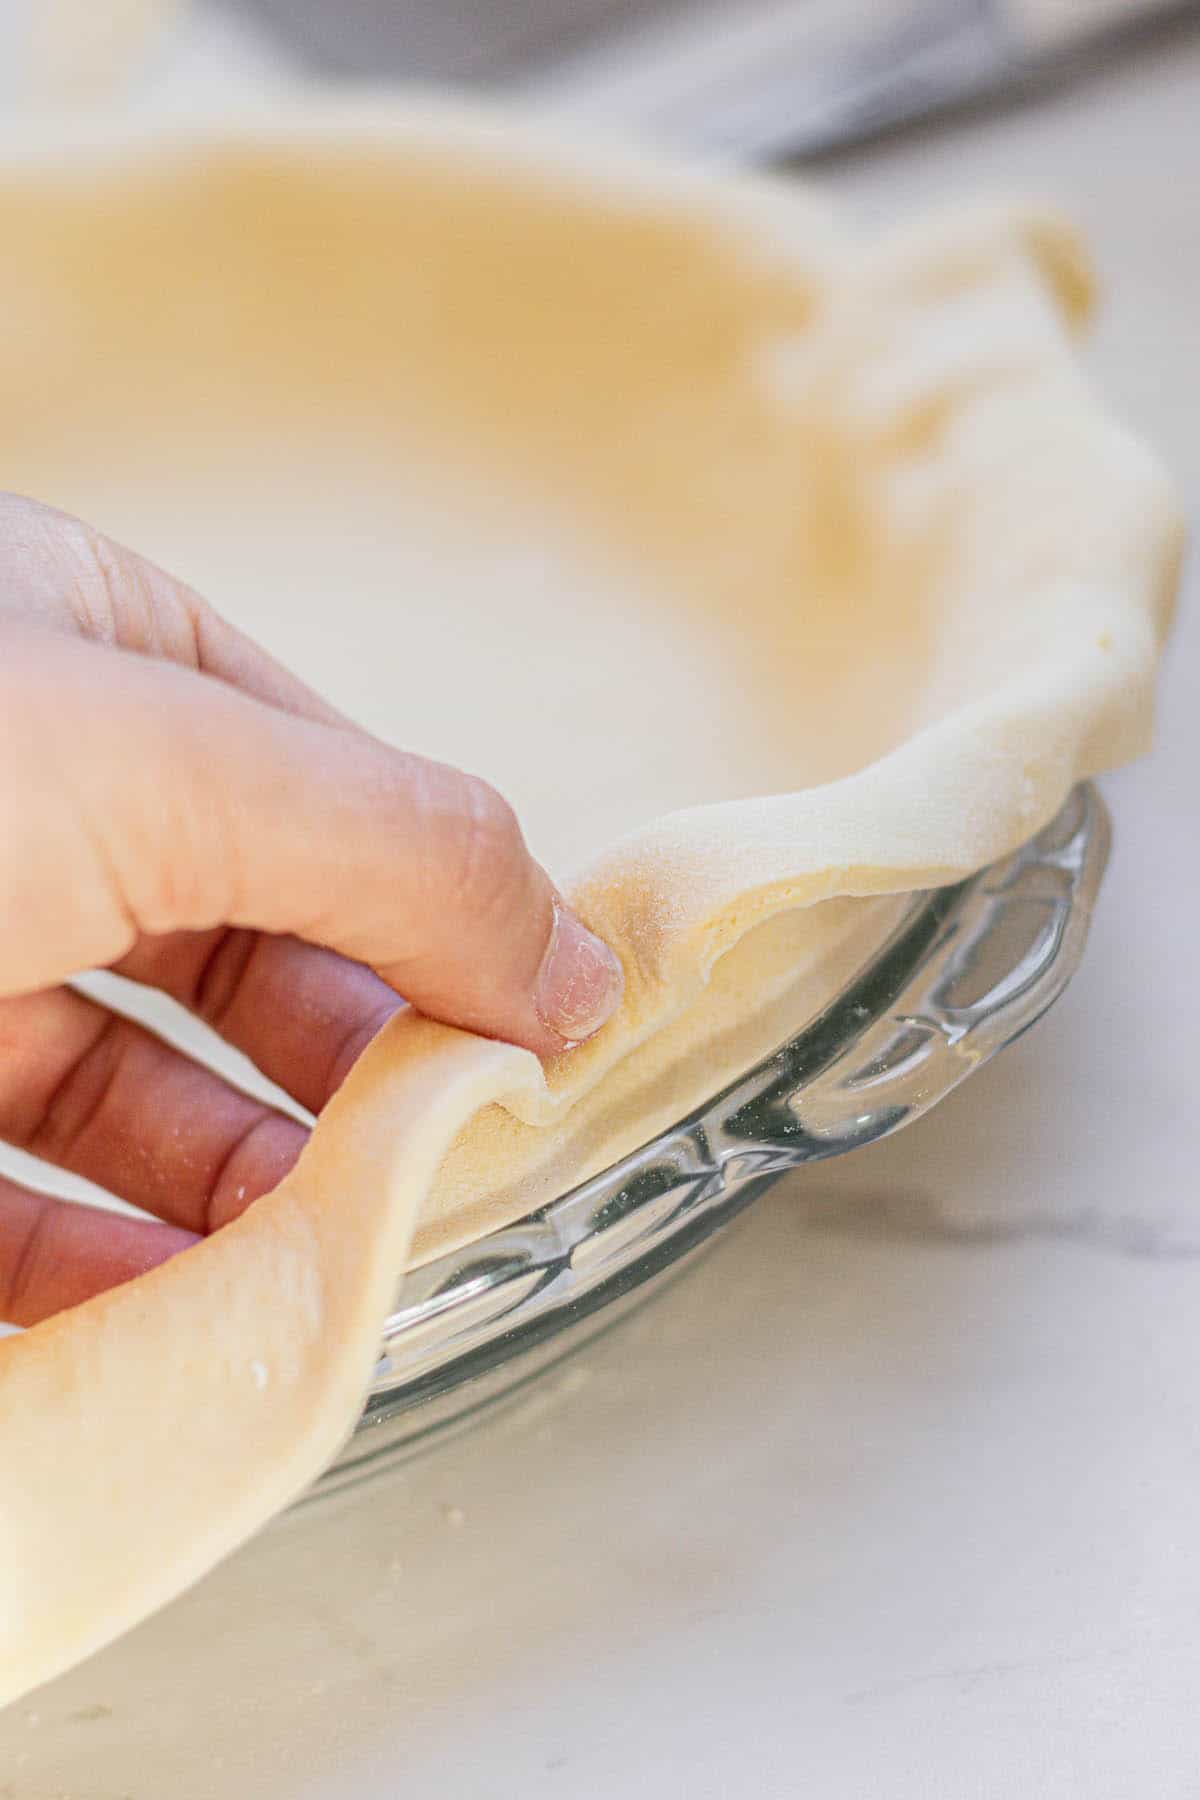
- Once the dough is rolled out, gently place it into the pie dish, ensuring it is centered. Press the dough lightly against the bottom and sides of the pie pan. Trim any excess dough hanging over the edge, leaving about a 1/2 inch (1.2 cm) overhang. Tuck the overhang under itself, creating a thicker edge.
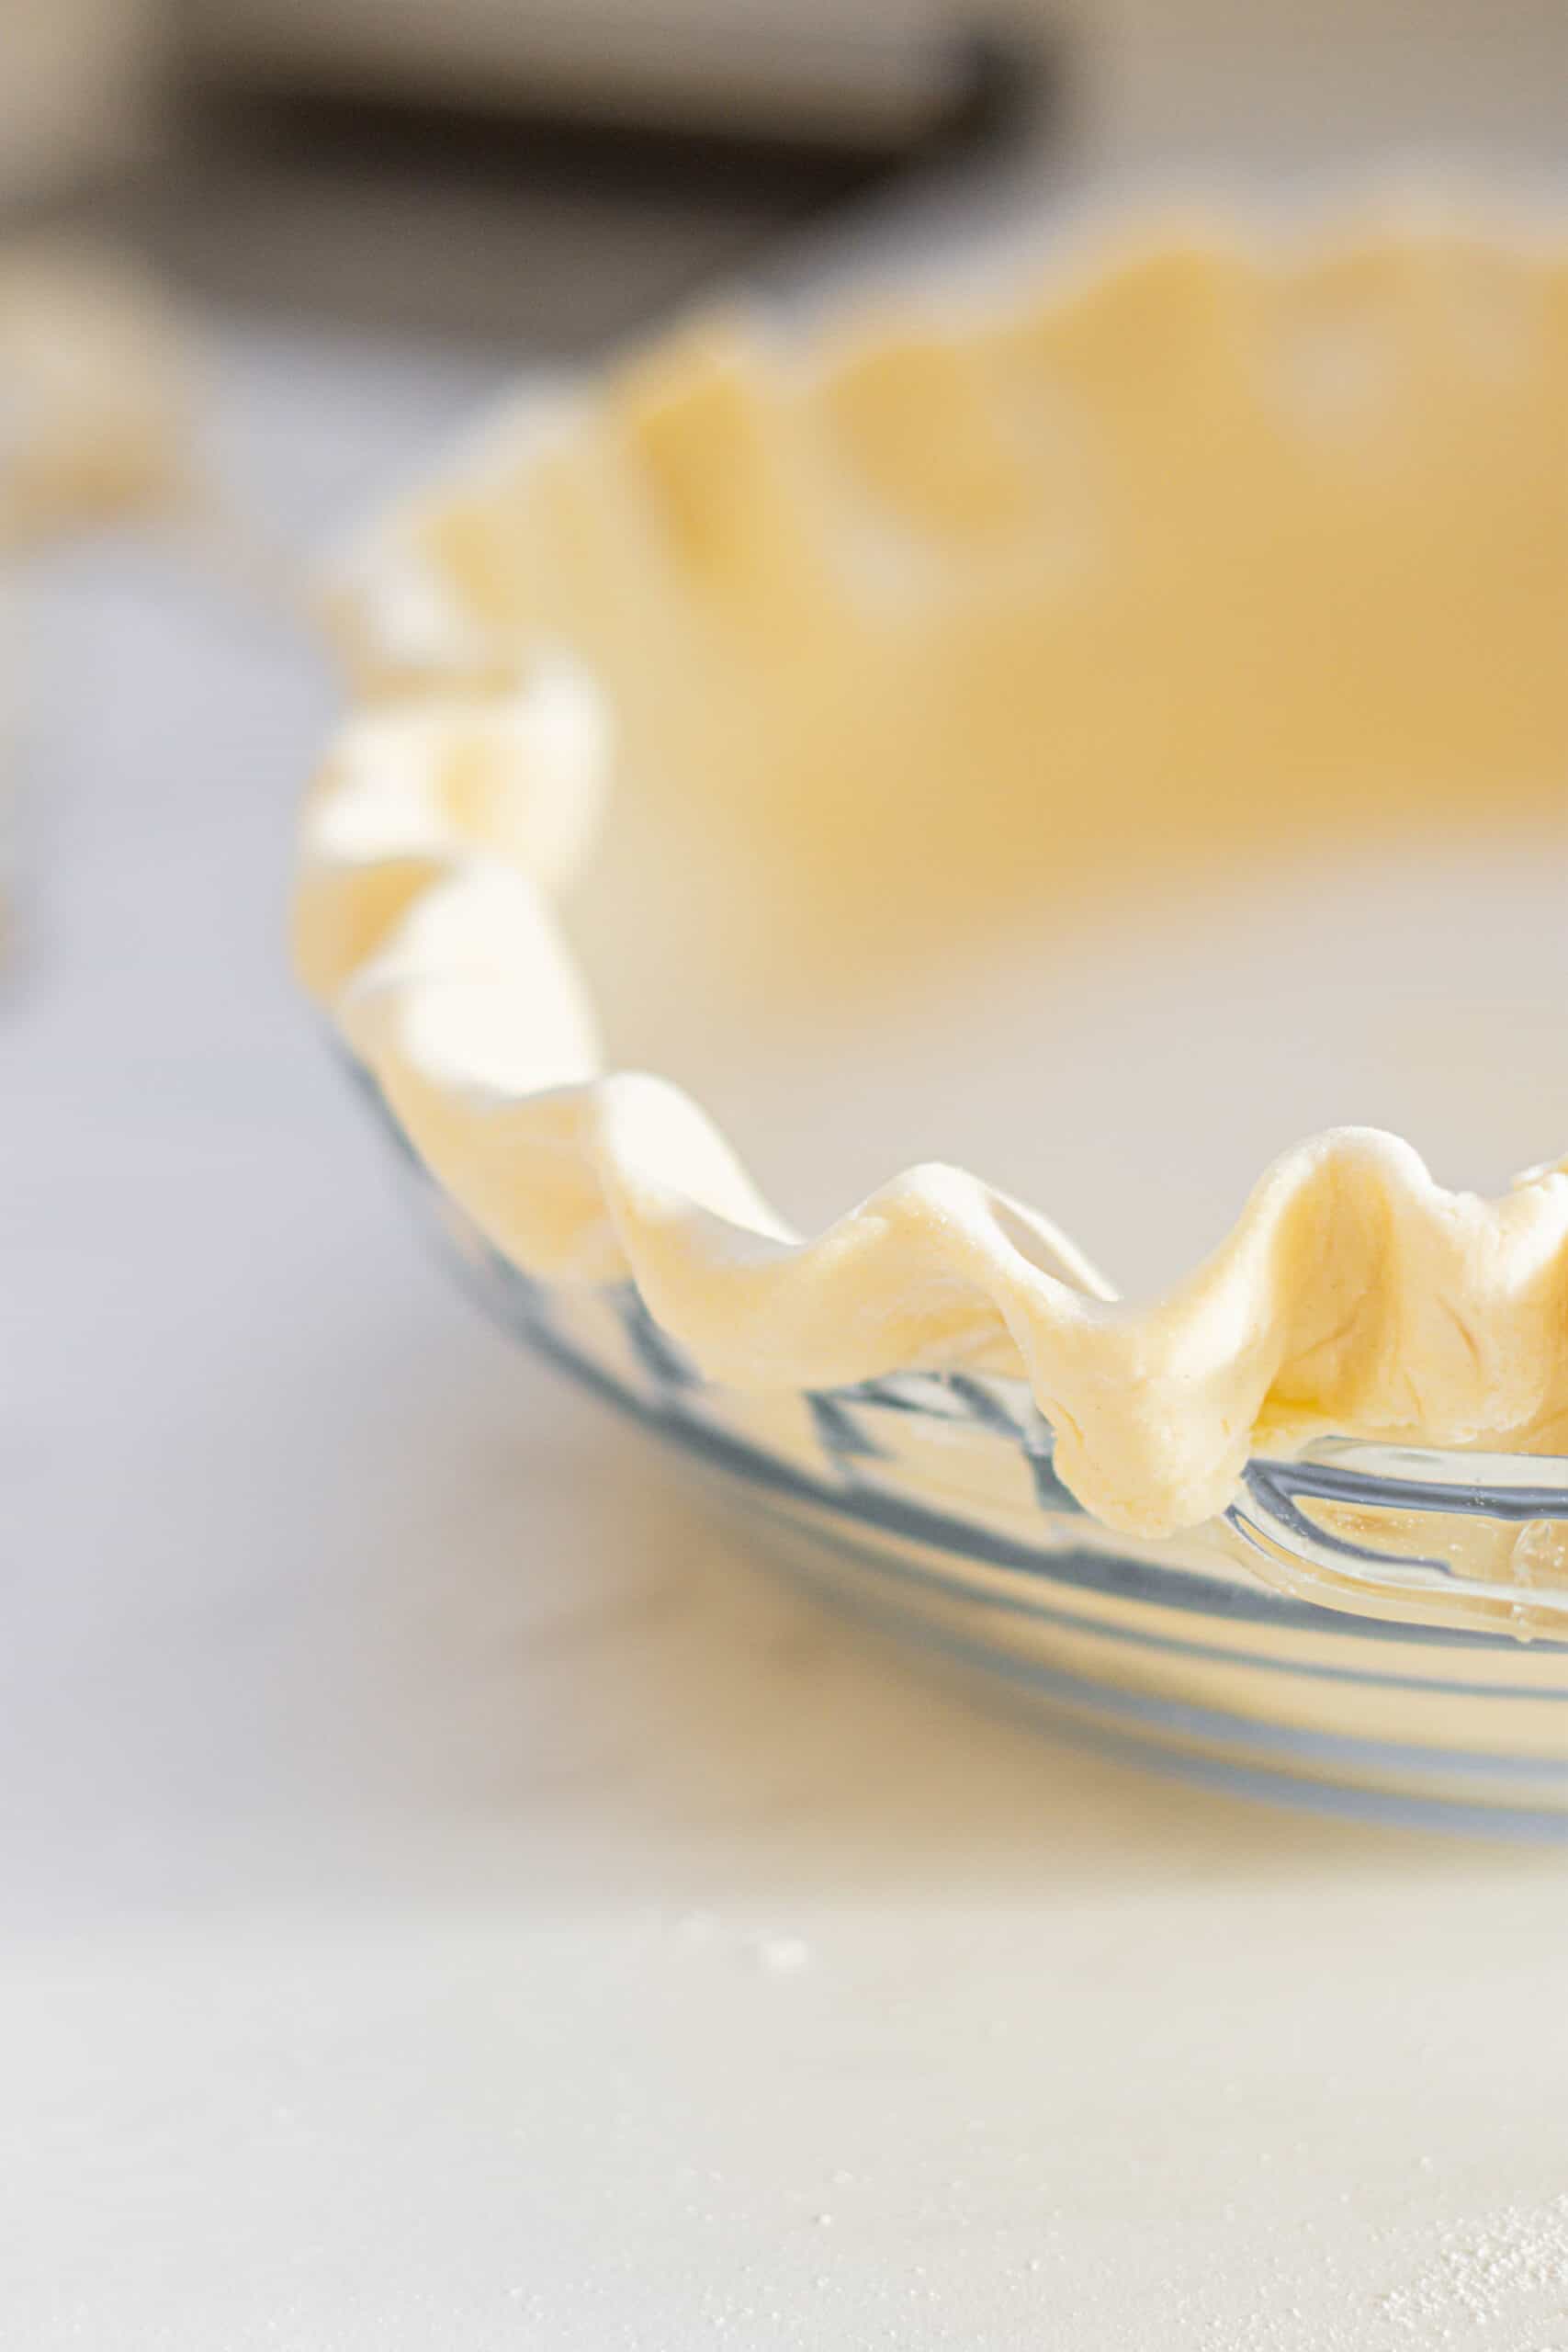
- Fluting the dough – To flute the dough, use your thumb and index finger to create a V-shape on the outer edge while pressing your other index finger from the inside of the crust to form a U-shape between the V.
Par-baking a single pie crust
Some pie crusts require par-baking before filling to ensure the crust’s texture remains crisp and flaky. This involves blind baking the crust until it’s partially cooked. It’s often used for a single-crust pie recipe with a pie filling with a shorter baking time than the crust. See my post on Blind-baking a pie crust for all you need to know.
Blind baking (par-baked): Roll out the pie dough, fit it into your pie dish, and chill. Line with parchment paper, add pie weights, and bake at 425°F (220°C) for 10-15 minutes until the edges are lightly golden. Remove the pie weights, dock the pie dough and bake for 2-3 more minutes to dry the bottom.
Blind baking (fully baked): After blind baking, remove the pie weights and dock the pie dough. Lower the oven temperature to 375°F (190°C) and return the crust to the oven. Bake for an additional 15-20 minutes, or until the crust is fully golden and cooked through. Cool completely before adding the filling.
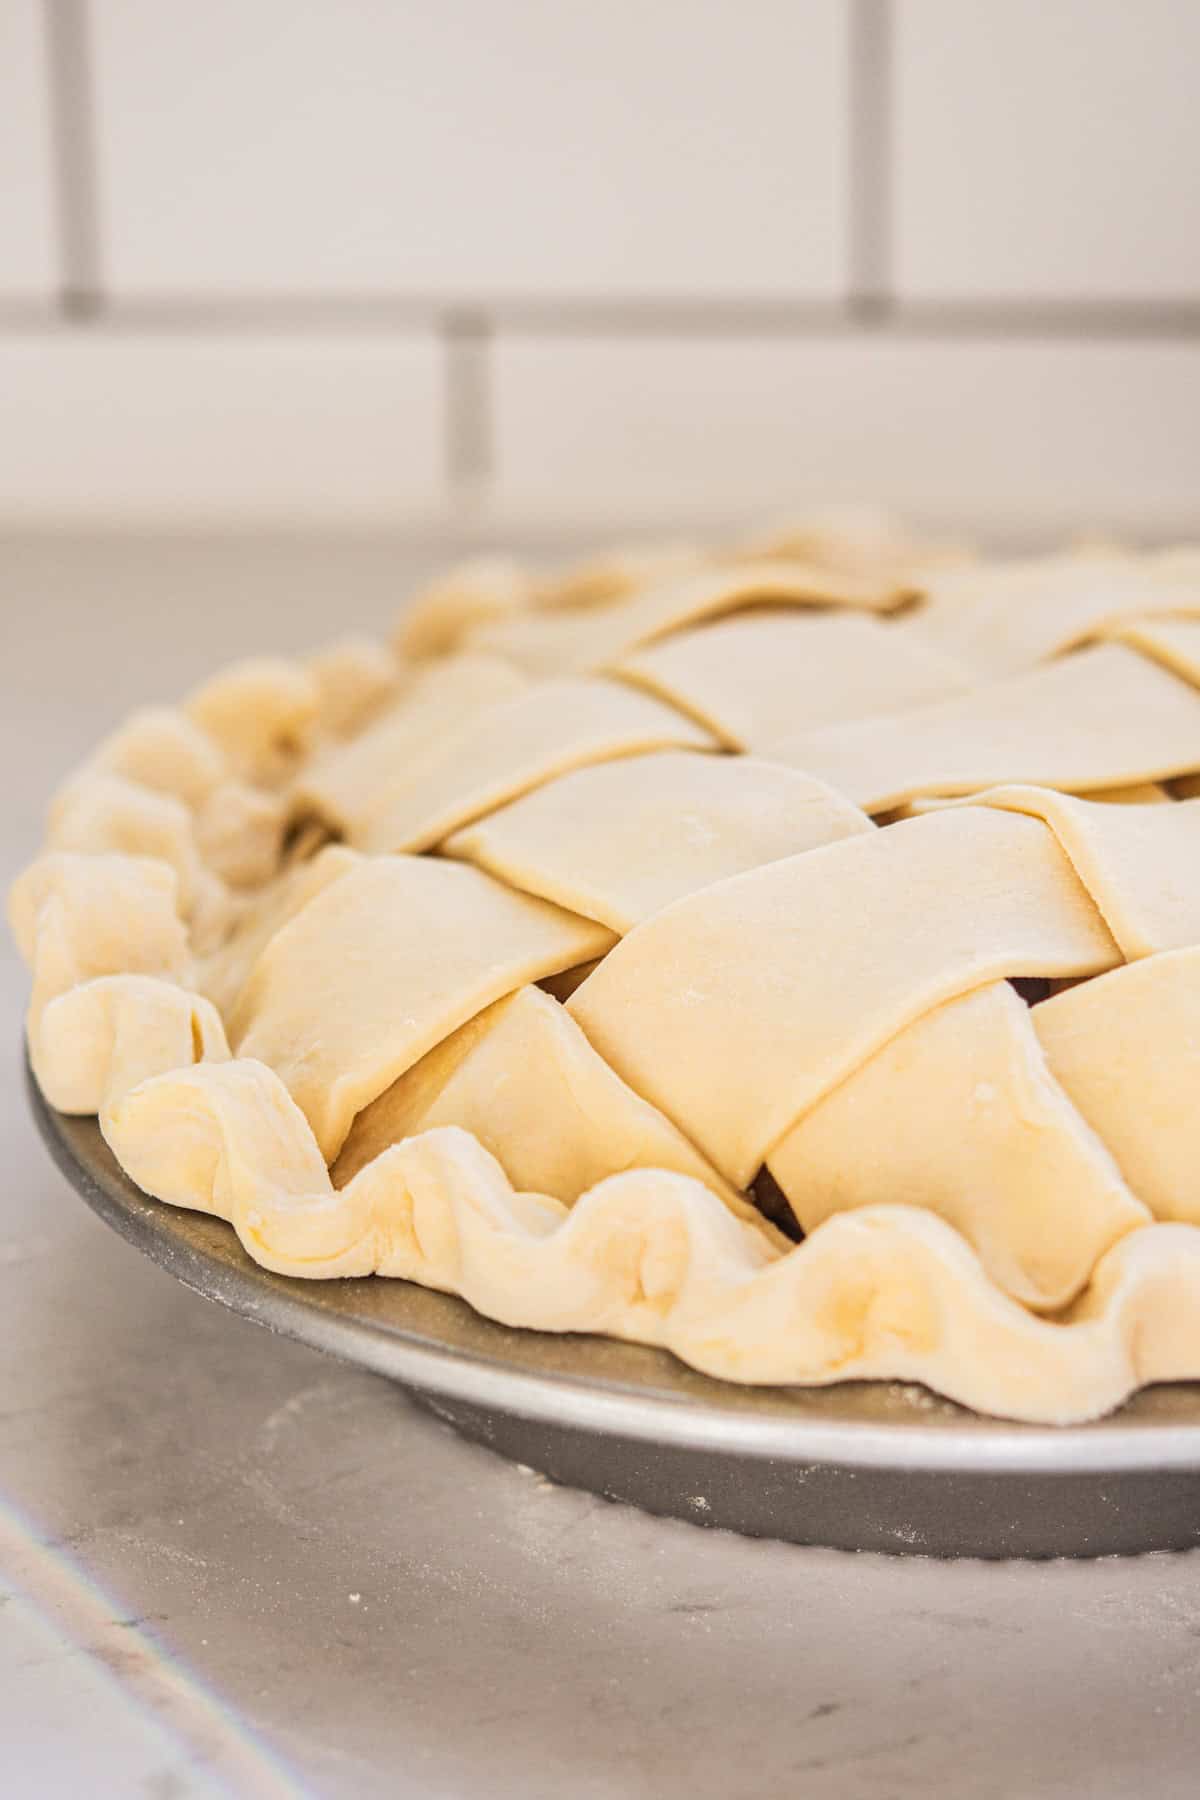
Rolling a double pie crust
When making a double crust pie, it doesn’t need par baking because this is usually used for pies that need a long baking time in the oven, so there should be time for the bottom bake.
- On a lightly floured work surface, roll out the bottom crust to 1/6-inch around 1 inch (3 cm) larger than your pie plate. Add it to your pie plate, and gently press it in around the edges. Fill the pie with your filling and place it in the refrigerator while you roll the second layer.
- Roll out the second disc of pastry into a 12-inch circle. You can drape this second layer of crust on top of the filled pie, or create a lattice crust. If you’re not making a lattice top, add 2-3 slits in the top of the pastry to allow steam to escape when baking.
Lattice crust
- Cut the dough into 10-12 strips of dough, depending on how wide strips you like.
- Arrange 5-6 strips vertically over the pie, placing the longest strips in the center and the shorter ones towards the edges.
- Fold back every other vertical strip halfway. Place an unused strip horizontally across the center of the pie, laying it over the strips that remain flat. Unfold the folded strips back into position, covering the horizontal strip.
- Repeat this process with the remaining vertical strips, folding them back and placing another horizontal strip to weave the pattern. Continue this with all the strips until the pie is fully covered.
- Cut off the uneven excess, but leave around 1/2 inch / 1 cm. Roll up the bottom crust to tuck in the lattice strips and seal the top and bottom crust together. To flute, push a thumb from one hand into the dough edge between the thumb and index finger and thumb of the opposite hand. Continue this all around the dough edges.
- Bake the pie as per your recipe instructions. I like to fill and then seal the pie and bake it at 425°F/220°C for 15 minutes then lower the temp to 375°F/190°C and bake for a further 50-60 minutes til the filling is bubbling


Storing Pie Dough
- In the refrigerator. Wrap the pie dough tightly in plastic wrap or place it in an airtight container. Store in the refrigerator for up to 3 days. Before using, let the dough sit at room temperature for 10-15 minutes to soften slightly, making it easier to roll out.
- In the freezer. Shape the dough into disks, wrap them tightly in plastic wrap, and place it in a freezer-safe bag or container. Store in the freezer for up to 3 months. Thaw in the refrigerator overnight before using. Let it soften slightly at room temperature before rolling.
- Pre-rolled dough. Roll the dough out to the desired size, then layer it between sheets of parchment paper. Place it in a large freezer bag or wrap in plastic, then freeze. When ready to use, thaw in the refrigerator and let it come to room temperature before fitting into the pie dish, then chill it again before baking.
Related recipes
Here are some great pie recipes to try this in!
- Lemon Chess Pie
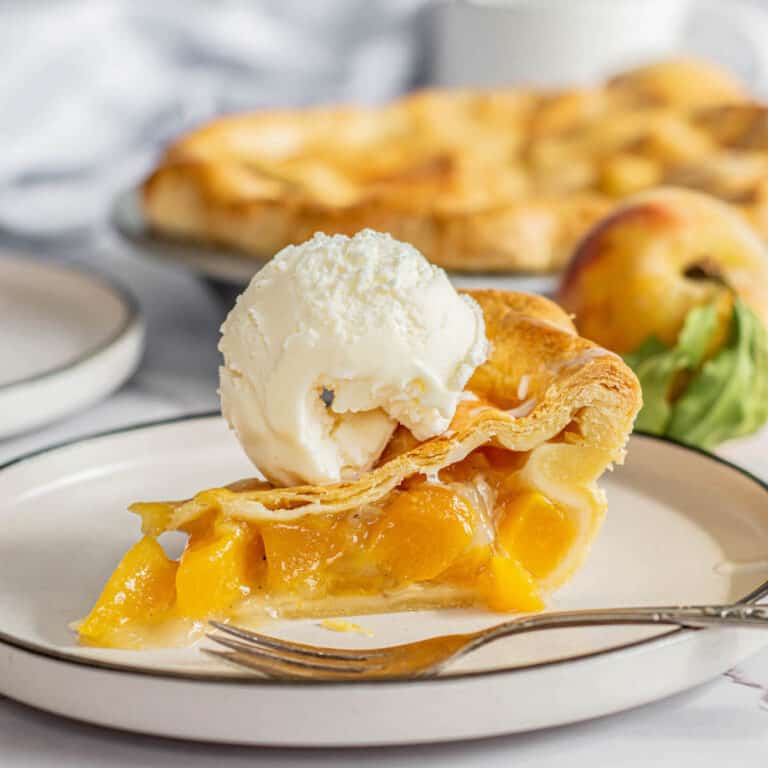
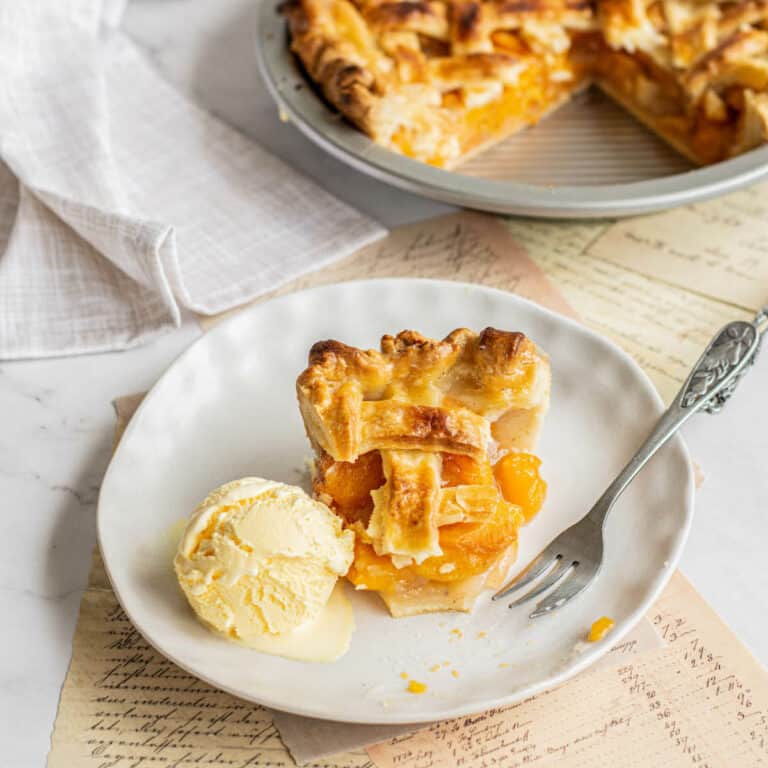
- Peach Cobbler with Pie Crust
- Strawberry Apple Pie
- Easy Blueberry Pie with Frozen Blueberries
The Flakiest Pie Crust

Ingredients
- 225 g unsalted butter cold
- 315 g all-purpose flour
- 1 teaspoon sugar
- 3/4 teaspoon salt
- 1 Tablespoon lemon juice or vinegar or see notes for yogurt substitution
- 150 g ice-cold water
Instructions
- Chop the butter into small cubes. Add the cubes to a bowl and place them in the fridge or freezer for 10 minutes to ensure they are cold.
- To a large mixing bowl, add the flour, sugar, and salt and mix them together. Add the cold butter cubes to the flour.
- Use a pastry cutter to cut the butter into small pieces and rub it into the flour, or use your fingertips to rub the butter into the flour. The end result should be like coarse bread crumbs with a few pea-sized butter pieces in the mix.
- Add the lemon juice or vinegar to the ice-cold water. Drizzle around 3/4 of the water into the flour.
- Use a spatula or your hands to combine the dough and add as much extra water as needed, a tablespoon at a time. It should hold together easily when pressed but not be sticky. If the dough is crumbly, add a bit more water.
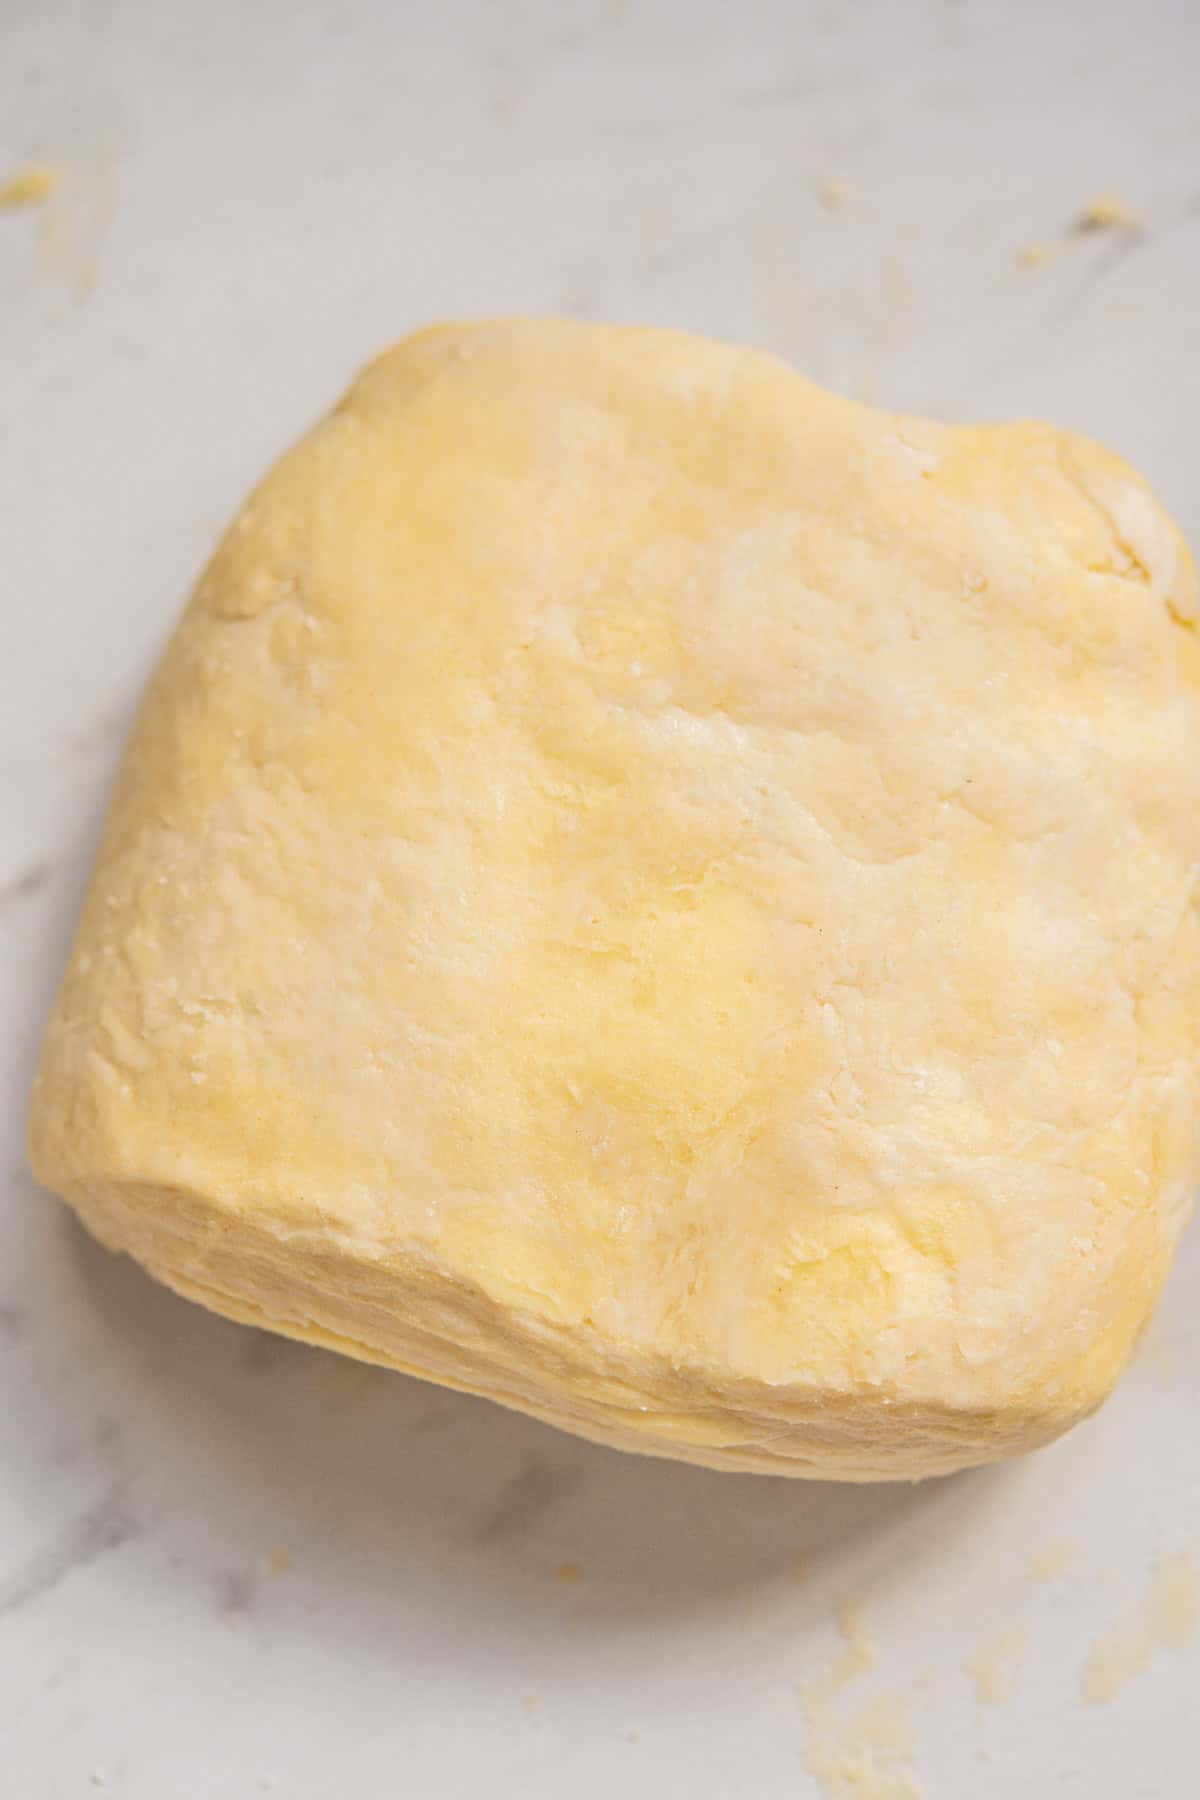
- Tip the dough onto a lightly floured bench and form it into a mound. Wrap the dough up tightly and place it in the fridge for 30 minutes before continuing with the next step.
Laminating
- Using a rolling pin, roll the dough into a rough 10-inch/25cm rectangle on a lightly floured work surface. There's no need to measure it perfectly; lengthen it to around 10 inches.
- Fold the bottom ⅓ of the dough up to the middle, then fold the top ⅓ of the dough over the top to make a pamphlet shape.
- Turn the dough a quarter turn and repeat this process once more.
- Cut the dough into two and use your cupped hands to shape each piece into a disc.
- Wrap the dough discs up tightly using. Chill it in the fridge for at least 1 hour or up to 2 days before using it in your favorite pie recipes.
Is there a substitute for the yogurt?
Thanks
Hey June, you can use iced water with a little lemon juice or white vinegar. Check out this recipe for pie crust without yogurt.
US measurements please.
Hey Sherri, I include both US and Metric 🙂 just use the toggle on the recipe card
I’m confused on the baking notes. If I use this for an apple or cherry pie do I have to blind bake this crust? How can I seal the edges if that is the case? If I CAN go right to the oven once it is formed, what temperature should I use?
Heya, the fully baked instructions in this post are for a single crust that would be filled with a no bake filling, not a pie like cherry or apple. If you’re using it for a double crust apple or cherry pie then it doesn’t need to be blind baked. In that case I like to fill and then seal the pie and bake it at 425°F/220°C for 15 minutes then lower the temp to 375°F/190°C and bake for a further 50-60 minutes til the filling is bubbling 🙂
Can I use a food processor to make the dough?
Hey you can but it won’t be as flaky as the butter will be cut smaller in a food processor. Take care not to over process it
Hi, I am confused on two of the laminating instructions :
#3 “Turn the dough a quarter turn and repeat this process once more.”
#4 “Once finished rolling, cut the dough into two and use your cupped hands to shape each piece into a disc”
If we do as #3 says to do, we repeat #1-#3 we are rolling, turning, and folding. But then #4 states “once finished rolling…”
Can you let me know if I have it right? That you are saying do #1-#3 twice ending with folding, not rolling, and that we would separate the dough after the final folding into 2 disks.
When I say ‘once finished rolling…’ I mean, once finished with the rolling+folding process of steps 1-3. I’ve rewritten it to make it a bit clearer 🙂
Can I freeze the dough if not using soon?
Yup! It freezes very well, just ensure it’s wrapped tightly 🙂
You say to sprinkle butter on two thirds of the dough during the laminating step. Is that additional butter that is more than the 1 cup of butter mentioned in the recipe? Or do you reserve some of the 1 cup of butter and sprinkle it on later when laminating?
Sorry about that, no, that was a segment from another one of my posts that was accidentally pasted into this post! There isn’t any other butter added when laminating the dough, what’s written in the recipe card at the bottom of the post is the correct method 🙂
Hello ,
About the yogurt version. Do you actually substitute 1/2 cup (isn’t that 8 tablespoons?) of yogurt for the 1 tablespoon of lemon juice? am I miss reading those instruction?
Thank you for your help,
Sherry
Hey Sherry, the 1/2 cup yogurt is the substitute for the both the lemon juice and the full amount of the ice water, as yogurt will bring in lots of moisture too. Then you just add extra ice water as needed. I will update the notes to make that clearer 🙂