

Sourdough Babka Recipe
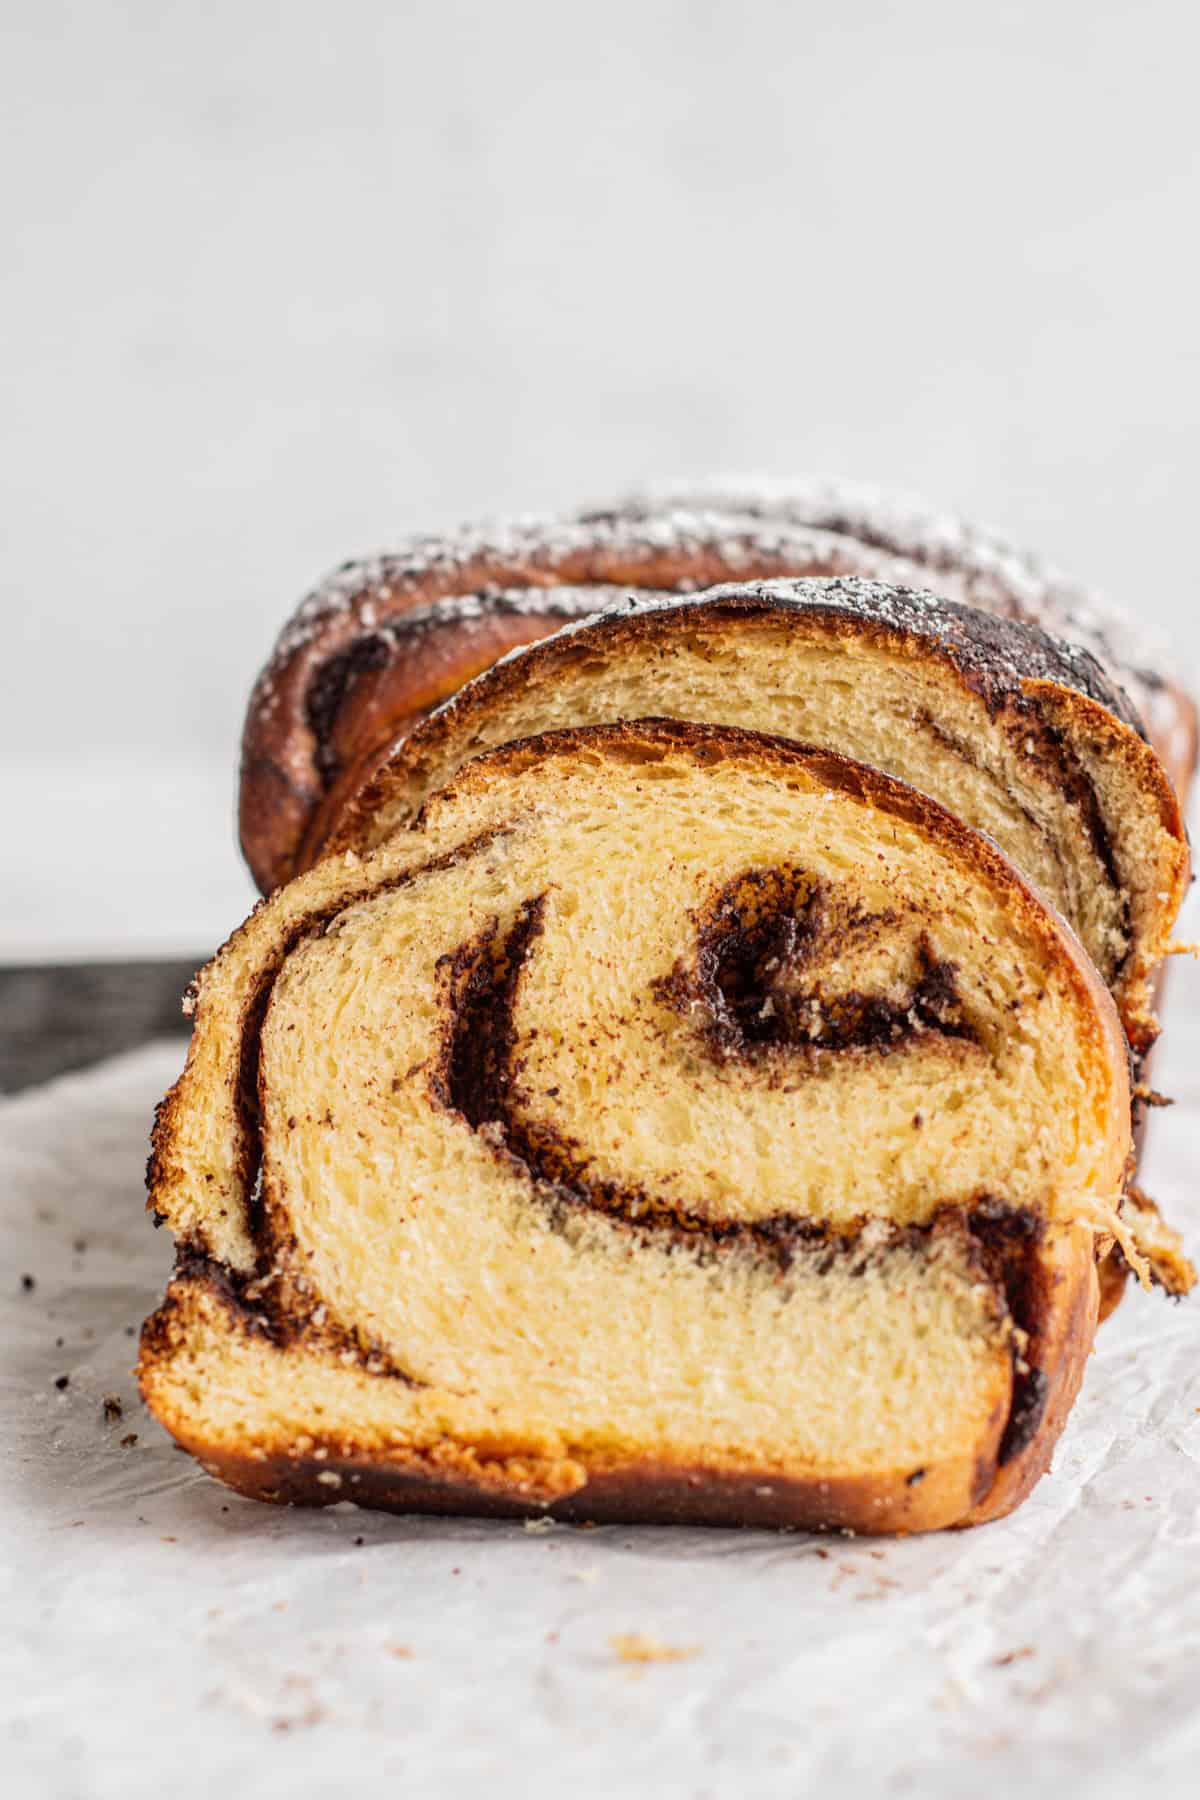
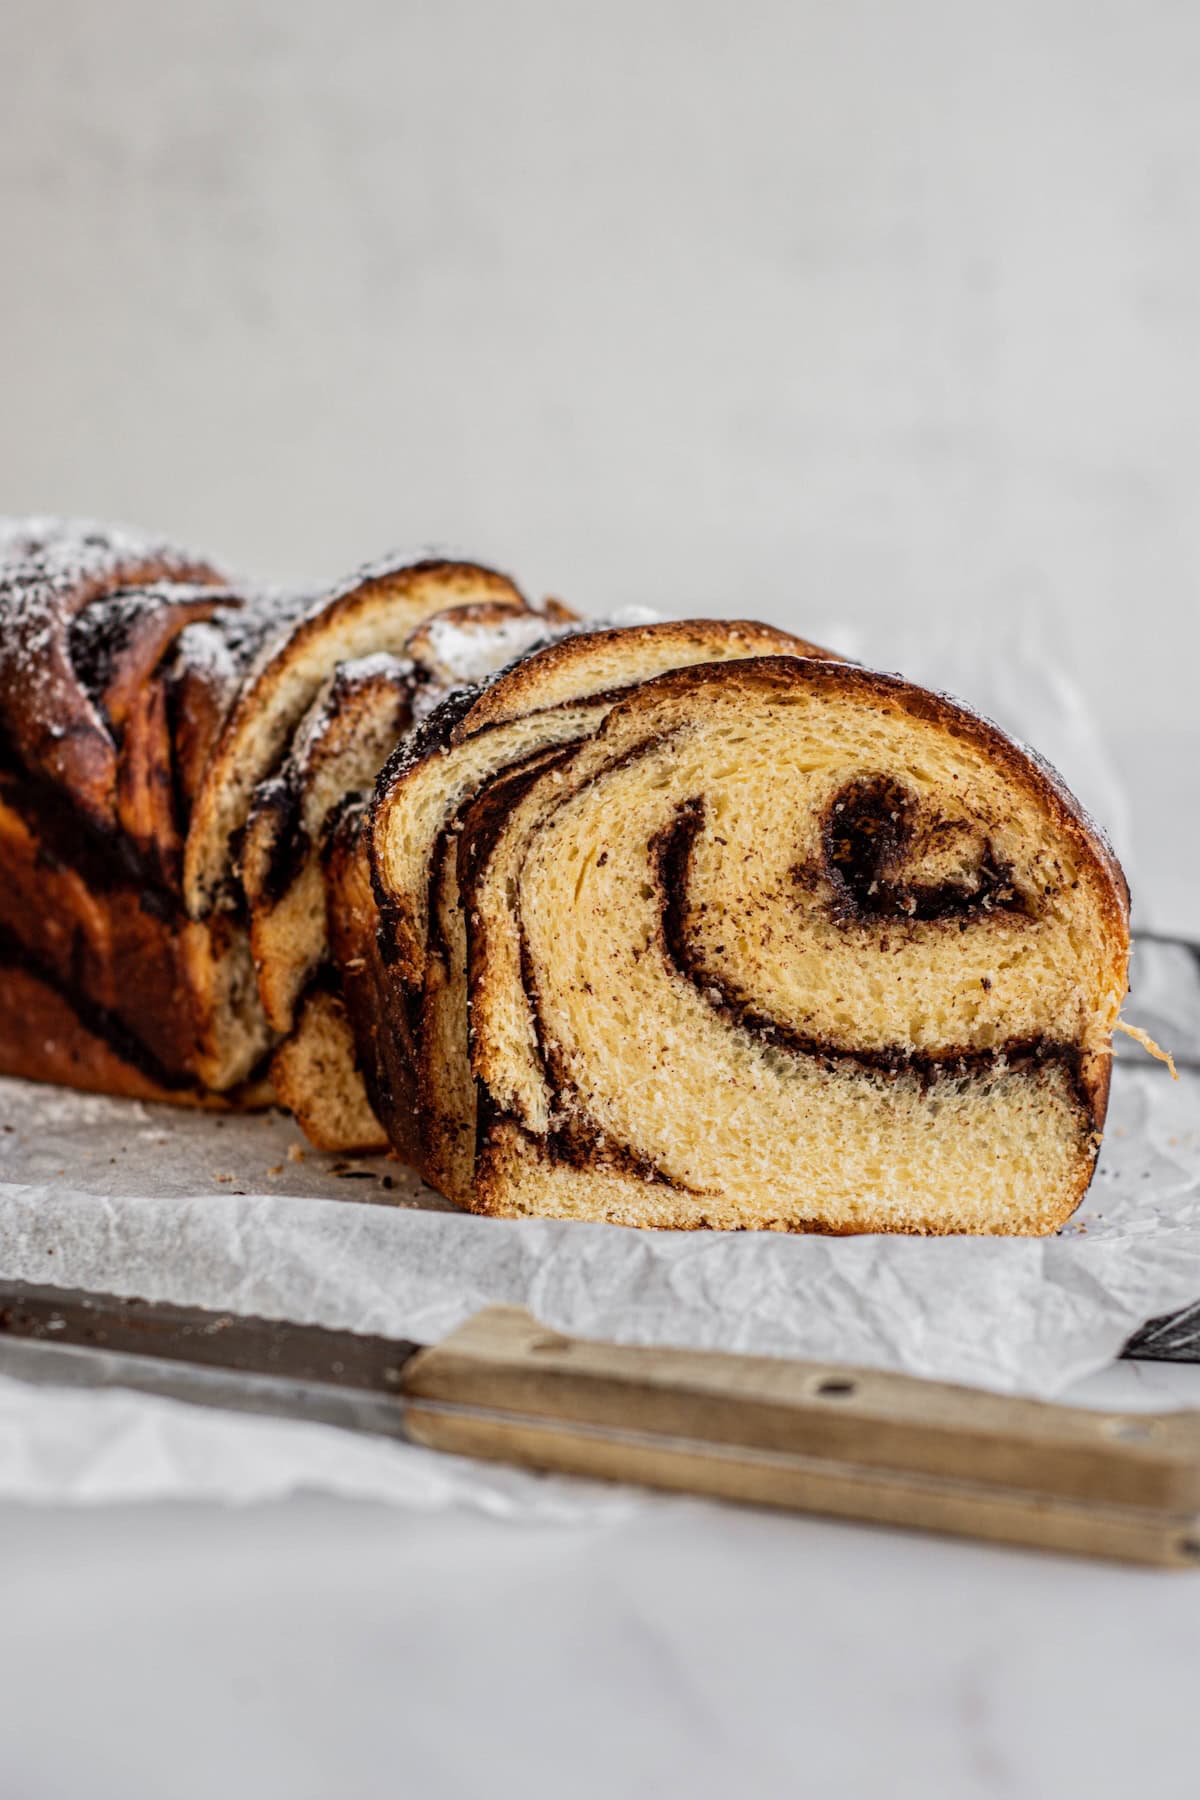
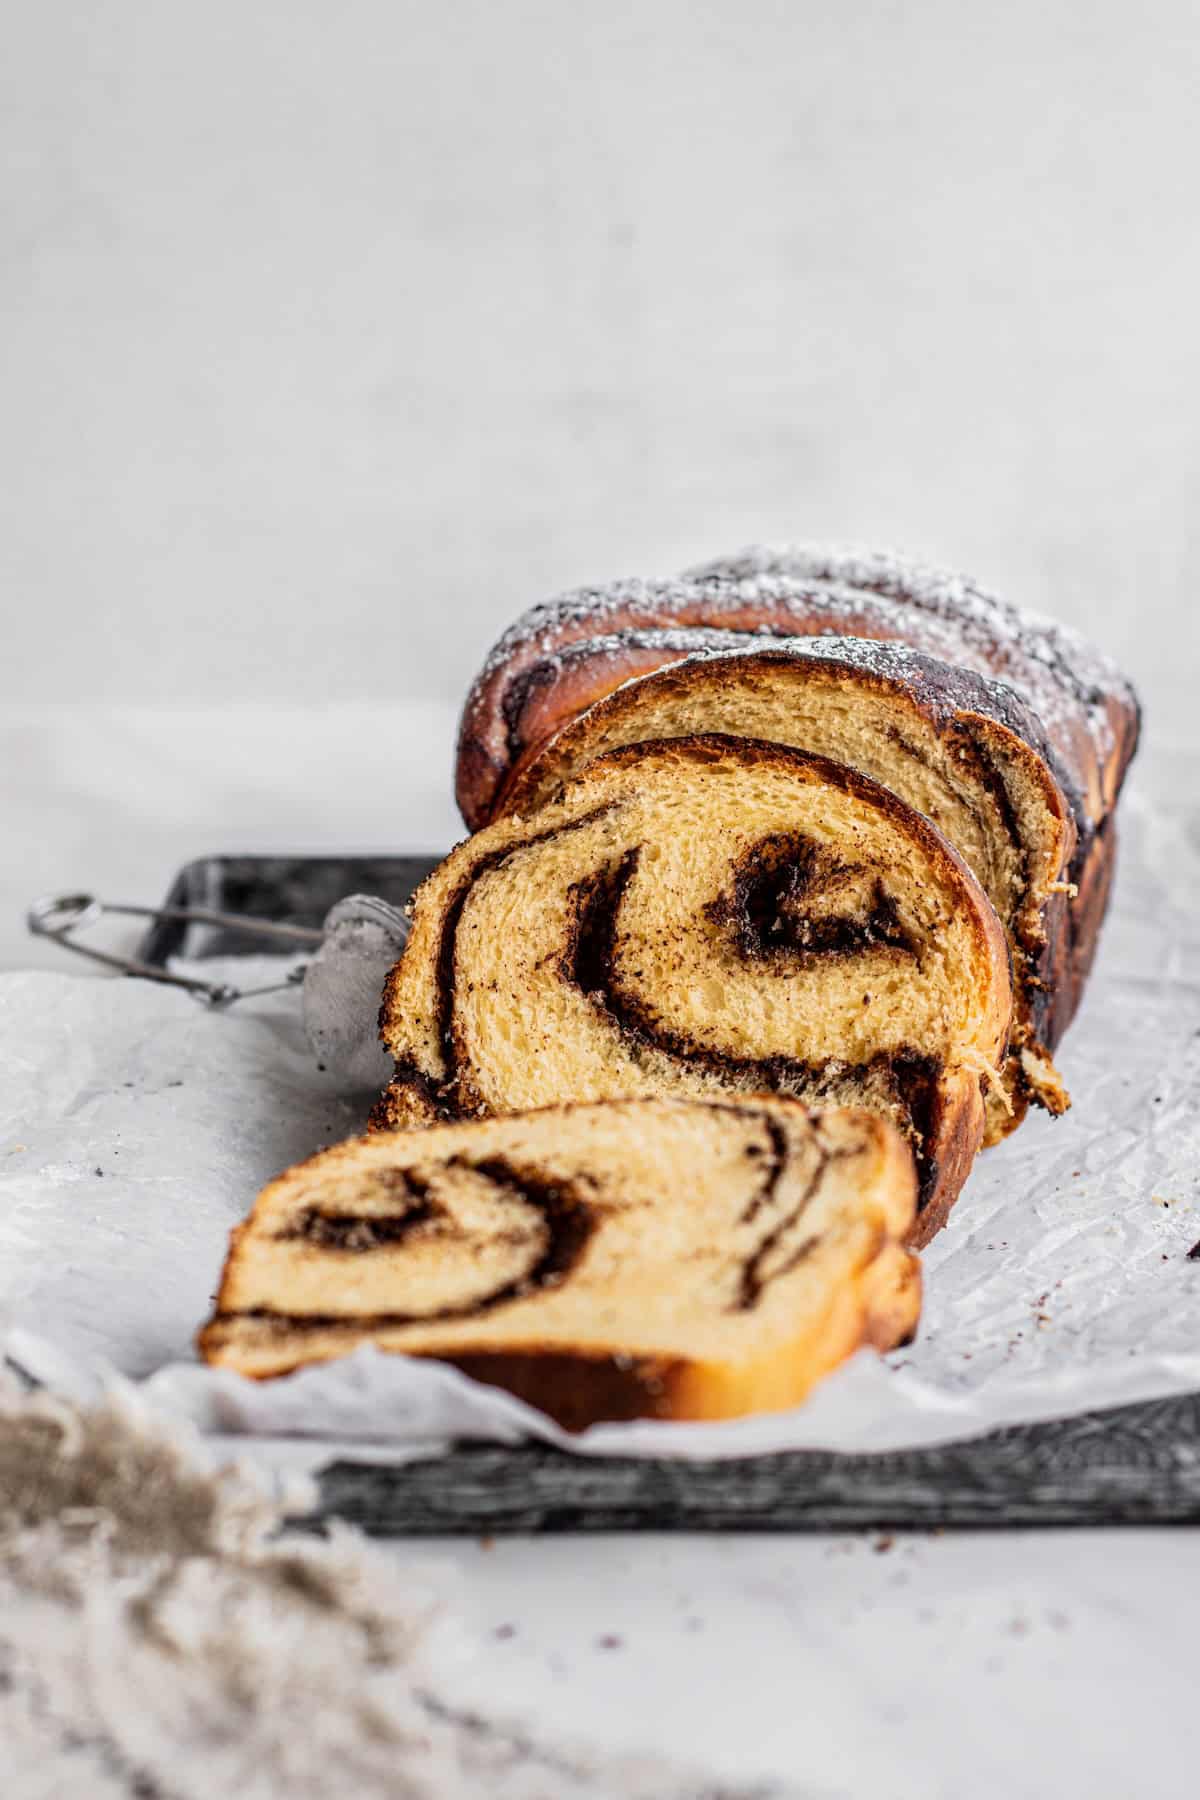
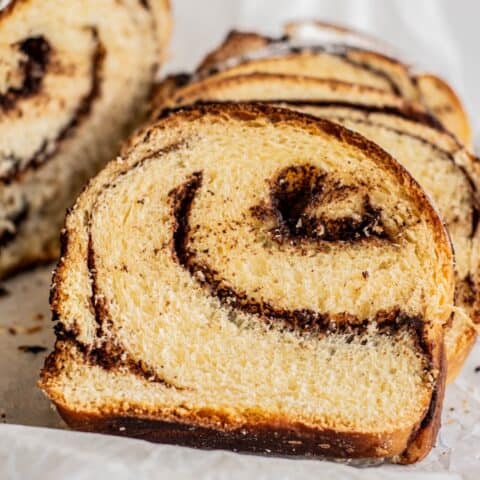
This sourdough babka recipe is made from sweet and soft brioche bread filled with smooth dark chocolate. It is such a treat. It’s soft, fluffy, tender, and filled with a decadent dark chocolate swirl.
The dough can be made with a mixer or by hand. It is leavened with a sourdough starter, and the process is spread over two days.
Babka originates from the Jewish communities of Eastern Europe, though each babka can be very different depending on where it comes from. Chocolate wasn’t traditionally used back then, but these days it’s a very common babka filling, and it’s delicious! (Or try this cinnamon babka.)
This sourdough babka uses a sourdough brioche bread recipe. Brioche bread is very enriched with eggs and butter. It makes wonderfully tender and flavorful bread and a delicious dessert or a breakfast treat. This brioche sourdough recipe is a brilliant base for babka and other yeasted bread, such as sourdough brioche cinnamon rolls.
Ingredients
Here’s a rundown of what you need for this sourdough babka recipe. Check the recipe card at the bottom of this post for the amounts.
- All-purpose flour- Strong all-purpose flour with around 11% protein or bread flour.
- Granulated sugar
- Large eggs
- Sourdough starter. This babka is leavened with a stiff sourdough starter.
- Vanilla bean paste or vanilla extract
- Milk. This can be whole milk or skim milk.
- Salt
- Butter. There is plenty of butter needed as it’s an enriched brioche dough. You can use salted or unsalted butter at room temperature
- Chocolate – The chocolate filling uses semi-sweet chocolate, preferably with 50-60% cocoa solids. You could use bittersweet chocolate too, which has a complex flavor, but the sugar in the filling may need to be increased slightly.
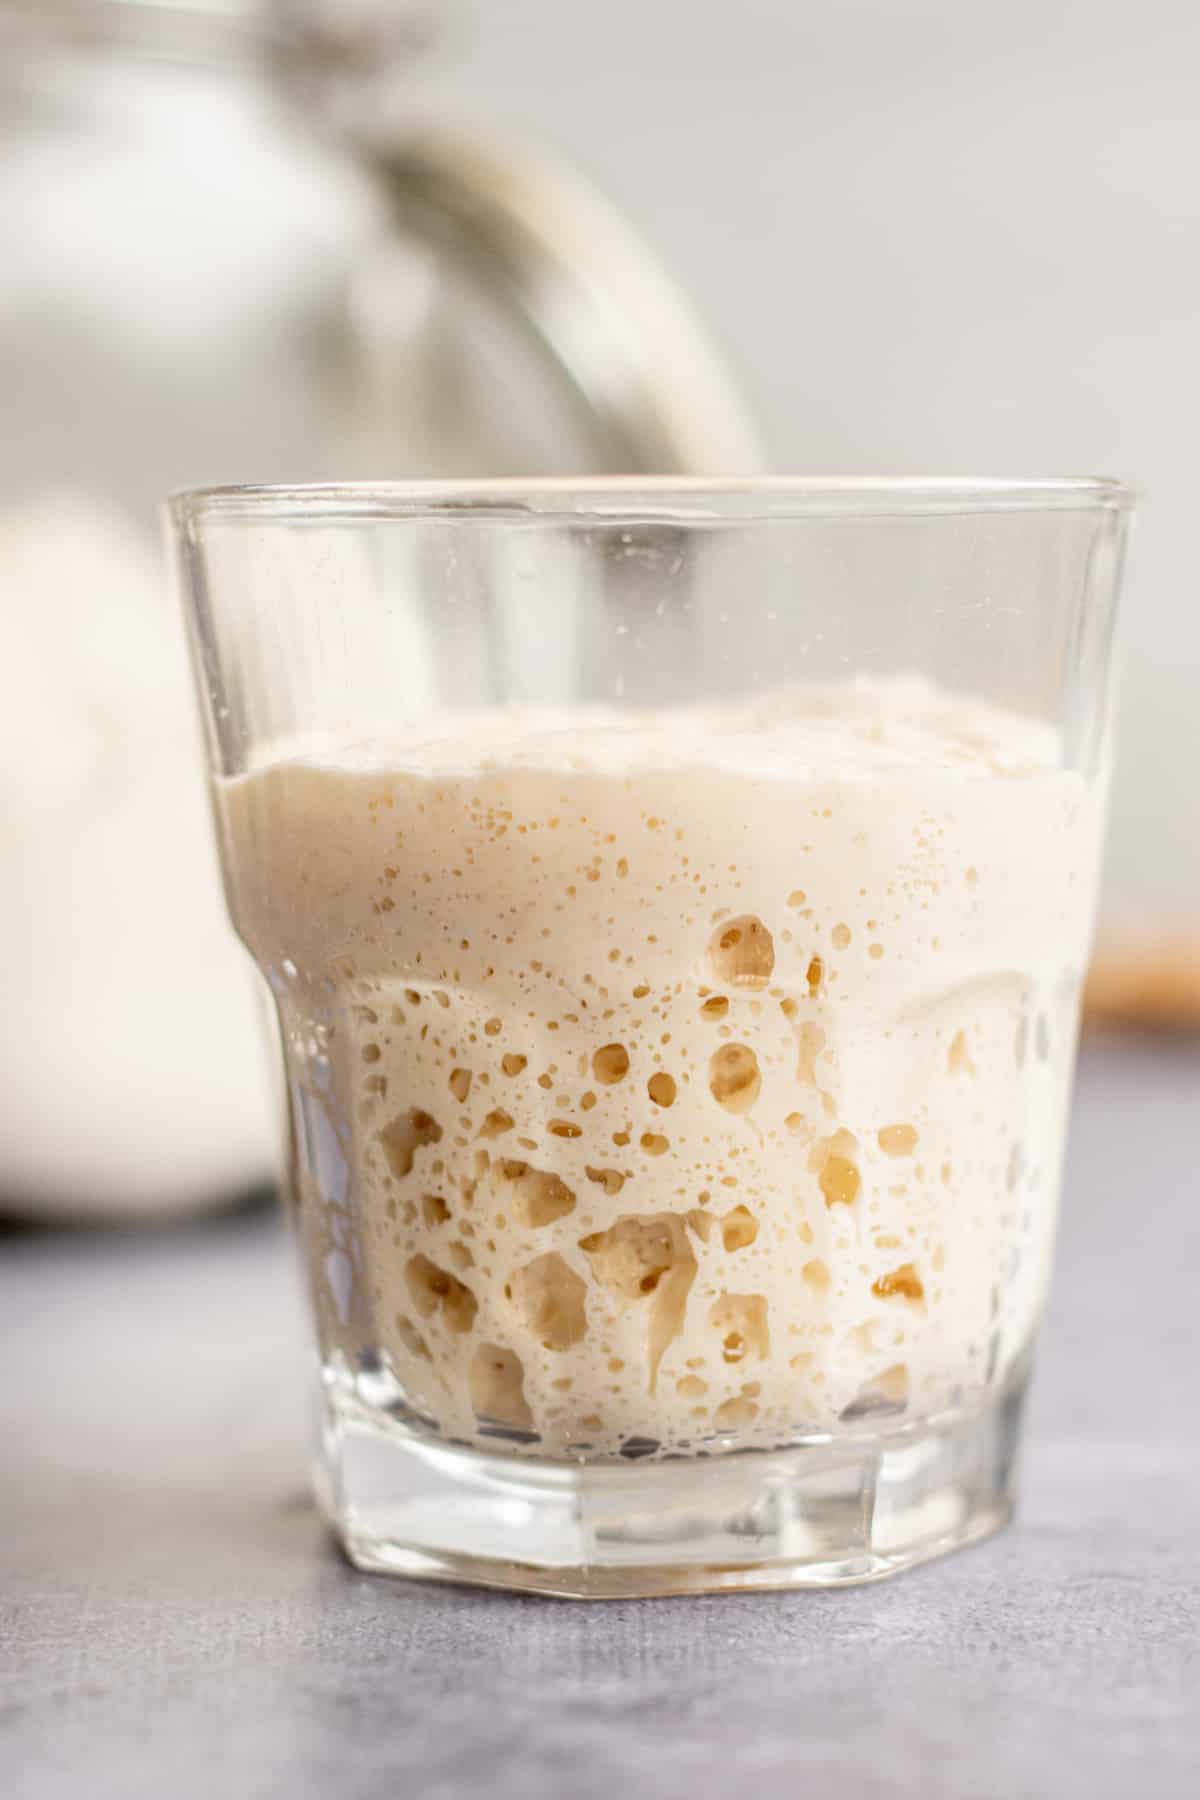
Stiff starter
Many recipes use a 100% hydration sourdough starter, but this sourdough chocolate babka is leavened with a stiff sourdough starter.
Stiffer starters are slower to rise than those with higher hydration. They undertake steady growth, with less risk of peaking too early.
The sourdough brioche dough needs extra time to rise so that the wild yeast can get to work. Adding all the extra fat to the dough can slow things down, so a stiff starter helps bring some strength to the rise. The starter is fed (in weight) overnight. One part starter, two parts flour, and 1 part water. It makes a stiff dough ball. In the morning, it will have more than doubled.
Equipment
For the easiest results, use a stand mixer. The babka dough is a very sticky dough. Many eggs and butter are present, and this extra fat and moisture mean gluten development in the dough is slow. Use a stand mixer if you can, as the dough needs 10-15 minutes of mixing to create the gluten structure necessary for a strong and elastic dough.
If you have no mixer, don’t worry. It is entirely possible to mix by hand if you’re prepared to use some elbow grease.
You’ll also need two 9×5-inch loaf pans for baking them in or similar-sized pans.
Baker’s schedule
Here is a rough outline of the baker’s schedule to get an idea of the timings.
The Night before
- Feed the starter
Day 1
- In the morning, mix the dough
- Let it rise in a warm spot until it bulked out at least 50-60% (approx 4-6 hours, depending on temperature)
- Refrigerate the dough overnight.
Day 2
- The next morning, roll out the dough, fill, and roll it up. Refrigerate for 10 minutes
- Braid the bread, then rise in a warm spot until doubled in size
- Bake and brush with sugar syrup
Method
- Mix together 30g starter with 60g flour and 30g water. Knead it for a minute or two into a stiff dough ball.
- Place this into a lightly oiled jar. Brush the top of the ball dough with a little water (so it doesn’t dry out too much overnight). Loosely cover it with a lid and leave it to rise for 8-12 hours until more than doubled.
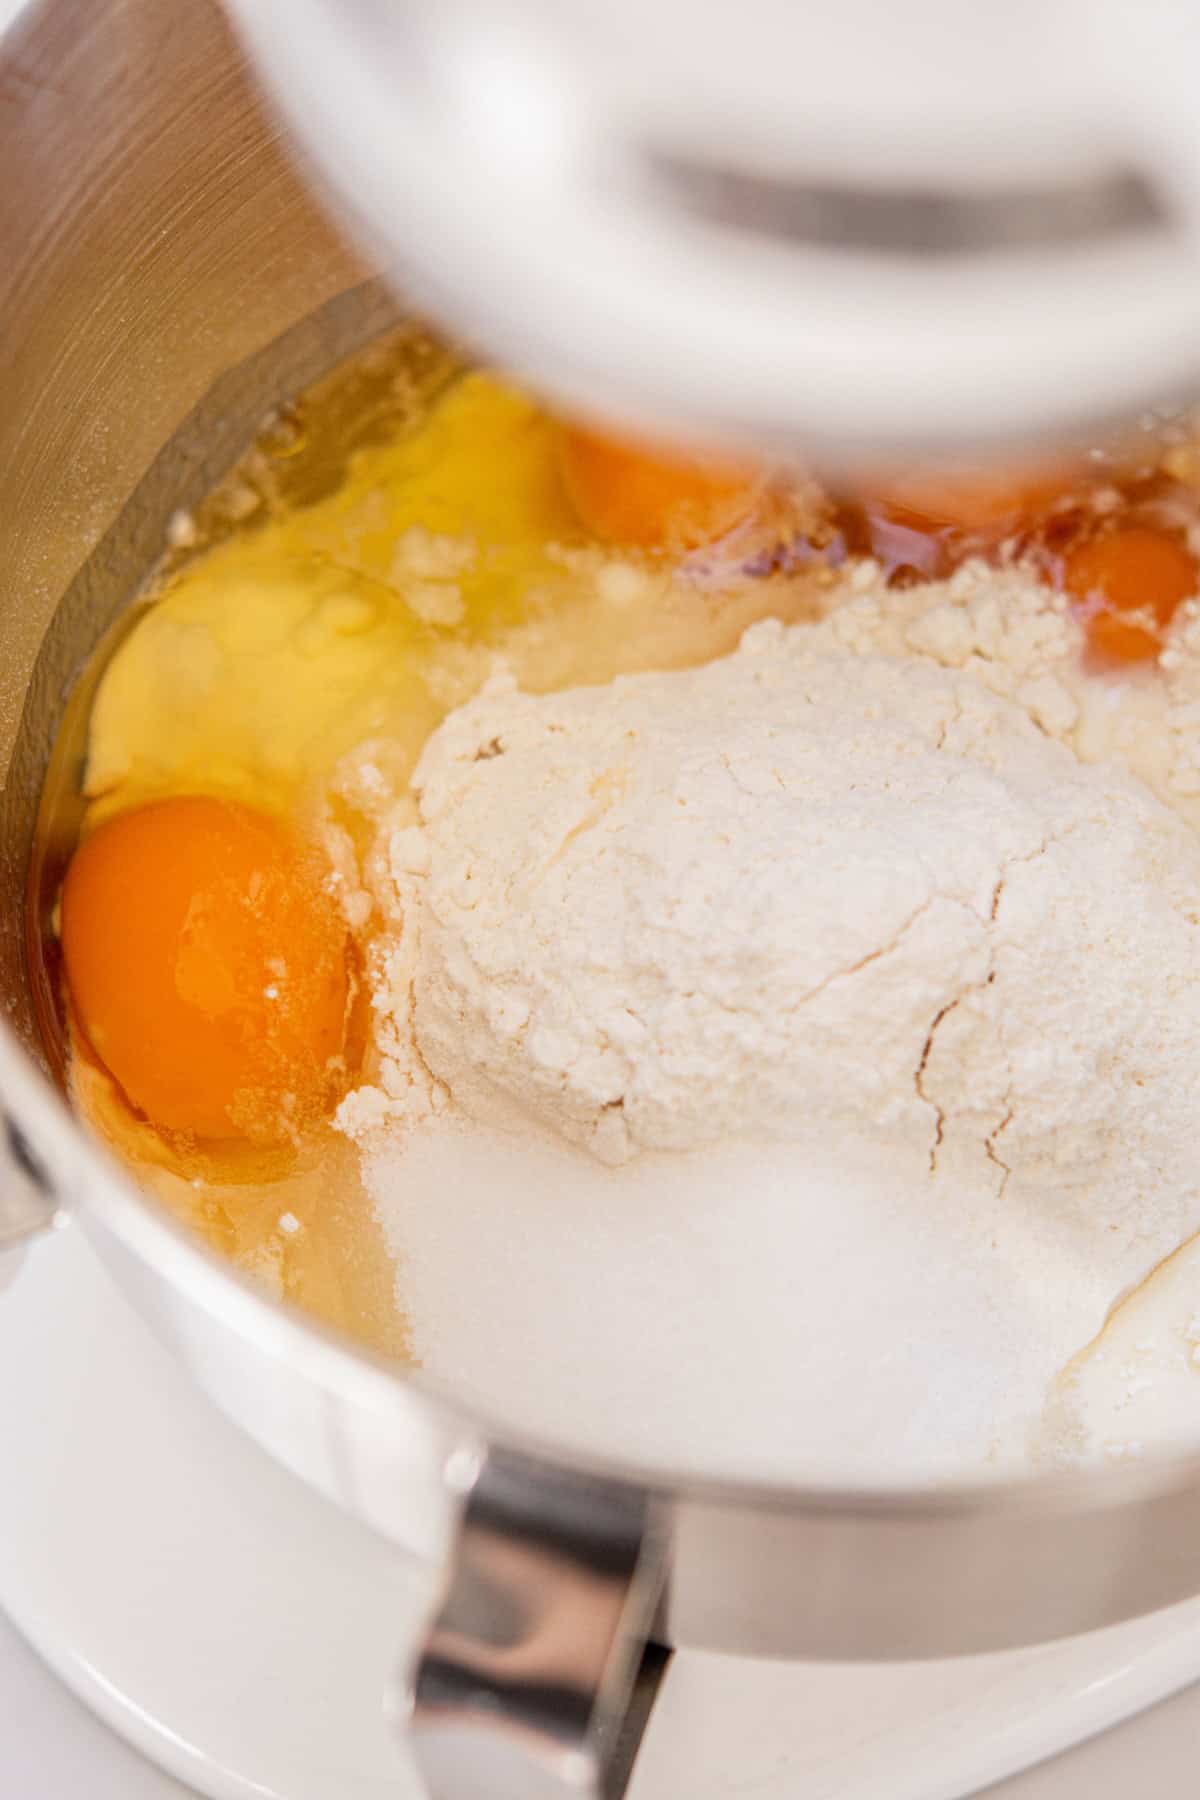
- Add the flour, sugar, salt, eggs, milk, and starter to the bowl of a stand mixer fitted with a dough hook attachment. Turn the mixer on low and combine until it forms a thick but slightly sticky dough.
- Mix this dough for around 5 minutes to begin developing the gluten. Add in the room temperature butter, a little bit at a time. Incorporate each cube before the next addition.
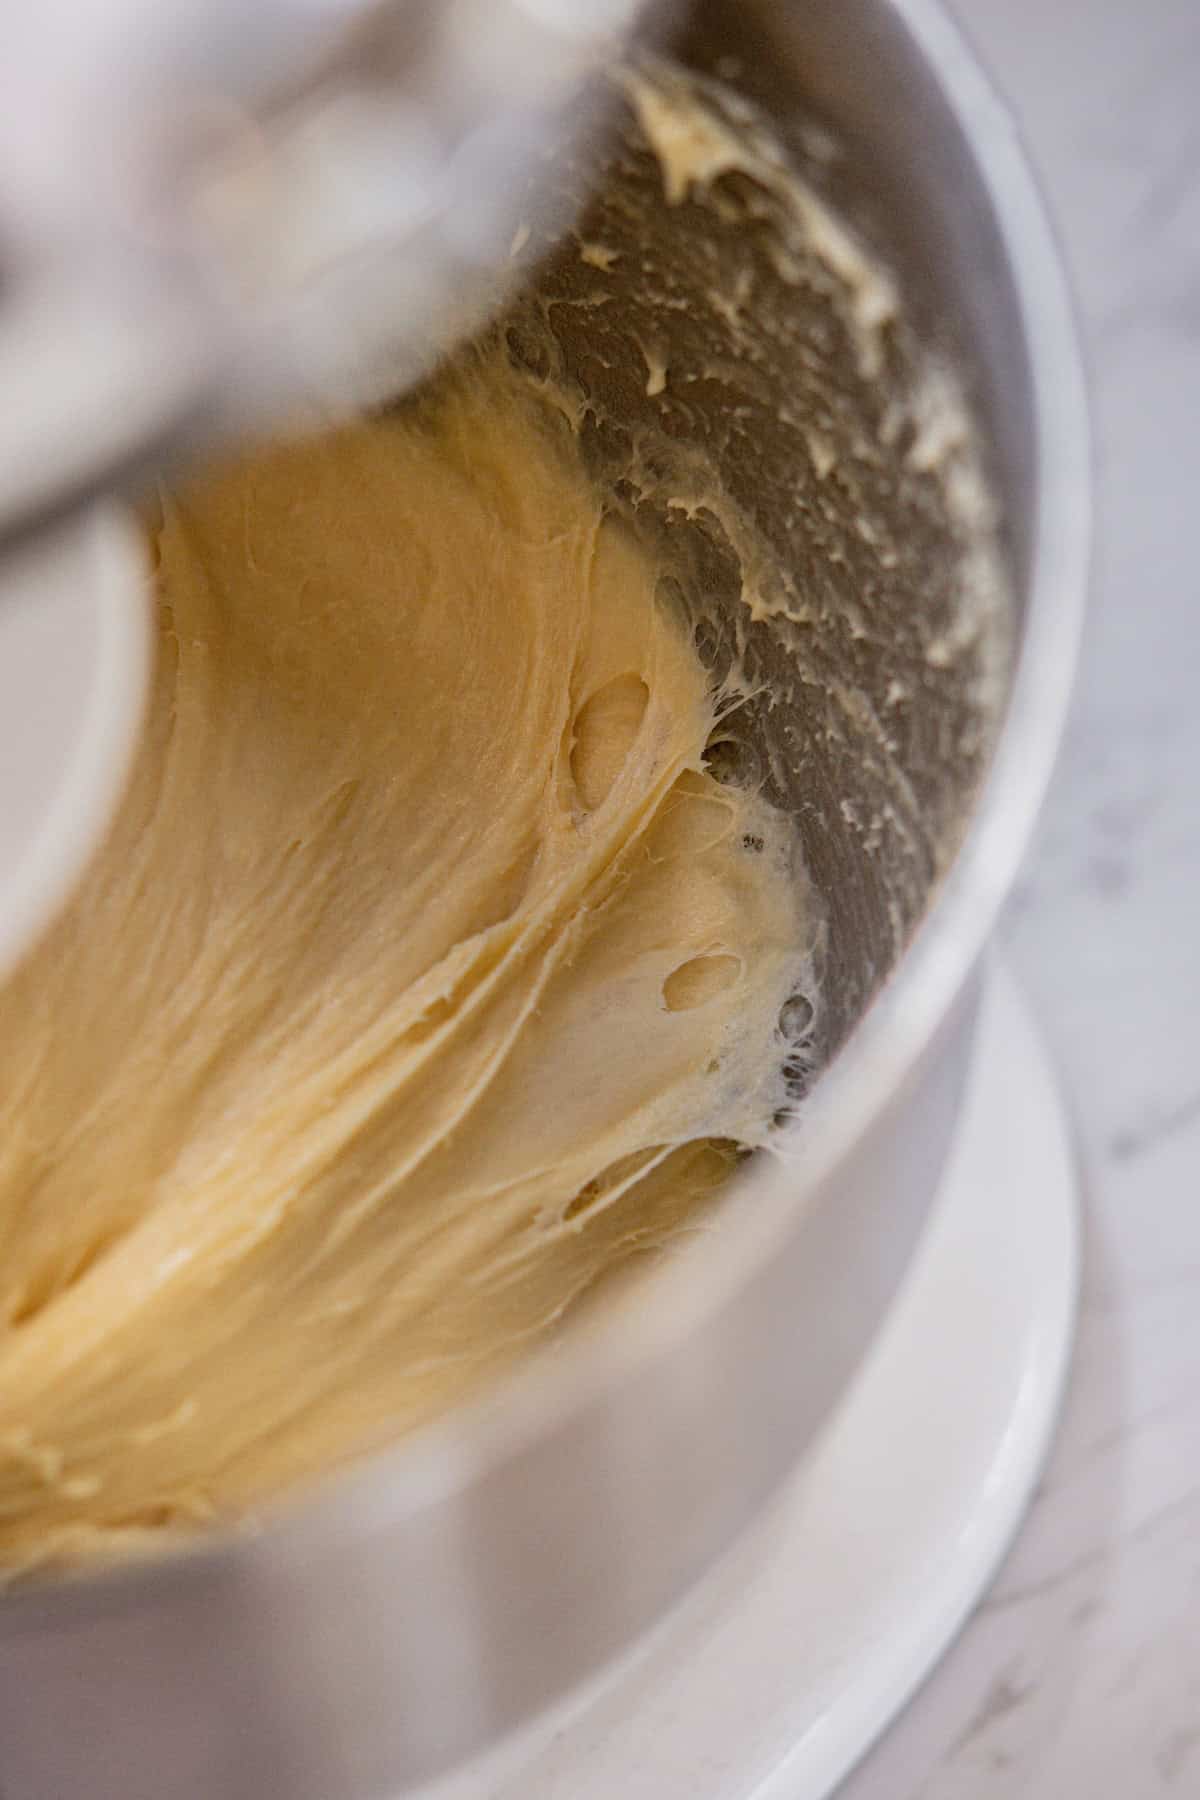
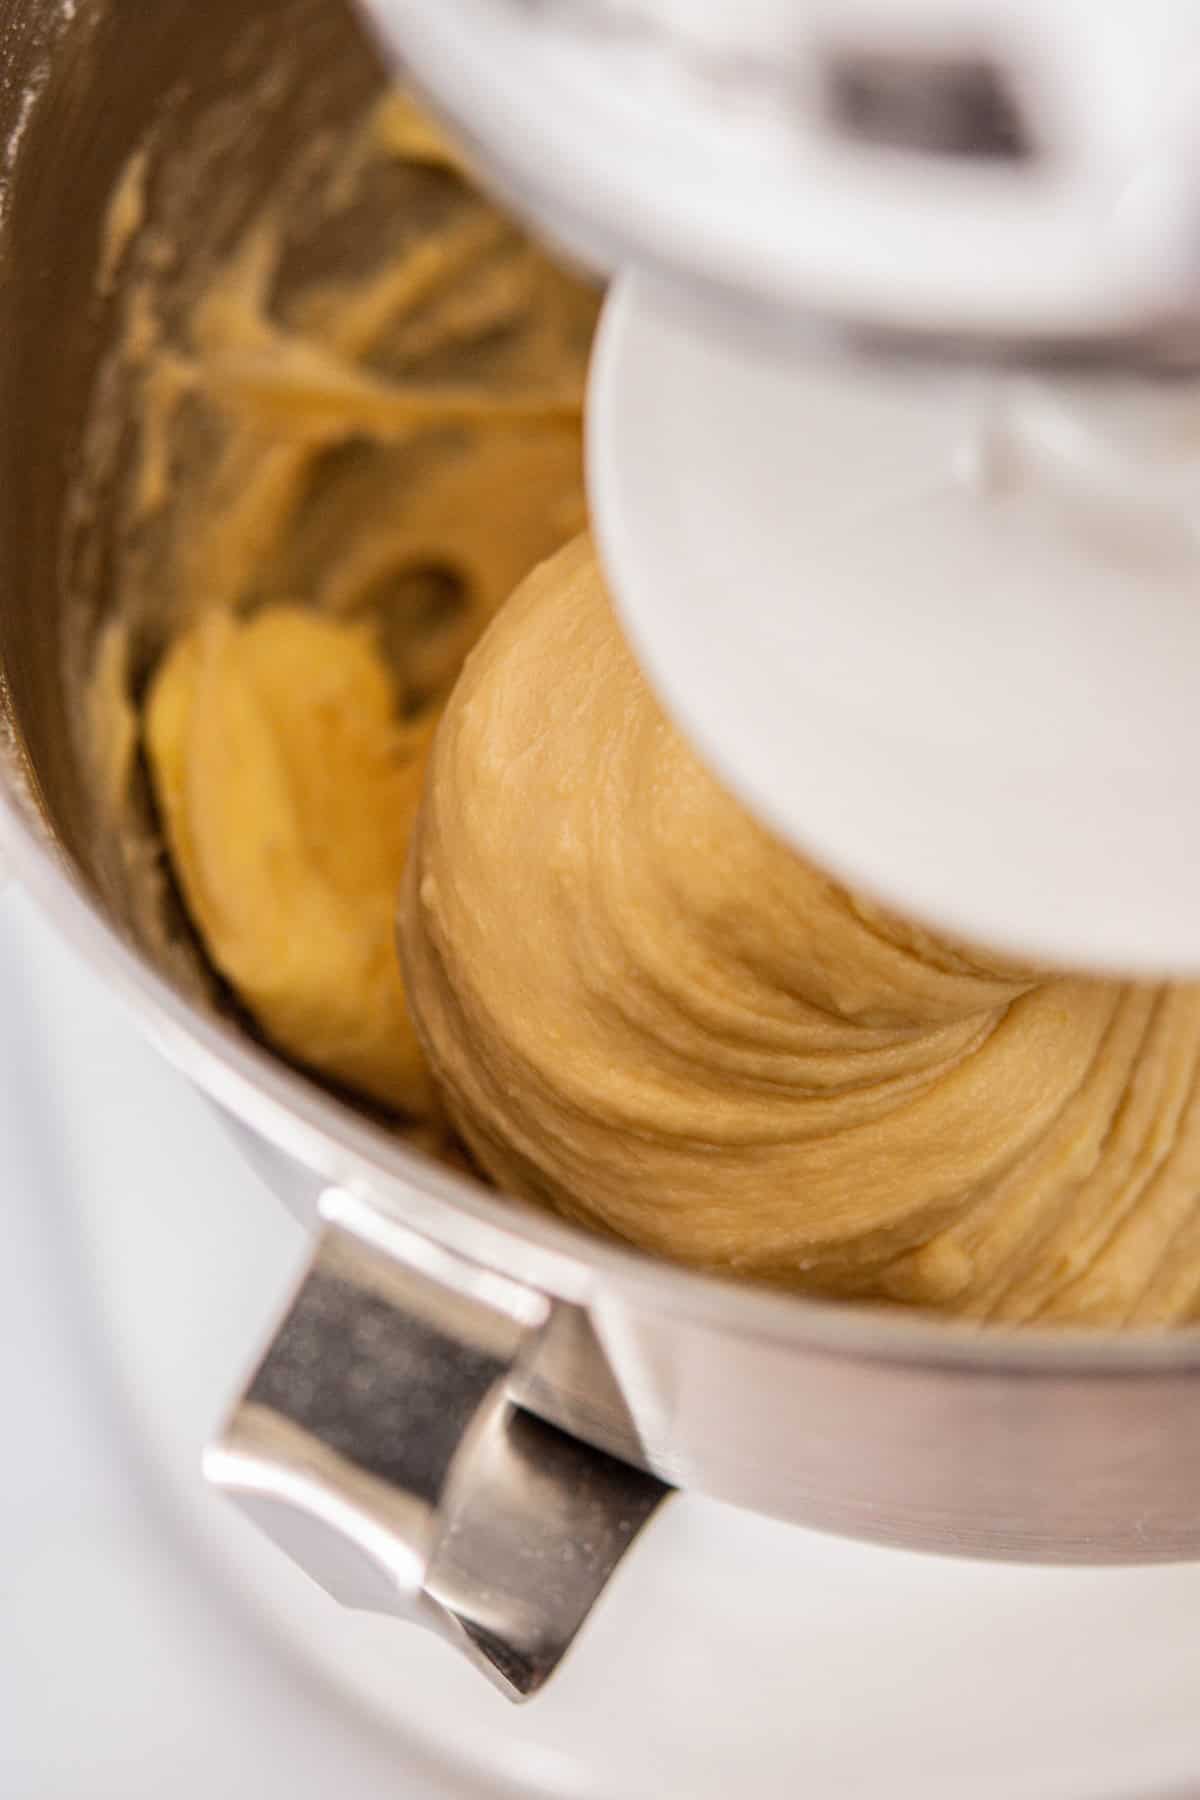
- Turn the mixer on medium and keep it mixing for around 12-15 minutes until the sticky dough strengthens and comes together and pulls away cleanly from the sides of the bowl.
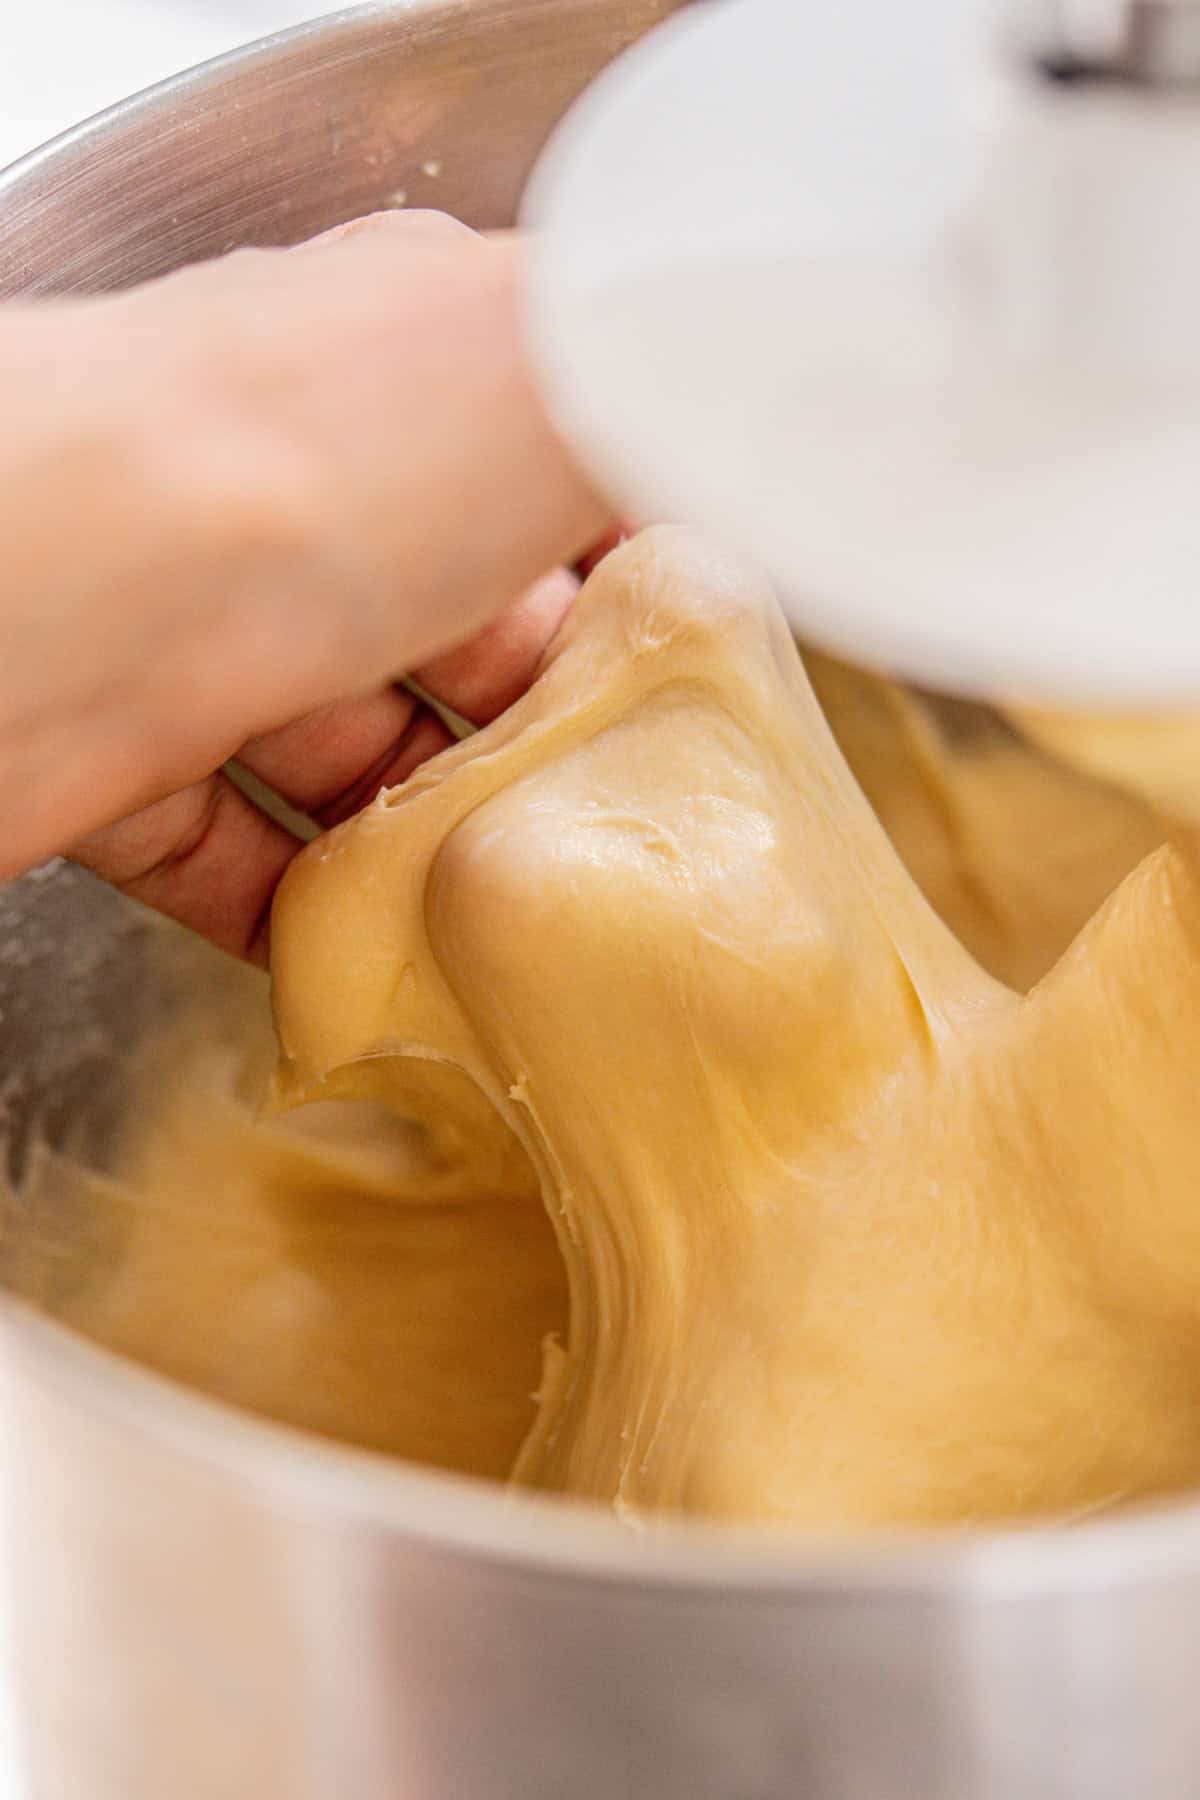
- Once finished mixing, leave the dough to rest for a few minutes, then grab a piece and see if you can stretch it out thin so it’s almost see-through, without it tearing. This is called the ‘windowpane test’ and shows proper gluten development.
Mixing by hand
Add the flour, sugar, salt, eggs, milk, and starter in a bowl. Use a fork to mix it into a shaggy dough. Tip the dough onto a floured work surface and knead it for 5 minutes to develop the gluten. Knead in the butter, a few cubes at a time. The butter is going to make the dough very, very sticky. Slap and fold the dough on the bench to create strength. Slap it down, and fold it over.
Once all the butter has been incorporated, slap and fold for a minute or so more, then leave the dough to rest for 10 minutes. After 10 minutes, return to it and keep slapping and folding for 10 minutes or more until you feel and see the dough become strong and glossy. If at any point you need another break, take it! It’s easier coming back to it with clean hands, and the dough does well with a rest.
Bulk fermentation
- Place the dough into a greased bowl and cover it. Place it in a warm spot, ideally around 25°C/ 76°F, but under 30°C / 86°F so the butter doesn’t melt. Let the dough rise until it has bulked out by at least 50-60%. This will take around 5-7 hours, depending on temperature. This dough will struggle to rise if the temperature is too cool.
- Don’t rush this rise. It’s an important one and will set the standard for any future rising the dough will do.
- You can create a warm and humid proofing spot by placing a large mug of boiled water in a turned-off oven and putting the dough in there. Replace the water with freshly boiled water as it cools down.
- Once risen, cover the bowl tightly and place the dough in the fridge until you’re ready to shape it.
Day 2
- The next day, prepare the chocolate filling so it has time to cool. In a saucepan over low heat, melt together chocolate and butter. Once melted, remove it from the heat, and while its still warm, stir in powdered sugar and vanilla.
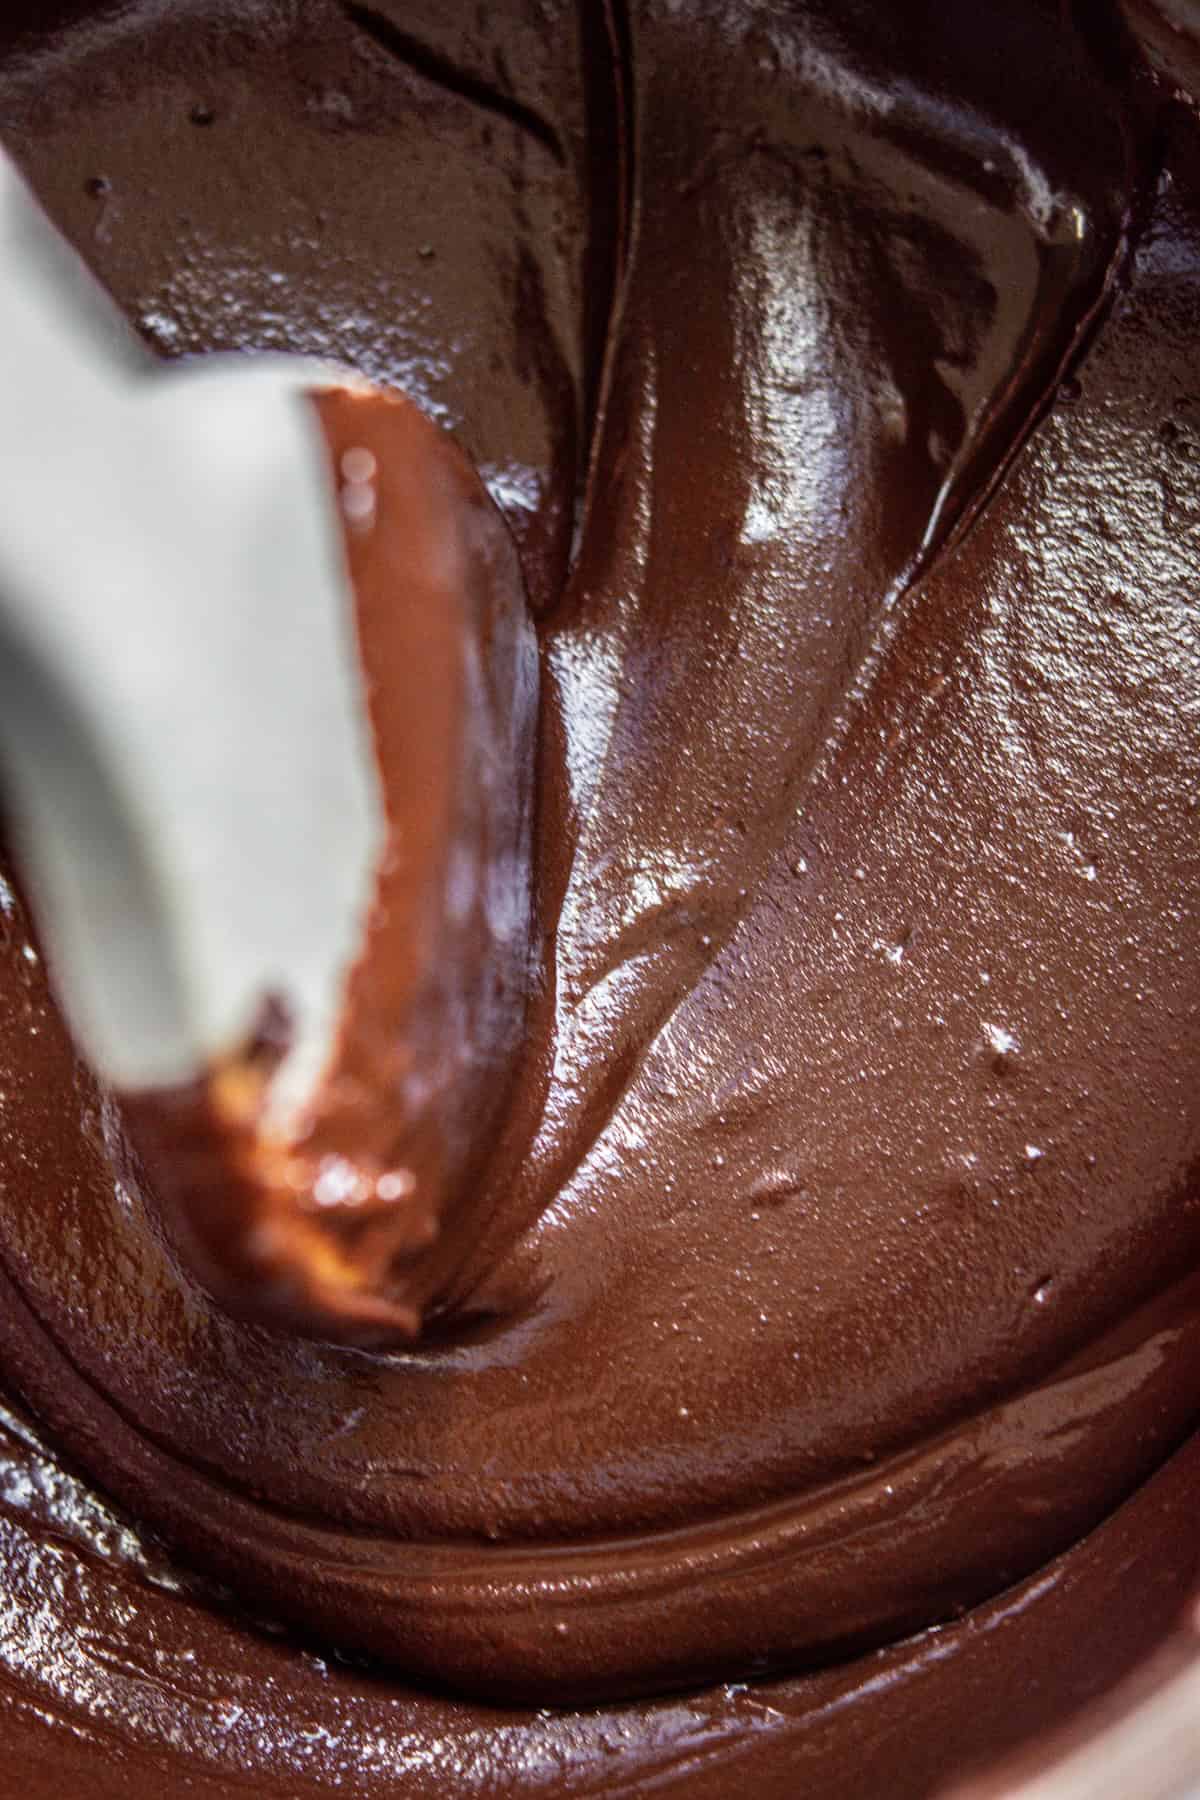
- Pour into a bowl and let it cool until it becomes a spreadable paste. You can place it in the fridge to speed this up, but check on it and stir it regularly so it doesn’t stiffen too much. If it does, warm it up slightly to thin it out again.

- Pull the proofed dough from the bowl and tip it onto a lightly floured surface. The next step is to cut it into two even pieces.
- Take one piece and use a rolling pin to roll it into a large rectangle measuring around 11×14 inches (27x35cm).
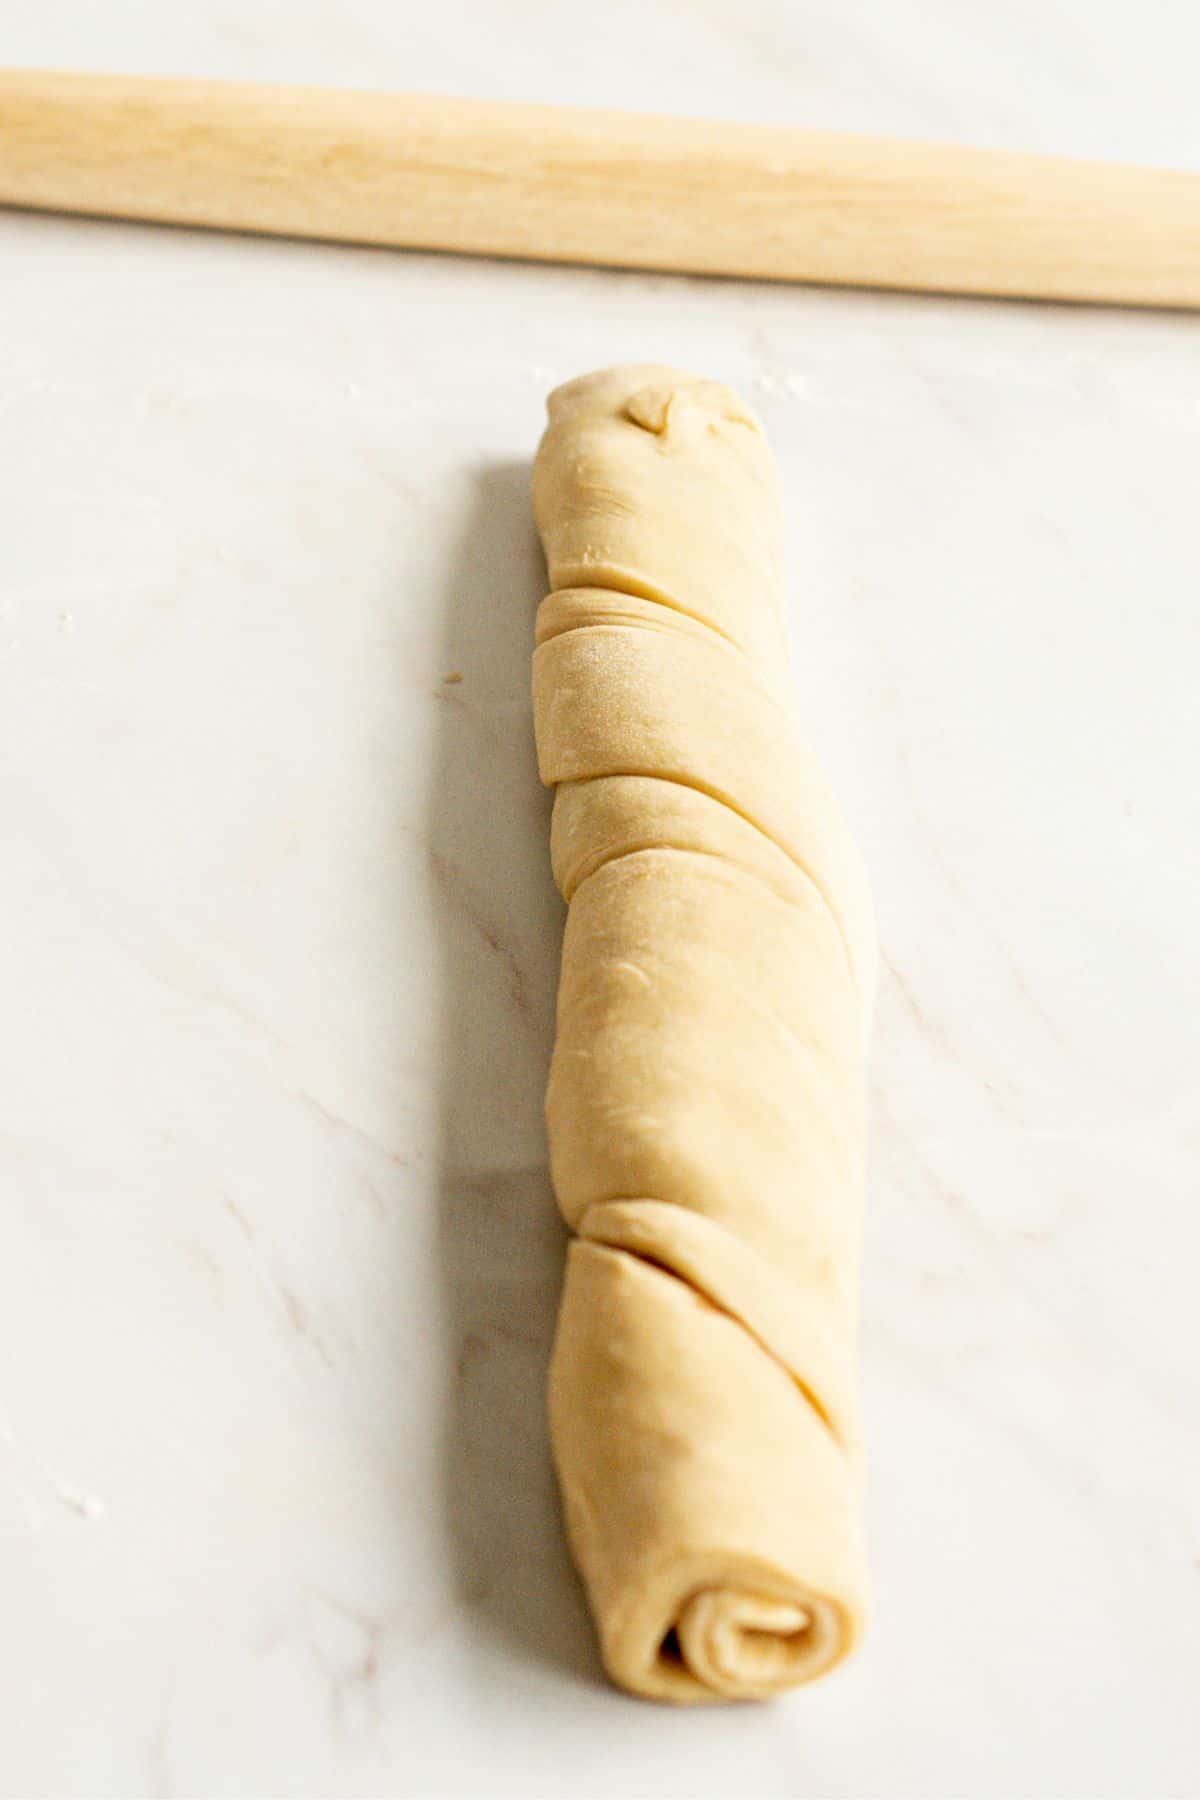
- Use an offset spatula and spread ½ the cooled chocolate filling over, leaving a ½ inch (1cm) border around all sides. Roll it up, from the long side upwards, into a log and place it in the fridge for 10-15 minutes. This cools down the chocolate and makes it easier to cut later.
- Repeat with the other dough piece. Once chilled, it’s time to shape and braid the sourdough babka. Here are two ways you could do it. One has the chocolate exposed, and one does not.
Shape 1
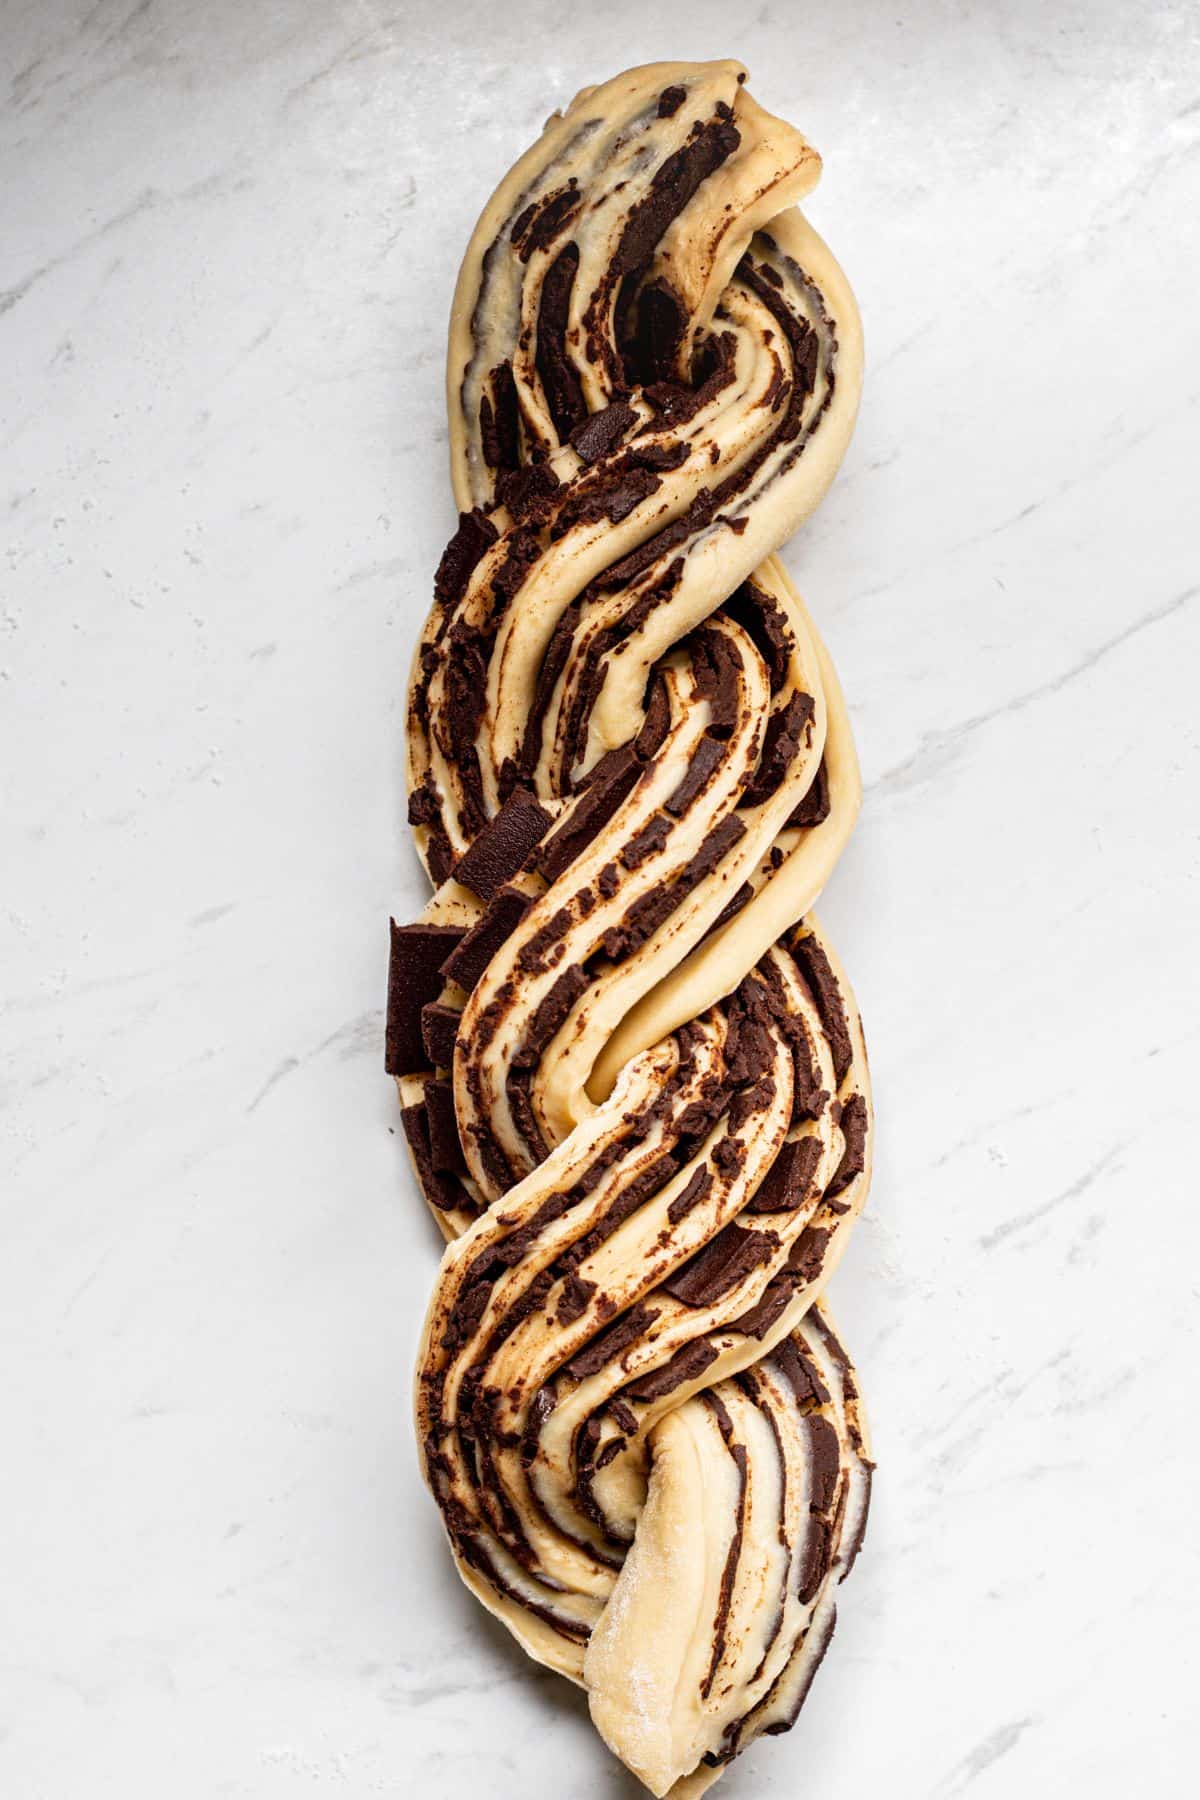
Slice the log in half lengthwise. Cut it with a sharp knife, and don’t push down on the dough or it will squash.
Take the two ends and fold them over, then lift the left half over the right half and the right over the left. Repeat all the way down, leaving the cut side facing you so the chocolate is exposed.

Shape 2
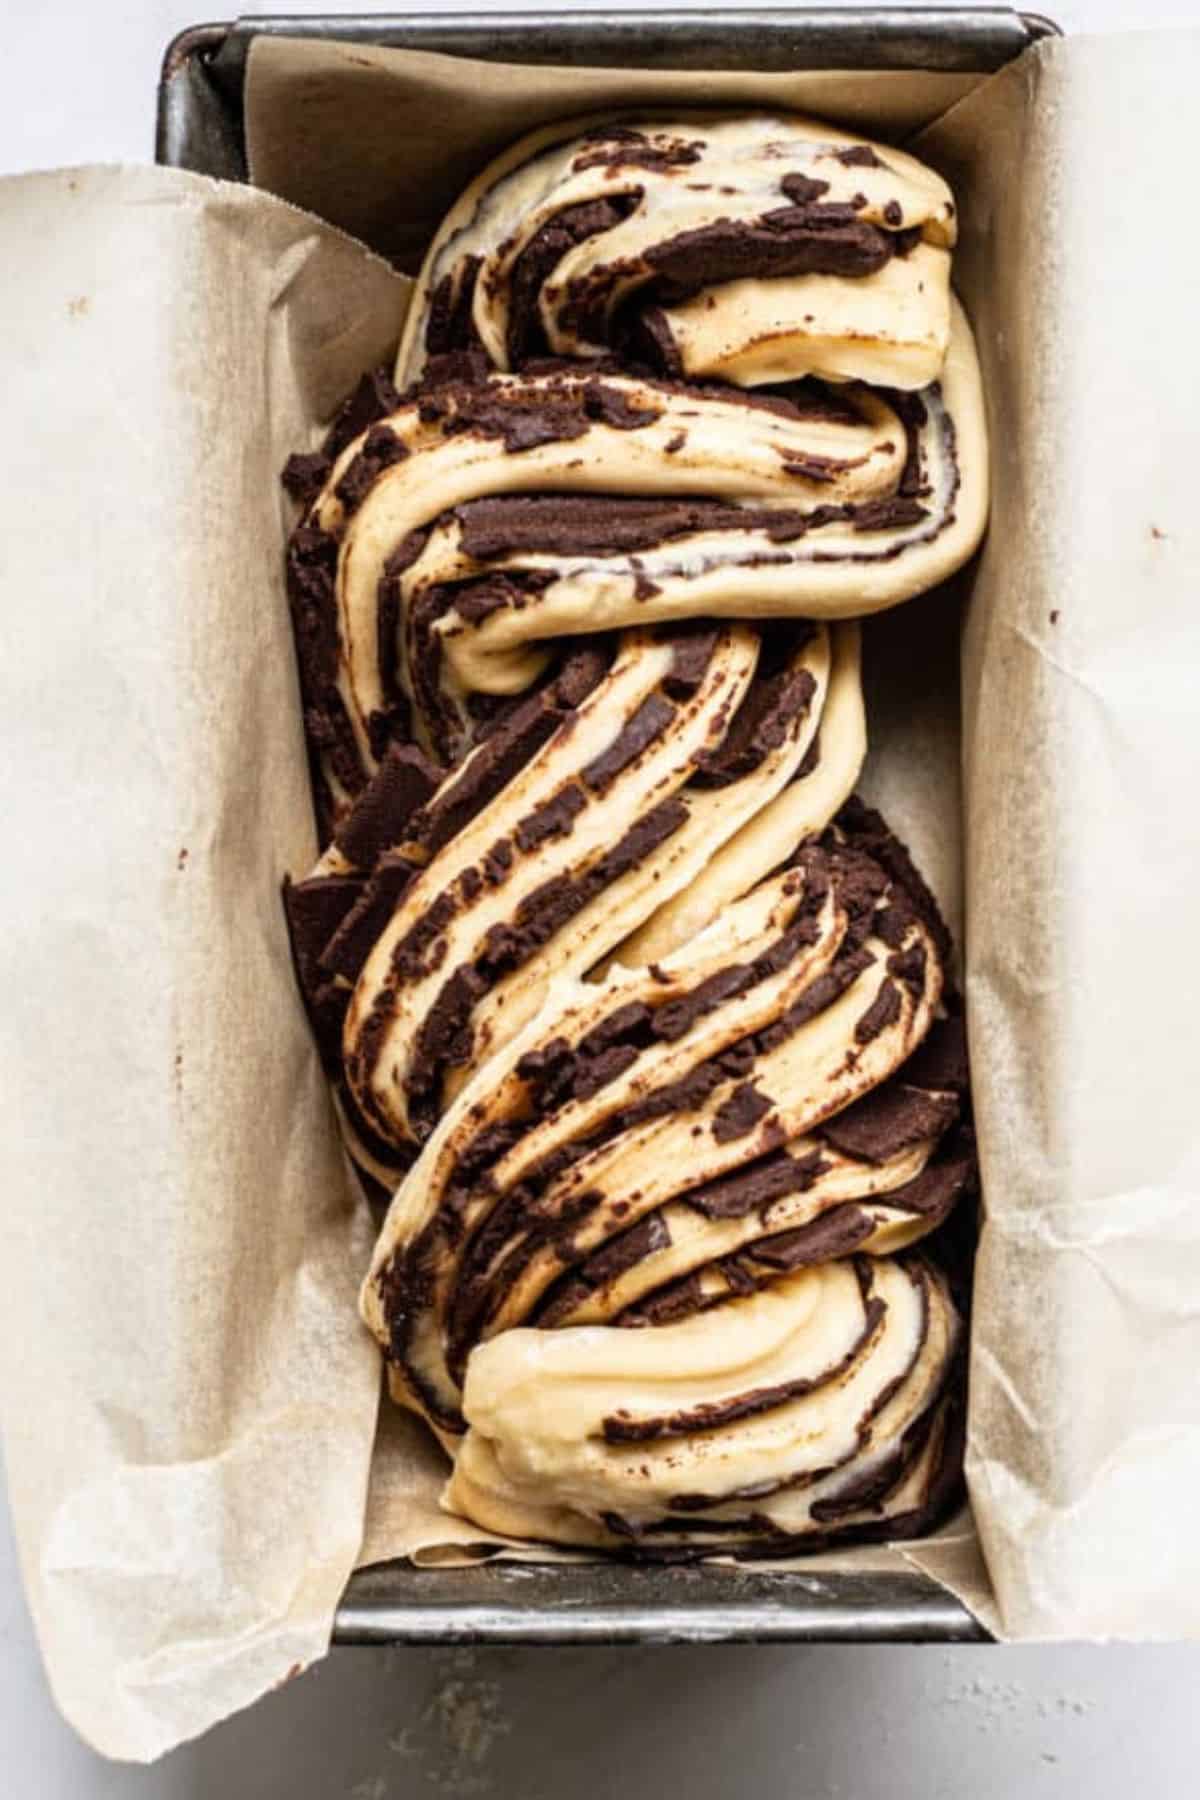
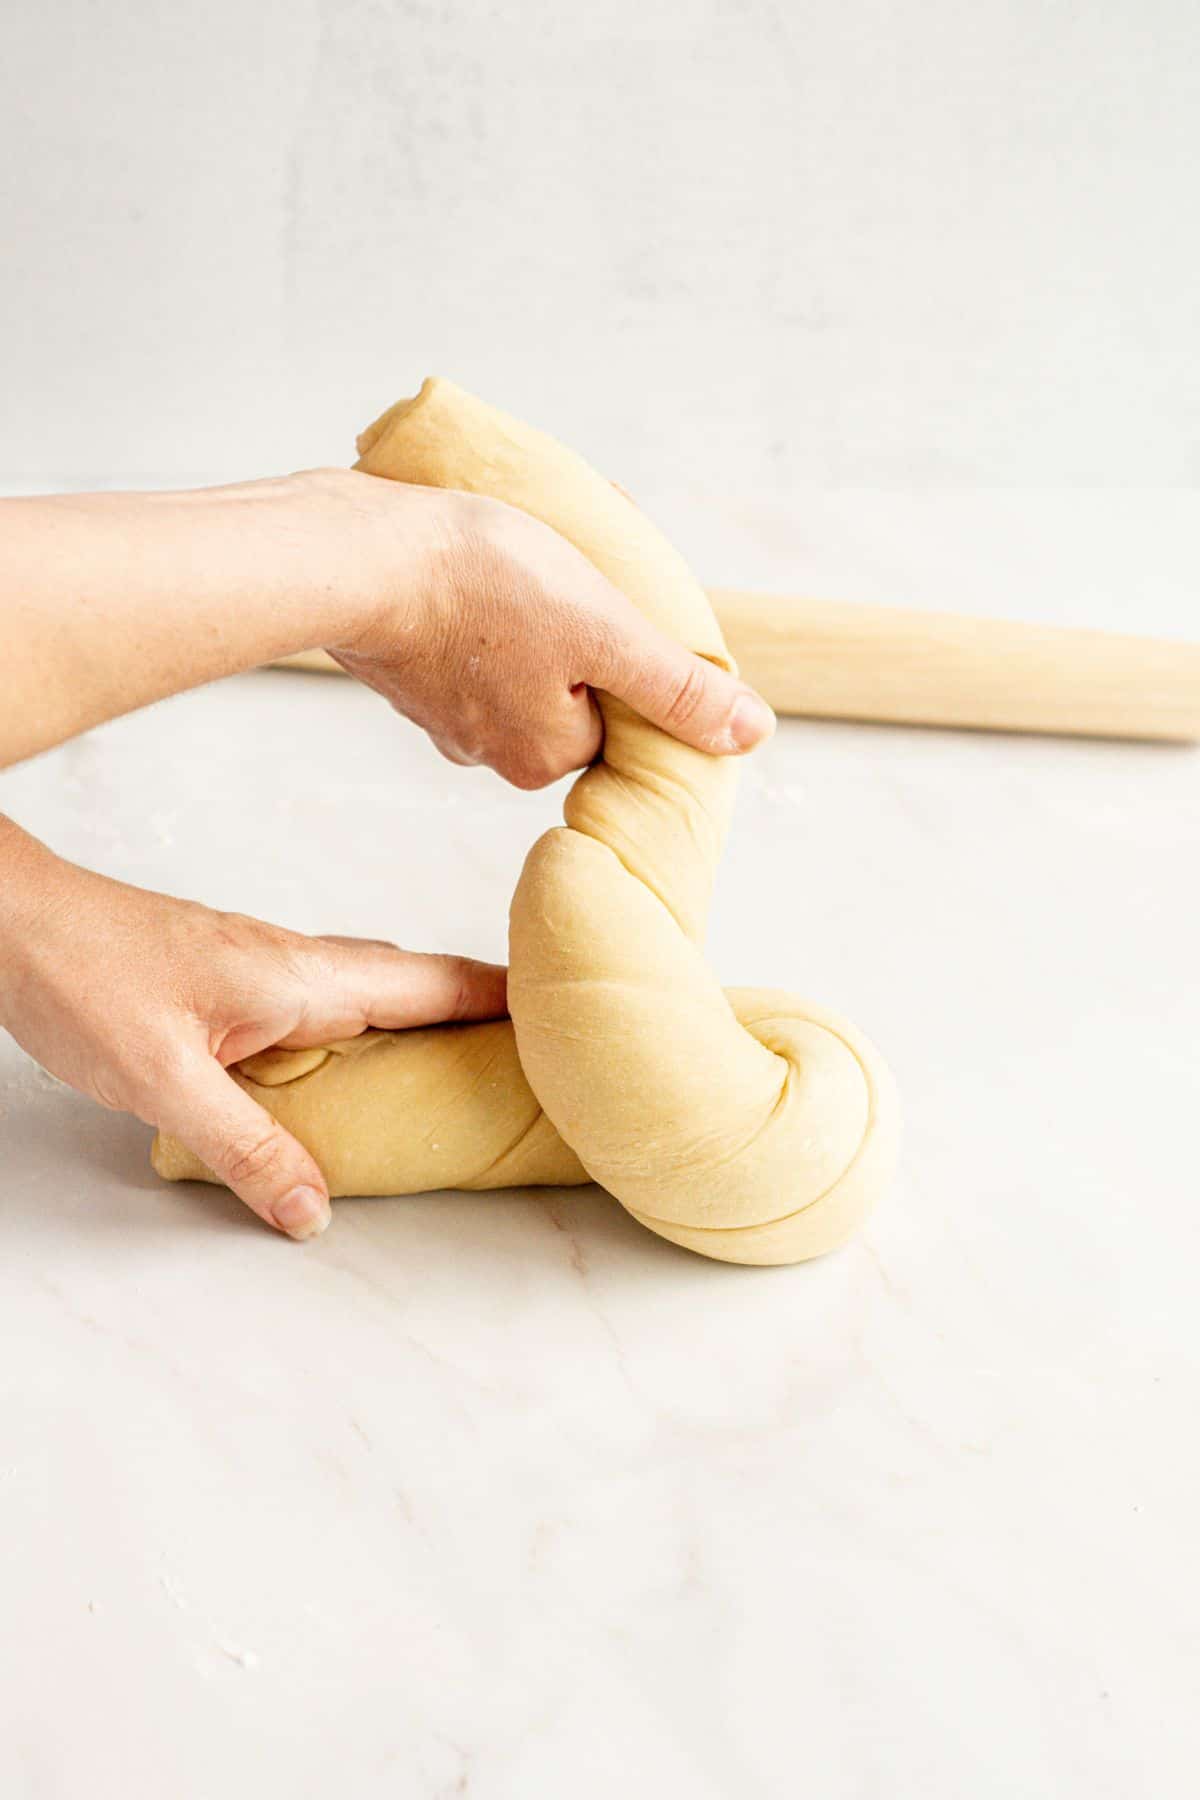
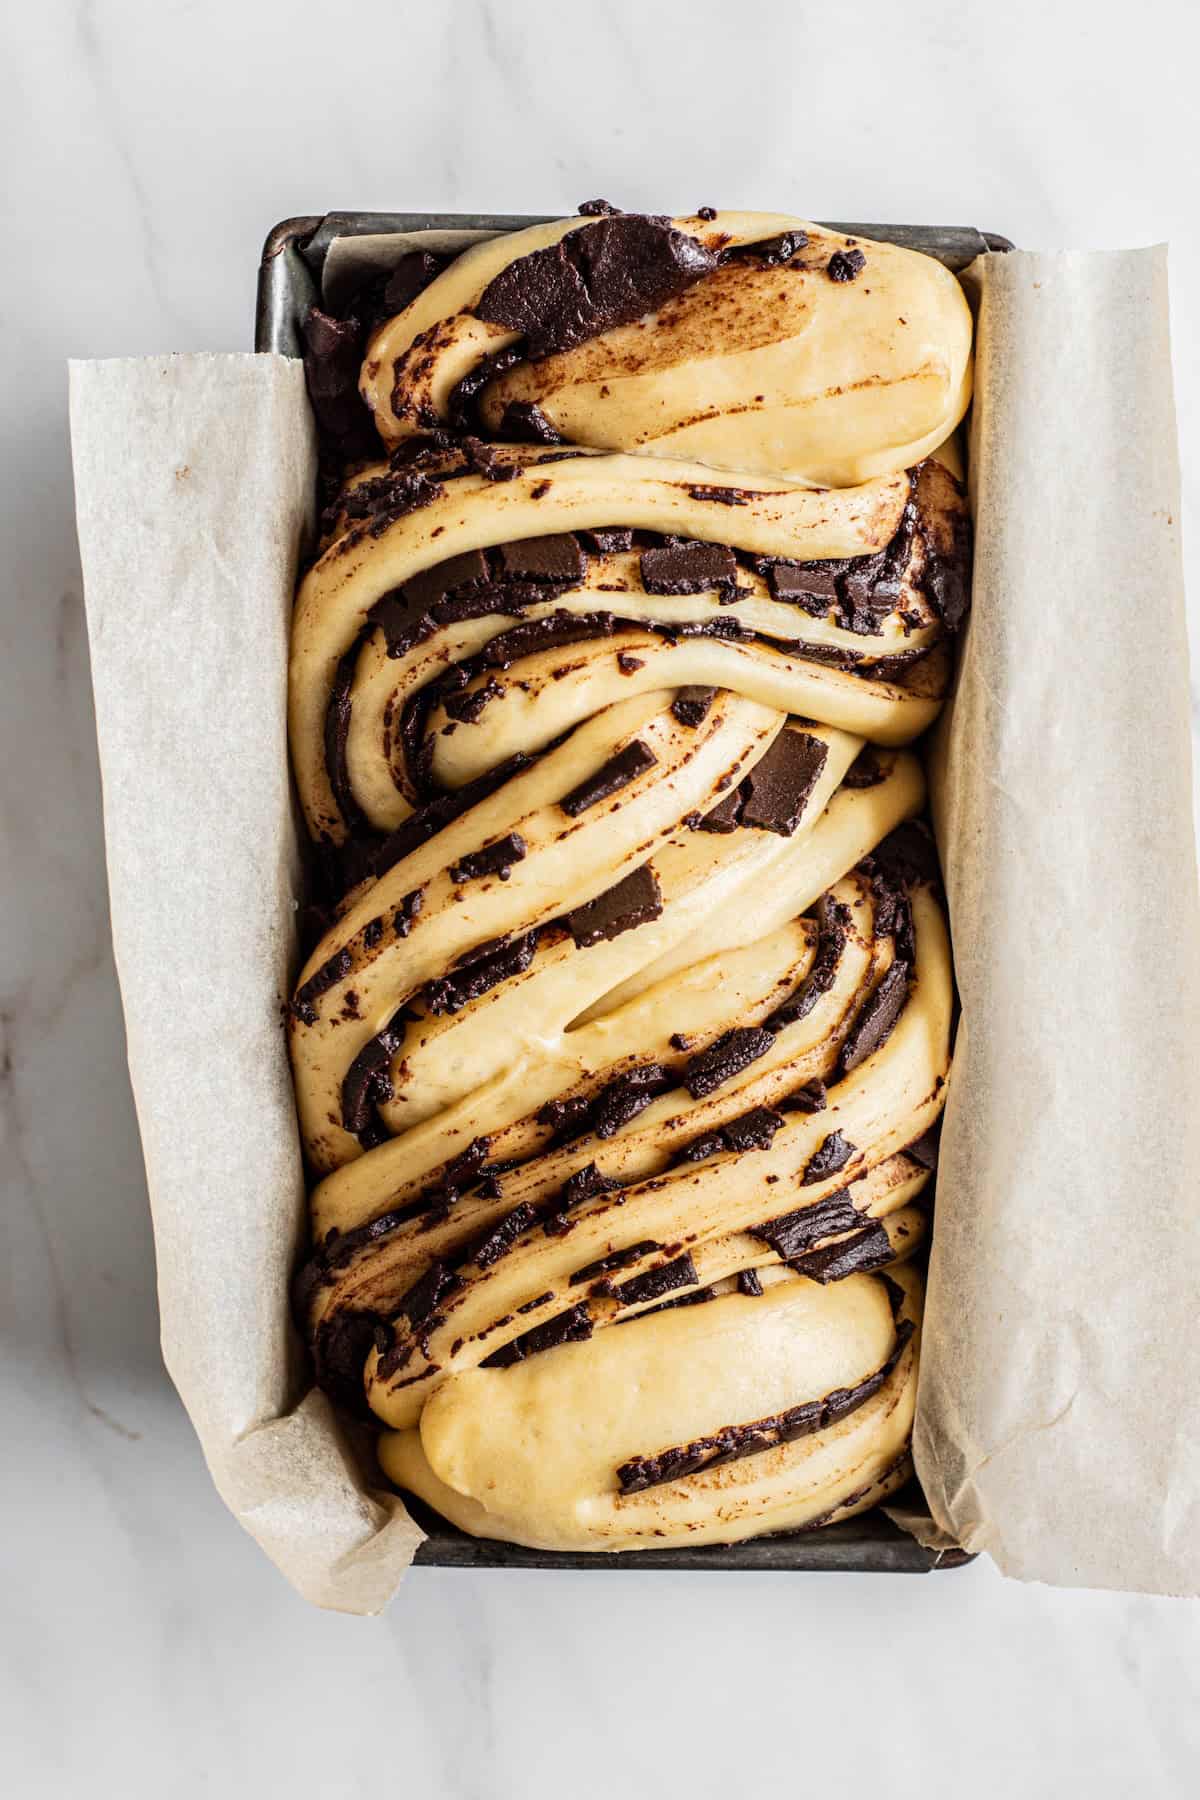
Twist the log all the way up its length, then take the two ends and twist them over each other. Then twist them over each other again. Place in a prepared loaf tin.

Second rise
- Leave the babkas to rise in a warm spot until doubled in size. The chocolate filling will crack apart as it rises which is normal.
Baking
- Preheat the oven to 350°F/180°C and place a rack in the middle.
- Once the babkas have risen, bake them for around 40 minutes until deep brown.
- While the babkas are baking, prepare the sugar syrup to glaze them. Combine granulated white sugar and water in a small saucepan over medium heat. Bring it to a simmer until the sugar has dissolved, then remove it from the heat.
- Once the babkas are removed from the oven, leave them in the baking pan.
- Brush the top of the babka liberally with the simple syrup using a pastry brush. Let them cool for 15 minutes before removing them from the pan. Continue to let them cool further on a cooling rack before slicing.
The babkas are best when served fresh, but they also store well, covered at room temperature for up to 3 days. Reheating leftover babka in the microwave will make it soft and fluffy again.Sourdough babka can be wrapped tightly and frozen for up to 3 months.
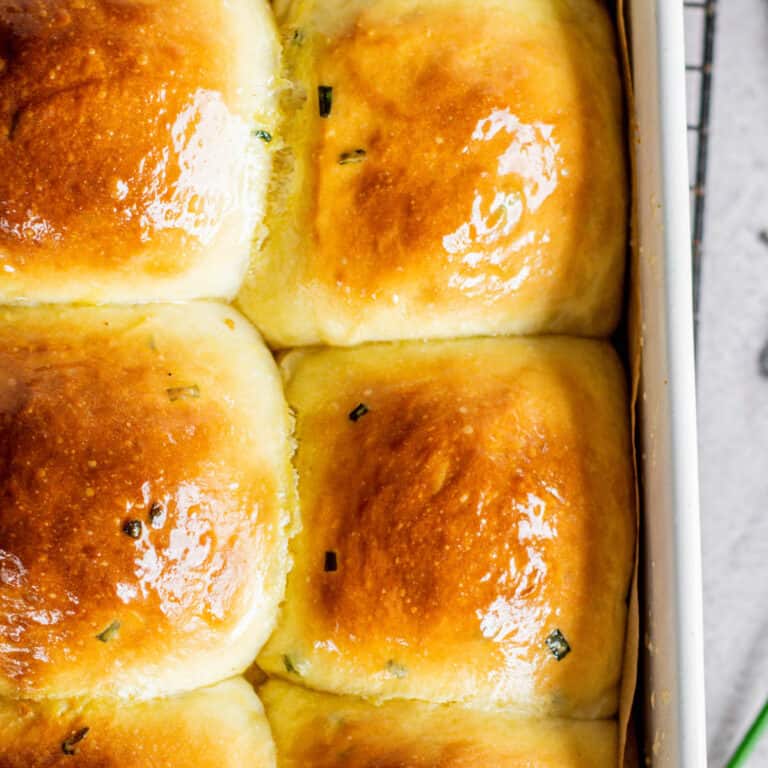
For another sweet bread recipe, try these cinnamon-sticky buns, sourdough cinnamon rolls or brioche chocolate chip bread.
Sourdough Babka
Ingredients
Stiff starter
- 30 g starter
- 60 g flour
- 30 g water
Babka dough
- 550 g strong all-purpose flour with around 11% protein or bread flour
- 80 g granulated sugar
- 4 large eggs
- 125 g milk
- All the stiff starter
- 8 g salt
- 180 g unsalted butter room temperature, cut into cubes
Chocolate filling
- 200 g good quality 50-60% dark chocolate
- 100 g unsalted butter
- 100 g powdered sugar
- 1/2 tsp vanilla paste or extract
- Pinch of salt
Sugar syrup
- 60 g sugar
- 60 g water
Instructions
The night before
- Mix together 30g starter with 60g flour and 30g water. Knead it for a minute or two into a stiff dough ball.
- Place this into a lightly oiled jar. Brush the top of the ball dough with a little water (so it doesn't dry out too much overnight). Loosely cover with a lid and leave it to rise for 8-12 hours until more than doubled.
Day 1
- Add the flour, sugar, salt, eggs, milk, and starter to the bowl of a stand mixer fitted with a dough hook. Turn the mixer on low and combine until it forms a thick but slightly sticky dough. Mix this dough for around 5 minutes to begin developing the gluten.
- Add the cubed butter, a few pieces at a time. Incorporate each cube before the next addition.
- Turn the mixer on medium and keep it mixing for around 10-15 minutes until the sticky dough strengthens, comes together, and pulls away cleanly from the sides of the bowl. If the mixer gets too hot, turn it off for 5 minutes and leave the dough to sit. It responds very well to rest.
- Once finished mixing, leave the dough to rest for a few minutes, then grab a piece and see if you can stretch it out thin so it’s almost see-through, without it tearing. This is called the 'window pane' effect and shows proper gluten development.
- The dough can be mixed by hand too. See the post for tips and video demonstrations.
- Place the dough into a greased bowl and cover it. Place it in a warm spot, ideally around 25°C/ 76°F, but under 30°C / 86°F so the butter doesn’t melt. Let the dough rise until it has bulked out by at least 50-60%. This will take around 5-7 hours, depending on temperature. This dough will struggle to rise if the temperature is too cool.
- You can create a warm and humid proofing spot by placing a large mug of boiled water in a turned-off oven and putting the dough in there. Replace the water as it cools.
- Once risen, cover the bowl with plastic wrap or an airtight lid and place it in the fridge overnight.
Day 2
- Prepare the chocolate filling so it has time to cool. In a saucepan over low heat, melt chocolate and butter together. Once melted, remove it from the heat, and while it’s still warm, stir in powdered sugar and vanilla. Pour into a bowl and let it cool until it becomes a spreadable paste.
- Grease and line two 9×5 inch loaf pans with parchment paper.
- Pull the proofed dough from the bowl and tip it onto a lightly floured bench. Cut it into two even pieces.
- Roll one piece into a rectangle measuring around 11×14 inches (27×35 cm).
- Spread over ½ the cooled chocolate filling, leaving an ½ inch (1cm) border around all the sides. Roll it up lengthwise into a log and place it in the fridge for 10-15 minutes. This cools down the chocolate and makes it easier to cut later.
- Repeat with the other dough piece.
- Once chilled, it's time to shape and braid the sourdough babka. Slice a log in half lengthwise. Cut it with a knife; don't push down on the dough, or it will squash. Fold the two ends over, lift the left half over the right half, then the right over the left, and repeat down, leaving the chocolate exposed. Place the braid into a prepared loaf pan. You will likely need to compact it a bit to make it fit.
- Leave the babkas to rise in a warm and humid spot until they double in size. The chocolate filling will crack apart as it rises, which is normal.
Baking
- Preheat the oven to 350°F/180°C and place a rack in the middle of the oven.
- Once the babkas have risen, bake them for around 40 minutes until deep brown. If browning too much, cover the tops loosely with foil.
- While baking the babkas, prepare the sugar syrup to glaze them.
- Combine the sugar and water in a small saucepan over medium heat. Bring it to a simmer until the sugar has dissolved, then remove it from the heat.
- Once the babkas are removed from the oven, brush them liberally with the syrup.


hi! I just made this recipe! It was delicious! My one problem was just that my chocolate filling was not spreadable at all, as soon as I put the sugar in the chocolate it became a doughy filling. I save it rolling it into a thin layer and putting it on top of the dough. Thank you again for the awesome recipes!
Hi there!! What size pans did you use?
Heya, you can use either two 9×5 inch pans or two 8 1/2 x 4 1/2 for this. The smaller pans make a higher loaf but sometimes the chocolate filling can drip out when baked in a small pan so you might need a tray underneath to catch any drips.
How long did it take for the babkas to double after braided?
Usually around 3-4 hours depending on temperature 🙂
Hi,
In your recipe I was wondering what kind of flour you use if it’s AP flour, bread flour, or a whole wheat flour cause I’m looking at the ingredients on my flours and I have one that has 4g of protein and one with 5g but it doesn’t give a percentage, so just wondering what you would recommend?
Hey is that 4g per serving? (Usually around 30g is a serving) cause that’ll work out to be around 13% protein
I have a question is it suppose to rise a bunch cause I let mine proof in my proofer and it doesn’t look like it really proofed rose at all and the dough seems kinda dense is that how it’s supposed to be.
Hey Ashley, the dough should puff out in the first rise. It doesn’t need to double in size, but it should be visibly bigger, by around 40%. Then, on the second rise, when the babkas are shaped, they should double in size.