

No-Bake Raspberry Cheesecake Bars
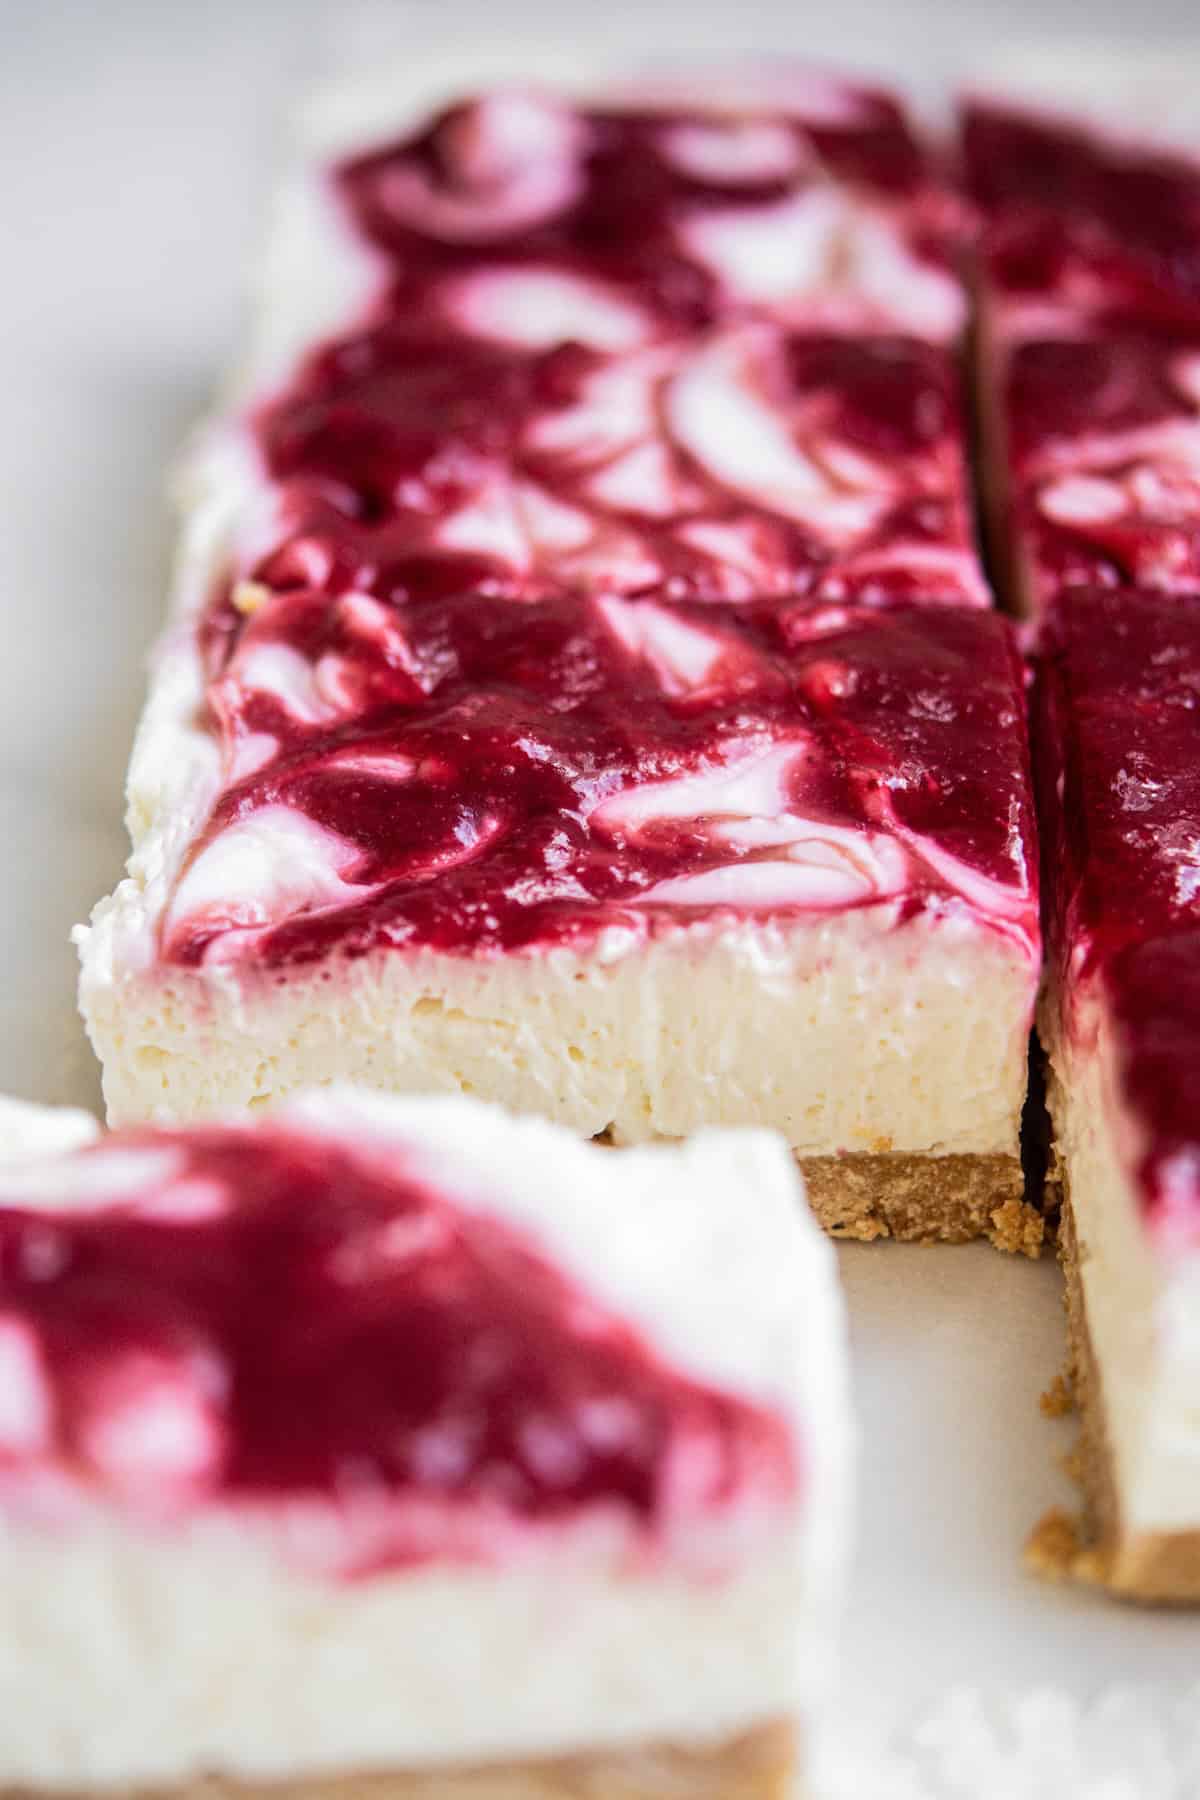
Creamy, no-bake raspberry cheesecake bars with a light and fluffy filling, tangy raspberry coulis, and a buttery crumb. They make the perfect summer dessert.

The no-bake filling for these raspberry cheesecake bars is super simple. It’s a classic no-bake cheesecake base, made of whipped cream, cream cheese, sour cream, sugar, lemon juice, and vanilla extract. The cream is beaten until light and fluffy and folded together carefully with whipped cream cheese to keep it light and airy.
There is no gelatin in this recipe so the cheesecake bars are soft and mousse-like. If you prefer a firmer cheesecake you can add gelatine. See the notes in the recipe card to do this.

Raspberry topping
The raspberry coulis is what gives these so much delicious flavor. A coulis is a smooth fruit sauce, either a fruit purée or made from crushed and strained fruits. It contains much less sugar than raspberry jam, making it flavorful, tangy, and bright. You can use frozen or fresh raspberries. Depending on where you live, frozen raspberries often are a lot cheaper. Frozen raspberries are picked at their prime size and sweetness too and make a wonderful coulis.
The raspberries are cooked slowly with a little sugar and then strained to remove the seeds. Cooking the raspberries concentrates the flavor more than using a fresh raspberry swirl. The raspberry topping is spread on top of the cheesecake. If you don’t feel like removing the seeds, make a raspberry compote instead!
Equipment
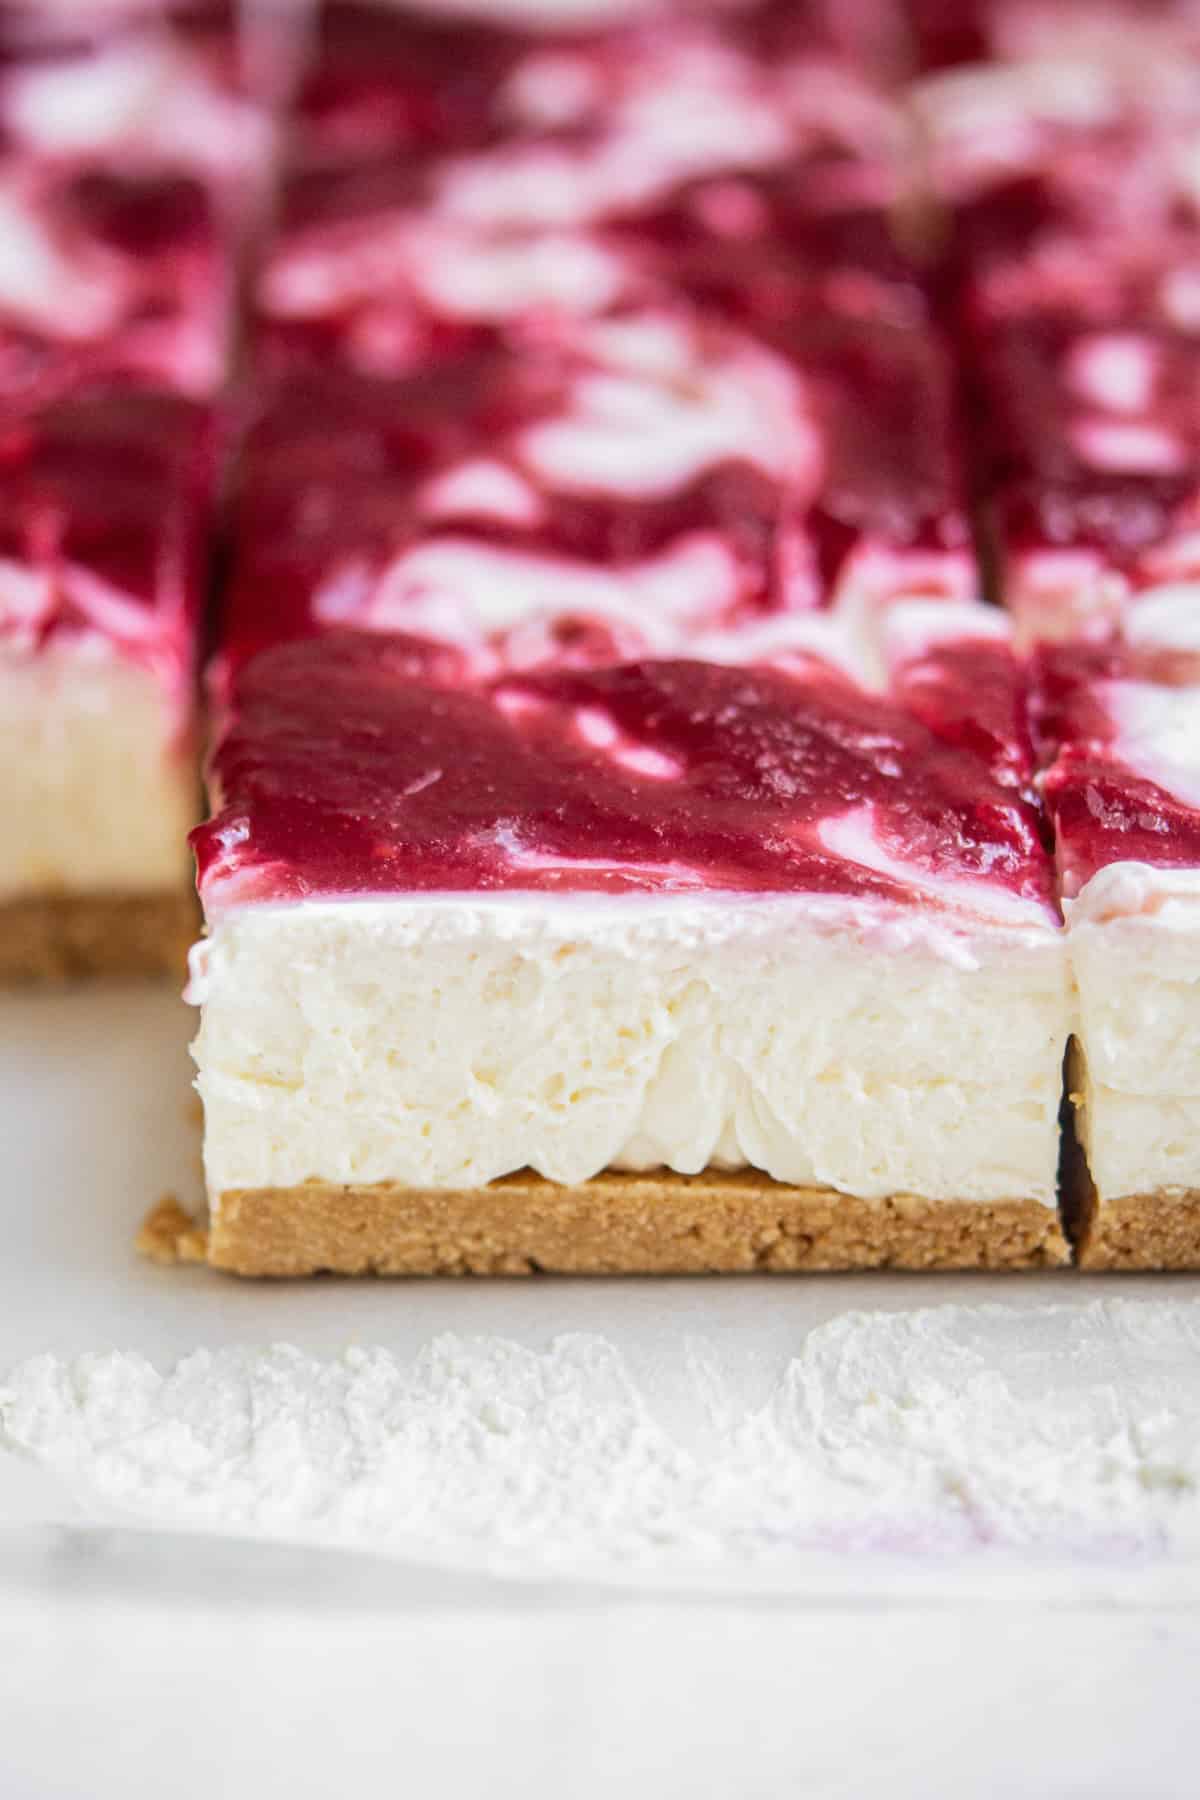
8-inch square baking pan– You’ll need an 8-inch square baking pan for these bars, the same square pan used in this crinkle brownie recipe. It makes a cheesecake square that can be easily sliced into 10 servings. The pan will be lined with parchment paper so that the cheesecake can be lifted out once it has been chilled.
Electric mixer or a stand mixer – to whip the cream and cream cheese
Food processor (optional) – A food processor is helpful to blend the graham crackers or cookies into crumbs, though you could also add them into a large Ziploc bag and use a heavy rolling pin or similar to crush them.
Here’s how it’s made!
- Line an 8×8 square pan with parchment paper. Leave an overhang of parchment so that you can lift the cheesecake from the pan to slice it.
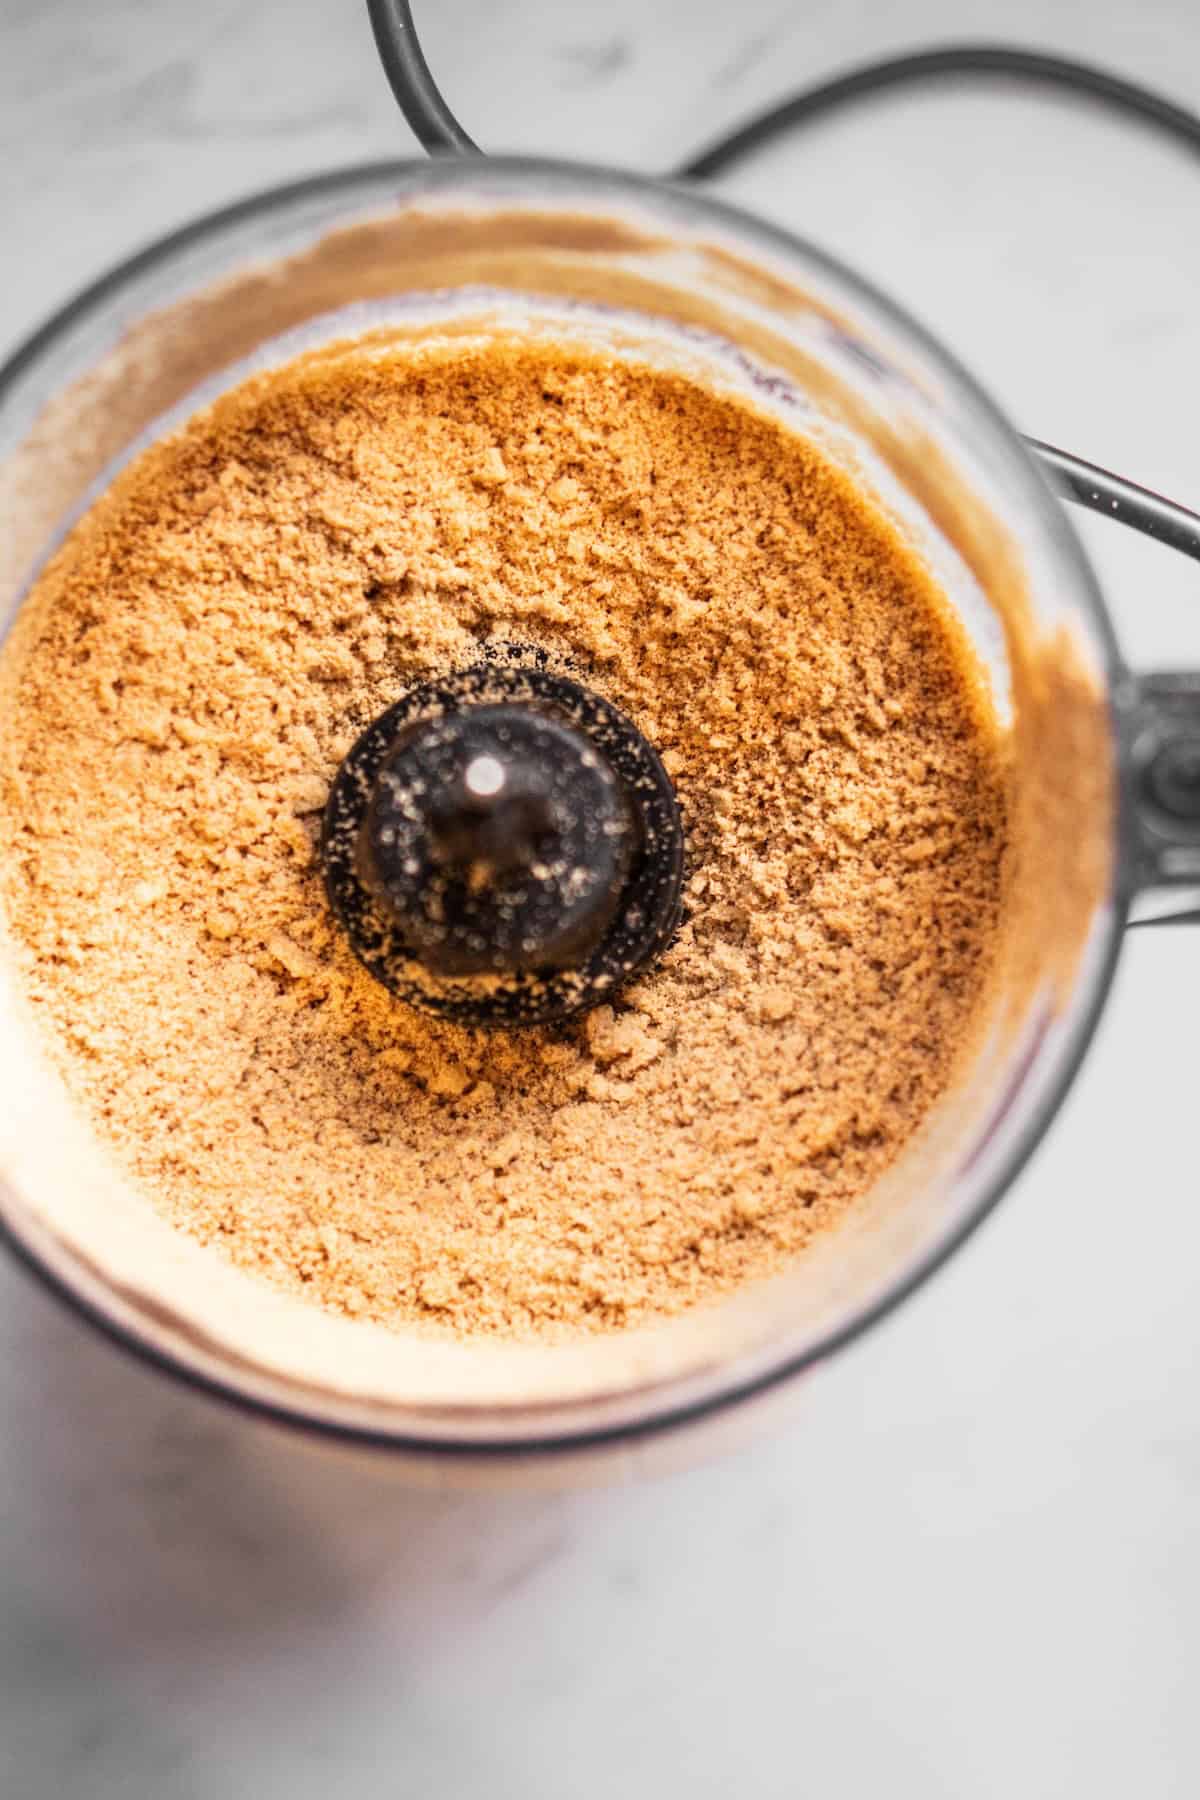
- Blend or crush graham crackers or equivalent (see notes in the recipe card) into fine crumbs.
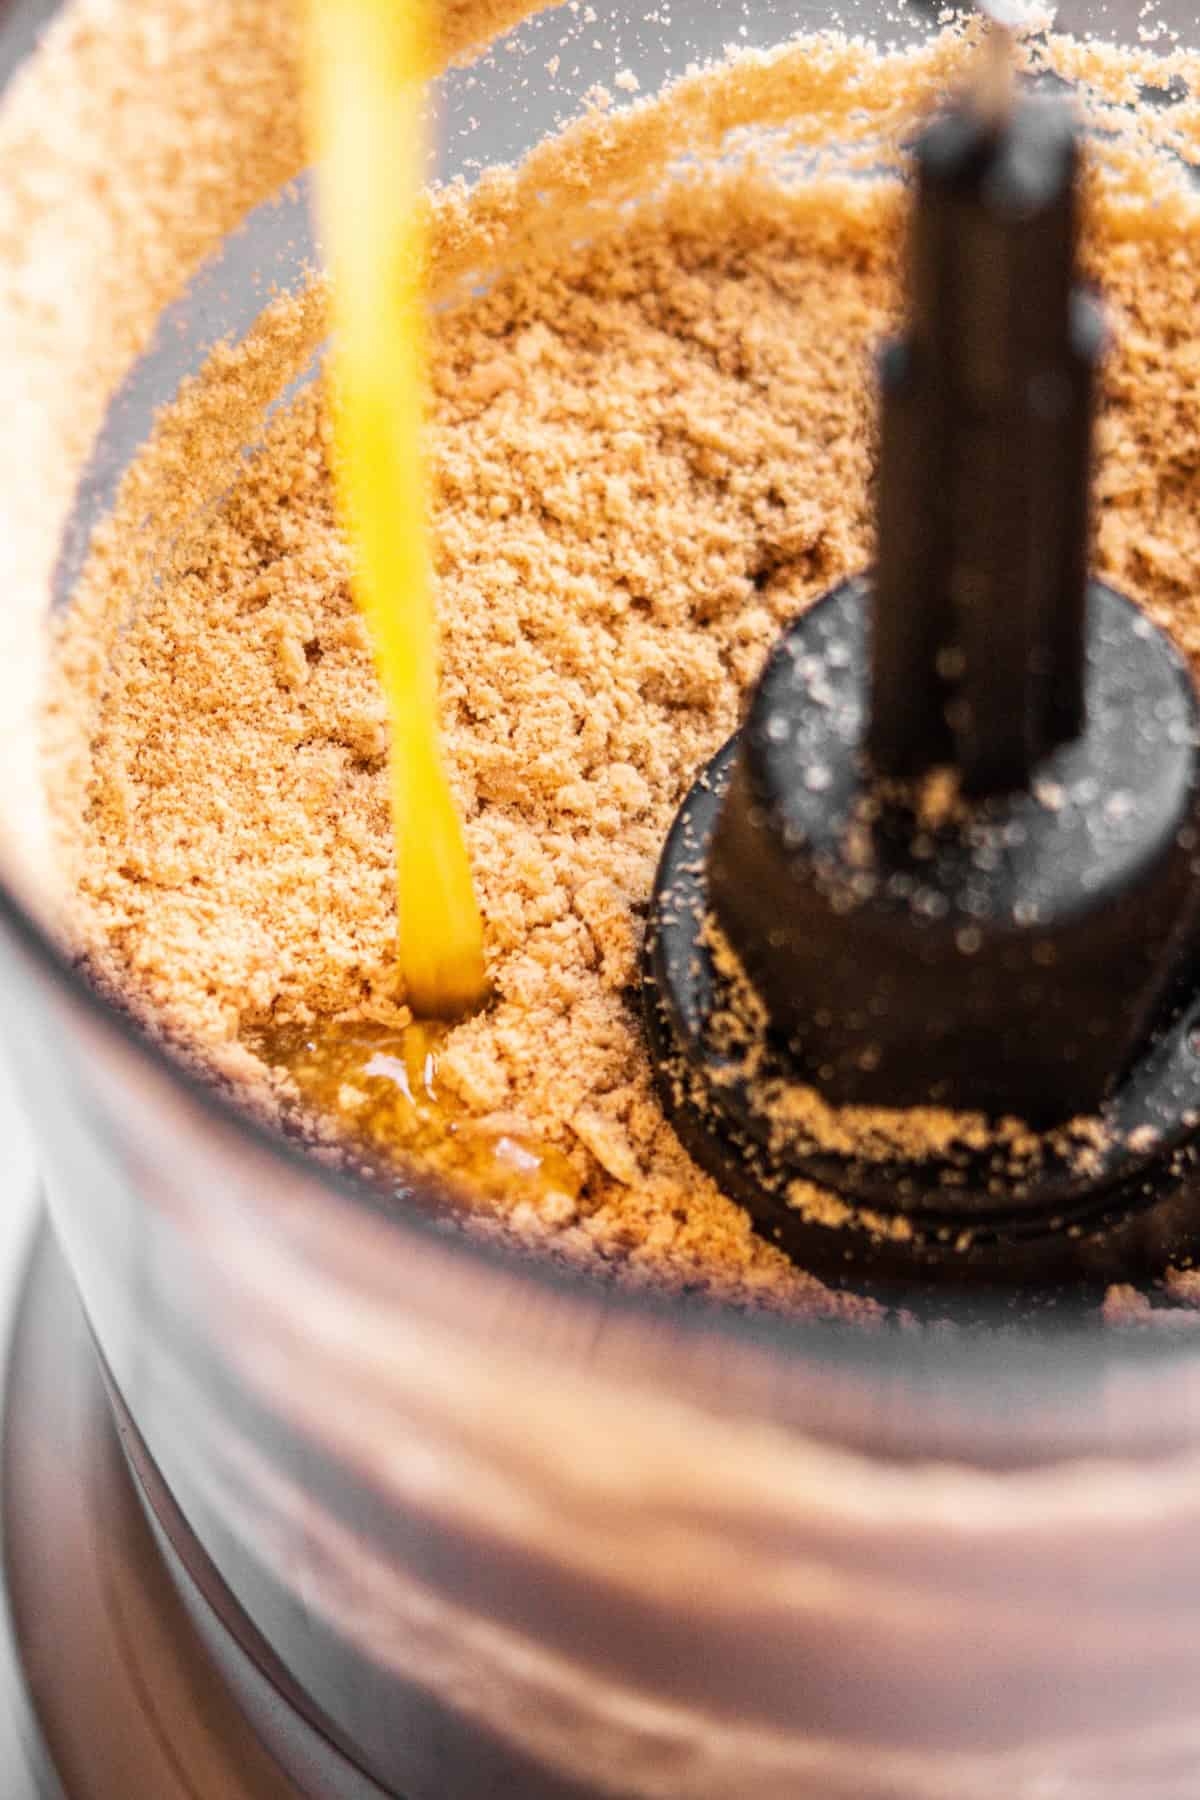
- Add in butter and mix into a crumbly mixture.
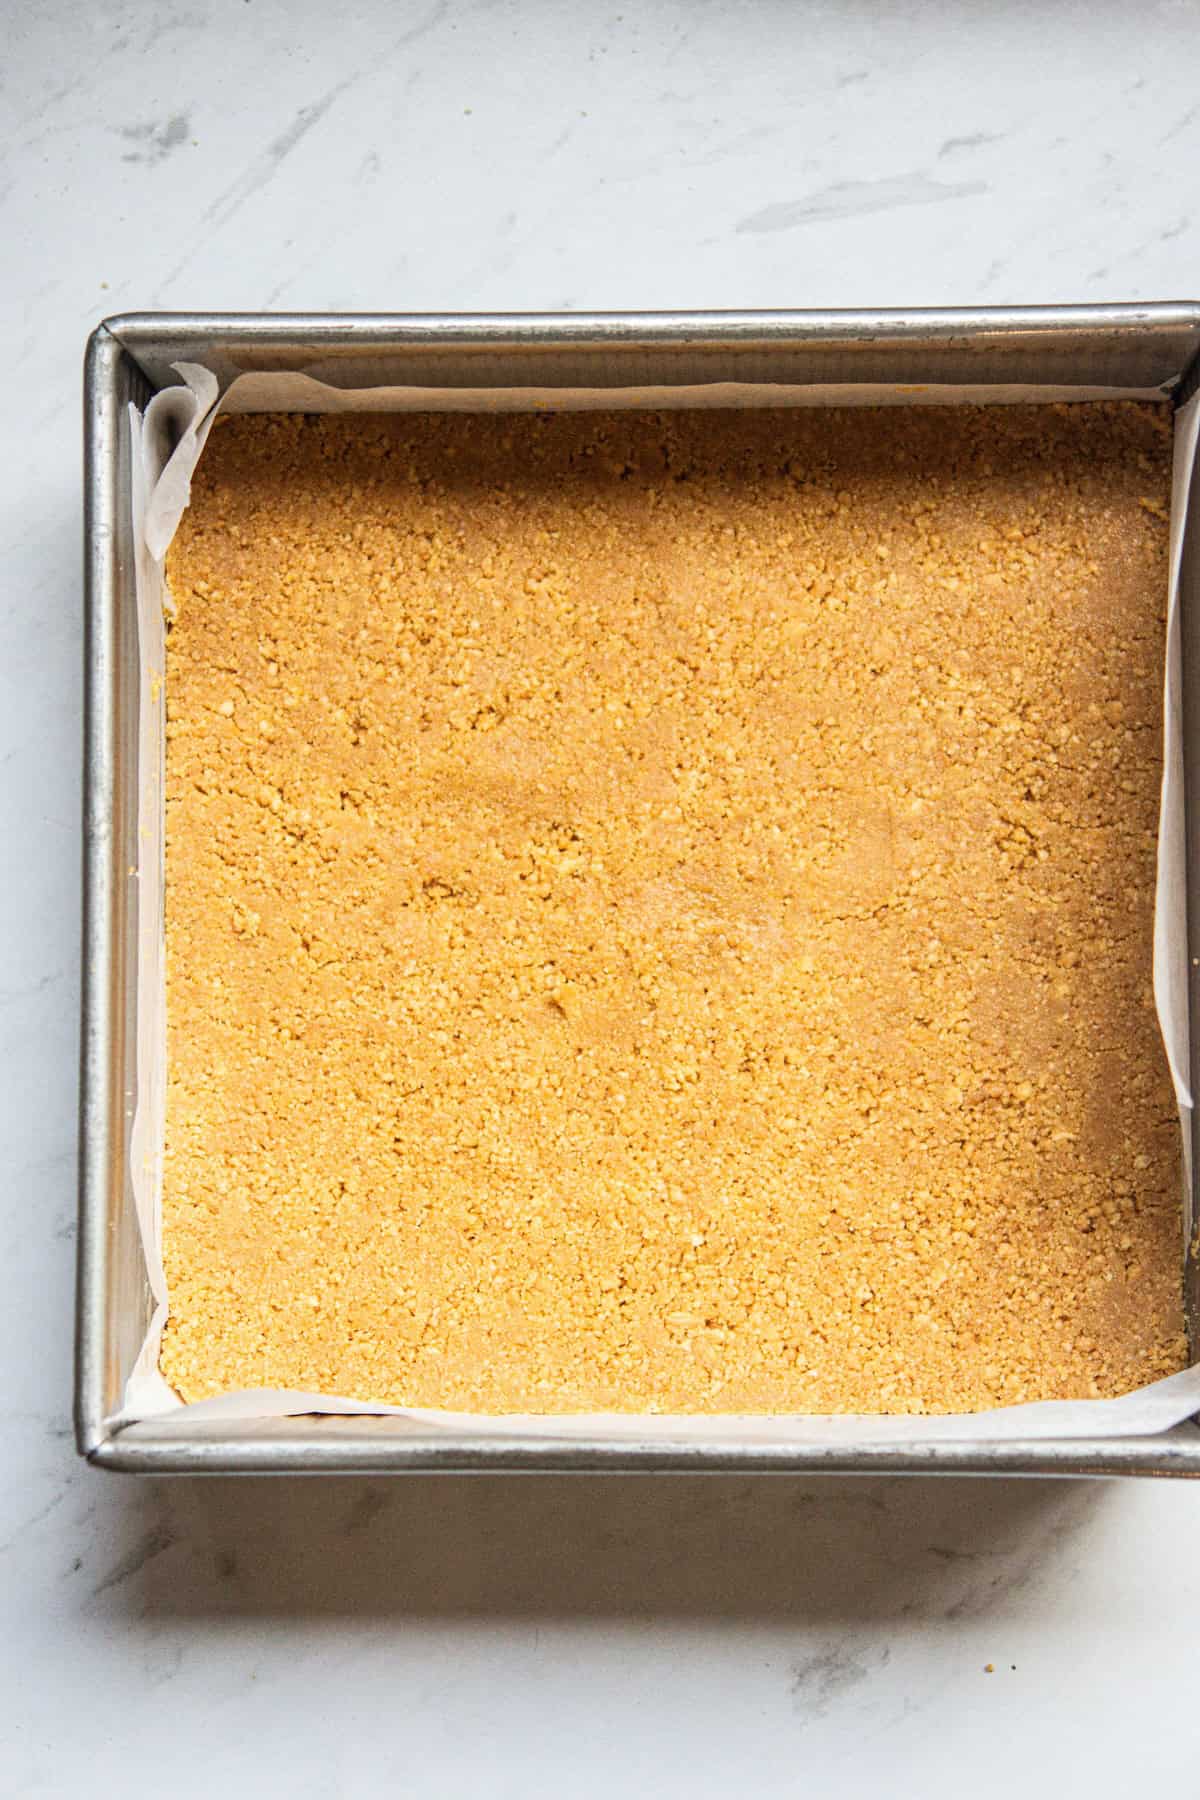
- Press into the 8×8 pan and place in the fridge.
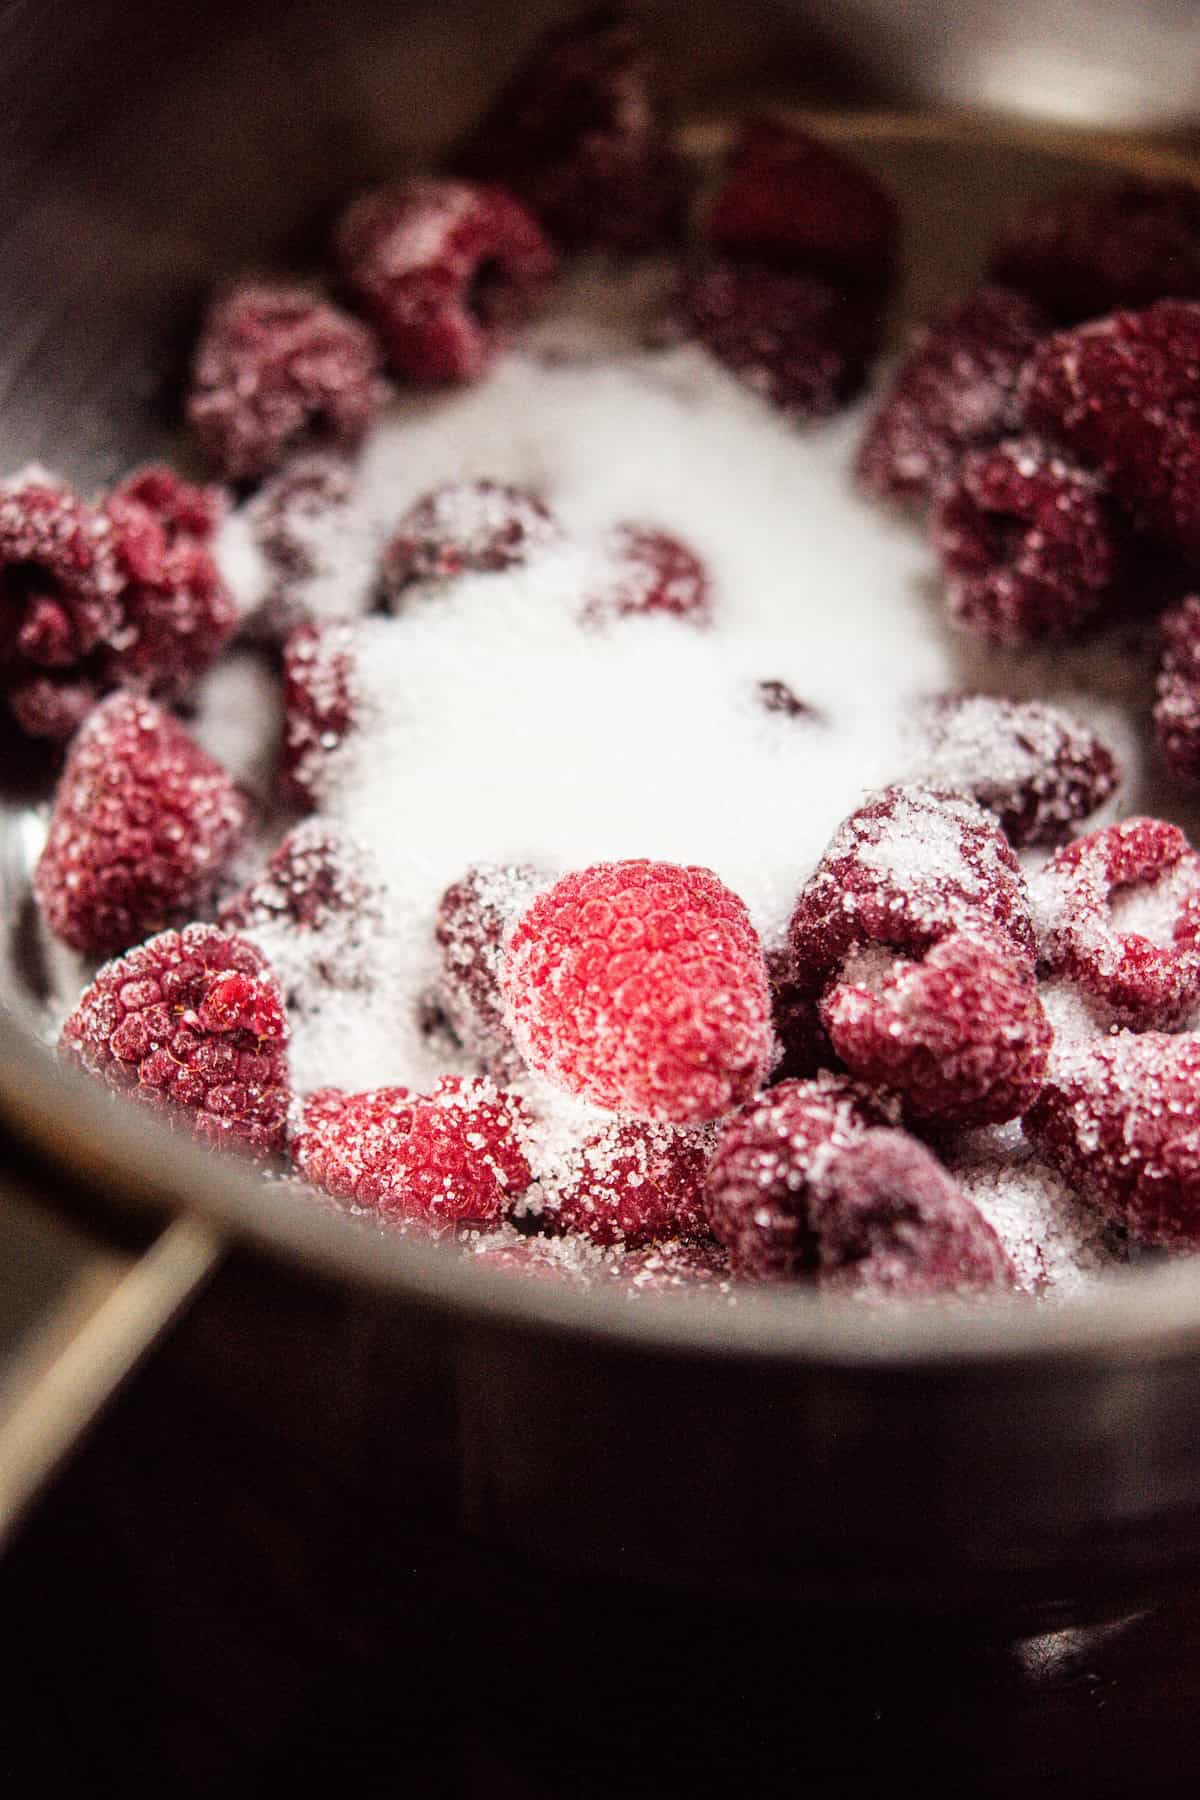
- Add raspberries and sugar to a small saucepan over low heat.
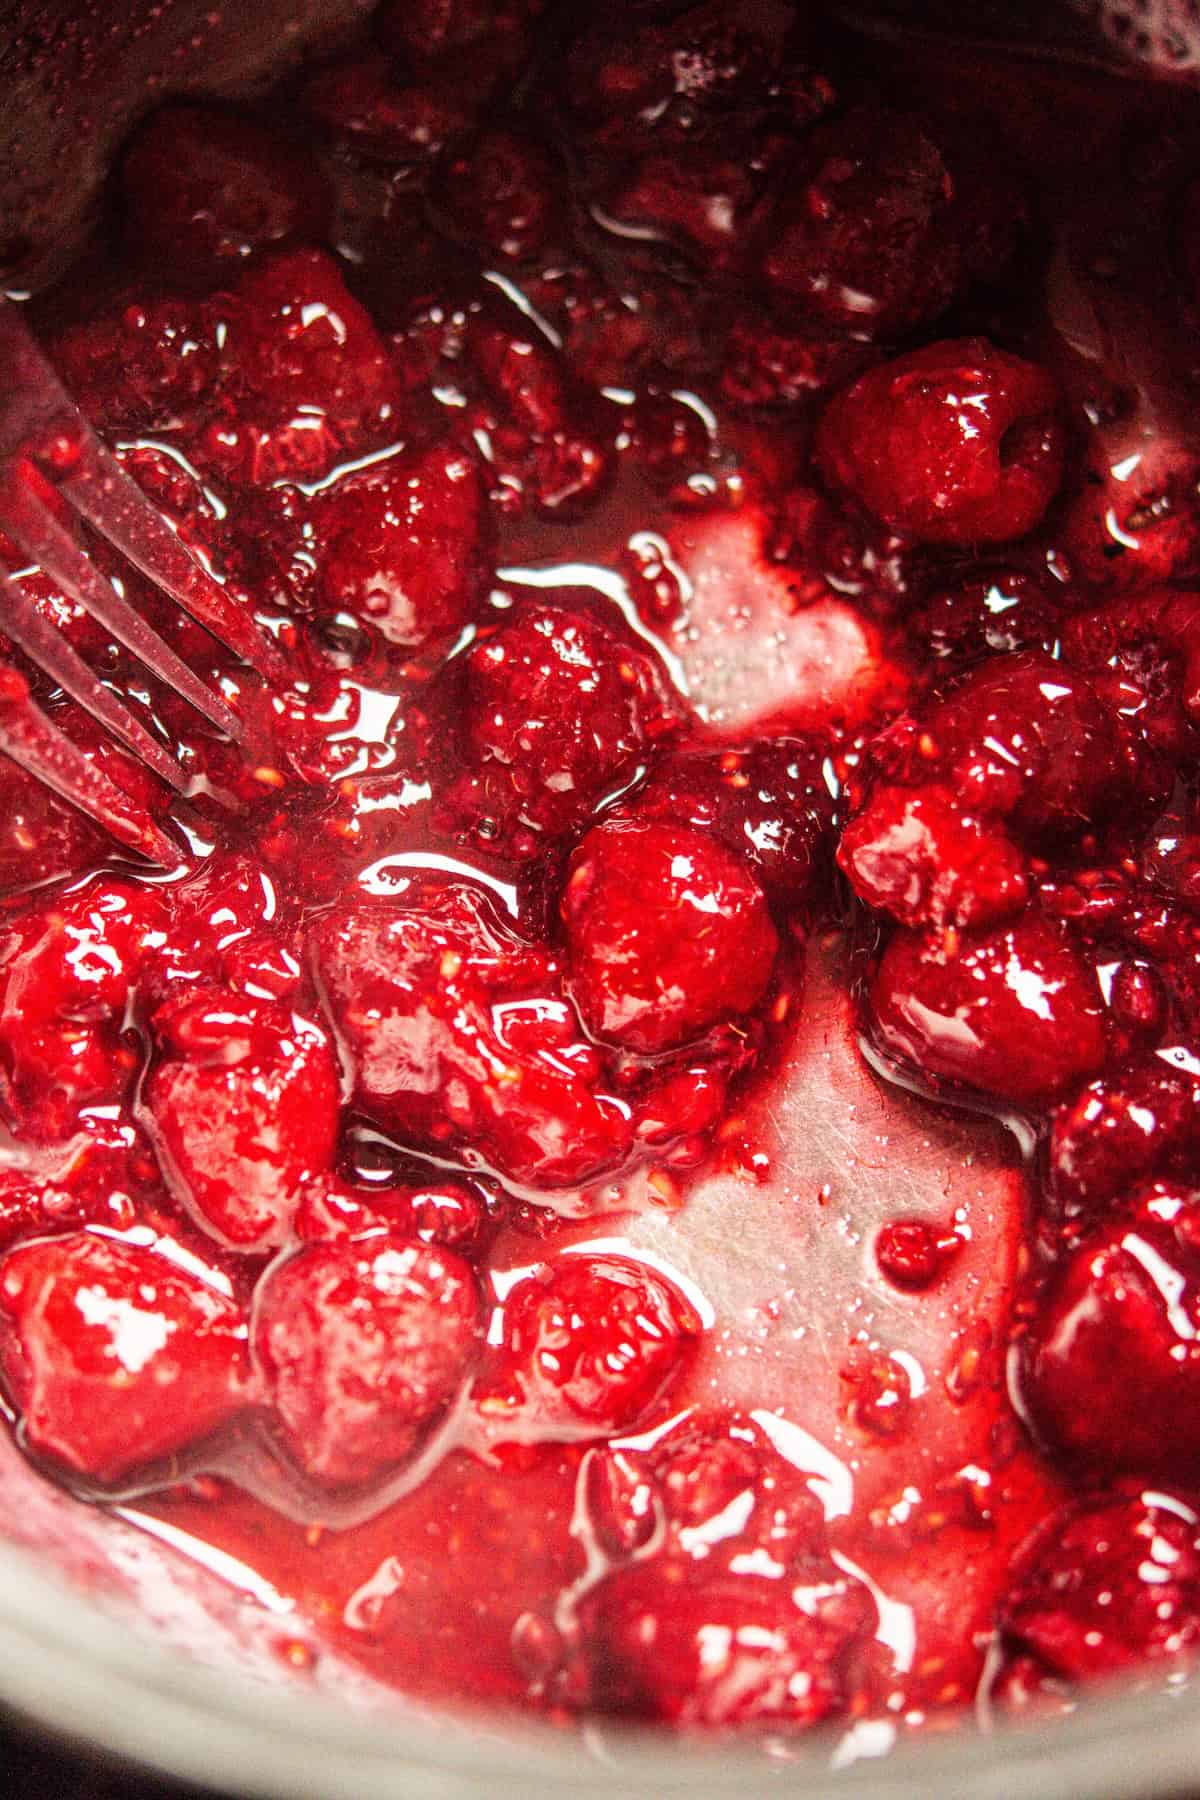
- Cook for around 5 minutes until the raspberries break down.
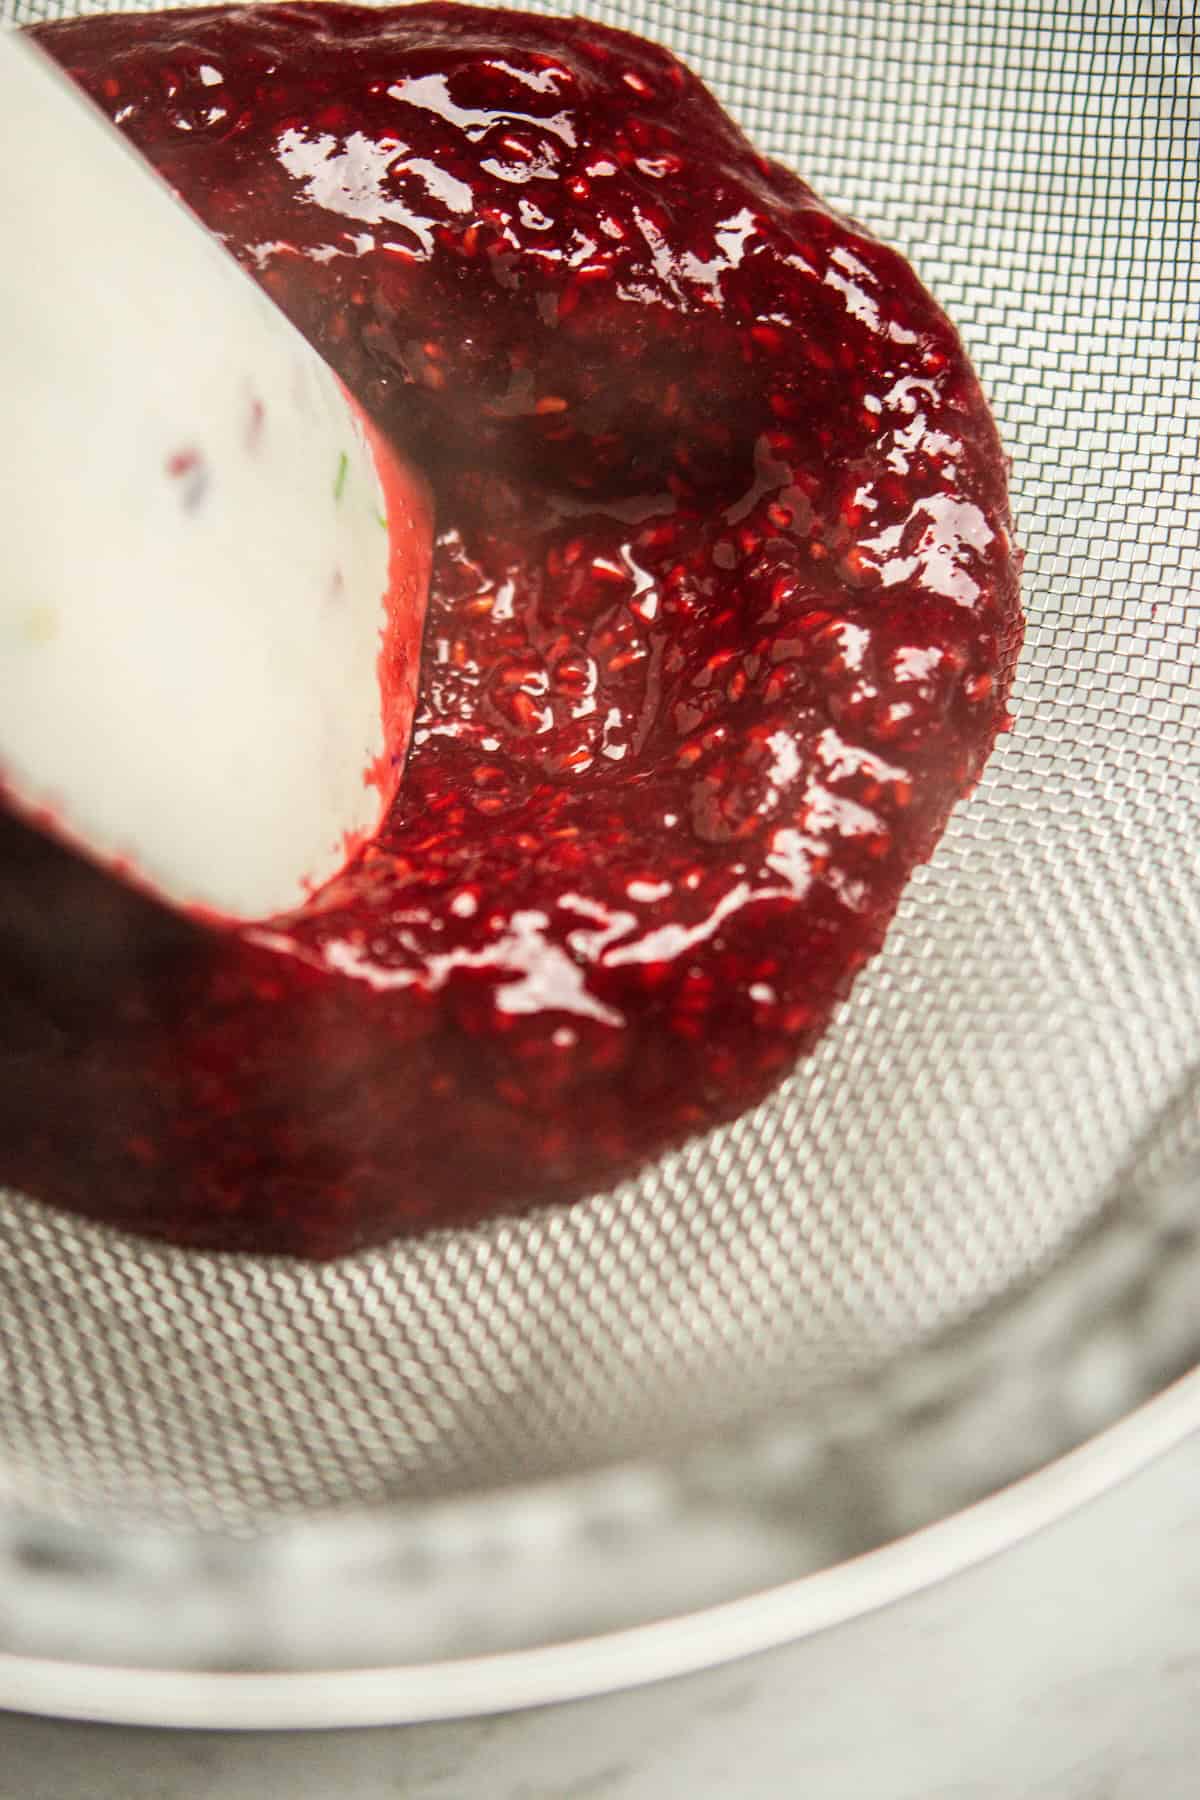
- Push the cooked raspberries through a fine-mesh strainer to remove the seeds, then refrigerate.
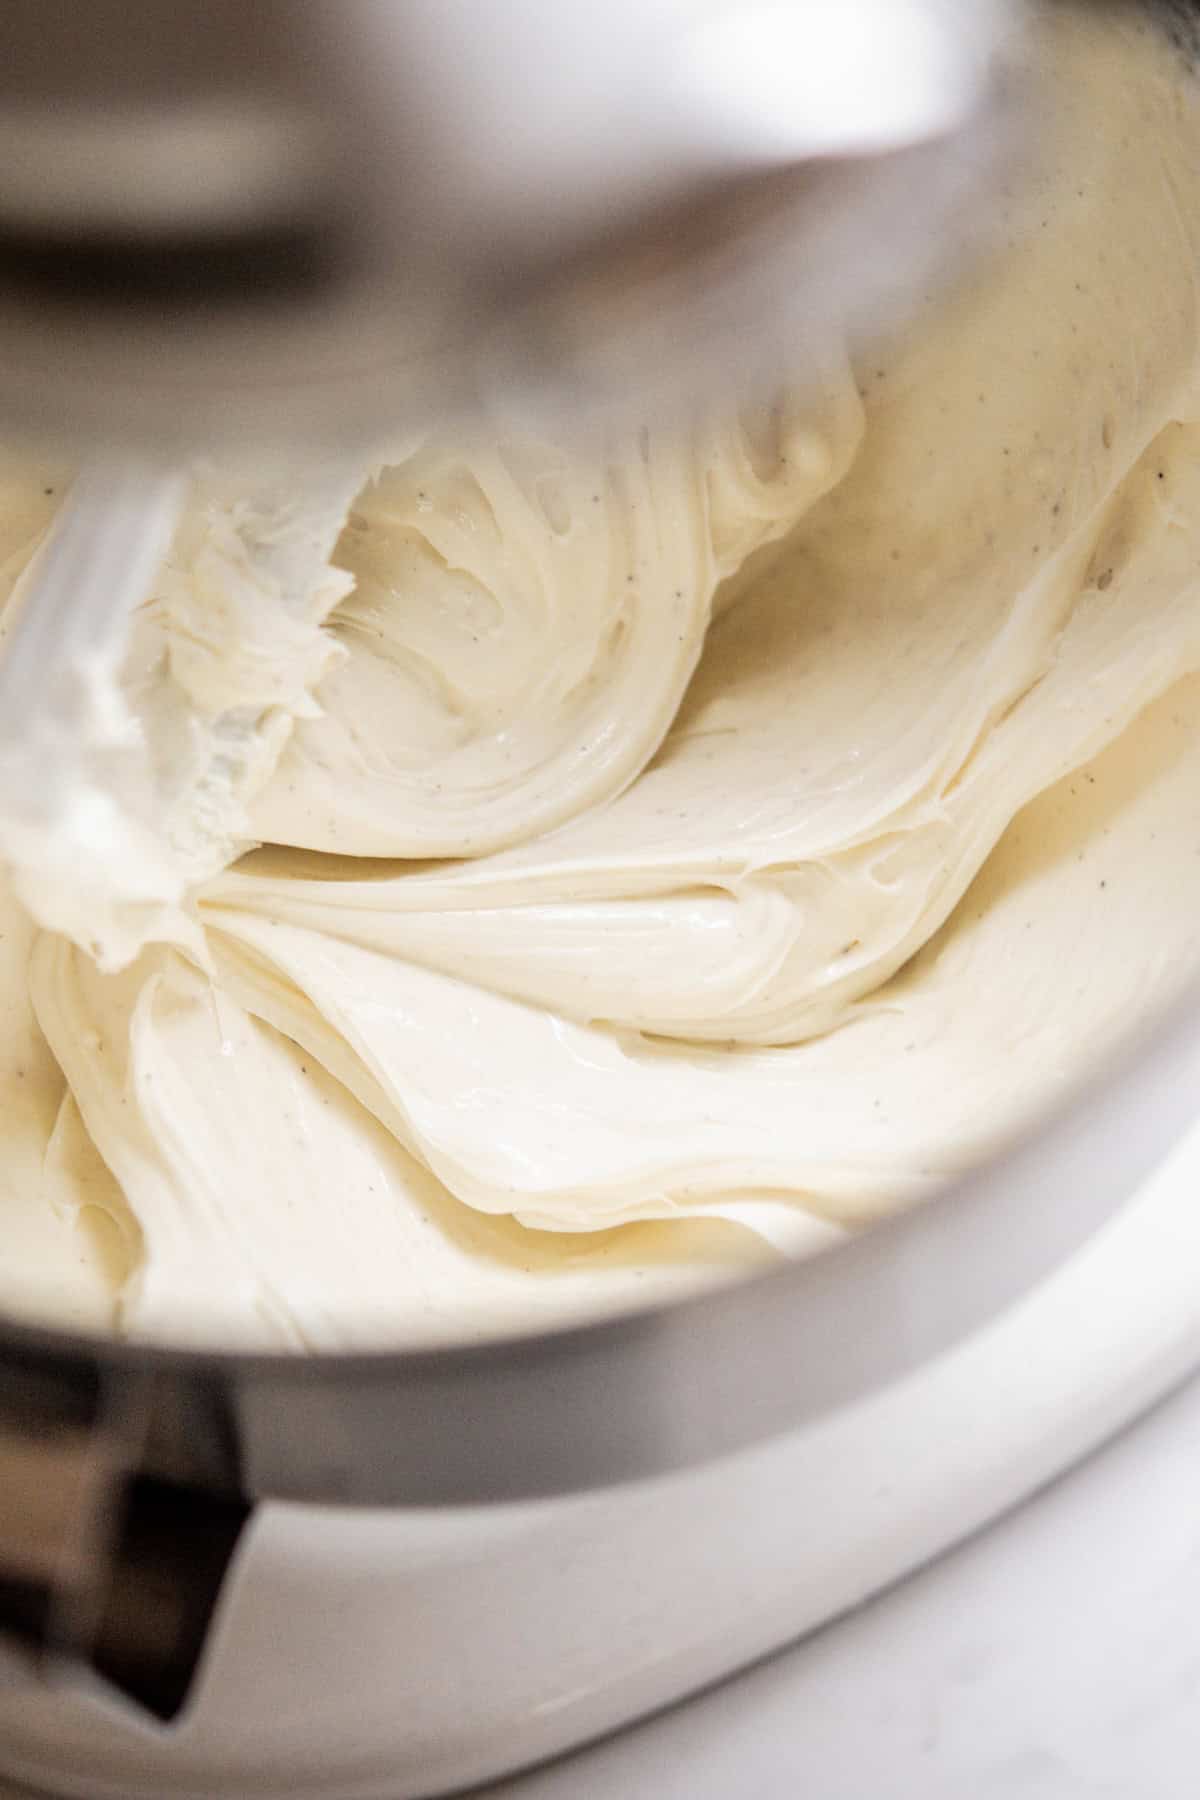
- Whip cream cheese until smooth, then beat in powdered sugar, lemon, vanilla, salt and sour cream.
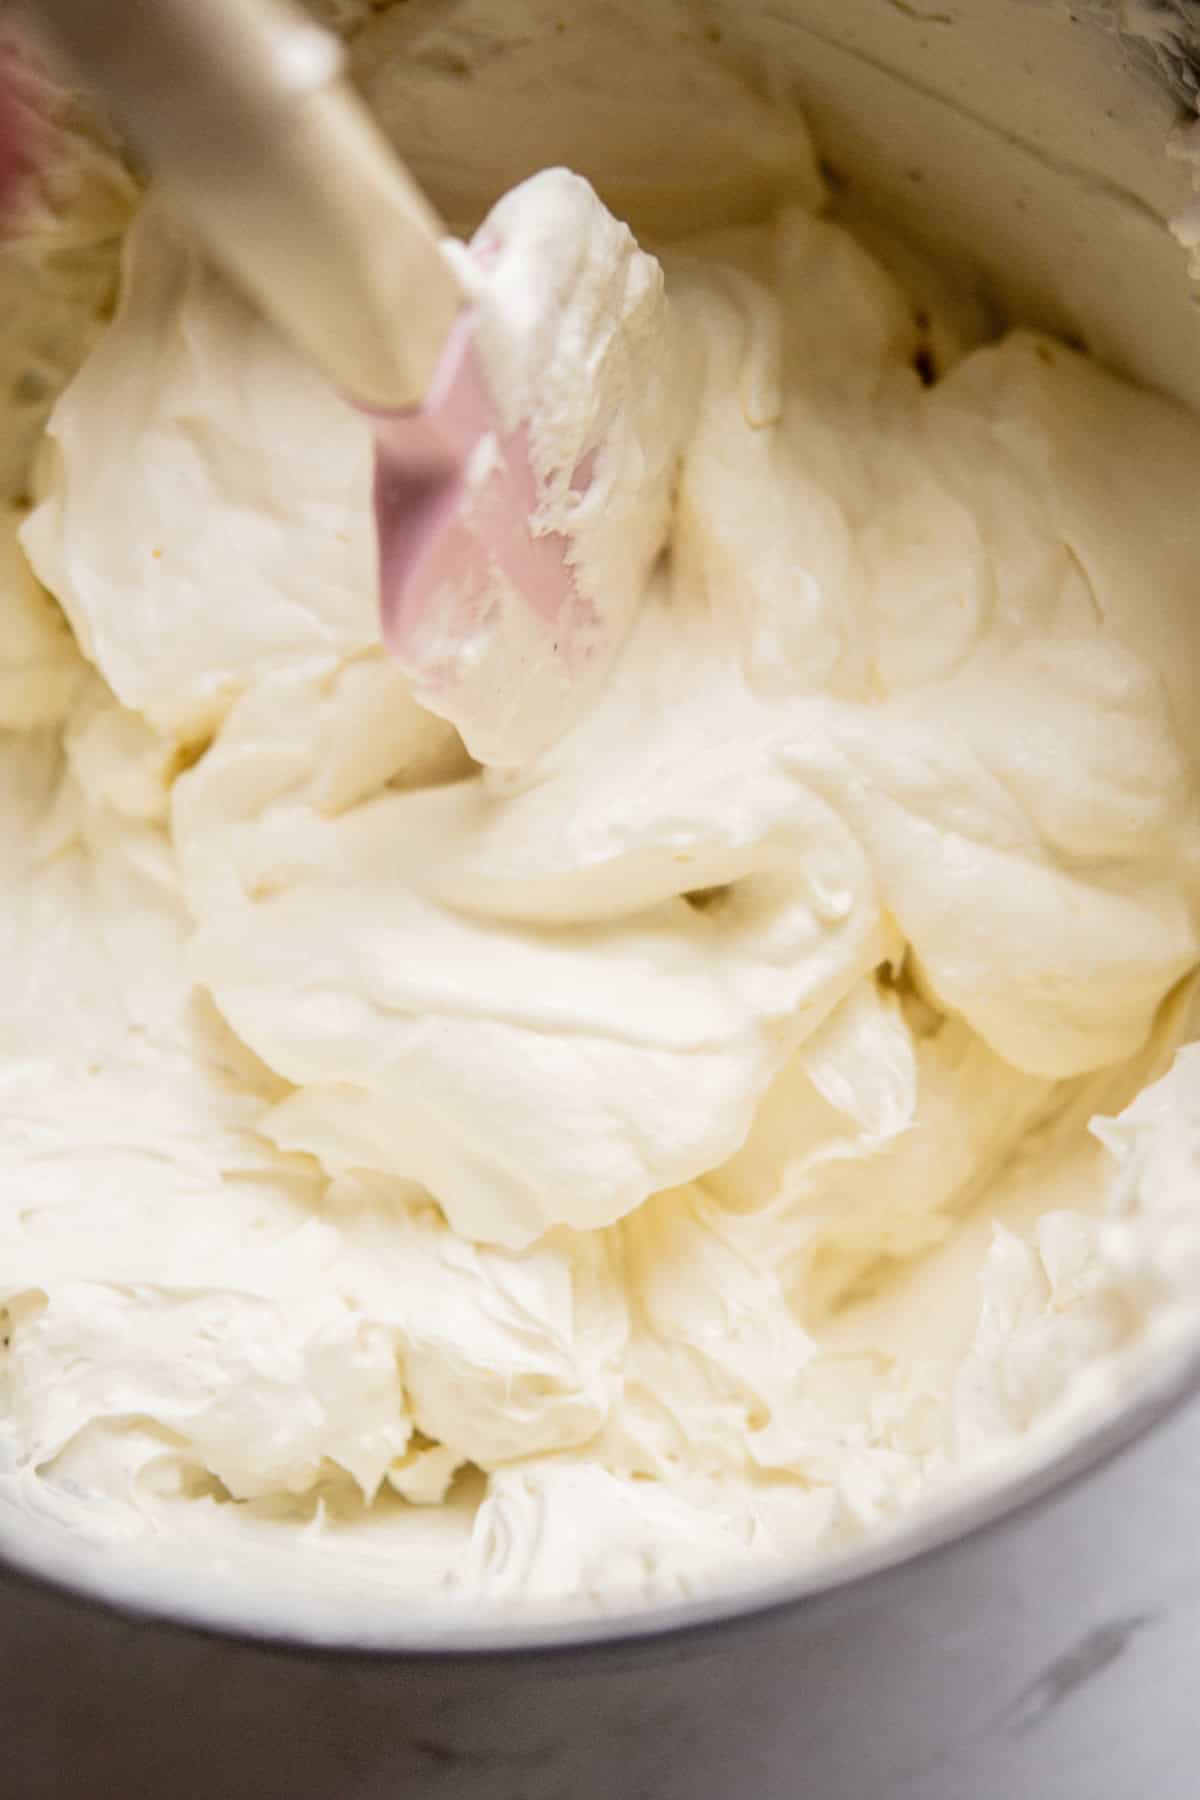
- Fold through whipped cream with a rubber spatula.
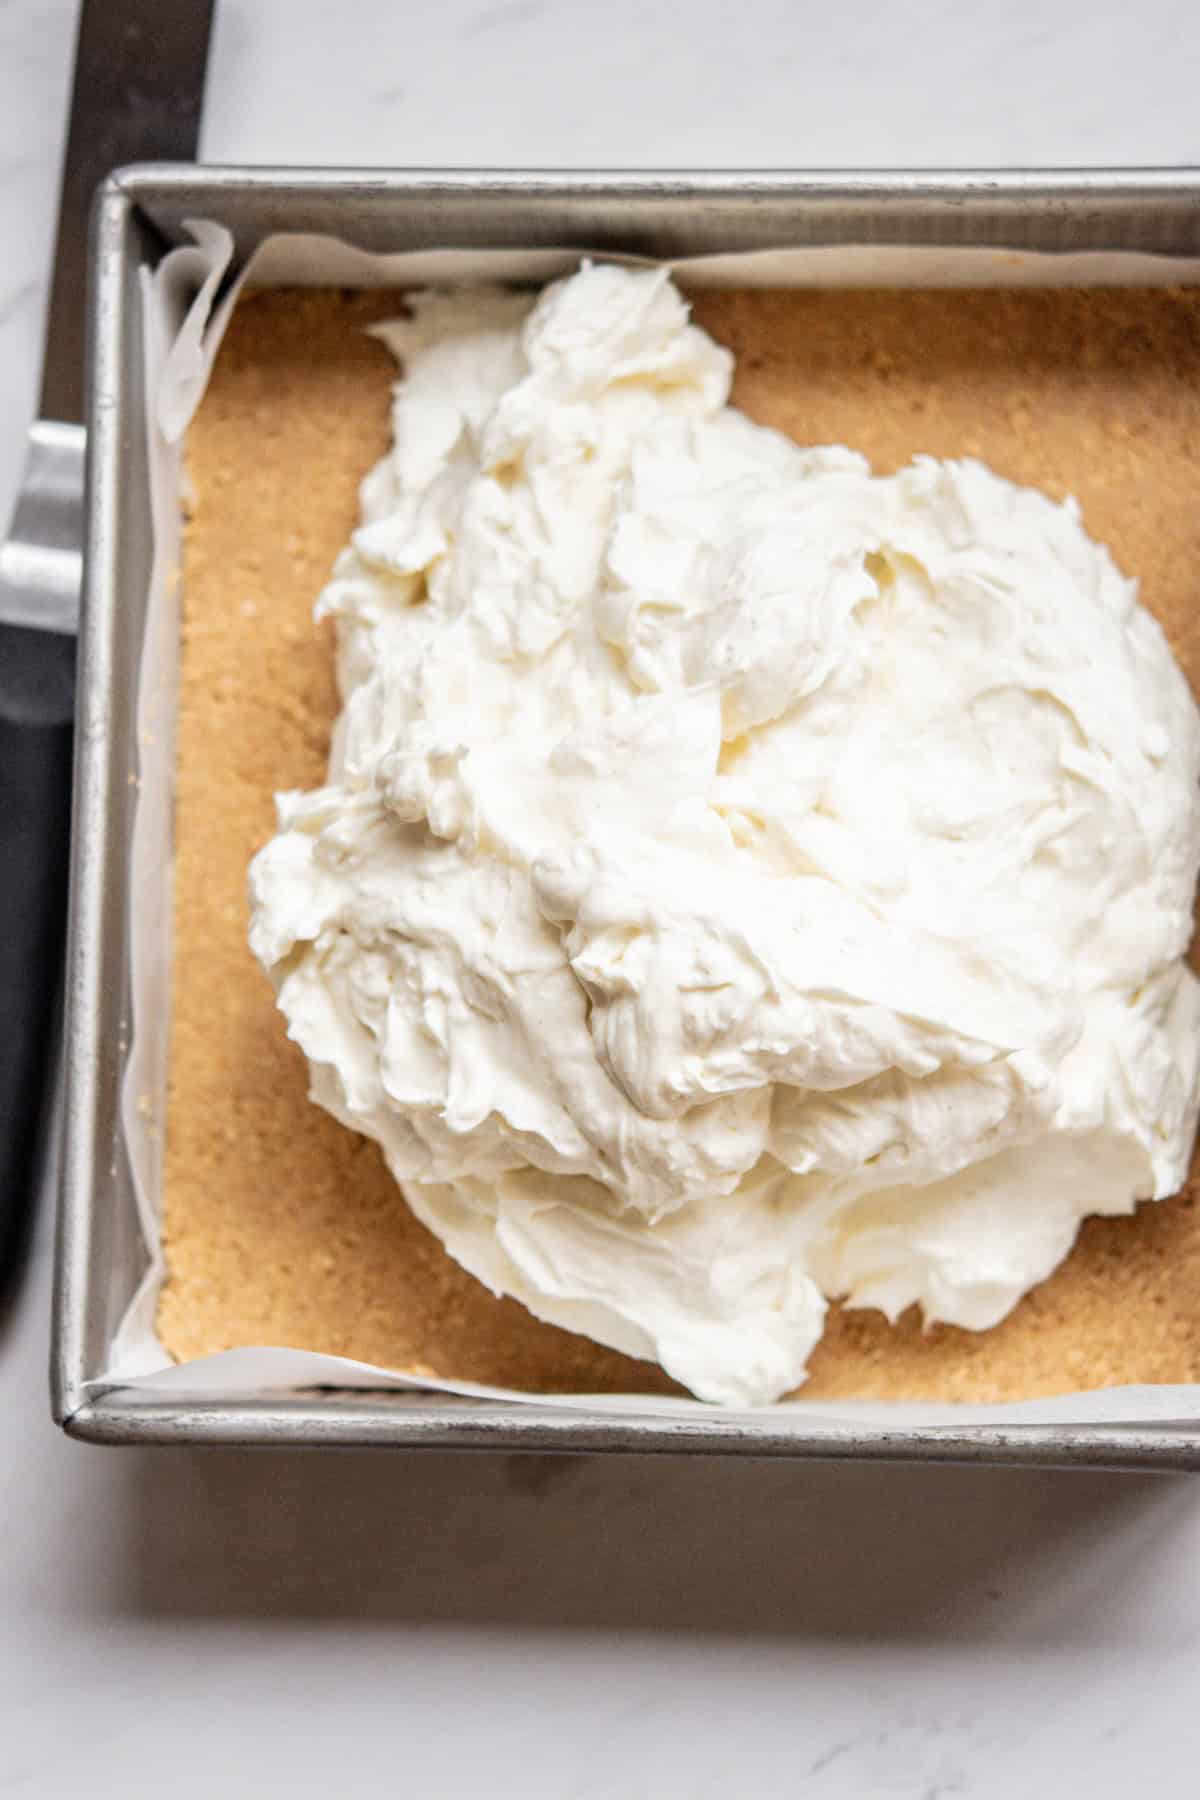
- Scoop the mixture on top of the chilled crust.
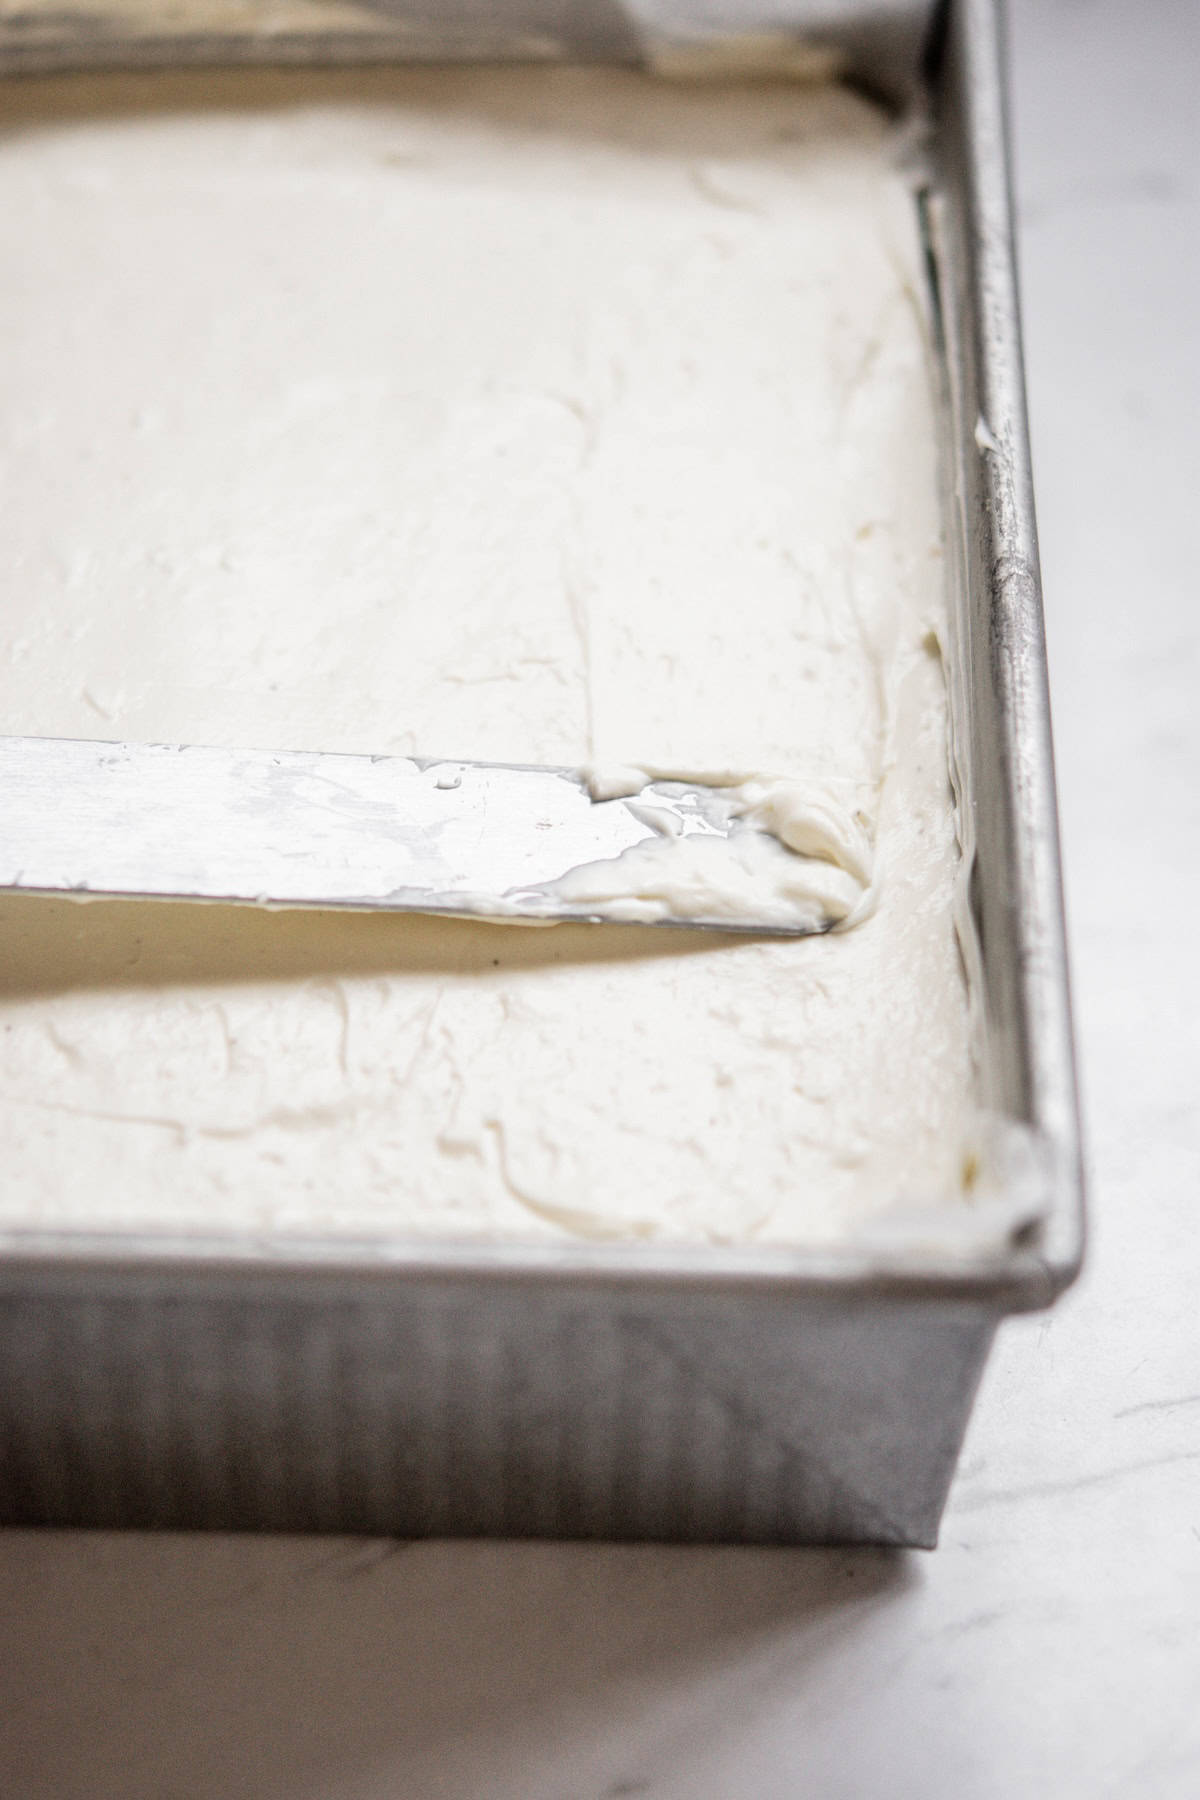
- Use an offset spatula to smooth it out
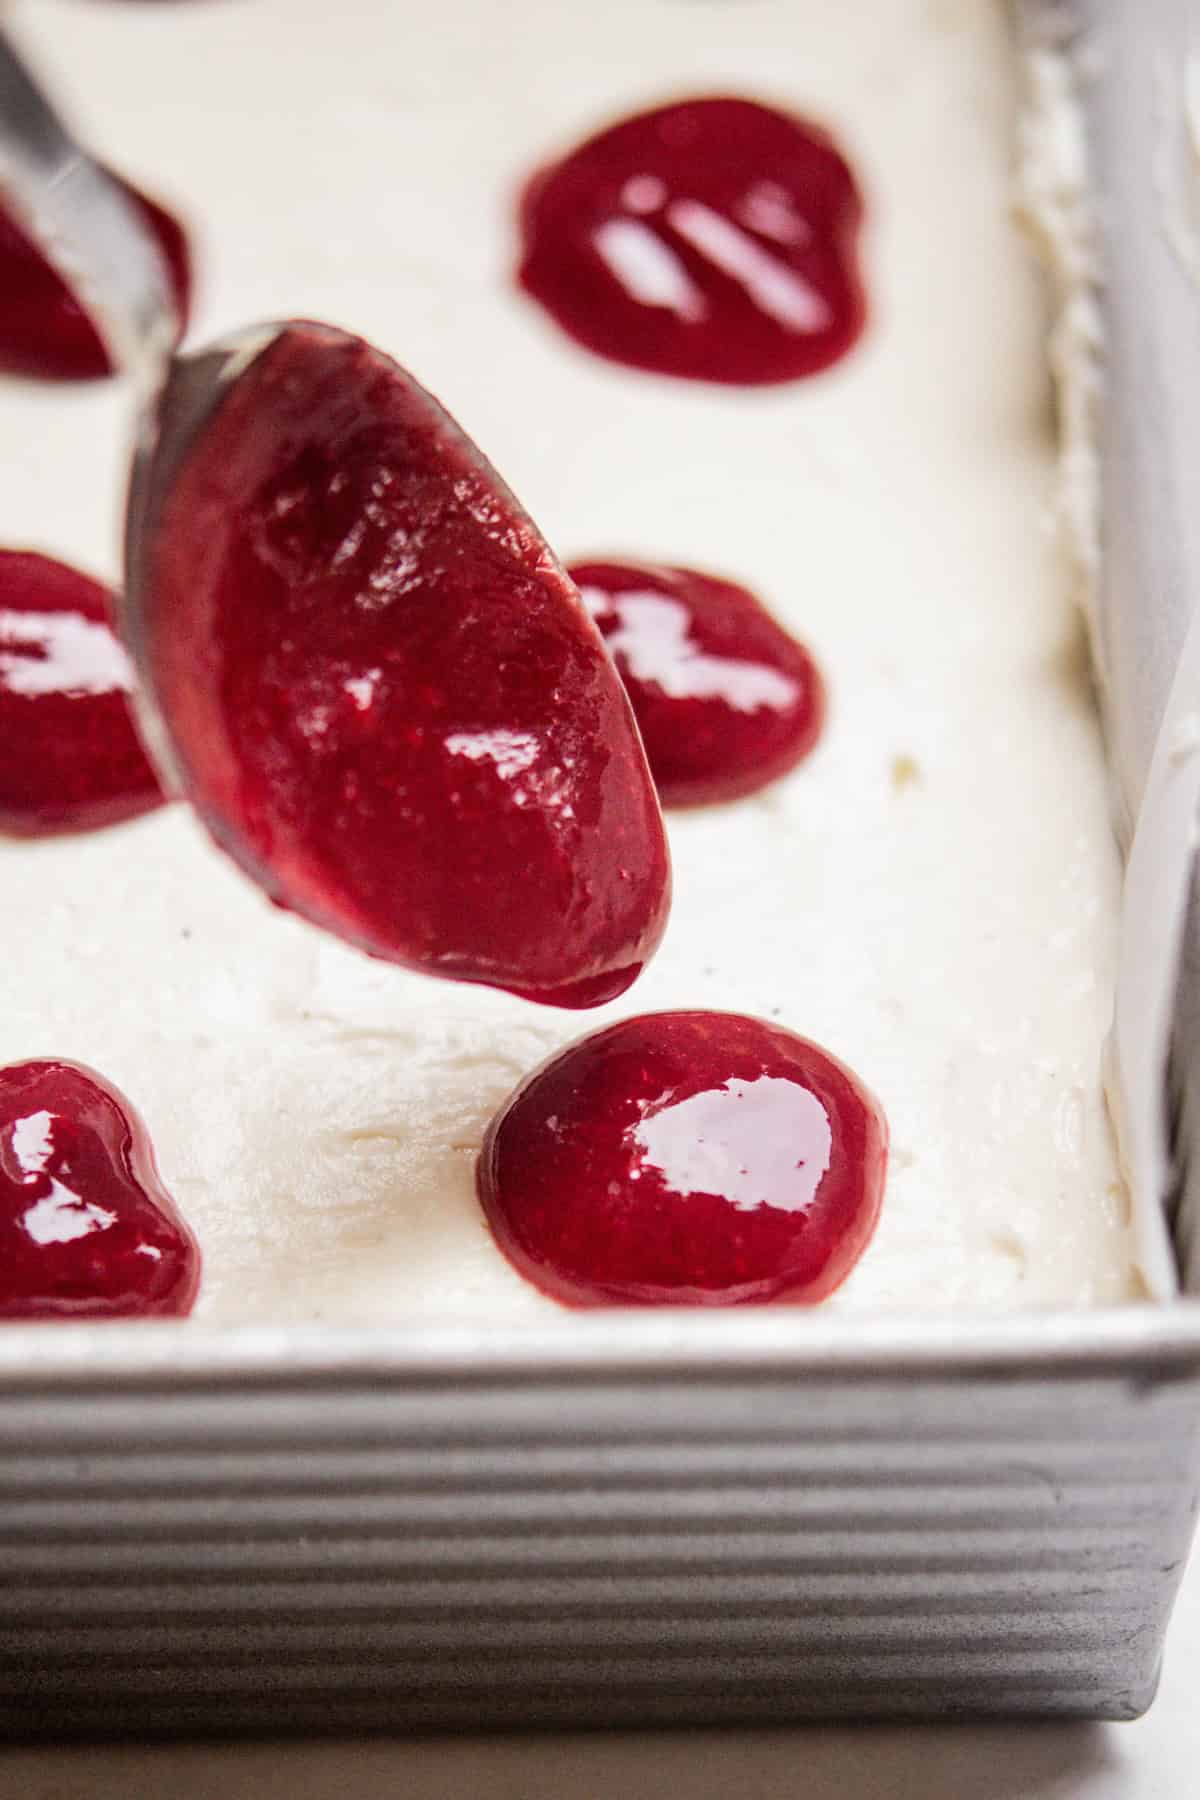
- Dollop the cooled raspberry sauce all over the cream cheese mixture.
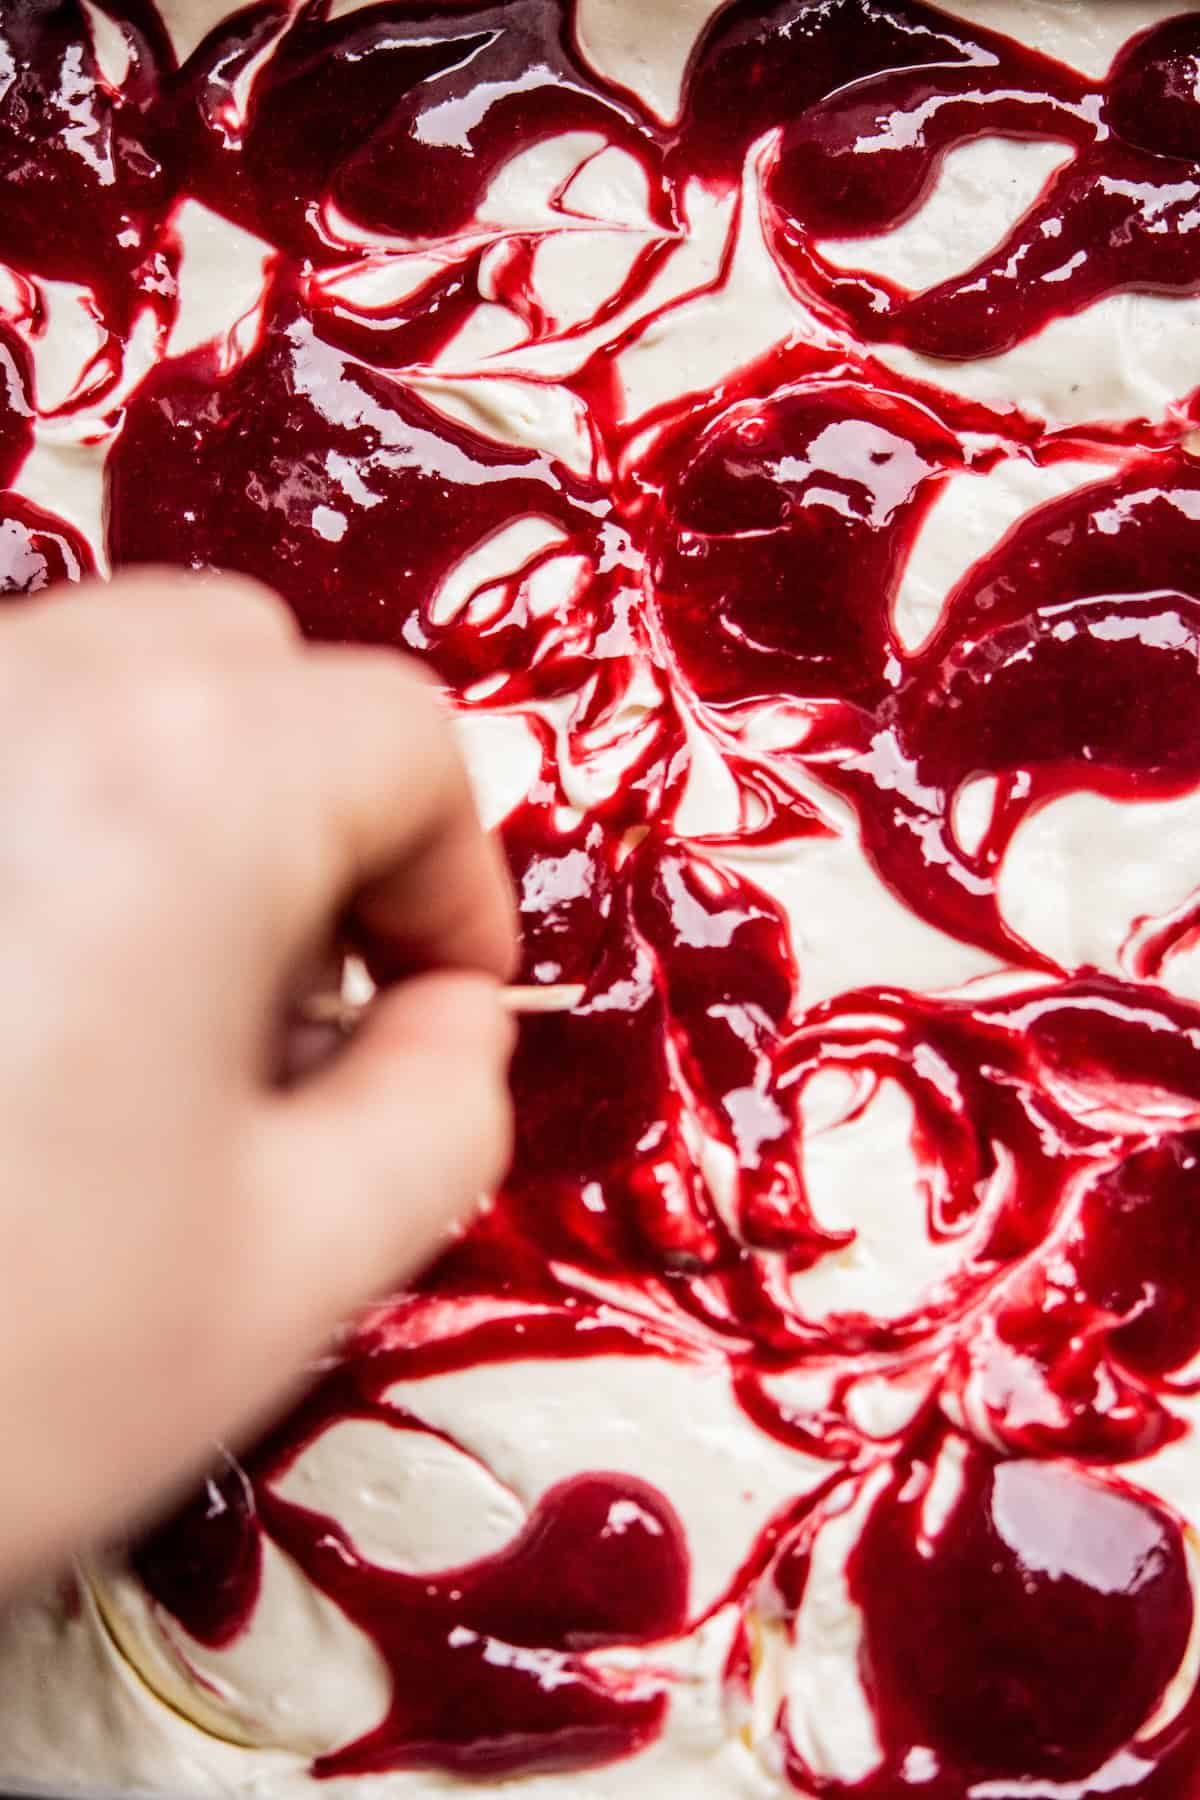
- Use a skewer to swirl the sauce through. Cover the cheesecake and chill in the fridge for at least 8 hours or up to 2 days.
Serving
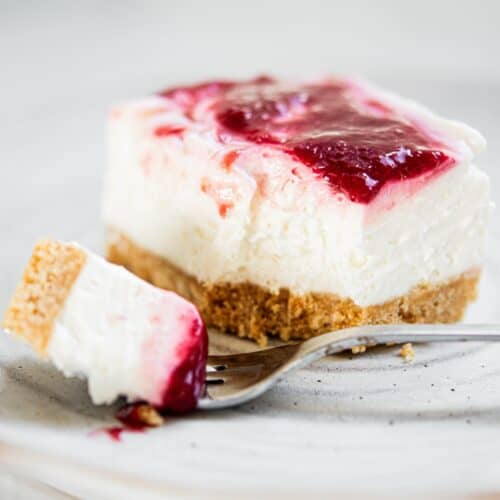
Use a sharp knife to slice the cheesecake into 12 pieces. Clean the knife in between each cut to keep the slices neaterr.
Leftover cheesecake can be stored in an airtight container in the fridge for up to 4 days. The finished cheesecake can also be frozen for up to 3 months.
More raspberry recipes
You might like these too!
No-Bake Raspberry Cheesecake Bars
Ingredients
Crust
- 165 g graham crackers or see notes for substitutions
- 2 tablespoons powdered sugar
- 85 g butter melted
Raspberries
- 125 g raspberries fresh or frozen
- 2 tablespoons granulated sugar
Filling
- 240 g heavy cream cold
- 120 g powdered sugar,
- 450 g Block-style cream cheese softened to room temperature
- 60 g sour cream room temperature
- 1 teaspoon lemon juice
- 1 teaspoon vanilla paste or extract
- 1/8 teaspoon salt
Instructions
- Line an 8×8 square pan with parchment paper. Leave an overhang of parchment to lift the cheesecake from the pan to slice it.
- Add graham crackers to a food processor and blend them on medium speed until they achieve fine crumbs. If you have no food processor, add them to a large Ziploc bag and crush them with a heavy rolling pin or similar device.
- Pour the melted butter and pulse to combine into a clumpy crumb mixture. Press the crumbs to the prepared pan evenly to create the crust. Place the pan in the fridge while you prepare the raspberries.
Raspberries
- Add the raspberries to a small saucepan over low-medium heat along with the sugar.
- Cook for around 5 minutes, stirring regularly, until the raspberries break down and the sauce slightly thickens.
- Once cooked, remove from the heat and push the cooked raspberries through a fine-mesh strainer, balanced over a small bowl, rubbing them along the bottom of the sieve with a spoon.
- Take your time doing this to get all the raspberry pulp you can, leaving behind the seeds. Let the raspberry sauce chill in the fridge while the filling is made.
Filling
- Pour the heavy cream into a medium bowl and beat it on medium speed with a hand mixer or stand mixer fitted with the whisk attachment until stiff peaks form. Take care not to overwhip it. Set aside.
- Add the cream cheese to a stand mixer bowl and beat with a paddle attachment until smooth. Add the sour cream, lemon, sugar, salt, and vanilla and beat again to combine. Add half the whipped cream and use a spatula to fold it in. Continue with the remaining cream, carefully folding it all together.
- Scoop the mixture onto the chilled crust and use an offset spatula to smooth it out.
- Dollop the cooled raspberry sauce over the cream cheese mixture and swirl it with a skewer.
- Cover the cheesecake tightly and chill in the fridge for at least 8 hours or up to 2 days. The longer it can be chilled, the better it will set.
- Once chilled. use a sharp knife to slice the cheesecake into 12 rectangles. You can cut extra if you want small squares. Cleaning the knife between each slice will keep it neater.
Notes
Other Notes
- Greek yogurt can be used instead of sour cream
Crust variations
You can also use golden Oreos or Vanilla wine biscuits.- 190g golden Oreos (about 20 Oreos)*
- 44g (3 Tbsp) butter, melted
- 200g / 7 oz vanilla wine biscuits (round 2 cups of crumbs)
- 100g (7 Tbsp) butter, melted


Can this be frozen?
Yes 😊
If I double the recipe will it fit in a 13×9 pan? Thank you’
Yup 🙂
Why is my base really hard? What am I doing wrong?
Hey Barbara, it may have been pressed into the tin a little too firmly.
I took this cheesecake along to a friend’s lunch party. It was a winner. I’ll be making this again.
So pleased you loved it!